I have one of these brass ball catches I am going to use on a cabinet door. What's the best way to install these so that everything lines up properly? Also, which part goes into the door, the part with the ball or the other part?
>I typycally put the part with the ball in the door. If the frame around the door is 3/4" then I will set the "catch" mid way, or centered 3/8" from the outside edge. I prefer to drill for the catch prior to glue up, that way I can use my DP and drill to the proper depth.
I glue them in with yellow glue. Be careful not to set the catch too deep. The crown should be just proud of the frame. The "slot" of the catch should be parallel to the door frame.
Then when the hinges are installed for test fit, close the door and mark on the bottom edge of the door the location of the catch. That helps you make sure you have proper alignment. Remove the door and drill for the ball, 3/8" from the outside edge. Glue and tap in. As with the catch, allow the crown around the ball to be just proud of the door.
I put the ball facing down to keep it from accumulating dirt.
For installing, all I can say is be real careful marking out your hole centers. A brad point drill is essential IMO.
I've done full scale drawings for these to help understand the critical dimensions.
The doors should be installed before you do the catch. It is important that the exact gap between the door and the cabinet body be known so you can figure out the height of the ball and catch above surface. Also, hole depth must be exact because once it is in it is not coming out. Slight misalignment can be adjusted by careful filing on the 'catch' part.
>Tommy, the ball is meant to go in the frame, this way the edge of the striker plate shows only on the backside of door. As you do it the striker plate shows on the frame.
This is a two piece catch. One piece is in the frame and the other in the edge of the door. I am unfamiliar with how you would install this with the catch being on the backside of the door.
You can install them top or bottom (or even side). Sometimes I even install two, one top, one bottom. But for a single I prefer the bottom of the door. I like the ball on the bottom edge of the door. As Ed points out, less debris can get into the ball (not a biggie) but I also think the catch is less obtrusive for when the door is opened.
>...for the reason he suggested. As far as making sure everything lines up perfectly, the way I do it is to actually hang the door first, then install the ball in the face frame, and then mark and drill for the keeper.
I drill the holes without a drill press using a drilling jig out of a small block of scrap wood. Drill a guide hole through the block at whatever distance from the edge you want your ball detent and keeper. Tack a piece of thin scrap to the outside of the block to keep it registered properly on the door or face frame. Chuck up the drill bit in your portable drill driver and extend it through the guide hole to whatever depth you want the hole. Wrap a piece of masking tape around the shank of the drill where it enters the block as a depth indicator. A brad point drill bit will leave a flatter bottom and will not tend to move off center as it digs in.
Once you have installed the ball detent in the face frame, open and close the door a couple times. The spring pressure on the ball will glaze a little trail on the edge of the door. Use this to accurately spot your keeper. Align your drill jig with the same side of the block against the door as you had against the face frame. This way, any tiny discrepancies in the hole alignment will be avoided.
The beauty of this method is that it is almost entirely empirical. You don't have to fuss over 64ths of an inch -- in fact, you don't technically need to measure anything. And you can use the same jig for any door of this thickness.
>Tommy, if you put the ball in the upper face frame, it will only rub on the rear edge of the door, where it will eventually wear a slight groove. This will be invisible from the outside of the cabinet. If the ball is in the door, it will wear the groove in the edge of the face frame, which will be visible.
I think Lee is referring to the old version of this catch that had a keeper that extended to the rear edge of the door to deflect the ball and keep it from wearing that groove into the edge.
I never thought of the catch being on the bottom so the detent thingy doesn't get dirt and so on in it.
Also, is it correct that the catch should be positioned so the slot is parallel with the face frame? Like my crude pic is showing? In other words, the ball has to go up and over the little ridge, so to speak.
>I have not used the hardware you showed in that photo, so I don't know exactly what the keeper looks like. I thought it was a cup-shaped receptacle that fits the curvature of the mating ball. A slot would also work there, and I don't know how it could work unless it were parallel to the door (and, by extension, the face frame). I did suggest putting the ball into the face frame, so I'm just a tad mixed up by your question.
Here is a slight variation on what Ellis suggested. After botching the installation of several ball catches on a bathroom vanity, I used the following setup and it worked very well on eight doors in a china cabinet. Two years after the install, I still love just opening and closing the doors to hear that muffled sound of the door catching perfectly.
Step 1: Making the Drill Guide. Mill a piece of hardwood (the harder, the better) scrap into say 1 inch thick x 1 1/4 - 1 1/2 inch wide x 12 inches long. Drill holes roughly HALFWAY through at intervals with the diameter bit recommended for the ball catch. Then drill all the rest of the way with a small diameter bit, say 1/8 inch centered EXACTLY in the larger diameter hole. That completes the drill guide. Having a drill press and fence makes this job easier.
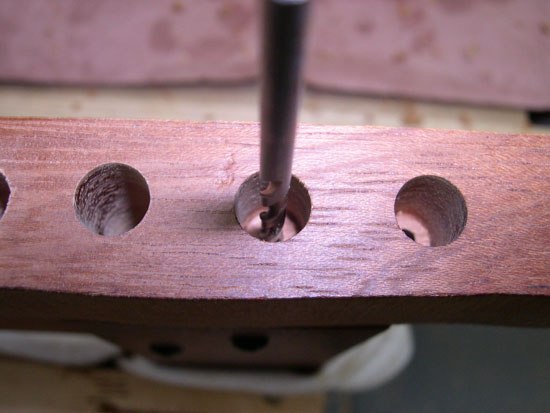
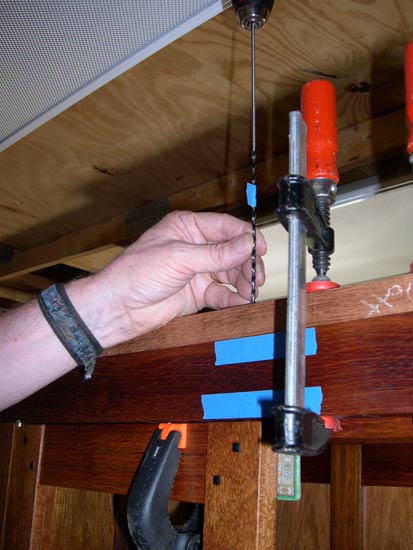
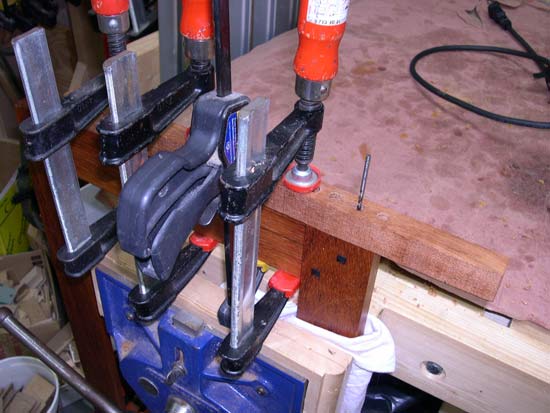
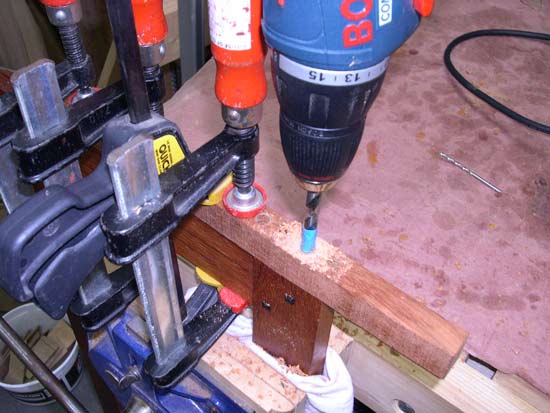
>Step 2: Drill the pilot hole. Make sure the smaller bit is long enough to go through the drill guide AND the rail above the door plus just enough to go slightly into the top of the door stile. Align the 1/8 inch hole in the drill guide hole EXACTLY where you want the ball catch to be using a pencil mark on the outside of the drill guide and a mark on the door. Make sure the door is correctly hung and that allowance is made for any door bumpers. Here I used playing cards to shim the door out. Using the small drill, carefully place the bit into the guidehole in the drill guide and drill through into the top of the door stile (say 3/16 inch) where the opposing catch will go. In my case, I then removed the door and clamped a scrap piece of wood to the bottom of the rail to prevent blow-out. Then, always keeping the drill guide clamped in place to guide the larger bit, carefully drill out the hole for the upper catch. In theory, if the larger bit was long enough, you could just drill all the way into the door stile and be done. But my bit wasn't long enough, so I had to to do the door separately as described in the next pic.
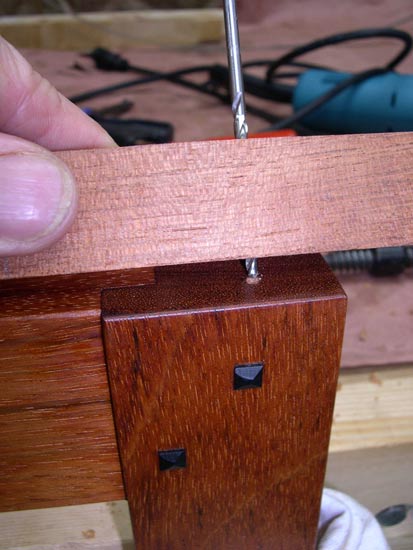
>Step 5 (if needed): Using the larger bit, drill out the hole in the top of the door stile.
Placement of the catches is relatively easy. I would suggest using a clamp (rather than a hammer) with a small block of soft wood to gently ease the catch into place thus avoiding setting the one catch in too far.
Now, wasn't that easy 8-). Hope this makes sense. Oh yes, I ended up coming down on the side of those who put the ball in the cabinet frame, and the catch in the door stile oriented so the slot is parallel to the door rail. Good luck.
>The sketch is a front view of the installation I'm referring to. The gap is exaggerated to make the drawing (hopefully) clearer.
The ball doesn't touch the door wood. There is no strike plate visible on the face of the door or face frame. If the ball projects too far the door operates harshly. If the ball doesn't project sufficiently the door will rattle or, worse case, it won't 'catch'.