Hello,
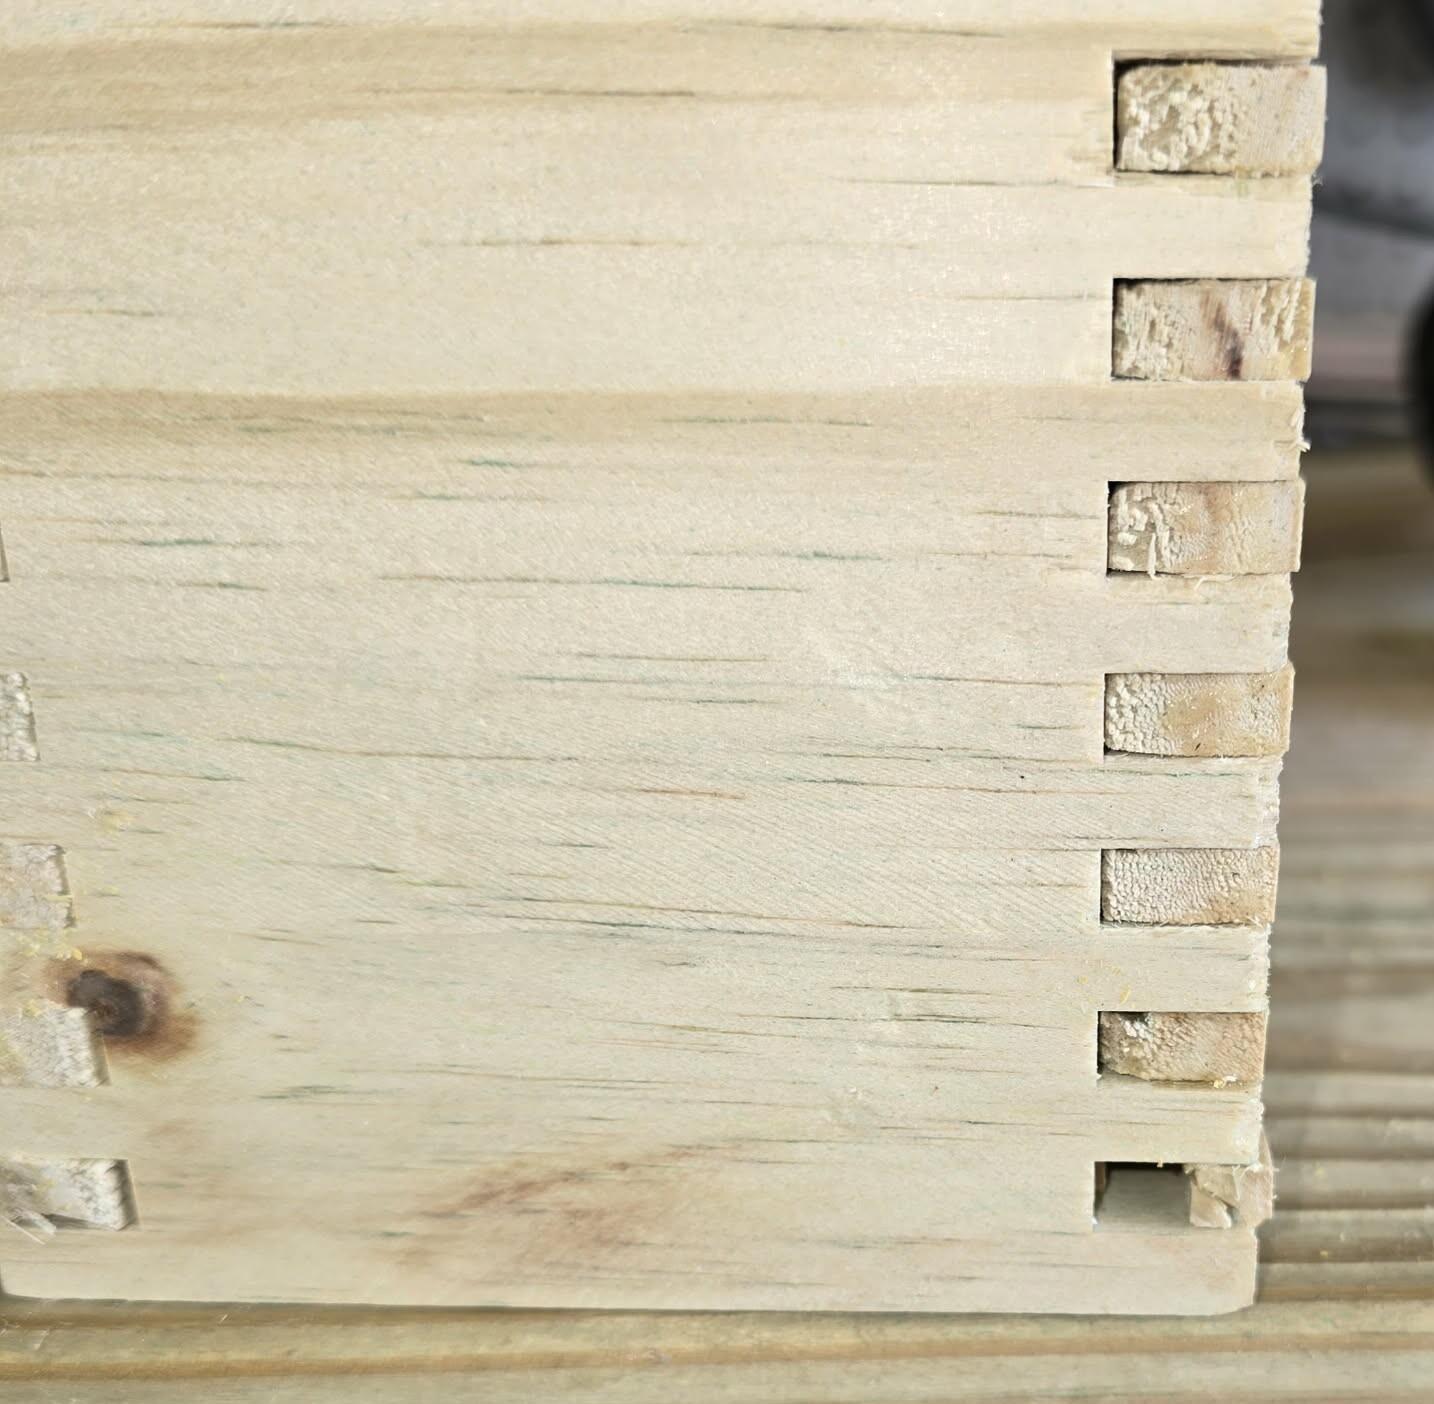
This is my first attempt at doing box joints with a router. I bought a jig rather than trying to build my own, it was just much quicker..lol. I did a bunch of test cuts on different pieces of scrap wood I had laying around (plywood and 1x6 pine I think). The issue I'm having is that I keep blowing out the box joints and I have no idea why and Im hoping someone can give me some direction. I'm using a Skil router and portable router table with a 1/4" bit.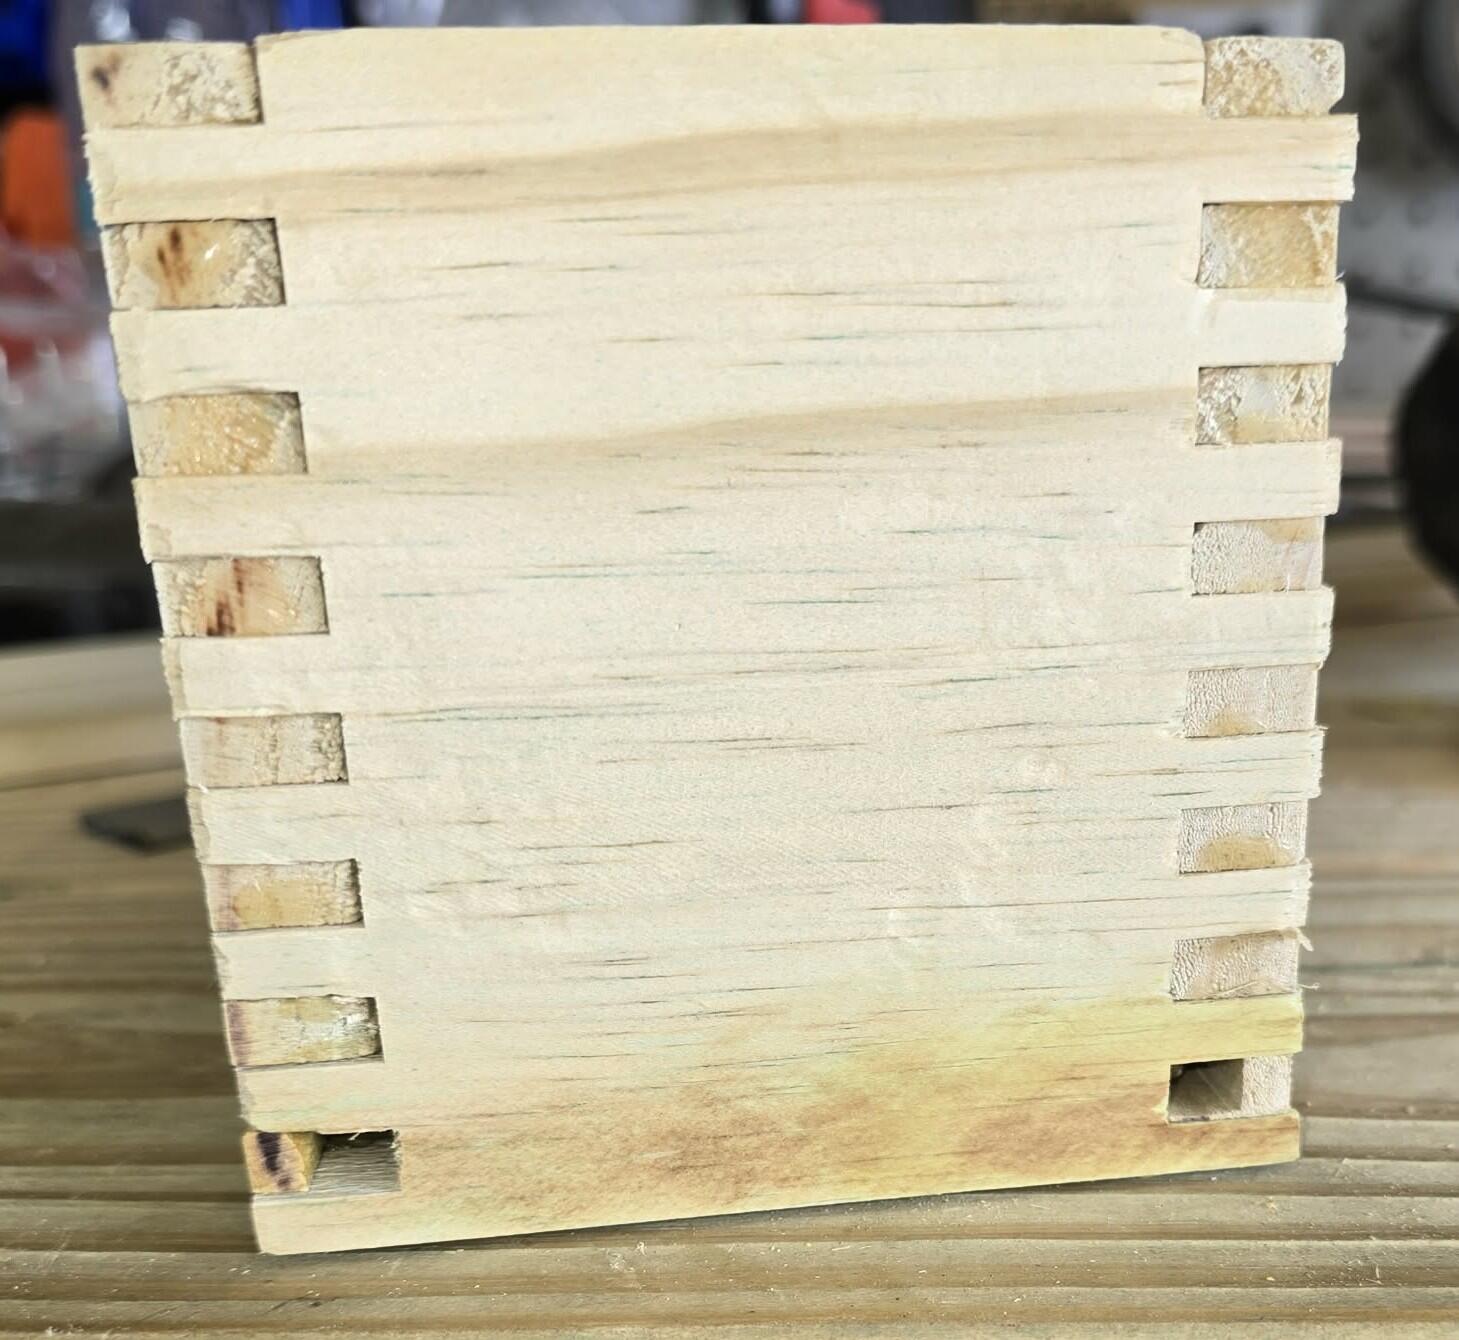
Box Joint Help Needed
Posts
Re: Box Joint Help Needed
#2

Looks like you're using a very soft wood that's subject to tearout. A harder wood would give better results.
Also, your router bit may be a little dull. Is it a bit you've used a lot before?
A straight bit also gives more tearout than a spiral. Try using a spiral upcut bit.
Re: Box Joint Help Needed
#3Thank you for a quick reply. That was a brand new bit. Something I was going to.ask also was are all bits equal? Do some work better than others?
I will try the sprial upcut though.
Thank you again.
Re: Box Joint Help Needed
Edited #4You're trying to "cut" end-grain with a router; not something not usually associated with smooth cut faces.
This is, of course, because of the jig needing to cut 3 sides of the boxes. A better jig works on the table saw.
Re: Box Joint Help Needed
#5

banatello wrote:I bought a jig rather than trying to build my own
Curious what jig you bought. Do you have a photo or link to where you got it?
Re: Box Joint Help Needed
#6Hello, sorry I missed the message about what jig i bought. I attached a picture.
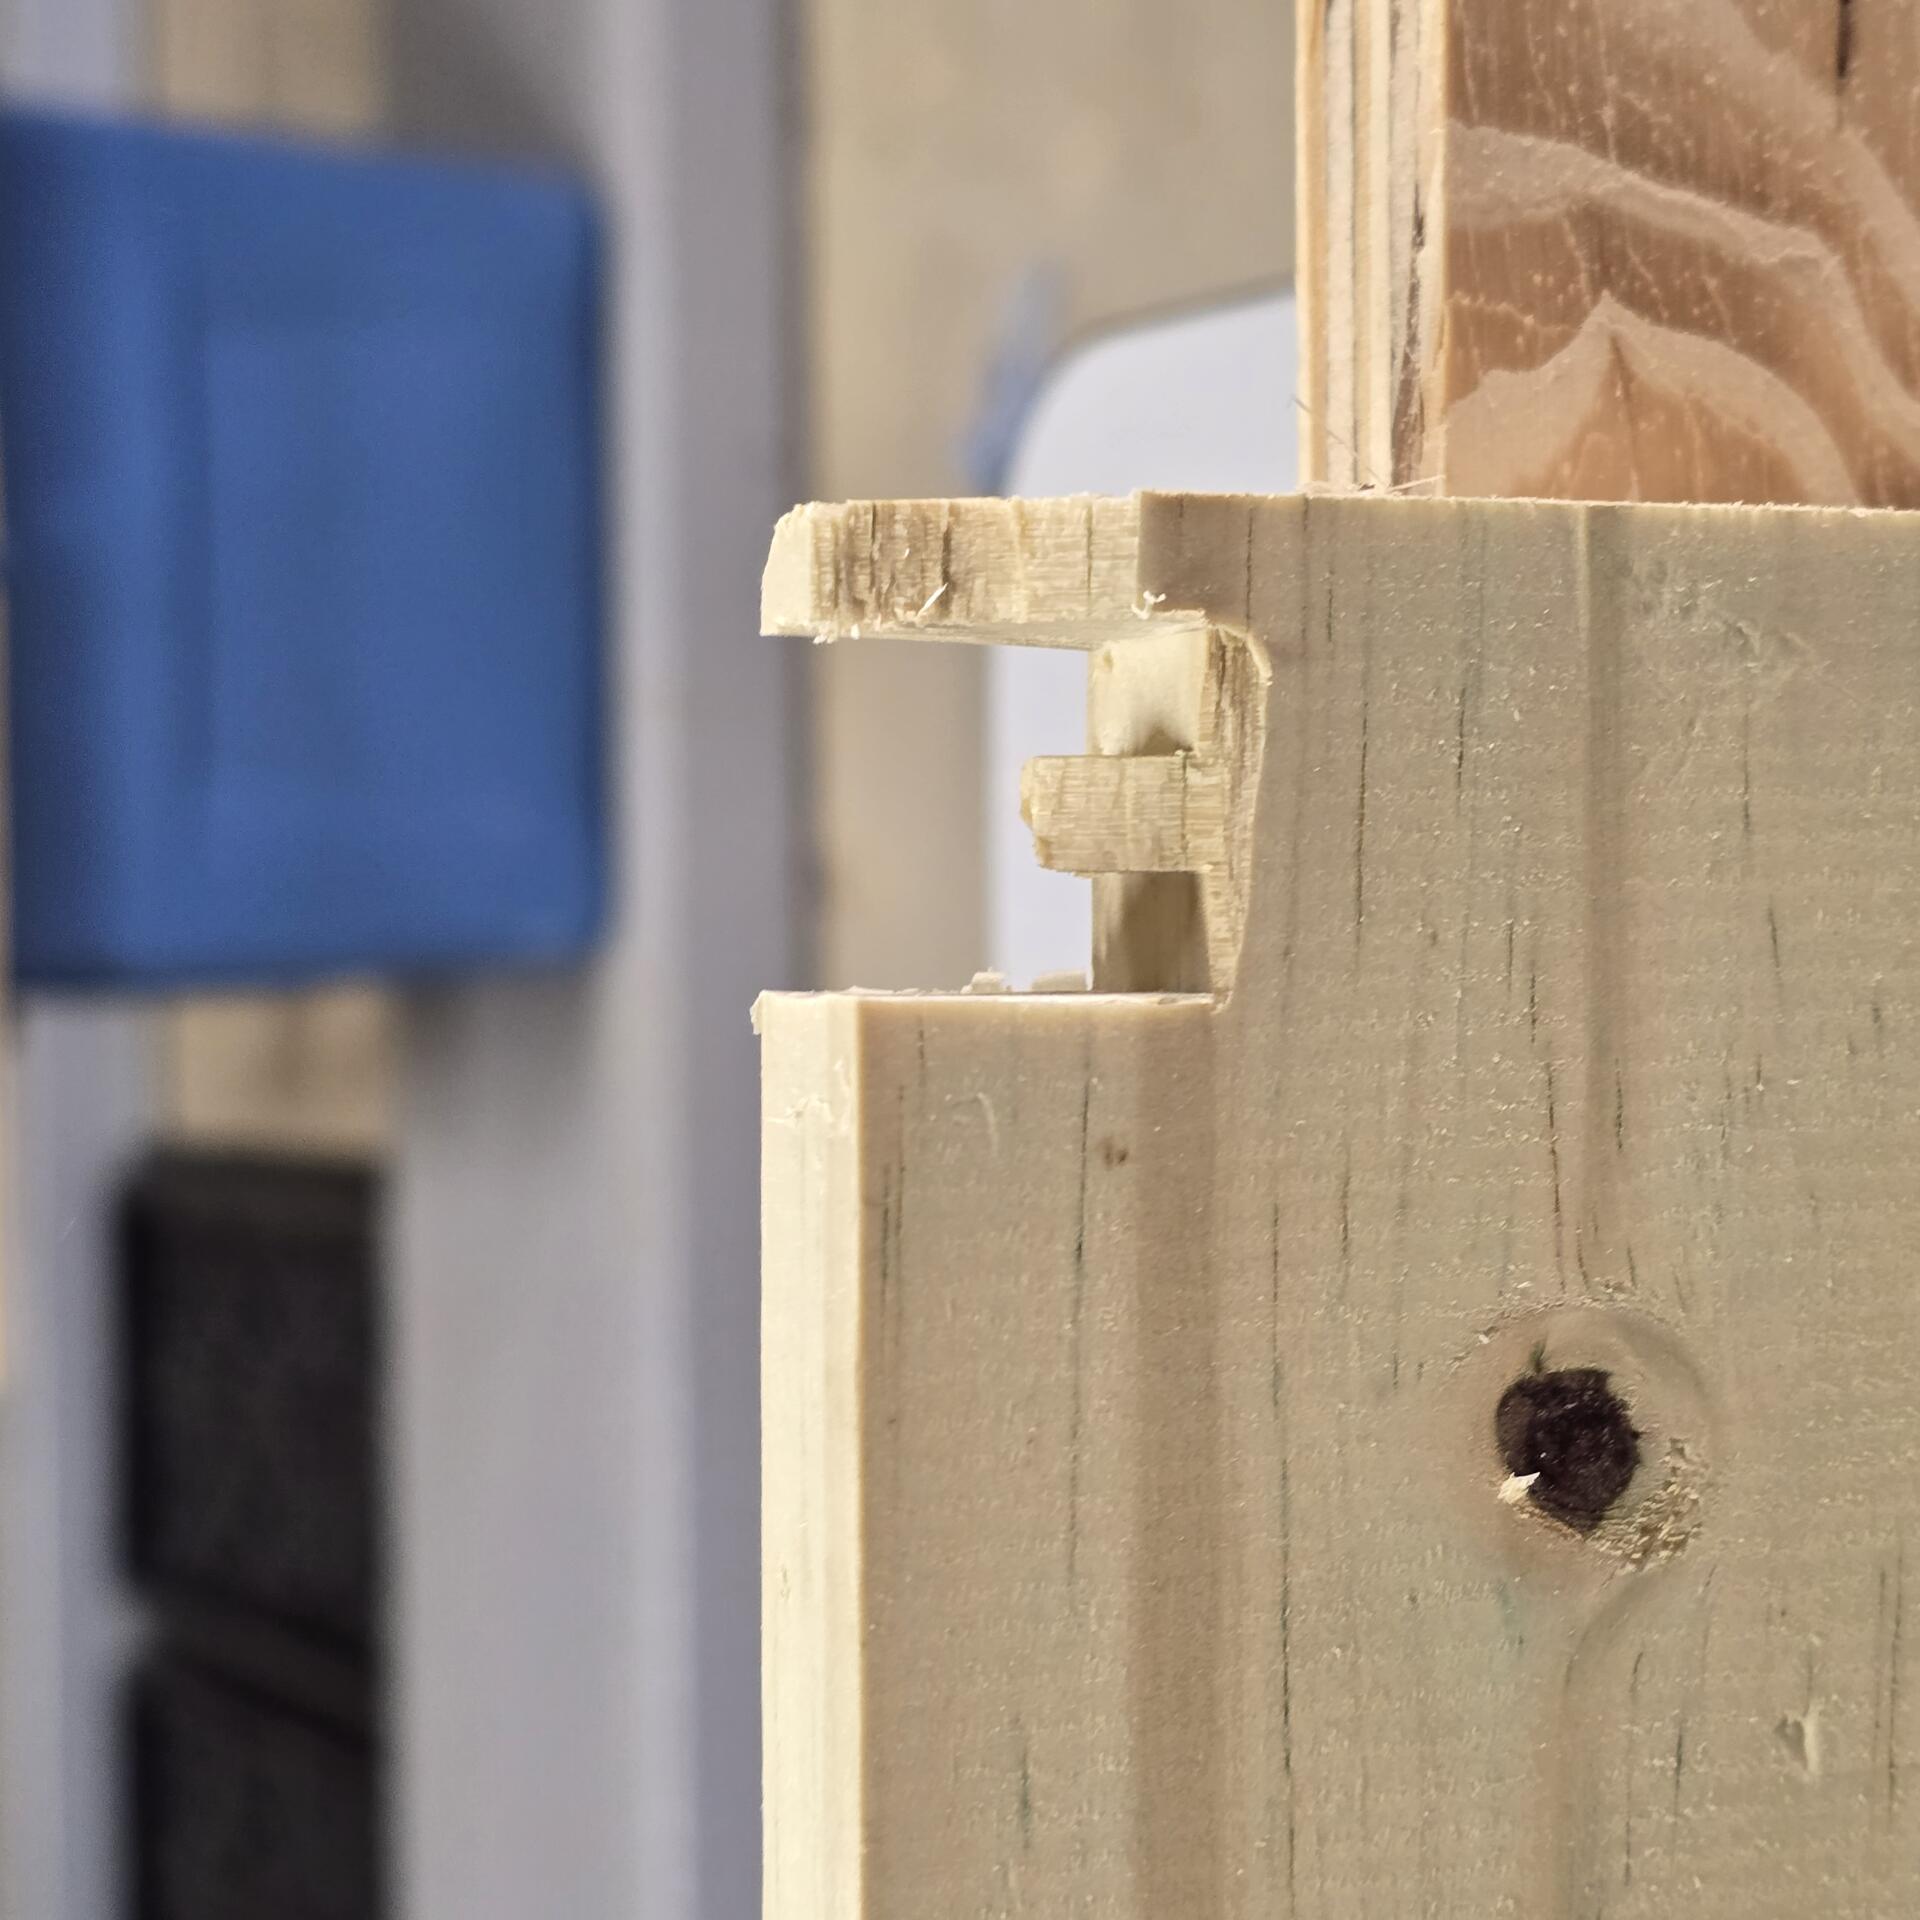
Also I did buy a sprial uncut and tried on the edge of a board, rather than the end grain. Its worse that before. I've attached a picture, im wondering if its the wood im using, do I need to just go buy some type of regular hardwood to work with ?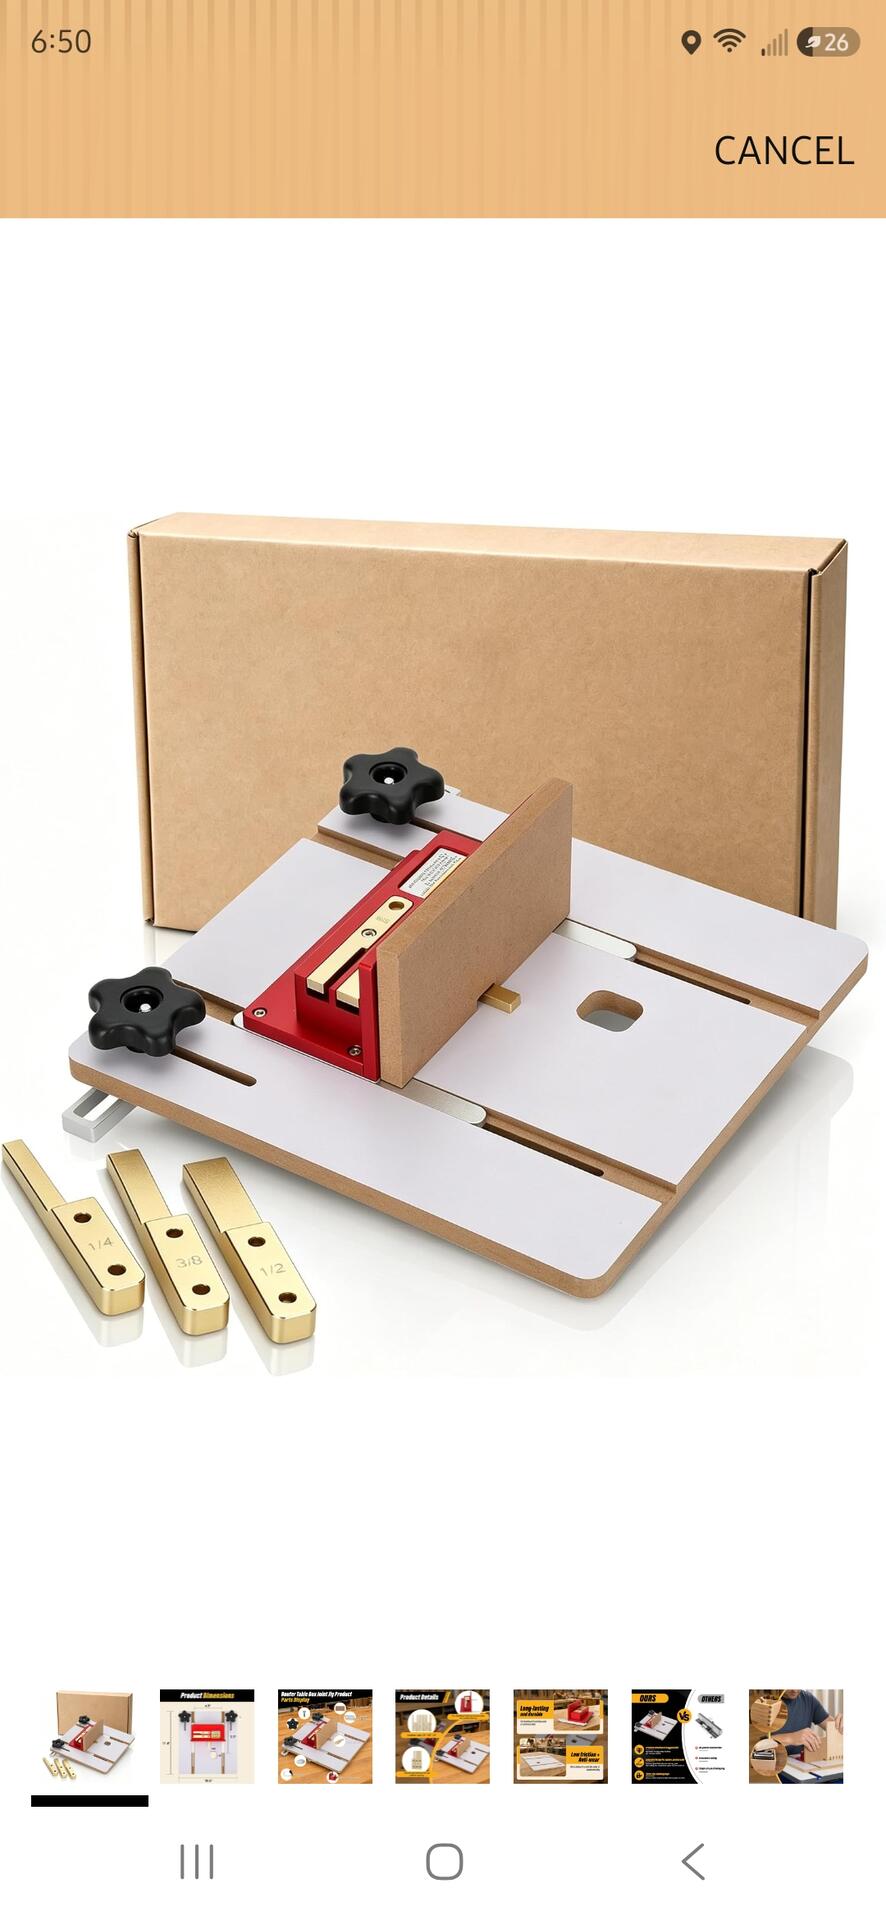
Re: Box Joint Help Needed
Edited #7
I provided our Ask Woody AI assistant a photo of your tearout, and it recommends using a backer board.
https://www.woodcentral.com/forums/public/upload/2609/1/e591ba8b-085a-4c01-8112-c9b3a1adf43a_1134.jpg
Woody:
Analyzing your blowout photo
Thanks for uploading the picture. The tear-out is classic: you're getting heavy splintering on the exit corners of the fingers, especially where the bit leaves the wood on the far side of each cut. This is almost always caused by unsupported fibers when the router bit exits the workpiece.
Primary fix: Add backer support immediately
The fastest way to stop this is to give the bit something to cut into on the exit face.
Clamp a flat piece of scrap (½" MDF or plywood works great) tightly against the back (exit) face of your workpiece before every cut.
The bit should just kiss or slightly enter the backer board. This supports the fibers so they don't splinter outward.
For box joints you often need backer support on both the front and back of the board because the bit exits on multiple faces as the jig indexes.
If your jig allows, hot-glue or double-stick-tape a thin zero-clearance strip right against the jig's indexing pins/fingers. That creates a permanent backer that you replace when it gets chewed up.
Additional steps that will help with your Skil router and 1/4" bit
Multiple shallow passes: Don't try to cut the full finger depth in one go. Set the bit height so you're removing only about ⅛" per pass. Make 3–4 light passes, lowering the bit slightly each time. This reduces heat, chatter, and blowout dramatically.
Feed direction and speed: Always feed so the router bit is cutting with the rotation (conventional cut, not climb cut) and go slowly. If you're using a handheld router on a table, make sure the workpiece is moving steadily left-to-right or right-to-left depending on bit rotation.
Sharp bit: A dull straight bit will crush pine fibers instead of slicing them. If the bit is even slightly dull, replace it. An upcut spiral bit (if you can get one in 1/4") will give noticeably cleaner results than a straight bit.
Better test wood: Pine is one of the worst woods for router tear-out because of its wild grain. Switch to poplar, maple, or even clear straight-grained fir for practice. Once the technique is solid you can return to pine.
Quick jig tweak
If your commercial jig has any gap between the indexing fingers and the workpiece, add a thin auxiliary fence (a strip of ⅛" hardboard or plywood) so the bit has almost zero clearance when it exits the side of the finger. Screw or clamp it in place and then trim it flush with a straight bit first.
Would you like step-by-step instructions for making a simple clamp-on backer board that works with most box-joint jigs? Or do you want tips on adjusting the depth and indexing on your particular jig?
You're very close — this is a common first-time router box joint problem and it's usually fixed with better support and lighter cuts. Post another photo after you add a backer and we'll refine from there. You've got this!
Re: Box Joint Help Needed
#8As you have learned so far, using a router to make finger joints is more difficult than it would appear. The tear out you have observed is partially due to the soft wood you are using. I would suggest using Poplar instead. The broken fingers in this photo are entirely predicable and very likely to occur even in hard wood. A backer board might help, but even with a spiral type bit you may still get tear out as the grain is weak in this direction.
I would suggest using a dado blade and home made jig similar to the one in this video. Table saw jigs are easy to make and give you a built in backer board to support each finger as it is cut. It is also a good idea to cut the fingers a bit longer than the thickness of the wood so you can trim/sand them flush after the joint is glued and assembled. Cutting mating halves of the joint at the same time as shown in the video is also a very good idea. Just be sure to mark the pairs as they are cut so you can insure that they are joined to their mate.
https://www.youtube.com/watch?v=xmA0_mLb8OA