I have seen a few square bowls and like the idea. What size are most of these when first started and what is the finished thickness. Do most of you use a scrap piece to glue for the tenon?
I know Jamie makes some very nice ones so I hope he can help here too
Well there are 2 ways of course. One is to simply turn it square. It does take some skill because you are cutting mostly air at the beginning. Push too hard on the bevel and you get chatter, tear out on the backside of the cut, sometimes the leading edge will be thinner than the back. However it is a good skill builder. When I teach turning hand mirrors we start with a square piece of wood even though it will be round when we get done. The idea is to teach them to be lighter on the bevel and not force the cut.
The other way which is much simpler is to glue on pieces of scrap and then turn a round bowl with a rim. cut off the scrap when your done. Or you can glue the scrap on with a paper joint and simply split it off with a knife when your done. Then you just have to clean off the paper. I use yellow glue and White vinegar will soften the glue so you can scrape it off.
Mark I start with either a square (each side must be parallel and square and the blank the same thickness) or a triangle which makes and interesting item as well. I use a screw thingy in my Nova chuck for the first side. I turn a spigot on the tailstock end. Then I shape the sides towards the drive stock. When I am satisfied I reverse the blank and use the spigot, or recess which ever you use, to hold the blank. From there it is up to what I want out of the item how I hollow that side. It is fun. I found that I need the speed to be higher than I usually turn the stabilize the pointy wings. Darryl
Mark the square blanks are generally around 10 inches really depends on the wood I have around. I have hallowed out the bowl to around 1/2 inch or so. Again depends on the flexibility of the wood so type is important. Maple seems to be a good choice for me. I like the winged type bowl like Terry Scott turns so frequently I end up with something sitting on points. I have also made some with lids fitting into the hollowed out section. Oh I generally start out with a blank that is 1-2 inches in thickness. If I try making a winged effect square thingy it is about 2" to start so the bowl bottom is off the ground. I turned some squaw things at first and then found Terry Scott's winged vessel DVD which helped a lot for both simple square and winged square vessels. Hope that helps. Darryl
>>>I have seen a few square bowls and like the idea. What size are most of these when first started and what is the finished thickness. Do most of you use a scrap piece to glue for the tenon?
Mark, I've made a couple of square bowls but I've made a bunch of "squarish" bowls/shallow bowls/dished platters. I call these squarish since the sides are not flat but curved. Gluing on scrap and turning round at first wouldn't work for the curved rims so I just turn "air" - not too difficult with good light tool control. I generally make rough and finish cuts with a 3/8" Hunter Hercules tool.
I've made these from 10-1/2" diameter down to about 7-1/2", measured across from side to side, not diagonal. (The smallest size lets me start with rough 2x8 lumber.) I like to start with 2" thick stock but have used 1-1/2" and 2-1/2".
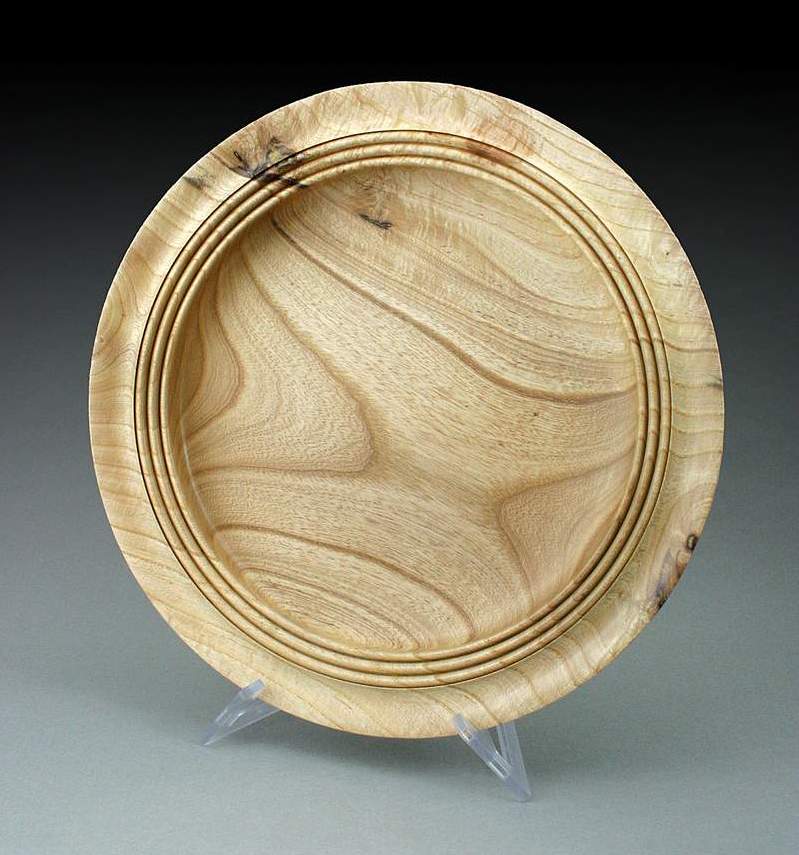
I think this one is about 8-1/2" across from 2" stock, shallow so it's more of a dished platter than a bowl.
I think the curved sides makes these look nice from the side, even when it is quite shallow. The relatively thick base makes it sit up off the table with a prominent shadow below.
I turn these from dry wood only. I make a template from plexiglas for each size so I can slide it around to make the best of the figure of the board.
My technique:
1 - Mark and cutout the shape with a bandsaw.
2 - Sand the sides on a disk sander (optional)
3 - Decide which side is going to be the top and mount that first. I usually use a Glaser screw chuck but a recess for a chuck works well (Forstner bit or jam and cut the recess on the lathe). Glue block tenon would work too.
4 - Hold by the top and shape the base and sides. I use a curved negative rake scraper at this point to remove tool marks. At this point I take the piece off the lathe and use hand scrapers and sandpaper and sometimes even apply finish to the bottom.
5 - I cut a recess in the bottom to hold when reversing. (I decorate the foot around the recess so I can leave the recess in the piece.)
6 - Reverse and turn the top with a curved NRS to remove tool marks. Like with the bottom, I hand scrape and sand with the piece off the lathe.
7 - Shape and smooth the rim with sanding sticks - strips of sandpaper glued to thin boards.
Scraping with curved hand scrapers eliminates the need for coarse sanding on the top and bottom of the piece.
I don't like power sanding with a rotating disk so all of my sanding is either by hand or with a small pneumatic ROS used at gentle speed. Sanding while the piece is spinning would be difficult with the wings anyway, but I almost always sand things with the piece stationary.
To hold the piece for smoothing and sanding I use a carving and finishing post/stand. This positions the piece where I can see and work on it better.
....pretty much determines the height/depth of the final turning design. This piece of spalted Silver Maple allowed me to make a deep box suspended in the middle, and width was about 15" and I call it "Samurai box"
>>>Your student is gifted if she can make that nice of a bowl!!
I sometimes feel about 2 cm tall around this person! She has a photographic memory, incredible natural tool control (her sister is a surgeon, must run in the family), microscopic attention to detail, and a healthy dose of creativity on top of that. She's in vet school now - started pre-vet school at age 13 and graduated #1 at the university. Good grief. Some days I have trouble even tying my shoes, and that's after I've found them....
I've posted this picture before, but you might find it entertaining if you haven't seen it:
Funny, I hear a lot of talk about how bad things are, how bad people are, blah blah blah...then there is people like her (and you of course)! I'm envious of people that seem to have these natural abilities - with hands AND mind. I have none. I have to work real hard to be average! But that's ok! Both of you - keep up the good work! I'm not much at teaching either, but I'm glad there are folks like yourself that are sharing the sawdust affliction with others. Very rewarding to see someone inspired.
Anybody remember that fella that had the web site where he was evaluating new products and teaching young folks woodworking? Unfortunately, I think he is no longer with us, but I enjoyed his web site and seeing the young folks learn and achieve. Very nice.
She often came directly from the vet's wearing scrubs. Still liked the smock over scrubs, depending on the chips.
BTW, after seeing what the staff at my dentist used, I bought some disposable smocks.
Made of paper, they will actually tear if caught at the lathe but I cut the cuffs off and sleeves short anyway. Very inexpensive and although disposable, they last forever in the shop. Soft, flexible collar, the girls sometimes wear them backwards to even better keep chips from the neck.
Also great for handling and doctoring llamas and peacocks on those very rare occasions I'm wearing a clean shirt.
I always thought helicopter pilots were either special or a little crazy. I've hired and used helicopters for photography/vide0 but never touched the controls (except for my RC copters!).
My best friend and cave diving buddy Carl, now deceased (from an illness, not an accident), were discussing life and flying on one road trip since we both flew private fixed wing. We opined that unlike an overwhelming majority of the people in the world, as US citizens with solid careers we could do almost anything we set our minds to, perhaps after saving up a little. I said, Hey, if we wanted to we could even fly helicopters!!
Months later Carl told me he came back from that trip and quietly started taking lessons! (He had some great stories about learning.)
Eventually he realized that without an independent source of wealth or employment with a company or the military he would not be able to fly copters for fun; he said unlike fixed wing there was no way to rent a helicopter for casual use.
Carl instead got his commercial, instructor, and ATP certs and taught flying for years.




 I've hired and used helicopters for photography/vide0 but never touched the controls (except for my RC copters!).