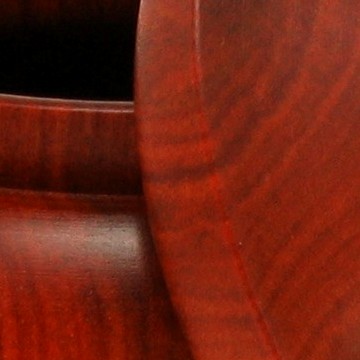
I've never used wipe-on poly so I thought I'd give it a try.
After three applications of Minwax satin I'm still not getting a finish that is satisfactory on a small platter made from yellow poplar. I'm following the directions on the cay. I'm used to "rich" satin sheen from 8-10 coats of danish oil.
Any suggestions from those with experience in wipe-on poly? Start with a coat of shellac sanding sealer on the bare wood? Go with the gloss version? Apply heavier on this soft wood, perhaps with a brush? Give up and use a different finish?
Will applying an oil finish over poly create a mess? This is an experiment for me on a demo piece from cheap wood so no big loss if I have to toss it.
..extensively for many years, and it is a go-to finish when some surface durability is desired. On a soft wood like Poplar a seal coat of lacquer or shellac significantly reduces the absorption problem, soaking in like a sponge! I use gloss and can cut it back with Scotchbrite when gloss is not wanted.
Thanks. I noticed today that after four or five coats it's starting to build up what I might consider an acceptable finish. I think I'll try a couple more.
For several years I've been using Pratt & Lambert 38 gloss alkyd varnish, mixed 50-50 with a premium mineral spirits, as a wiping varnish and still love the results. In fact, just put a 2nd coat on 14 magic wands - guess who empowered me to turn them?
Here in Cincinnati I'm able to get quarts of P&L, and have been using it as a wiping varnish on my wooden bowls for several years. At first I was using a danish oil mixed from equal parts BLO, mineral spirits, and P&L 38, but didn't feel the resulting cured finish was sufficiently durable. My daily milk and cornflakes red oak cereal bowl now has been washed every day for 23 months and shows no water damage. On bowls, five coats usually builds to a nice satin or semi gloss. With a small piece of muslin, I'll rub the wiping varnish over the entire surface three times, then wipe as dry as possible with clean paper towels and let cure overnight. After that first coat, I'll apply three additional coats per day (10 am, 1:30 pm, 6 pm) until I get the desired sheen.
Used to lose part of every can to premature gelling, but I purchased some Stop Loss bags last June and so far no gelling. The bags hold a quart, and I'm guessing I still have 2/3 of that quart with no gelling. A 2nd bag holds small quantities of the varnish mixed 50-50 with the mineral spirits.
P&L 38 probably is available in additional sheens besides gloss.
I just buy Minwax quick dry poly. I think they lowered the viscosity a couple years ago and it's fine right out of the can. I apply with a folded up cotton rag. Sand with 320 between coats. 3 coats makes a great build. I rub the final coat with 320, 600, then Mirka Abralon pads on a random orbit sander to the desired sheen. On closed pore wood like hard maple and cherry, 2 coats gives a nice finish that is "close to the wood". Doesn't look like plastic coating which I hate.
I like wipe-on "gloss" poly and generally use it as a first coat on a piece after sanding sealer has been applied and sanded down. Depending on the look of the poly and the nature of the wood, I wet sand the poly using a 600 to 1000 grit wet-dry paper. Subsequent coats of "spray" Minwax brand gloss poly are applied and wet sanded usually up to a 2000 grit to my satisfaction. I used an store brand poly one time and felt it very inferior look as compared to the brand, plus the Minwax brand has a much better spray nozzle.
I have a slightly different approach to using this finish.
1. I use baby food jars for this finish. I add some of the well mixed finish from the can to a baby food jar and add just a splash or two of odorless mineral spirits. I swirl the two around with the lid on to get them to mix. I try not to make more than I am going to use as it will cure in the jar in a few days’ time.
2. I apply this finish with a disposable natural bristle brushes that I buy from Lee Valley. I pre-wet the bristles by dipping them in mineral spirits before I start finishing. I think I get a better flow off the brush by doing so.
3. Make sure the piece is finely sanded and vacuumed and tacked free of all sanding dust.
4. Apply the finish liberally to the piece with the brush while rotating the lathe by hand.
5. The idea here is to get the piece uniformly wet with finish. Finish will be absorbed at different rates depending on whether it is being applied to end or face grain. Once this is achieved take your folded paper towels and wipe off the finish until no more is picked up by the paper.
6. Take a clean folded paper towel and wipe down the finish with the lathe running at moderate speed. Apply pressure to the paper to generate some heat. The paper should eventually slide smoothly over the finish without grabbing.
7. In between coats use 4/0 steel wool and/or cheesecloth to remove any raised grain or other imperfections. If you are seeing streaks the finish may be drying too fast and needs to be further thinned.
8. Continue to apply coats of finish in the same manner until the finish wants to remain tacky while you are wiping it. This means the finish is saturated and needs to dry before you do anything else. I usually let it dry overnight.
9. After it dries overnight start with some steel wool and rub it down really well with the lathe running with steel wool or the cheesecloth (or both). Carefully examine the finish under raking light and see if there are areas that need attention (more finish, more rubbing etc.)