I believe I have read here in the past that it is good to start the process, after sanding, with something like a diluted sanding sealer on the wood to even out the way the dye soaks into the end grain and sidegrain. Otherwise the result will be blotchy.
Today, 'somebody' told me that I have to put the dyes on absolutely RAW wood, after sanding because the application of a sealer will cause the result to come out blotchy.
Sorry but one of these is wrong.
Will some of you colorists out there with real experience in the matter please tell me which is correct and which is not?
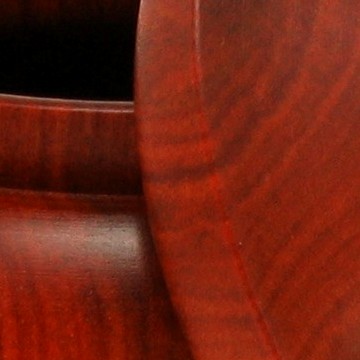
I have always dyed wood without any sealer. Staining certain woods can require a sealer. It depends on the affect you want. To highlight curly maple for example you dye without a stain. The curl acts like end grain and soaks up more dye. You sand it back a little and the dye stays in the curl but didn't soak into the non curl areas so this really pops the curl.
If you use a sealer and sand lightly afterwords when you apply the dye it won't soak into the curl as much. Sealers are commonly used on woods like Cherry to even out the color when staining for the same reason, to keep the end grain areas from soaking in too much. This is mostly done on furniture. For turnings we usually want the figure in the wood to show so we don't use a sealer.
I do not routinely dye wood but like John I have always dyed the raw wood.
I did learn that if I pre-conditioned, read "wet" the bare wood with the same solvent which in my case was alcohol, I was able to get more even color application on the first try. Even doing that I found that multiple coats of dye were necessary to achieve the desired color.
Of course then I discovered that multiple coats can lead to a final color darker than I wanted so I learned to thin the dye and apply this thinned version to a scrap piece of the same wood one coat at a time so that I could know when to stop when dyeing the piece I wanted to dye.
I hope others with more experience and knowledge about dyeing will chime in because this is a subject I need to know more about.
Most of what I know about dyeing I have learned from Chris Pytlik and as far as dyeing ala Chris it is always on raw wood. When Betty does her Liming wax thing she seals the wood prior to coloring, I always have to look at a video of her demo to get it right.
Dyes (well and milk paint, some other colorings) look different when you apply a finish. Sometimes it's really drastic. Sometimes coating it with water or an evaporative solvent like Naptha will closely mimic the finish color and intensity to help you decide if it needs additional color. A practice piece is by far the best bet. If in doubt always thin the color. You can always add more. If it's too dark sometimes you can use the solvent you mixed the dye in to wipe away some of the density but I haven't had 100% success with this. You can sometimes sand it back a little also but then you can get into the color variation I mentioned above when sanding curly maple.
In Jimmy Clewes' Turnaround video he applies multiple colors of dyes to a curly/quilted maple platter. He illustrates techniques of sanding between colors and spraying/misting alcohol on sections of the platter so he can wipe away or even out the color.
It is well worth watching this video if for no other reason to see the beautiful result.
When I decide to dye a piece, it's usually burl or something with pretty wild grain. Since dyes will tend to even out the wood's color (rather than congregate in the grain lines) my process for turnings is to immerse the piece and let it soak in for an hour of so. I then remove and allow to dry well. Next step is the use 2-part wood bleach to bring the harder grain back to white. Since the dye has penetrated the softer grain deeply, the bleach has no effect. I then dilute some dye and apply by hand to re-tint the whitened grain as a lighter value of the same color. Here's an example
Finish is a spit coat of dewaxed shellac then topped with General Enduro.
I think this routine gives the wood nice depth and preserves the identity of the grain. Darker sections around the star are actually epoxy fill.
To seal or not seal depends on what you are trying to accomplish and how you are applying your colors. It also depends on what dye type you are using.
I have been dyeing wood for more than ten years. I first saw Jimmy Clewes do it and I took a couple of classes with him. Jimmy is generally a raw wood guy that wipes the color on heavy. Think deep soak. This works IF:
1 - The dye will not penetrate to the back of the piece. On open grain woods, the dye will go right through.
2 - You are using figured wood. Jimmy almost always uses highly figured wood for his wide-rimmed bowls and platters. You get grain going every whhich way, so the penetration irregularities are desirable. However, go look at dyed pieces on WOW (including some of my early color posts) where you can discern both side grain and end grain in the same piece. Wherever the side grain resides, you will get the "white band of poor penetration". When I did end grain ash vessels, they all came out with a lighter "white" belt around the max diameter of the piece where the side grain prevails. As soon as the form turns the corner and exposes end grain, deep soak occurs. I dried adding more dye. This made a mess. I tried sealing the wood. This worked right up until the alcohol worked its way through the sealer, then blotchy.
I took a class with Don Derry. He generally seals before dye. He also applies the color with an airbrush. By doing it this way, you limit the solvent action on the sealer and get the right amount of color everywhere. This is how I apply dye now and how I teach color application. I seal with a spray coat of lacquer, then airbrush my colors without soaking the wood. I build the color gradually. On WOW, look at my "six for KC" to see sealed figured wood with airbrush dyes. The results are WAY better.
Chris P. does a "soak" method to get the colors he desires. Same with Jimmy. But for these techniques to be effective, you have to understand the grain of the wood and what will happen when you apply color.
For what it is worth, I mostly use Chestnut dyes and metal acid dyes. I have been doing some light fastness testing with the Chestnut and have been happy with their staying power. Most alcohol colors are not too light fast.
A couple of WOW pictures here showing the effects.
Joe you reminded me I was staining some finials for replacements on an antique clock. As you mentioned the stain would not color the top side grain portions of the beads the same as the end grain portions. I used my airbrush to add more stain to the side grain areas until they matched the end grain. I had forgotten about having that problem.
The simplest way I have found to dye wood is to (yes start with raw wood or after bleaching) air brush the dye on the piece. When you go to sanding back, you will appreciate how little sanding it takes vs. using a brush. The brush typically saturates the surface and this makes sanding a problem if you are trying to achieve multiple colors. Generally, I only use three colors and black. Say you want green, spray yellow first then blue to get a green. Sanding between sprays will give you interesting effects in the final color. AND, by all means use Procion MX dye; sold by Jachard(sp) or it's equivalent. It is used by wool and silk dyers and is the most color fast dye available. I used to use aniline dye because I liked that the alcohol did not raise the grain but it fades after a while almost no matter what you do.
As I said earlier in this thread I just know enough about dyeing to be dangerous.
I don't understand part of what you said. You said that after taking the class with Don Derry you seal the wood then dye but that you apply the dye with an airbrush. Here comes the stupid question: If the wood is sealed with lacquer does the dye actually penetrate through the sealer/lacquer and dye the wood or does it remain on top of the sealer/lacquer?
If it remains on top of the sealer coat and dries do you have to topcoat it with something?
The examples of your dyed work are beautiful by the way.
Thanks, All, for your excellent comments. I won't reply to each individually, but you can be sure I read them all with interest and appreciation. I will single out Joe for his excellent post and kicking the discussion into high gear with his very astute discounting of my 'subject' line.
Even though it was obviously silly of me to imply that we woodturners, as a group, could ever agree on only one way to do ANYTHING, I'm very glad I asked, because this chain has resulted in a lot of very meaningful, shared knowledge. Nothing is ever black and white -- particularly when it's color!
And don't let it stop here -- keep it coming. More pix too! Let's see and hear about more examples!
When it has come time to dye the pieces I think might benefit from dying, so far, by and large, I have chickened out for fear of ruining them. But I've seen such wonderful results, as some of the ones above, that I really want to suck it up and DO IT. Which is why I asked. Unfortunately, the use of an airbrush ups the ante quite a bit for me. That will be a new skill to learn -- and more tools to buy!! (Hey, maybe I'll win!)
Speaking of which, I just bought a Hunter Osprey #2 to play with, so I'll be watching John's excellent video on that again.
I think that it would be good to mention the different purposes of dyes and stains. Stains are primarily pigments that are intended to color wood uniformly. Some types of wood, especially softwoods like pine used in trim work have a bad habit of absorbing stain unevenly so there are products (not sanding sealer) that help to reduce the absorption of stain into end grain. While stains are used to color wood, dyes are mainly used to emphasize grain figure by taking advantage of the differences in the way that it is absorbed in end and side grain. Dyes penetrate deeply into end grain because they are in solution of whatever solvent is used (alcohol, water, or acetone) whereas pigments are solid particles in a carrier that evaporates leaving the pigment sitting on the surface. Dyes wouldn't be able to do what they are intended to do if sanding sealer were applied to the wood. And, in my opinion, there are better products than sanding sealer to use as a surface prep before applying pigment stains on "problem" woods. In general most hardwoods do not need pre stain treatment if properly planed and sanded first.
While I agree wholeheartedly with you for flat work, when we deal with curvy surfaces, straight-grain woods will have uneven absorption of the dyes on the side grains when saturating the wood.
When using figured wood, you can use dyes with less absorption issues on the curved surfaces. Burl is great, and even curly or tiger striped wood works well too.
Gary I dyed projects for years using everything from an old rag to Q tips. It all works. You do have more control with an airbrush and I'll be using that on part of the project I'm working on now. It's a multiple part piece and I'll probably dye part of it with just a cloth. No need to dirty up the air brush again for those parts.
The best bet is to just turn a few small projects and dye them several different ways. that way you can easily learn the differences and how they look.
Do you use the Chestnut Spirit Stains or their Transtint. Best I can see is the Spirit is thinned with lacquer thinner and the Transtint with water. I also want to try my hand at dyeing (wood that is!!!). This is a great thread. Ron.
Chestnut makes "spirit stains" although they are really alcohol-based dyes. Thin with denatured alcohol. You can buy Chestnut dyes from WoodWorld of Texas: http://www.woodworldtx.com/
Homestead Finishes makes TransTint and TransFast. TransFast powders are aniline dyes. Mix with water. I use TransFast powder to color epoxy when gluing wood. TransTint dyes (concentrated liquid) are metal-acid based and are very light fast. They can be mixed with distilled water or denatured alcohol. You can get them from many places including Woodcraft and Rockler. Woodcraft is having their 2-day anniversary sale starting Friday this week. Finishing supplies are 15% off.