Turning Green to finish questions?
Barry Irby
When you turn green to finish, what do you use for a finish?
Can you describe the process for me? Turn, sand, finish? Whats the timing involved? Do you wait between steps?
Knowledge You Can Build On — Est. 1998
Turning Green to finish questions?
Barry Irby
When you turn green to finish, what do you use for a finish?
Can you describe the process for me? Turn, sand, finish? Whats the timing involved? Do you wait between steps?
Re: Turning Green to finish questions?
Dale Miner
I'm sure that for as many folk doing turn green to finish, there are as many ways being done.
My way;
Mount the blank between centers, turn the outside shape to final form including the foot if there is to be one. If a foot is going to be used, leave the foot about 1/16" to 1/8 inch longer than wanted for final form. The tenon will be smaller than the foot, and this leaves a shoulder for the chuck jaws to register aganist.
Dismount the blank from between centers, chuck the blank, and hollow to final wall thickness. I use tailstock support for as much of this step as possible. For a once turned piece, I aim for a wall thickness of about 3/8" for larger bowls, to as thin as 1/16" for small items. Wall thickness much above 3/8" increases the likelyhood of cracking and increases drying time.
Getting as good a finish off the tool as possible is sought in turning the outside and inside.
Depending on the moisture content of the piece, it may be possible to start sanding at the completion of turning, but usually the moisture content will result in clogging of the sandpaper. For most items, the piece will be set aside for a day or two in open air. This allows the moisture content to drop and allow for sanding without clogging of the paper, and yet still have the piece reasonably round so that power sanding with the lathe spining at a slow speed is possible. Sanding to 320 grit at this point is as far as practical for me. An exception to this short drying period will be for items that are 1/8" or less. For those, the item will be wet sanded with waterproof paper at the completion of turning.
The piece will be set aside for another drying period to get the moisture down to as low as it is going to go. This will cause the piece to warp to it's final shape and the moisture content that was present during the initial sanding raise the grain.
The piece will be rechucked on the now out of round tenon and lightly sanded with 320 and if desired finer grits.
I then reverse mount the piece against a block in the chuck holding it in place with the tailstock. If a bowl, a protective pad will be used to prevent damage to the inside of the bowl.
I then take a light cut on the bottom of the overlength foot or bottom to flatten it so the piece will set without rocking. I do not recut the outside of the foot at this point, even though it is out of round. If no foot is used, the line where the bottom was flattened will be blended with a little sanding.
The tenon then gets turned away leaving a small stub against the tailstock center to hold the bowl against the chucking block., and the foot or bottom undercut. This will leave a varying width to the foot since the outside will be out of round and the inside round, but not objectionable to my way of thinking.
The foot and underside of the bottom get sanded as much as possible at this point, and then the piece is dismounted and the stub broken or whittled off, and final touch up sanding to the area done.
I finish most pieces off the lathe with either a hand applied oil finish or lacquer spray once off the lathe.
Re: Turning Green to finish questions?
don stephan
Dale's reply is very thorough and very excellent, and I like his tip to make the tenon separate from the foot, if there is to be one.
All surfaces get shear scraping, and I will also sand if possible to 220 as soon as turning complete. The major difference is I store each bowl in a brown paper grocery bag on the cement floor, weighing on a kitchen scale every few days. When the bowl only loses 3-4 grams between weighings I then move the bowl and bag to a shelf off the floor and continue. When the bowl now only loses 3-4 grams I'll continue it on the shelf without the bag until the weight again stabilizes. Then it may be stored for a month or more until I have time to finish. After sanding to anywhere from 320 to 600, depending on the wood and character, I label the bottom with a wood burner and finish with three coats of equal parts mineral spirits, boiled linseed oil, and Pratt & Lambert 38 gloss varnish. I allow 48 hours between coats.

Re: Turning Green to finish questions?
Dennis in Southern Oregon
I agree with the above except that, when practical, I prefer to wet sand immediately on the lathe using power and/or wet sanding. The secret is to keep the turning and sand paper continuously wet so that sanding produces a thin slurry rather than a clogging paste. I keep a pan of water on the lathe bed and a spray bottle of water at hand and rinse the sand paper every few seconds as needed. Keep the speed low and wear a face (mud) mask. The advantage is that this is fairly fast operation, because if your tool work is good you do not have to remove much material to get a smooth surface. If you wait until the piece dries to sand, most woods will develop a crinkly finish and you will have to sand away the crinkles to get a nice looking finish. (Ugly tool marks will be evident in the bottoms of the crinkles until you have sanded them out completely.) After wet sanding you may get crinkles, but they will look natural. Be sure to wipe off the slurry between grits.
Dennis
Re: Turning Green to finish questions?
robo hippy
The more warped my bowls are, the better I like them, and the better they seem to sell. When you explain why, the usual comment is 'Oh, they are so organic'.
I mount with a forstner bit drilled center, and expand the chuck into that. I turn the outside, turn a recess, reverse, core, and finish turn the inside. Then turn the core, core again, and repeat. Generally I will aim for 1/4 to 3/8 inch thick. Much thicker than that, and the risk of cracking increases. Any thinner, and they are not suitable for daily use. Well, maybe they are, but they just feel too light to me, and to most of the people I have sold bowls to. I then soak them in a mix of cheap brown hand dish soap, and half water. The only thing this does is to make them a lot easier to sand out when dry. Note here, keep a separate bath for walnut. It also really brings out the red in madrone. I did try the DNA soaks, and it made absolutely no difference in drying time, or crack control. I do not worry about getting the grain centered in the bowl. The warping seems to over shadow grain lines. I have found if you do careful lay out on the log before you turn, you can get pretty close.
For me, I prefer to let them air dry before sanding. I find them to be totally dry in 10 to 14 days max, even in our humid weather. I tried the wet sanding, and the forced drying, and it was just too much extra work. The problem is in sanding them out. I power sand, and at any rpm above about 15 to 20 rpm, you can not keep your abrasives on the wood. My old PM 3520A would go down to this speed. When they made the B model (Jet included here) they would go down to 50 rpm and then turn off. I asked them why and was informed that I would over heat my motor and that would fry my electronics. I told them that I had sanded out thousands of bowls at those speeds, and never had any problems. They told me that was impossible, and they had run 'tests' in their labs and the motors had over heated. Again, I told them about my sanding, and was told that it was not possible. They will not program them to run that slow for you, though they used to do it over the phone. There is a long thread on the AAW forum under tips and techniques where the code for getting into your phase converter, and resetting the speed ranges. I had my Robust lathe reprogrammed with help from Brent, and keep doing a hand check on the motor, and it runs cooler than when I am turning. Mostly because there is no torque load on the lathe.
Now, how to mount the dried warped bowl. I use a 4 jaw chuck with extended fingers. My usual recess is 2 5/8 diameter when wet, and oval when dry. The extended fingers close down to maybe 1 inch or so. I can expand them out to easily fit into the warped recess. I have to wiggle the bowl around a bit to get all four jaws to contact, and snug it up, but don't tighten it enough to mar the wood as the recess is my finished bottom. While you may consider this dangerous, it most surely would be for turning, but not for sanding as the rpm is 20 or below. It does hold securely enough for sanding. If you can't get your lathe to go that slow, hopefully you have a 2 or 4 position spindle lock. I frequently will stop the lathe and slowly spin the bowl by hand.
For drying the blanks, first, make sure to round over the rims, maybe 1/8 inch or so. A sharp edge will not only slice you to the bone if you brush up against it when turning, it is much more prone to splitting. After the soak, I rinse them off, let them air dry for maybe half a day, then stretch some plastic film around the rim. I go around a couple of times, and really stretch it out. This protects the rim which is the most vulnerable part, and puts it under compression, which is better for drying. I start them up on the floor and out of any wind. After about 3 or 4 days, they go up on a wire rack. Done in 2 weeks max.
robo hippy

Re: Turning Green to finish questions?
terry gearhart
Hi folks, I'm not the one who asked the question, but thank you, I really learned a lot about bowl turning,
Now, to the shop and start over
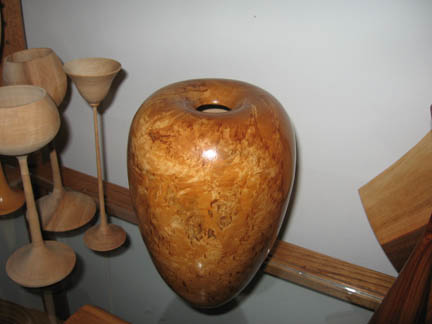
I Love crinkles
Lyle Jamieson
You can still dry sand and keep the crinkles and character from the drying process. If you turn wet to a relatively thin wall the free water, or unbound water (maple syrup) is pretty much gone by the time you are done turning. The wood does not start to distort and crinkle til the bound water has had time to escape, dry. So the trick is to sand when the unbound water is gone and the surface is dry enough to sand, without clogging up the sandpaper, but before the bound water dries out and has started the distortion. If the wood is too wet to sand when you are finished turning just go to lunch or set it aside for a couple hours til the surface of the wood dries enough to sand. Sand slow without heat...that means with sharp sandpaper!! I finish right after I sand.

Re: I Love crinkles
Brad Vietje
I'm with Lyle on the crinkled look -- especially curly figure and burls.
I wet sand with a dish of water and a spray bottle to 320 as soon as the turning is complete -- no dry time at all.
Then I towel dry and apply an oil based finish -- formerly Craft Supplies' Urethane Oil, and more recently Tried & True original or Watco clear. I never use a gloss anything for a once-turned bowl that will warp.
John Jordan tells us that applying oil to damp wood does nothing to slow down the drying or prevent cracks, which was news to me. I'd like to read the article he referred to a few weeks back for more info, so if anyone has the reference for that, I'd like to do a little more homework to follow up on John's information -- nothing wrong with an old dog (me, not John  ) learning something new!
After the piece is air-dry I hand sand with a little 320, 400 and/or a grey Scotch Bright pad, which is good at removing any raised grain while preserving the crinkles.
Rarely ever lose a single one to cracks. I'm careful about no sharp edges, and I finish turn all at one go, so there's no tenon left, which can cause cracks because the bottom of the bowl can be twice as thick as everything else with the tenon on there.
Works for me -- YMMV.
Safe spinning,
Brad Vietje
Newbury, VT
Re: I Love crinkles
robo hippy
My favorite crinkle pieces are usually from the buttress parts on the bottom of the tree, and turned end grain. Fairly easy to get a very clean cut, and wet sand with a penetrating oil. Kind of messy, but when dried, you want that texture. I like a coat or two of oil on it first, then use the grey or white synthetic pads to put on more oil. And, then there is Madrone. You never know what it will do......
robo hippy
Abranet works great on wet wood sanding
Dick Coers
and you can soak it in water if it would plug up. I'm not sold on the round over the edges advice. I've had a patron order a dozen 6" deep x 18" diameter soft maple salad bowls. All were turned to 5/16" walls, didn't soften the edges of the rim. Didn't loose a one, and most went out of round by 1". I don't wet sand anymore, especially on these big ones. I throw these in landscape waste paper bags because of the double bags. I use a Harbor Freight 5" random orbit sander on these. Not a great sander, but the dust bag connection is very small. It lets me get in the bowl very easily, and oh yeah, I don't use the sander dust bag. I sit on a stool to sand, and have two dust collector pickups right by the bowl. He wanted a couple dyed with turmeric. 
Whew! Thought I screwed up again....
Barry Irby
I used to turn green to finish a lot, but it been years. So I asked here. Then went right into the shop and started working on some ambrosia maple blanks I rescued from a neighbor. (firewood)
The first group of answers all mentioned waiting for them to dry. I had already applied lacquer to them. Glad to see some of you finish right away. Now I am going to look at yesterday's batch. Got my fingers crossed. Thanks
Re: Whew! Thought I screwed up again....
Dick Coers
If that lacquer didn't blush, the wood wasn't that wet. If the wood is throwing water as you turn it, lacquer will not work. It traps the moisture inside the finish as the solvents flash off, and you get a hazy finish.
Re: Whew! Thought I screwed up again....
bob davis
lyles method works for me
Dont use lacquer on wet wood


