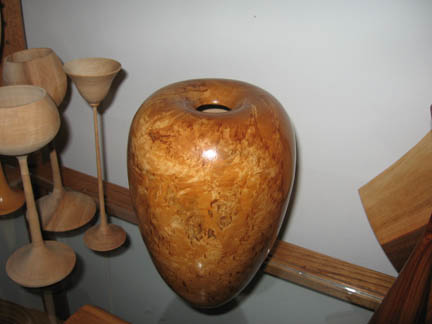
i'm working on learning finials.. wanted to make some but i only have green wood.. when i make them they tend to curve after drying ...
and cracking is a must...
i know most people use kiln dried wood to make finials, but was wanting to do it from similar types of trees.. hackberry, elm, etc.. pretty much the same logs I'm using to make the boxes or hollow forms or bowls out of...
and since i have no patience i put a blank in the microwave and tried to slowly slowly dry it , but the cracks are there again..
now that i think about it, lots of locals use mesquite (very stable) for most of their finials, but mesquite isn't easy to come by, so was wondering if i should try another rout or sit and be quiet...
Try making some 1in dia sticks, then boiling them in water for 30 min on the stove and then letting them dry for a few days. Perhaps that would give you wood stable enough to turn a finial. The downside is that a very nice finial must be turned on very dry and straight grained wood, al la Cindy. If you have never seen her turn the details into her finials you must do so. Good luck! Philip
Are you trying to learn how to dry wood or to turn finials?
If the latter, just buy a 3/4" poplar dowel or two that you can get at ACE, HomeDepot, Lowes, etc. They're inexpensive, dry and stabile. If your tools are sharp and you learn how to use them properly, poplar dowels turn well, sand well and finish well.
Get the techniques and proportions down first - then worry about turning them in all sorts of woods.
I'm afraid the best thing is to simply have patience. I cut green stock anywhere from 4" square to 1" square and seal the ends with parrafin wax. I'm starting to get quite a bit of stock after a few years of doing this.
You can turn smaller pieces for things like ornament finials from 3/4" square stock. As long as they are thin they won't crack. However they do move and if the grain runs funny you may end up with a crooked finial. Thicker wood that is say 2" can easily check if turned freshly green. I've turned a fair number of stool or chair legs from stock that has been setting for 6 months with no problems at all. Thicker stock I prefer to wait longer.
I just keep looking for fresh wood and then harvest it into spindle blanks and put it up. Right now I don't have a lot because I don't have place to store them but I'm working on that solution.
One more thing to imporve your success rate is to use half the tree/branch. Never have the pith in it. This alone will cut the chances for cracking and checking in half. It will likely have less warping too.
And it can be available at better lumber yards. They stock it in different thicknesses for decks, and deck rails. They sell 2x2s for rail spindles. I got a nice batch of cutoffs that were left over from a big deck construction project. You can really turn it down to tiny diameters. I've turned it down to 1/16". Also made a crochet hook for my niece. It is incredibly hard.
I forgot to mention that size does matter in my turnings. My idea of small is what most people consider LARGE. So the box i have is about 4 inches tall and about 8 inches wide, which is tiny for me, but the base of the finial/lid is about 3 inches at the base.
So my finial will be about 3 inches at the base and about 8-10 inches tall...
or more...
so a 3/4 x 3/4 isn't big enough.i need a blank at least 4 inches in diameter.
Maybe understanding a little about what you're starting with may help. And that gets us all the way back to the tree your piece of wood came from - and WHERE on the tree it came from.
If trees - and branches - grew nice and symetrical - the growth rings concentric - a woodworker's life, especially a turner's lifem would be a lot simpler. Alas, thanks to wind and snow, sleet and hail, slopes and competing trees, THEY DON'T! Trees and their branches REACT - to both their growing environment as well as gravity. So as they grow, their growth rings have to REACT to the forces they're to resist.
If you think of the growth rings as concentric rubber bands, one inside the other, some of what you're dealing with when playing with part of a tree will make more sense.
Imagine a tree growing on the side of a hill. The "uphill" part of the growth rings will try and PULL the tree up the hill - ie. are in TENSION - to keep the tree from falling over. The "downhill part of the growth rings will try and PUSH the tree uphill - ie. in COMPRESSION.
Imagine a big branch growing more or less horizontally out from the trunk - all its weight trying to rip it off the tree. The growth rings on the top of the branch are really stretched trying to pull the branch up against gravity. The growth rings on the bottom of the branch are squeezed together by the weight of the branch - compressed by gravitational forces.
Now imagine that you cut through this rubber bands within rubber bands within rubber bands. When you do, both the tension AND compression forces will be released - and things will MOVE - the stretched part relaxing and getting shorter, the squeezed together part springing out and getting longer.
Then imagine, in the center of this bands in bands in bands thing - a soft spongy space - the pith. Unlike the rest of the wood, it HAD only one purpose - to create a space and support for two or three leaves to grow - either as the seed sprouts and starts growing, or a branch begins growing. It doesn't need a lot of strength to support three leaves. It just has to grow fast towards the sun - and let a few leaves soak in energy from sun light and CO2 out of the air.
Think of a soda straws between the rubber bands. They run up the tree and out the branches. Their function is to provide structural support AND carry things back and forth between the leaves and the roots. Little gets out the SIDES of the soda straws, lots get into and out of the ENDS. As a piece of wood dries, the free water in those soda straws evaporate out the top and bottom (the "end grain") and the soda straws, squeezed by the rubber bands start to collapse. Lose that free water too fast and, in addition to the soda straws collapsing, they pull apart from their adjacent neighbors.
The minute you cut a piece from a tree all these forces and changes in moisture content begin the process of returning the tree to the soil - usually aided by bacteria - and bugs. This is what you're up against - wood that wants to rip itself apart - decay - and with exposure to sunlight and all the stuff that's in the air, change color - to brown, usually getting darker over time.
Let's look just at shrinkage as the wood dries. As you can see, WHERE in your logette you get your finial blanks will affect how its cross section will deform.
For understanding how Where On The Tree your logette is from affects the wood in it, see the attached link. There's more to this than just the drying.
And you might want to look for a Wood Shrinkage by Species table and learn about Radial and Tangential shrinkage values. The closer the ratio of Radial/Tangential is to 1.0 the more stabile the wood used for a finial - assuming of course that you're playing with straight grain and not crotch or highly figured wood where the grain is running all over hell.
Hey Charlie, I know you didn't draw those diagrams, but I think there are some questionable changes being illustrated there. First, the rift cut board on the upper left, should match the square on the right, by becoming a long trapezoid, not cupped to the left.
Then, It would have been nice if the annual rings were included in the drawings, but I'll assume the middle 1 x 6 has the pith in it's middle, and I have no argument there. And I'm sure the changes are exaggerated for easier basic understanding. But there should have been a 1x6 right over the middle one, which would have a slight V shape, due to the smaller arcs close to the pith, changing more than farther out.
That top 1x6, as it is shown, should be just over what I just described, but under the square, to more closely match reality. Then if there was another 1x6 up above, it would likely have less cupping than that one.
Since Darrin admits having trouble getting his head around this, shows a need to keep it simple.
My advice to D is to try to start with wood from farther out near the bark where the cells are straighter, and the annual rings are flatter. That is to say, don't even bother with small branches. Juvenile wood, just doesn't have the same properties as normal wood.
If you do that, then put them in a paper sack, along with a few more scraps of green wood, for a week to dry, you should not have to worry about checking, or warping. Your thin parts can't give up its moisture faster than the middle of the fattest parts, to keep the shrinkage tension balanced.
I cannot imagine being a woodturner without understanding the tree and wood movement?
For finials, I would want my wood from that lower left "board". If you have a log and make two cuts around the pith, the slab in the middle has two of those boards in it to either side of the pith. I cut the pith out of the slab and stack those bits for handles, spindles, end grain boxes and goblets. Most stable wood in the log.
that's ok.. I cannot imagine a photographer that knows nothing about the fundamentals of photography or business, but thats what 96% of the 'professional' photographers are doing. Most don't even have a tax id.
I cannot recall a single injury I ever suffered as a result of toting around my Hasselblad? A wood lathe is a different beast.
Aside from the fact that you've got a sharp tool in hand, the real danger comes from not understanding the wood, a little bit of physics, ad some basic procedures. If you have wood with cracks in it, it becomes more important to know this stuff ... or you run the risk of being bludgeoned about the head and neck with your art.
I think your best bet is to cut and stockpile. Don't be afraid to throw away something that didn't dry right, or to recut it smaller. Some wood cannot be "saved".
Personally, I wouldn't want to be bludgeoned with a Hasselblad...
I'm with Steve -- these are the fundamentals, like f/5.6 vs f/64 in photography, shooting free throws in basketball, or using a pitching wedge or putter in golf. If you intend to process locally-sourced wood, this is must-know stuff.
Like Steve, when I cut up logs for bowls and such, I cut a slab about 3" thick through the center of the log, with the pith running down the center. Then I discard the wood within about 3" of the pith, and the two chunks remaining on either side are basically short quarter-sawn planks, which can be converter to small bowls or little candy dishes, or split into spindle turning squares.
I cut or split these out, wax only the ends, date them, and cross-stack them on a shelf somewhere in the barn. Later -- sometimes a number of years later -- I grab spindle pieces as needed, and as long as I replenish the supply every now and then, I have an endless stream of wood passing from fresh, green stock to air-dried.
A 3" or 4" diameter finial is a pretty big hunk of wood. If you split these from green logs, they would need 3-5 years to air-dry. Depending on the design and desired color of the finials, you could use stable woods like Mahogany or Mesquite, or seek out a furniture company that makes table legs, and see if they have scrap bins, or if they sell their waste as firewood. You might be able to secure a good source of free or nearly-free wood to use while your spindle stock dries.
BTW: I have found that the more wood I have on hand, the more patient I am for it to dry.