
Picture Resizing *LINK*
Ellis Walentine
We have so many folks here who have expressed frustration with photo resizing over the years that I thought I'd share a really quick and easy resizing solution that I just stumbled across. It is www.picresize.com. Forgive me if you've already shared this site with our members.
Anyhow, I tried some of the options on picresize.com and came up with this set of instructions that will resize any of your images to a size that will be under 100Kb, our current maximum limit for uploaded images:
1. Go to www.picresize.com
2. Click the "Choose File" button and navigate to the photo you want to shrink. Select the file and click "Open" in the file dialog box. Unless you need to crop or otherwise manipulate your image, proceed to the next step...
3. Click the little blue link that says "Or Quick Resize." The screen will expand downward, revealing the next steps of the process.
4. Under "Choose New Size" (Step 2), click the "Custom Size" button and type "600" into the "Width" field, then choose "Pixels" from the dropdown box directly next to the "Width" textbox. This will create an image whose width is 600 pixels -- small enough to fit in our 800-pixel content field but large enough to show all the detail you need.
5. At the bottom of the next step (Step 3), check the "Remember my settings for next time" box, and then click the "Resize Pic!" button. Your cursor will turn to a hourglass/arrow as your photo uploads to their site and gets worked on. This could take up to a minute or so. Don't be impatient.
6. When the picture has been resized, the original and reduced file size of the image will be displayed at the top of your screen. The reduced size should be below 100Kb in size for WoodCentral uploading. If it is over 100Kb, hit your back button and go through the process again but with a smaller pixel width, (e.g., 500 pixels instead of 600). Once it is under 100Kb, choose the "Save" option. This stores the reduced version of your photo to your Downloads folder (usually in "My Documents" on a Windows computer. On a Macintosh, this folder would be User > Downloads or however you have your Mac set up.)
7. Go back to the messageboard where you want to post a photo. Hit "Post New" (or "Reply" to another message) and type your message. Place your cursor in your message at the point where you want your photo to appear, and hit the "Choose File" button, then navigate to your Downloads folder and select the reduced-size image you want to display. Be patient while your computer sends the image to WoodCentral. When it arrives, you will see a new line in your message beginning with img and ending in /img (in square brackets). This is our software's "image tag" and means that your image was accepted. I like to have a carriage return before and after image tags to create a little space above and below the image. Preview your post to make sure, then hit the "Post" button to actually post it to the public board.
So, for any of you who have had trouble navigating these waters in the past, give this a try. There's nothing to download, no learning curve, just quick, painless photo resizing,... and it's free! Hats off to these guys!
Ellis Walentine, Host
Picresize.com
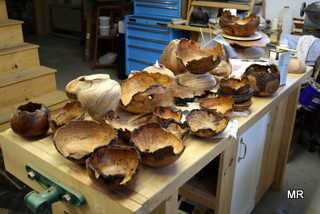

 Depending on the original photo, sometimes just using the "small" option results in a pic that us old folks can't even see! An extra 20kb at 600 pixels makes a difference.


