Home Articles Forums Gallery Marketplace Videos

WoodCentral Forums

Knowledge You Can Build On — Est. 1998

100+ Wood Species + Full-Shop Services: Lumber, Veneer, Tools & CNC. Everything in One Place.

Hunter Taper Hollowing Tools - Review

Posts

Hunter Taper Hollowing Tools - Review

#1

Phil Stivers

Hunter Taper Hollowing Tools - Review

Phil Stivers

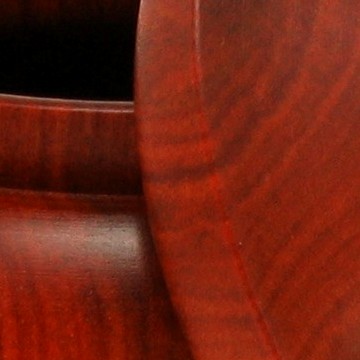
The Hunter small (3/8" tapered) tools arrived. The HF is 3 3/4" tall 3 1/2" dia. Opening is finished 3/4" and the walls are appropriately thin (without being see through.)

The tools consist of a straight tool, bent tool, and "back" or under lip tool. All on 3/8" tapered shafts. The back tool is only useful under a rim and is pulled toward you. The bent tool's #1 cutter is set at an angle while the back tool is angled and set recursive. The straight tool's #1 cutter is set straight with the operator in charge of canting the tool to ease it into the work.

The tools will cut aggressively but will also yield a smooth controlled cut when desired. I used a home made straight scraper to work the bottom. A definite need for this set.

I like the tools. This is about the limit for the tools in depth, but I got very little chatter. The little buggers cut like crazy!


Re: Hunter Taper Hollowing Tools - Review

#2

Phil Stivers

Re: Hunter Taper Hollowing Tools - Review

Phil Stivers

And thanks to John Lucas for the videos on their use!

Re: Hunter Taper Hollowing Tools - Review

#3

Mike Stafford

Re: Hunter Taper Hollowing Tools - Review

Mike Stafford

Phil, the Hunter straight tools can be use for cleaning up the bottom of forms such as the one you pictured and other shapes as well.

Just turn the cutter to 90 degrees with the screw pointed at 9 o'clock. Move the cutting edge slightly right of center and gently engage the bevel until it is cutting. Swing the handle slowly and gently to the right while the tool cuts. Depending on your tool control and the material being cut you can get a near polished surface. I use the straight tools all the time for that purpose on end grain material.

Re: Hunter Taper Hollowing Tools - Review

#4

Re: Hunter Taper Hollowing Tools - Review

john lucas

I've done it opposite to Mike with the screw pointed toward 3 oclock and I start the cut from the outside and go toward the middle. Either way it's a bevel rubbing cut once you get started.

Re: Hunter Taper Hollowing Tools - Review

#5

Steven Antonucci

As long as you cut in the same dir. as the screw

steven antonucci

you should be fine.

You get in trouble if you try to go backwards, as it will run out of the cut. Unlike other orientations when you can cut push and pull, 3 and 9 o'clock are one way streets.

Steve

Re: Hunter Taper Hollowing Tools - Review

#6

Mike Stafford

Re: Hunter Taper Hollowing Tools - Review

Mike Stafford

Yeah, I did mean to also say you could do it the other way around in reverse..... :b

I don't know why but I like to go right to left but it works just as well going left to right.

Re: Hunter Taper Hollowing Tools - Review

#7

Rob Wallace

Re: Hunter Taper Hollowing Tools - Review

Rob Wallace

Like Mike, I also prefer to move from the center outward when refining the bottom interior of bowls and other vessels with a bevel-rubbing cut. In so doing, you are working with (not against) the centrifugal forces generated by the rotating piece which would naturally move the tool from the center outward. By moving in the same direction of this force, you may get a bit more control, instead of having to counteract it by moving from the outside inwards. Although I've performed the same task in both directions, I prefer the cut moving from center outwards.

Rob

Re: Hunter Taper Hollowing Tools - Review

#8

Phil Stivers

Re: Hunter Taper Hollowing Tools - Review

Phil Stivers

Thanks ya'll for the pointers. I use a scraper generally to remove the nub at the bottom of a HF if I've created one. Cup up under, lift and move laterally. I'll have to try it with the straight bar cutter....

Re: Hunter Taper Hollowing Tools - Review

#9

Re: Hunter Taper Hollowing Tools - Review

Fred Holder

I think these tools are really designed to make little boxes and perhaps Christmas Ornaments, but I had a piece of wood supplied by Bob at our July Collaborative Meeting that I wanted to try. I do not know what type of wood it is but it is highly spalted. The tools didn’t seem to care. They just ate the wood right up and cut fairly clean. I rough turned the piece using a skew and spindle gouge, but all inside work was done with a drill and the Hunter tools.

The little tools worked wonderfully well. It was a pleasure to hollow this piece. I started by drilling a 3/4 inch hole to almost the depth of the portion to be hollowed. Because I was using a Forstner Bit with its little point on the end, I chose to stop a bit short of where I wanted to hollow.

Once the drilling was complete, I first used the #1 Tapered Straight Tool to enlarge the hole, working down from the top toward the bottom. I then switched to the #1 Tapered Shoulder Tool to enlarge the hollow inside the vessel. I made sure occasionally, to check my wall thickness because I didn’t want to give Bob back his wood in several pieces. I’m also used to hollowing

with a laser to keep track of my wall thickness. With this set up I had no laser, just calipers.


Re: Hunter Taper Hollowing Tools - Review

#10

Question Fred *LINK*

Dave Peebles Lyons, Ohio

What ever happened with the question you posted a couple of weeks ago?

Link below

Dave


TCC

Re: Hunter Taper Hollowing Tools - Review

#11

Re: Question Fred

Fred Holder

I forwarded all of the responses to the questioner. The last I heard from him was that he had figured out another way to do it. So, he didn't need the thing he was looking for. Sorry, I should have finished that posting with his last response.

Re: Hunter Taper Hollowing Tools - Review

#12

Thanks Fred