Home Articles Forums Gallery Marketplace Videos

WoodCentral Forums

Knowledge You Can Build On — Est. 1998

If you sell to woodworkers, your customers are already here

working with some new amatuer lighting

Posts

working with some new amatuer lighting

#1

working with some new amatuer lighting

john lucas

I got the new FLD photo lights this week and finally had time to run them through a test. man to they tell tall tales about these things.

Here is what I got. this one is a 70watt FLD in a softbox.

http://www.adorama.com/FPSSB.html

This one is 3 45 watt FLD lamps in a 12" reflector. comes with a diffuser, umbrella and a stand.

http://www.adorama.com/LTO210.html

Because I didn't believe the power ratings and knowing that the type of reflector, soft box, etc will drastically change the output, I put them in a plain socket with no reflector whatsoever.

I had two standards. A 100 watt incandescant bulb, and 500 watt EBW blue photoflood. I used a 70 watt FLD and one 45 watt FLD.

The 70 watt FLD claims to be equivalent to 350 watts. Interesting because it read 2/3's of a f stop less light than the 100 watt lamp.

The 45 watt lamp came out to be equal to about a 35 watt lamp, 1.4 stops less than the 100 watt lamp.

color wise, they are supposed to be 5500 K. they actually read more like 6300, the 45 watts are more like 6170K. shooting with them on the daylight setting they are extremely close color wise. They are very slightly green. Less than most people's computers would show. My computer at work is color corrected.

Here are some sample photos. I will try to put together a video on how I would suggest using them. This system costs a little more than I would like. Tax shipping and all I have about $170 dollars in it. That doesn't count one light stand I already had. I'm going to do another test with some plain hardware store reflectors. That and the lamps should cut the cost down to $50 not counting stands but you can make what we call "stick in a can" stands very cheap. I'll show those also later.

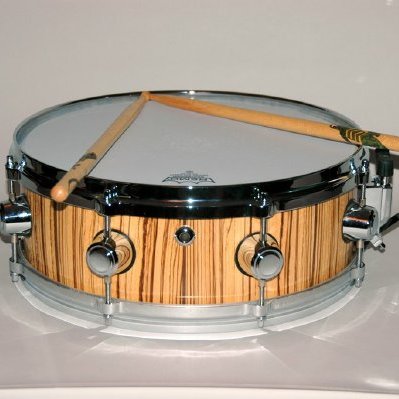
for those interested the shots were done at 1/4 second at F8, 200 ISO, on the Daylight white balance. No corrections were done in the software, these are straight out of my Nikon D700 using an 80-200/2.8 lens.

don't laugh at the turning. That was one I did about 25 years ago when all I knew was gluing dry wood together. We've had it in the office for all those years.

I'll be doing a demo at the OHIO symposium in September and wanted to update my lighting. The quartz lights I've been using are good but they are very hot and dangerous. These lights will require a longer exposure by about 3 stops so you need a darkened room to shoot in. I did some reciprocity tests on long exposures on 2 of our cameras and noticed only a very slight difference in exposure, no color shifts. Your camera may be different but if not you should be able to shoot at f22 at about 2 seconds for this kind of photo. With the hot quartz lights it would have been about 1/4 second. Still need a tripod of course.


Re: working with some new amatuer lighting

#2

lighting

john lucas

I took the same lights, used the reflector with the diffuser instead of the umbrella, then I added cards to block the light from hitting the back ground and got this look.

I believe you can to a nice job with these lights. now I need to experiment with using just the bulbs in cheap reflectors to see If i can get good results and keep the price down.


Re: working with some new amatuer lighting

#3

Richard Allen

Re: lighting

Richard Allen

Thanks John. Very good help. I am looking forward future installments of this series.

All the information is great.

I suspect that different objects present different illumination concerns. Bowls vs hollow forms, flat finish vs shiny finish...

You mention darkened room. How dark a room? Would I be able to read a newspaper in the darkened room?

Could you take pictures of the setup with a different camera so we can see the location of the camera when taking pictures of the turning? Pictures of the setup from different angles would also be great. Annotating the pictures of the setup to identify the things in the picture (background, reflectors, supports...) would be great.

Re: working with some new amatuer lighting

#4

Re: lighting

john lucas

I did a test in my living room with late afternoon sun coming through the dining room window. there isn't a wall between the two. I could barely see some blue in the shadow area which comes from the dining room window. So it really doesn't have to be that dark. Less ambient light would be better but it doesn't have to be dark.

Where the camera would be is purely based on the focal length of the lens (and the size of the sensor). In this case I was using an 80-200 zoom on about 120mm setting. consequently I was about 6 feet or so from the vase. If you use a shorter focal length you will be closer but the background behind the piece would have to be larger which makes it harder to control the lighting on the background.

Re: working with some new amatuer lighting

#5

Re: lighting

avalon

curious.. why are you using so many types of lights?

i have white lightnings and never change...

and does your studio have a website?

www.studioonephoto.com

www.avalonweddingsbcs.com

my studio in a small town.. lots of different things to shoot...

Re: working with some new amatuer lighting

#6

I have "played" with these FLD type....

JamieDonaldson

...bulbs for several years now, and agree with most of John's observations. The lumen output is greatly overrated and varies widely from bulb to bulb, and they must be allowed to warm up for several minutes to reach max output. During that warm-up period the color balance also varies widely, and I just don't trust equipment that has that much deviation from standards and wastes my time. So today I'm using 1 of them in a 12" reflector in the garage to assist in waxing the car! At least they're good for something!

Re: working with some new amatuer lighting

#7

Re: lighting

john lucas

In the studio at work we use Speedotrons for most of my product work. We use White Lightenings for our portraits and location work. We also have a full set of quartz lights that we used to use a lot for large format work.

I'm playing with the various inexpensive lights for when I teach. Most people aren't going to spend any more money than necessary to get the job done. My old teaching set up was 300 watt quartz work lights with stands. they work but are quite hot. I thought I would try and see if I could find an inexpensive way to use the Daylight balanced FLD's because they would work better with the point and shoots that don't have manual white balance and would be cooler to the touch than the quartz lights.

Re: working with some new amatuer lighting

#8

Re: I have "played" with these FLD type....

john lucas

Jamie I haven't experienced the warm up or temperature change in the photo quality FLD's but I will definitely run a test to varify.

Re: working with some new amatuer lighting

#9

Re: lighting

Carol Reed, Strawberry, AZ

John, I am following this thread closely. Please continue to include information like where the camera is relative to the object and what difference that makes. Please don't assume we (I!) know beans about photography. I can barely find the 'snap the picture' button. Thanks.

Re: working with some new amatuer lighting

#10

Re: working with some new amatuer lighting

Mike Foster

John,

I have been playing with my lighting for years and am still not quite satisfied. I started with some rather large bulbs that have 2 filaments and a silver reflective backing (still have one bulb but no markings on it, with the bulbs shining through a translucent white cloth. I have used the translucent fabric and halogen floods (not the work lights) in a phrugal box. I do have 2, 10" photo fixtures with tripods like you show in your photo but use the regular halogen flood lights. Probably not bright enough. I have a photo box with white posterboard sides and top and bounce light to the best effect I can get. I find the lighting a little inadequate.

Do you think the soft-box is a good idea, or would you think the old bulbs would be better if I can figure out what they are and where to get them. Would these bulbs work better?

So many questions and so little time

Thanks in advance for any help.

Mike

Re: working with some new amatuer lighting

#11

Re: working with some new amatuer lighting

john lucas

Mike When I have time, hopefully later this week. I will set up my photo booth and play with the lights. I think the photo booth will probably help a lot of people shoot work. It won't work for every piece which is why I thought I would buy the soft box since it was reasonably inexpensive. It will still light the photo booth but will give you some options of not using the booth, which is what I show in this photo.

Carol I will answer the camera question better later but for now here's my suggestion. Zoom the lens out some. You want to be a little ways from the piece so you have room to work with some of the later tricks I'll try to show. Zooming in also reduces angle so the background doesn't have to be as large. It also makes the piece look a little more like the correct perspective.

As far as height goes most pieces look good from a little above eye level with the piece. Having the piece at your waist and standing up looking down seldom looks good unless it's a bowl or platter with detail on the inside. For hollow vessels I move up just enough to see both sides of the lip of the vessel.

Re: working with some new amatuer lighting

#12

Re: lighting

avalon

I used hot lights in college... when i got skin melted, i decided i would always use flashes...

My teacher was evil...

had to shoot 4x5 tungsten using a window as a light source with florescent fill... and we had the lights of the room to deal with...

so we would use filters on the lens, window, hotlights (would usually melt) etc... even had filters for the florescent tubes in the ceiling...