I have trouble sanding out the tear-out in grooves on the outside of bowls. Beads also represent a problem with power sanding. Coves is another problem. Have any of you found an efficient way of attending to these areas?
For grooves, I like sanding cord (available in a variety of places - like Rockler or Woodcraft). For coves I usually use a contour sanding pad as the "backer" and an appropriate grit of sandpaper.
Assuming that you are talking about spindles, you should practice technique. Spindles are easy to cut cleanly with good technique. Sanding them only blows out your details, so cutting them cleanly is job #1!
Grooves and beads on the outside of bowls can be a challenge to sand because of the tear out on the endgrain areas. Of course try to get as clean a cut as possible to being with, but beyond that, I use a small section of abrasive paper, folded to get into the small areas. I fold the small section of abrasive paper into thirds (or sometimes just in half). The sort of abrasive you use makes a difference, buy good quality abrasives and do not over-use each grit.
You might have to begin with 80 or 100 grit, then progress to 150 or 120, then go to 220 or 240. The first grit you begin with (80 or 100) will take the longest to use -- that's where you are removing all the tool marks and the tear out. Don't progress to a higher grit until all the torn grain is sanded smooth.
(If you've achieved a really good cut before beginning sanding, you might be able to begin with 120 grit.)
Slow down your lathe when you sand bowls. Sanding at a high speed creates heat, which warps the bowl. High speeds also do not let the abrasive work properly. And if the bowl is even slightly out of round (which they almost all are at the point of sanding), if your lathe speed is too high, then you'd end up hydroplaning -- hitting only the high points, not really sanding the endgrain areas.
I sometimes even turn the lathe off and sand a small problem area by hand. The problem with doing this, though, is that you will have made a bit of an indentation and subsequent sanding with the lathe on will skip over the low area.
Even though sanding beads can be time consuming, they can add a really nice element to a turned bowl. Good luck!
#1 is to work on your tool technique or which tool you use. I prefer the long nose of a skew for this. It can also be done with a spindle gouge that has a sharp angle on the end but I find the skew better.
Second is to sand with the lathe off. Odds are the tearout is in the end grain portion of the bowl so you will have 2 bad areas opposite each other. When sanding under power I find it takes quite a while or you have to back up to really course paper. If you sand by hand you can concentrate on just that area and it goes pretty fast. Once you've sanded out the tearout you can turn the power back on and go through the grits as high as necessary.
to sand these problem areas I first try folding the paper. Use it for just minute or so and fold it again. The fresh crease works better than worn paper so you will have to do this often. If you have a larger area split off a piece of wood so it's a sharp wedge, like the blade of the skew. Wrap the sandpaper around this. This method helps when sanding the sides of a bead that are torn.
Use a sharp edged piece of sandpaper to work the bead down into the corner. I cut my paper into 1" wide strips just for this use. Keep moving the paper up and down the strip to keep a sharp edge. I sometimes use a 6" steel scale (the thin type) as a backer to work into the corner to keep it clean.
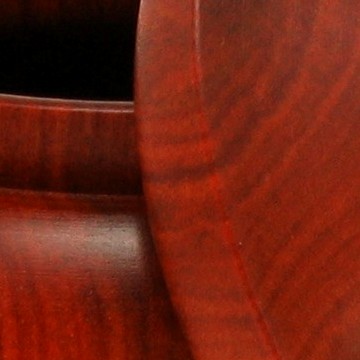
you can get excellent results. I'm including a couple of pics of a piece I've been sanding using those methods. My lathe spins too fast at it lowest speed, about 600rpm, so I end up with a burnishing problem when I go to the finer grits. If your lathe is capable of slower speeds do it, no fun having singed fingertips anyway. "Raising" the grain also helps, wiping a small amount of water on the troubled area and letting it dry before sanding again can help you get a smoother surface. After I've decide what grit I'm going to stop at, I remove the piece from the lathe and hand sand to blend the surfaces. If you're careful you can keep the details pretty crisp.
As you'll see in the pics I have a little more sanding to do... the streak is a 600 grit burnished spot. The funnest thing about turning is you can put whatever type of details on whatever type of turning you do.
Your point about using water to raise the grain is excellent. I use water (moisten the wood) often when sanding bowls. For whatever reason, that works really well for torn endgrain.
Pay close attention and do what Betty and John say to do. Sanding a piece of wood like that IS NOT something you want to do fast and quickly.
Any coloring is best done with dyes and stains and not wood density from sanding and heat.
Always remember that heat will be your enemy on getting a nice finish on your wood, and especially this one. Speed and heat will cause dense surface areas and sanding scratches that you definitely will not see until the piece is finished, and then it will be too late to do anything about it.
Take your time with the sanding and finishing. You will appreciate the extra time spent when it is "finished".
My favorite sandpaper is the Norton 3X because it has less grain spread from it's listed size. In other words, there are no loose 80 grit particles on a piece of 150 grit. Most important is that the backing paper is more flexible yet stiff enough to hold a curvature than any other I have used. That means the ability to sand nice curves with sharp corners. Others may disagree, but that is what works for me.
Another caution - son't use a heavy sanding pressure on the paper. It does a very good job with less heat when it touches the wood just hard enough to make a sanding dust, and that can be very light pressure.
deftly described. But then you are really good at that Wasn't trying to hijack the thread, just wanted to show your advice was sound, and produced good results. Thank you for the kind compliment, coming from you that means a great deal to me. Listening to the advice of folks here has helped make me better. Not "there" yet, but happy with my progress
Frank Penta taught me how to use a point tool when I took his platter class. For Frank that was like teaching a rhinoceros to skip rope....
During that week we turned cedar, ambrosia maple and sapele and some other woods and the point tool made the cleanest beads and was easy for me to learn.
The hardest part of the entire process was learning to sharpen the darn thing correctly to get the facets right.
Get your hands on a piece of 1/4" diameter HSS and make a point tool. It will serve you well.
Somewhere on the AAW site there is a video demonstrating how to use point tool.
Definitely Norton 3x paper! It IS three times faster and lasts 3x's longer (and is 3-times as expensive, but well worth every cent). I gave away all my other abrasive paper years ago when I discovered this amazing stuff!
I'm guessing Dry Ice must be fairly new . . . I've not tried it. But, then, I've not been in my shop much these past two years. I'll have to give it a try sometime soon.






 Wasn't trying to hijack the thread, just wanted to show your advice was sound, and produced good results. Thank you for the kind compliment, coming from you that means a great deal to me. Listening to the advice of folks here has helped make me better. Not "there" yet, but happy with my progress