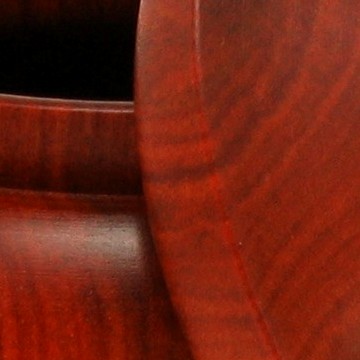
>Here are the box elder bowls I've been working on. They were a pain. The wood had a bad tendency to tearout on the endgrain. Worse than most woods I've turned and I've turned box elder before. It also had a punky area around the pith. This only showed up on the large bowls and required some stabilization. Thin CA worked pretty well but on the 17" I had to thin some epoxy.
These all came from a 4 foot log thanks to the Coring tools I purchased and built. I actually got 3 more turnings from it. One was a small bowl that I blew up and 2 hollow vessels. One I blew out the side on and the other was rough turned to 1/2" and is sitting there waiting for me to do something with it.
>This was the worst wood in the lot. This bowl is 17" and about 7" deep. The bowl cracked just as I started to sand it. Fortunately I was running at very slow rpm. I put some CA in the crack and held it with my hands until it dried. I sanded the bowl and then put it aside to let it dry to see if it would still crack. It held together but I was nervous so I put some butterfly patches in. These are the worst patches I've done. The wood was so punky it was chipping out while I was filing the hole to size. Consequently there is a fairly large gap filled with epoxy around the patches. I had to coat the punky areas with thinned epoxy to be able to sand it affectively.
Did you hand-cut the dutchmen or did you use some sort of jig? I've done a few of these on flatwork with a router, etc., but never considered doing any on bowls, etc. Nicely done!
>Thanks everyone. I've been working to improve my finishes and still feel like I have a ways to go. I have trouble not getting sanding marks. I tried as hard as I could on these and darned if there still aren't a few here and there but then there's a lot of footage to be sanded. I'll keep working on my lighting and finding ways to see the scratches before I get to 400 grit.
Mike I've been sleeping a lot lately. I got something between a cold and the flu. Unfortunately it happened when my boss was on leave so I had to spend some time at work. Working with a fever really takes it out of you. I took of yesterday at 1 after shooting all morning. I slept till 5 at dinner and then fell asleep at the TV by 7. I got up at 9 and went back to bed. Except for a cough and runny nose I'm about back to normal and headed for the shop to turn a little tonight.
>Rob I would normally cut them with a router but this wood was really weak in that area and I thought I could saw and file it safer. I may have been wrong because it crumbled with each file stroke. I even tried strengthening it with CA and it helped a little.
I believe a better approach to this piece would have many coats of really thin lacquer to toughen the fibers. Then I'd probably go with the router. It's very simple to cut inlay pieces that only go 1/4" deep but when you try to cut perfectly parallel sides all the way through a 1/2" piece it's much more difficult. On flat wood you can easily draw layout lines on both sides but it's much more difficult on a bowl.
If I do it again I'll cut out some foldable patterns out of thin poster board. Fold them over and cut out the butterfly's on both layers at once so they match perfectly. Then fold them over the bowl lip. This should in theory give you matching lines on both sides so you can cut from the surface toward the middle which should work better than cutting from one side only. Of course if you don't keep the two foldable extensions parallel is still wouldn't work. I'll have to try it on another piece and see.
I suppose I should try this fix soon - I have a dry 12" diameter shallow bowl (not quite a platter) made from spalted maple that i turned wet nd allowed to dry. It now has a "drying" split 2/3rds of the way across the bottom of the piece. The wood is gorgeous, but the crack (and partial bark inclusion) makes it less desirable if it can not be structurally fixed. I hate to throw-out a potentially nice piece, but unless I can be comfortable with the piece's longevity, I will never bring it to a gallery for sale.
I thought about first scroll sawing and filing down butterfly pieces to get the shapes correct, and then scribing around them on either side of the crack to define thee edges. I then planned on taking my Dremel tool with a router base attachment and routing-out the area needed to fit-in the butterfly pieces. Your box elder fix has inspired me to give this a try!