>This piece is a continuation of my linenfold series. I was recently invited to participate in the invitation-only "Made in New York: The Art of Wood" exhibition in Cooperstown, NY. This piece was part of my entry; it received a second-place award. Best of Show was taken by a stunning mahogany bombe chest-on-chest...a well deserved win. Made of black walnut with a tungoil mixture finish. The interior was finished with black gesso. Thanks for looking.
I've seen several of your folded cloth pieces but those I've seen have all been in light colored woods or maybe they were bleached. On this piece I noticed texturing to imply more shadows where there aren't actually much shadow. Is this something new or have I just not noticed this technique used in the other folded pieces of yours I've seen.
With this piece, using a texture to fill in more shadwos effect than actually there, the photo is lit from the upper right - so the shadow areas match the lighting. Would they look somehow incongruous if the piece were lit from the upper left, which is the more traditional lighting?
In "flat work" low relief carving low areas are often stained to kick up the contrast between high and low points. Still have the problem of potentitally incongruous shadows, but a lot less time spent tan texturing.
I don't think some folks realize that while carving the folds and getting them to look right takes time and skill, getting the "field" that the "cloth" is draped on/around to look right can take a LOT more time and effort to get right, especially on a curved surface, where interruptions of the curve are noticable.
As always - really nice work - and a really nice piece.
>Thanks Charlie, Much appreciated. It is a challenge to create the linenfold that appears to drape around a form, especially when I'm trying to put my own styistic interpretation into the work. Here's another view, showing how the whole piece works together. The foot isn't apparent, but the folds continue through the foot, ending in a spiral shape. Yes, a flowing form makes carving easier and appear more natural. The lines and folds are all hand carved with chisel and mallet, then sanded. The texture in the folds is the same on all my linenfold pieces. I'm not skilled with photography or lighting , so the effect I was after really didn't come through...I need more practice. Placing the lights facing down really enhanced the shadows of the linenfold, but created glare. In these photos, the lights are facing up.
>Thanks everyone! Ron, I begin with a sketch of the proposed piece, then once the turning is complete, I draw the lines, then hand carve starting with a V tool, then various carving gouges. Probably the hardest part is blending the carving so the wood appears to tuck under the folds with no loss of flowing line. I think this angle shows that, plus how I worked with the grain pattern to accentuate the effect. Thanks again.
>This is the view that shows - or rather doesn't show - the tricky part of your folded linen pieces. In order to have the fabric appear to be draped ON the underlying shape, room for the folds has to be left on the turning for the carving.
Since you can't ADD the "folded linen" OVER the turned shape, you have to remove wood from the "uncarved" area of the original turning to create the depth of the linen. That's not easy to do when the "background" is flat. But when the background is a constantly changing smooth curved surface cutting too deeply ANYWHERE means having to take everything around it down to avoid a dimple. And any interruption of the curving surface will reduce or destroy the illusion being created.
If you've carved a footed piece you have an idea of what it takes to blend the area around the carved feet to the rest of the piece. But at the bottom of the piece you've got a relatively small area you must blend the carved area into the turned area. With these linen folds, ALL that blending is right out there in the very visible part of the piece - where any interruption in the flow of the surface will be seen - and noted - either consciously or unconsciously - and a sense of something "not right" will take away from the desired illusion.
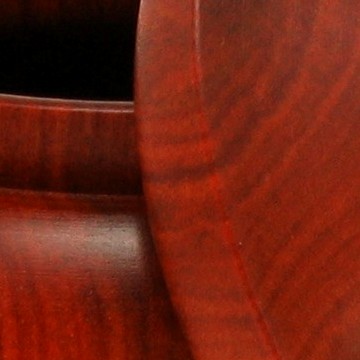
Imagine "blending" all the reddish surface - without a slip.
Carving symetric spirals in a piece is tricky enough - and often gets the carving OOOOHs and AHHHs. But they're symetric - the surface of the high points of the spirals - and thus the profile remains as originally turned. With these asymetric folds that's not the case - and require more work - and skill. Simple grace and elegance definitely ain't simple - to do - this well.
Thanks for your clear explanation of Keith's most excellent piece. I've done so little carving in the round that I can only imagine how difficult it is to get it just right.
>Thank you Charlie. You are correct; lighting makes all the difference. When carving, light must be shown tangent to the surface to highlight any valleys or high points. Also, the interior must be consistant; any points that are too deep will result in a disaster..cutting through the wall.
>Congratulations Keith on the second place award and thank you for posting photos of Linenfold (the third photo pulls it all together), it is spectacular. Thank you also to Charlie for his explanation of the difficulties producing a form like this and for giving Keith the recognition due him. Not having carved a piece I would not have understood the difficulties Charlie explained in making the completed form look so perfect.
>Keith, I really like your linen-fold series. I hope to someday have the skill to carry off something similar. This is the first time I have seen pictures of the back and sides of these works. They really help me get a better feel for the pieces and the vision behind them. BTW, the bombe chest is nice but it's still just flat-work. :)