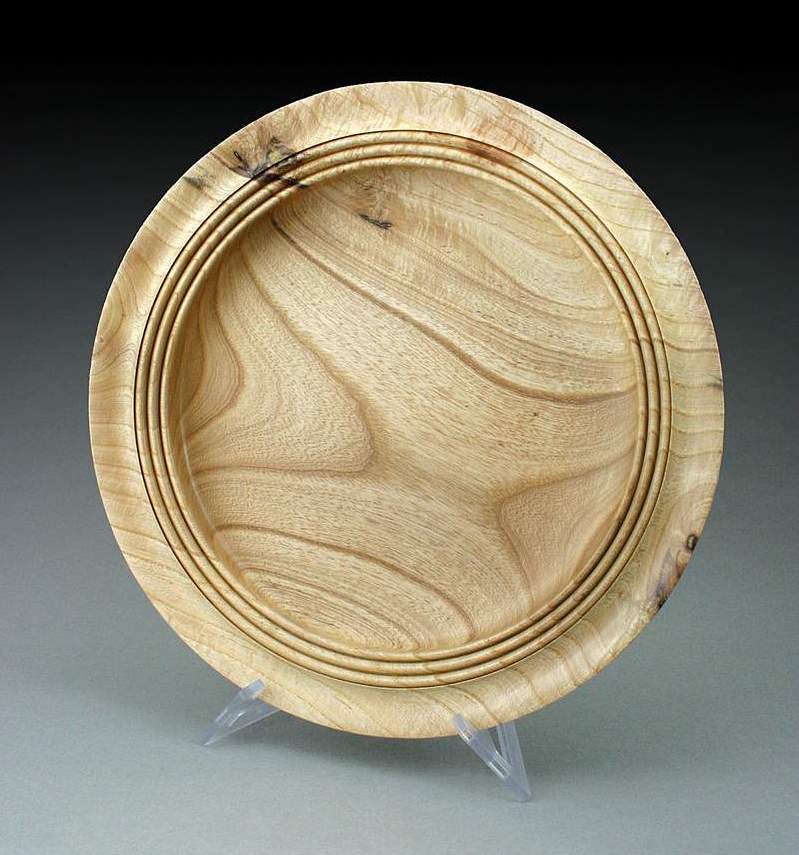
>I think I have a nice turning to post, but it's very shiny. I can't seem to get a decent shot without the so-called headlights on either side of the turning. I use a 3 ft cubed tent with 2 halogens on either side, and a window shade for background. There is a florescent fixture in the ceiling above. I have moved the lights to the front, to the back, raised them, and bounced the off the ceiling. I still get the headlights. Here's a pic of what I'm talking about. Can anyone help?
First off, your turning is fantastic! To answer your question though, I can see where the "headlight" effect may not be desirable. I would suggest moving the lights away from the light cube a little and using some sort of diffuser to spread the light out more. Try using a "flood" type bulb if your currently using a "spot" bulb. Also, your mixing florescent with halogen light which shows on the surface of the piece. I don't think it's a really BIG deal though. The only other suggestion would be using a slightly darker background. A light gray perhaps, maybe with a hint of brown. White is tough to work with sometimes. Nothing that takes away from the piece though. I can tell you what to really spotlight" the turning it's best way. :-) I would too.
Personally, I think your photo and turning are super!
>Paul Glossy subjects that are that shape are going to show the hightlight. Smaller the light source the smaller the highlight but it's usually brighter. The larger the light source the softer the hightlight, but it's usually bigger. Shooting through panels produces a bigger softer light with the resulting larger highlight.
To get rid of the deer in the headlight look what you have to do is move one of the lights further away, which makes it not so bright, and I often move it up so the light shines on both the top and side panel. On reallly glossy pieces that are shaped like yours this may only move the highlight up but if it covers the panels evenly enough you will have a much larger softer highlight on that side.
You might try bouncing one light off the ceiling (which will give you along exposure so use a tripod) If you are using a photo booth with top and side panels this works pretty well. Then if the front is too dark try using a mirror to pick up light from the ceiling and bounce it back onto the piece. The mirror will create a small hard highlight so move the mirror around to move the highlight where it's least objectionable.
Another option that will occasionally work is to put a polarizing filter on the camera. This doesn't work as often for lights shining though panels because the light must be polarized and panels can break up the light so it's not polarized.
I have an article on my home computer about shooting really glossy subjects. It's pretty in depth but goes through the problem solving phase so you may be able to better understand the nature of the problems and can find a solution.
Send an e-mail to my charter address and I will send you a PDF.
>..use only 1 light source, thus eliminating 1 headlight. Shiny pieces are a PITA to illuminate properly, and placing the single light at about a 45 degree angle and above center works well. Bounce light from the opposite side with a white board placed inside the enclosure if there is space, and move it about to fill the off side shadows.
>...problem with color balance and repeatability for future projects. Indoors with a standardized set-up is the better way to get predictable and controllable results.
>I agree with Jamie. Outside in the shade makes things blue unless it's under trees, then it's green. Outside in direct sun with the piece in a photo booth works fairly well for some things but not for glossy. Glossy pieces will see everything outside the booth including the camera and the photographer. Inside you have much more control. But outside is pretty easy because you don't need lights.
>That's pretty good. The front needs a little more light. Try moving the piece deeper into the booth. This will allow more light to hit the front. The piece is actually getting a little flat looking now. You want some roundness. Move one of the lights a little closer and it should help this.
Or - you could tweek the image in PhotoShop *LINK*
charlie belden
>I know this is considered cheating - but graphic arts outfits and even photographers who develop and print their own stuff do it.
I took your image into PhotoShop and used the
Burn Tool set to about 33% and a bit smaller than the highlight fuzzy brush size to darken
the highlights. Only took a few minutes to do - and this is just a quck and dirty to illustrate the results - more care would result in better results.
I've also attached a link to one of our club's newsletters with some stuff about shooting turnings.
What I sometimes do is complete the photography before the piece is completely finished, in those cases were I know the final result will be a glossy surface. And especially if the wood is a dark color.
I'll put on one or sometimes two coats of finish, enough to bring out the color and pop the grain, and then do the photo shoot. After completing the photography, then I'll continue with the finishing process until I have the glossy finish. This greatly reduces the problems with reflections, and the photos look great.
This only works in those cases where the first coat results in even color, and not in those cases where the first coat results in a blotchy surface.
>Ric that's the best bet. I have a client who is an expert on French polishing. When he brings the furniture he sands to 600 grit and then puts a layer of finish on but doesn't rub it out. We shoot it that way and then he takes it back to apply the final polish. It makes the shoot go a huge amount faster and the photos work fine for magazines and websites.