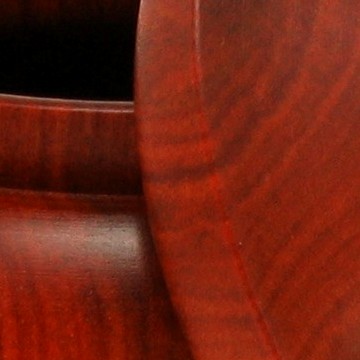
>One of the problems I encounter with box turning is that some woods have beautiful flat grain and nondescript end grain. Since the end grain forms the lid of the box you have to settle for little finials, beads, coves, chatter work, etc. but none of it really disguises the fact that the end grain is not much to look at. Some woods are just disappointing as the side grain is too dark and the end grain is not distinguishable. I have tried to make the best of some of those woods in this box. I turned the body from some curly maple, the lid frame from some East Indian rosewood that has little grain interest and some birdseye maple for an inlay.
This box is 2 1/2" tall and 3" in diameter. Your opinions and critiques appreciated...
>Thank you Jim and Allen. I am having a discussion on another forum with an expert about this very thing, Allen. To date I have not had any problems doing this technique and I hope that is because I am using relatively small pieces of very dry wood inlaid into relatively dry pieces of very dry wood....I have already received one very good suggestion; make the inlay like one would do a collar on a hollow form. That is, turn a tenon that is slightly smaller in diameter than the recess it is to fit into on the underside of a large piece that is to be the "beauty side" of the inlay. Then glue the inlaid piece only in its center to the lid portion of the box. I am working on some additional boxes where the inlays will be of end grain wood. Surely you don't see as much of a problem gluing end grain into recesses in end grain...Any thoughts appreciated as I have a lot of wood I am planning to do similar things with.
>That really sounds interesting - a "floating" inlay, sort of. (If I understand you right). If it works on floors, why wouldn't it work on a smaller scale? I'd like to see how that turns out, too, if you try it!
But if there's no problem with expansion cracking in the first place, it wouldn't be necessary, would it?
What kind of glue did you use to on the inlay?
So far, on all my glued collars, I've never had one come loose or crack. Guess I'd better knock on wood???
>Mike I like your boxes. I would not worry about wood movement on wood that size unless you pick a species that really moves. Generally when I'm doing inlays I try to make the grain match. End grain to end grain or side grain to side grain. On small boxes it reallly won't matter but why take the chance.
I've turned I don't know how many boxes over the years and used end grain chatter work inlays on many of them. As far as I know there haven't been any problems. I generally inlay them the same way you do although I've done the tenon thing as well. Usually I do the tenon when I want the inlay to be proud of the other wood.
When I do larger inlays I usually use segmented rings because they don't move as much. I also use a double sided scraper that I built. It a flat front and both sides are tapered with the same taper. I can cut the inlayed ring and use the scraper on the outside and inside. This makes the outside edges wedged shaped so the bottom is narrower than the top. Then when I turn the opening for the ring I use the scraper to give me a negative cone shape so the sides slant outward. This is kind of a reverse dovetail. This makes it easier to get a perfect fit. You sort of sneak up on the size so the bottom of the ring fits. Then you take a little off the inside and outside until the ring drops all the way down in.
I've never been able to prove this but my thoughts are that if the wood moves it might push the inlay up a little instead of cracking the outer wood. I haven't had a problem with this method so far so I don't know if my theory is sound or not. I do this on my hand mirrors which are typically 5 1/2" so you do have some wood movement. I know that because I've brocken a few where I made the opening for the glass to snug. Glass doesn't move so if the mirror wood shrinks too much the wood splits.
Here is a shot of one of the mirrors that I did a segmented inlay.
>This is the scraper I made. The top is flat and the sides slope out 10 degrees. The sides and top were relieved about 10 degrees. I sharpen it using diamond hones so that I don't change the angles any. I ground it by eye using an angle gauge. The actual angle didn't matter,only that both sides had the same angle.
Yes I did use a file. I put it in the oven at 400 degrees and left it for an hour, then let it cool. This takes the hardness and brittleness out of it. It makes it easier and safer to grind and use. Don't use a file straight off the shelf, you could hurt yourself when it shatters. I would use an old planer blade if I had a good thick one but I was out the day I needed this so I used what I had.
>Keith, I asked another experienced turner the same question about burls since they don't have a predominant grain direction. Chris Stott makes a box where he uses very dry burl to good effect by creating an inlay that is visible from the outside and the inside. He turns a hole through the lid and created a little shelf to glue his inlay on.
Allen, I used regular old Titebond...a large dot in the center of my inlay and in the box recess. I do intend to try the other method recommended for inlaying a piece like a collar on an HF. And yes, I always hit myself on the head (knock on wood) whenever I say something like "So far, on all my glued collars, I've never had one come loose or crack". Never tempt fate Allen, never tempt fate....
>on the inlay scraper. I like that idea a lot. I can't say for sure I will make one but I might grind an old scraper I have to a similar shape. I am using a 1/4" square scraper that I have ground relief on the left side.
>Thanks John, I love the way you inlaid the mirrors. I have seen similar work done on the rims of bowls. I think you might be right about the wood movement pushing the inlay up. Malcolm Tibbetts thinks that might be the most likely thing that might happen over the years creating a small ridge that you can feel with your finger. I like the segmented ring idea for an inlay.
I am still mastering the chatterwork thing. To date I haven't done any chatterwork that was fit to show on any of the forums. I need more practice....
>Mike That's how I started doing the small inlays. I couldn't use the chatter tool very well and the idea of screwing up a box I just worked 2 hours on didn't sit well. I took some endgrain wood and started practicing the chatter work. Every time I got a good one I parted it off and save it. Not only did I get better at using the chatter tool but I had a whole bunch of chatter work "buttons" that I used as inserts in box lids, ornament inlays and put them in the sides of some of my candlesticks.