I made this box using just handtools. (boy! resawing and planing to thickness is a lot of work). I purchased a bunch of walnut from a friend here in northeast Penn. Beautiful 5/4 stuff. I am here in PA for a temp. church assignment so all of my tools are 2300 miles away. I purchased a Lie Nielson #4 and I do all of my work with that plane. I have two really nice handsaws at home, so of course I did not bring them with me. (darn! Wife made me purchase a Lie Nielson back saw. I purchased an ebay rip saw and sharpened it to work for me. Drawers are all dovetailed as are the carcass sides. Curly Maple veneered fronts. A friend turned the knobs for me.
Bruce, luckily I had the presence of mind to bring my moxon vice. I saw a fold down workbench in woodsmith magazine, made it and brought it with. It folds down to a suitcase sized package for transport and has been great. I got two bags of cement to weigh it down. On these cold winter days my extra time has been fun filled.
Bill, the dividers are in a stopped dado. I plowed out the dado with a chisel. BYW I use only liquid hide glue. I do not have the capabilities to do hot hide.
Capabilities are not special. For years I used a coffee warmer plate - like a $5 thing I got at Walgreens, intended to keep your cup warm is all - and a 1 1/2" copper pipe cap I dug out of my dad's plumbing junk box. Worked fine, but you have to keep an eye on it and not boil the glue.
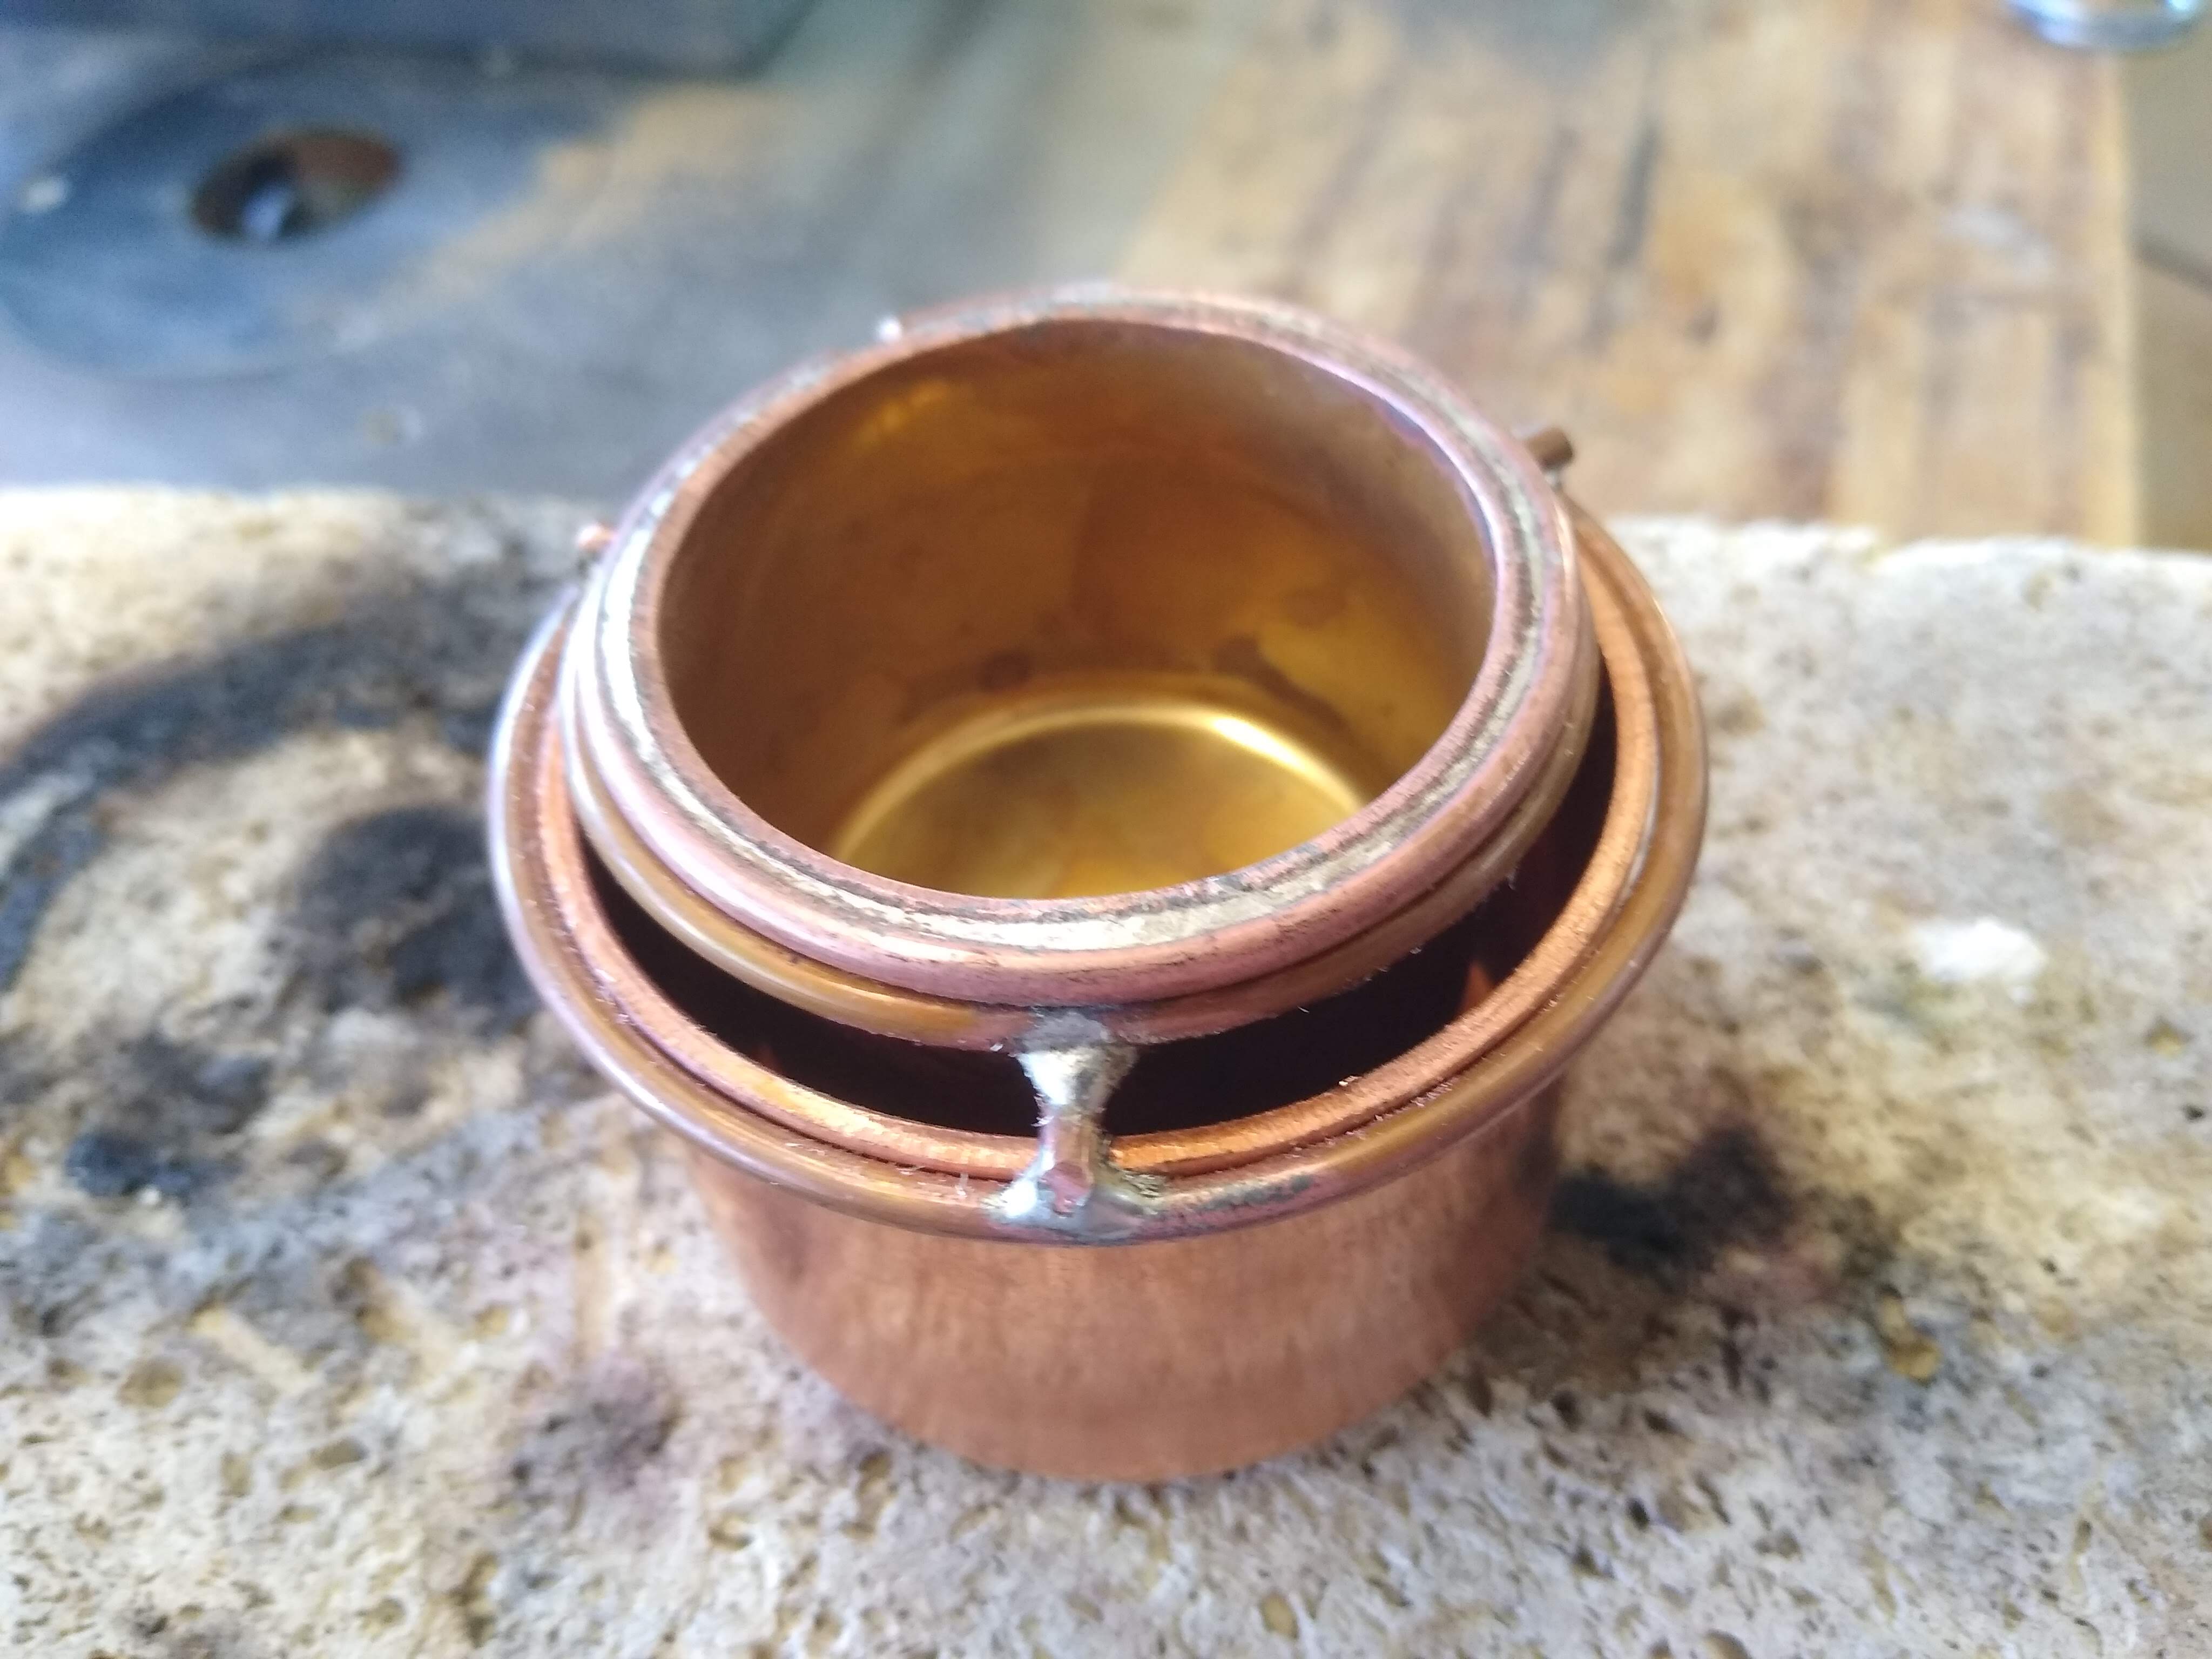
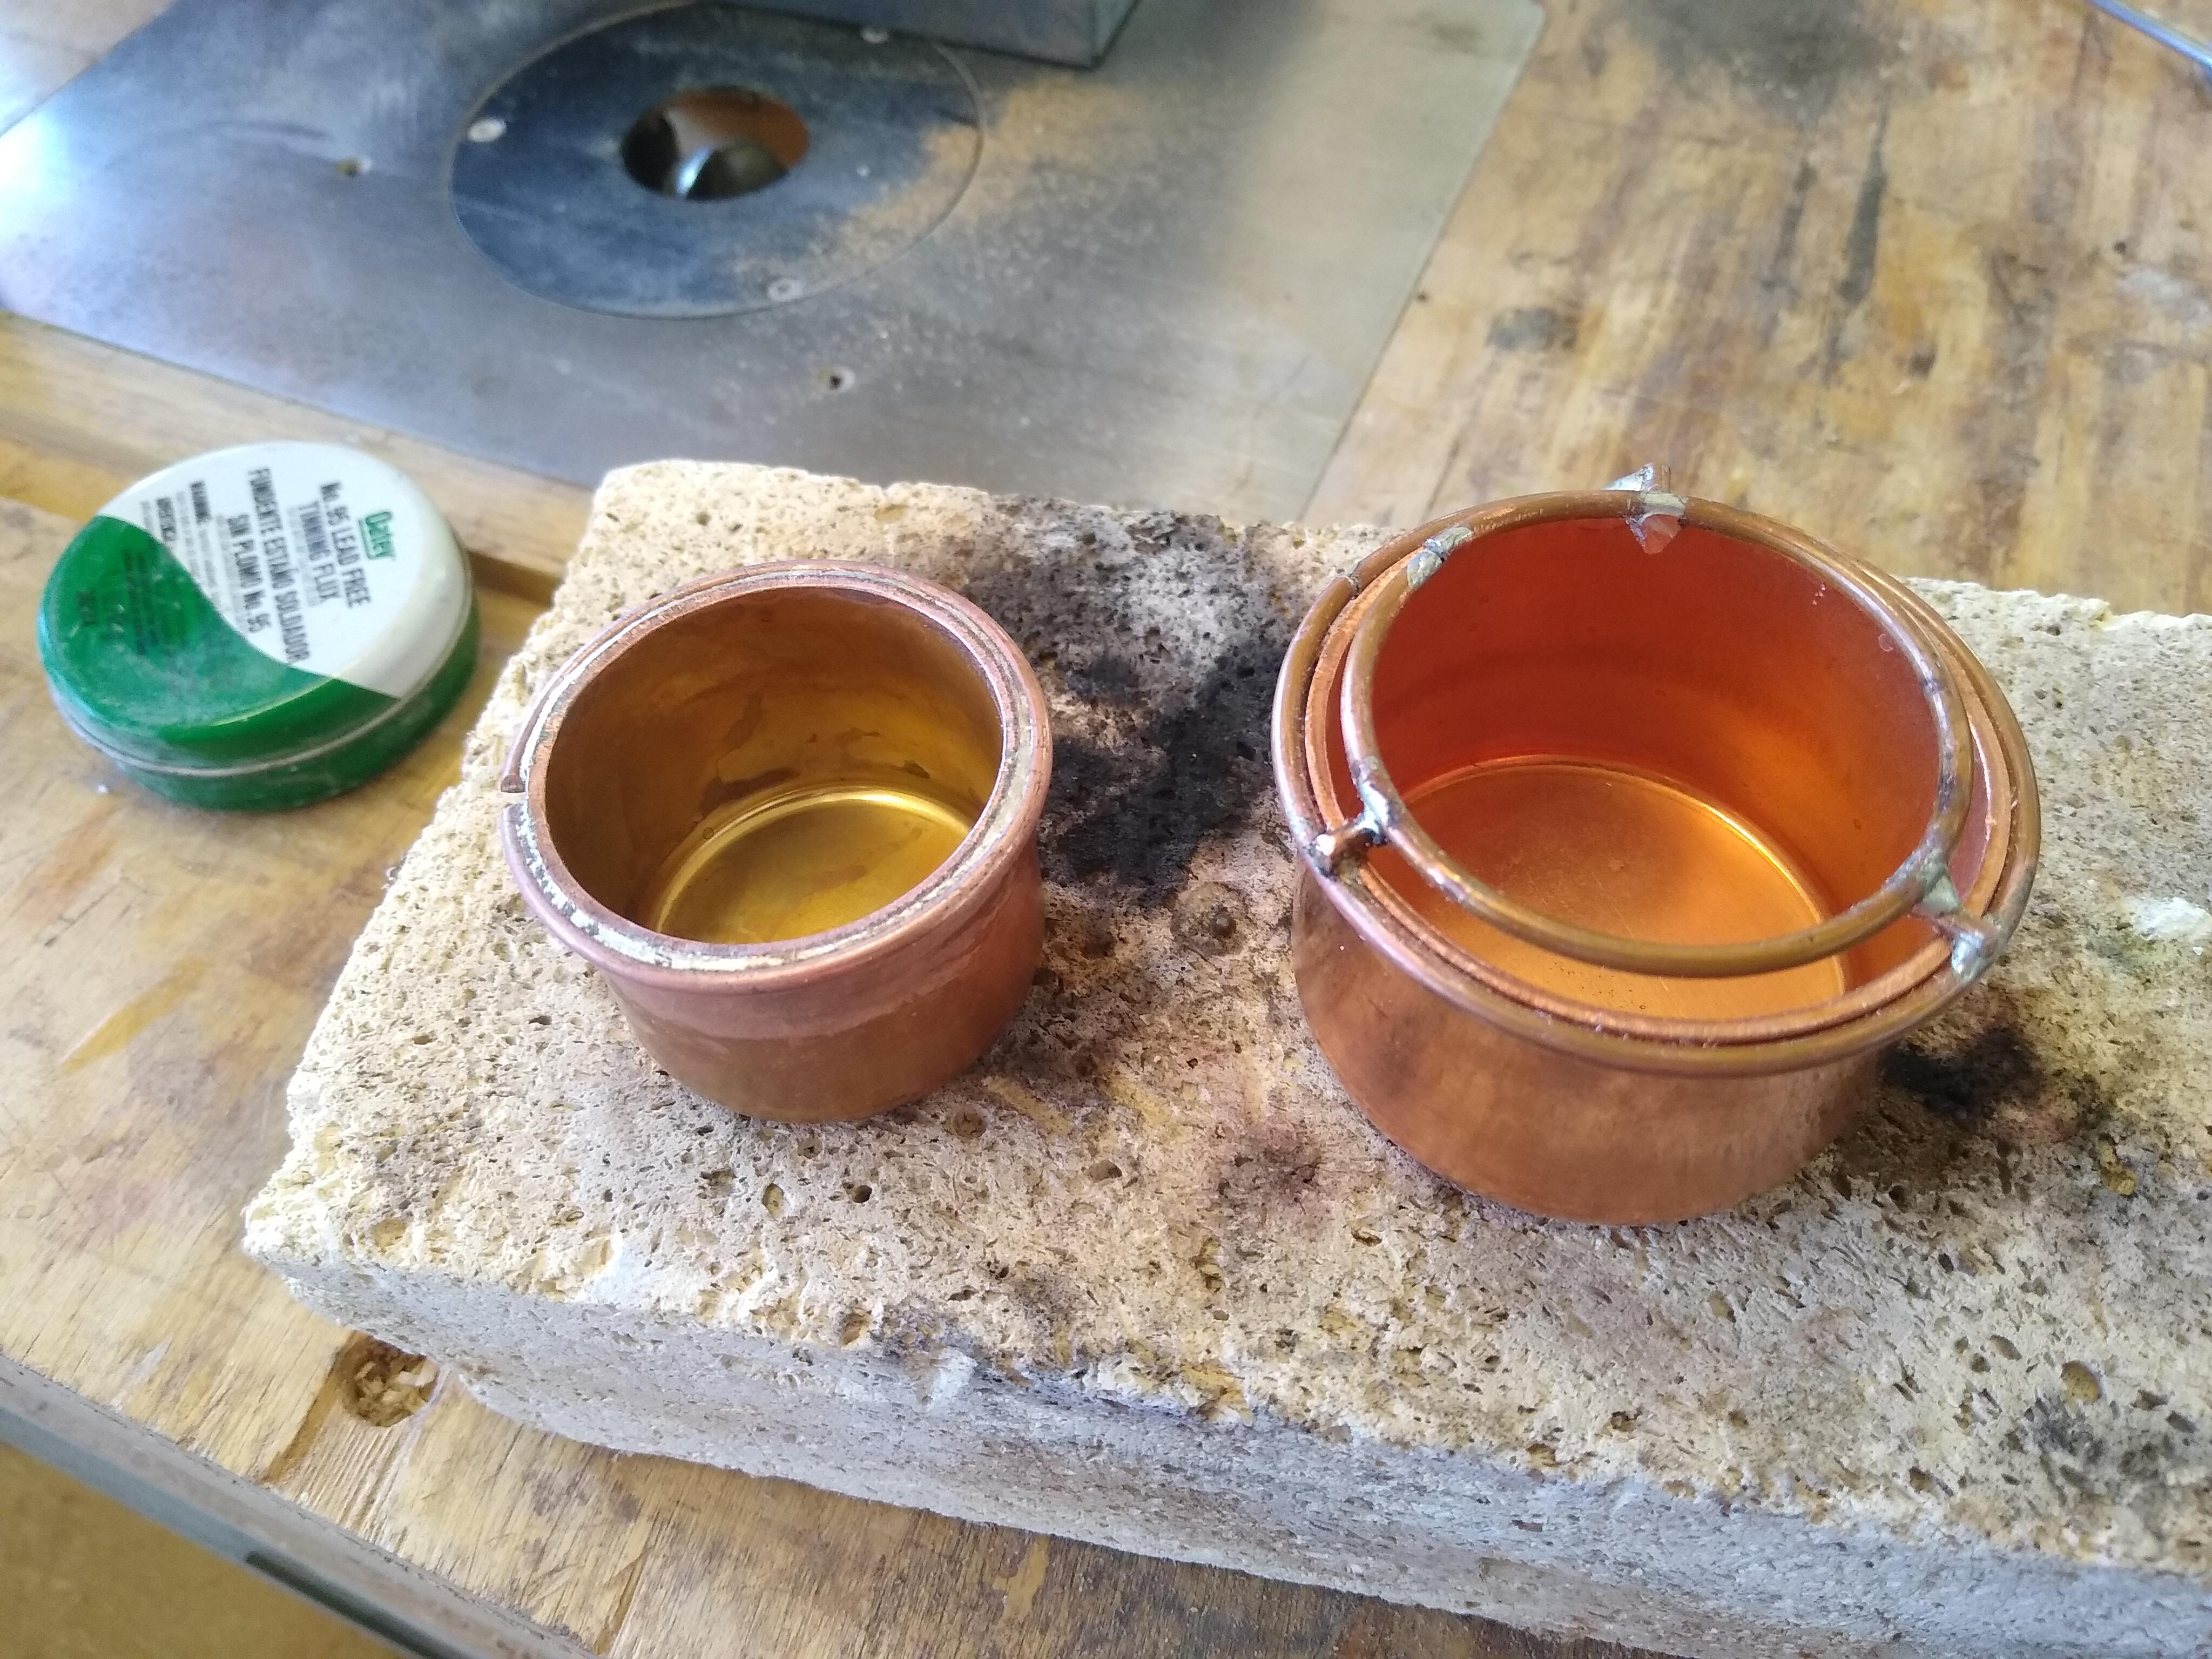
At the beginning of the pandemic I was doing some plumbing repairs and needed to order parts (an oddball underground valve) so I also ordered some big copper caps and made myself some double boilers. Using nesting with only ~1/8" between them keeps the water volume to a minimum so I don't have to wait as long heating it up.
These little plumbing parts are cheap, available most anywhere, and make plenty of glue for small project assembly. A 3/4 full 1 1/2" cap is about enough for 2 M-T joints on something like and end table.
I also got a bunch of little squeeze bottles recently to freeze left over glue (wife's big freezer is in my shop). That works well, just leave them a while in the hot water and you're ready to go.
Very pleasing! Lots of features and everything flows together. I particularly like the stepped tiers and the way the drawers are staggered. Exposed joinery all very tight and clean—like it grew together.
The most important requirement is that you don't get the glue temperature hot enough to cook the glue, breaking down the protein chains, so that it loses its efficacy. That temperature is 154° Fahrenheit, but you don't want to push it due to inaccuracies in your heating equipment. 140° is safe, and plenty warm enough for usable glue.
Just last night, Bob, Ray and I (from NJ) were discussing glue pots via email and on the WoodCentral chat room, with Links and Pics! The chat is worth looking at, because you can get immediate answers to your questions, if you can get someone else to sign on concurrently. We solve that problem by sending emails (last decade technology, but it still works) to arrange a time to meet.a great improvement of the latest chat room system (RumbleChat) is you can read what has been posted for at least a few days after the discussion is over. Note that we don't currently enforce the "Scheduled Chats" schedule; for the time being it is "by appointment or by chance,"
It's easy to sign in and use. All you need is a simple user name and simple password. (Of course, it is always advisable to write them down so you don't forget.)
How are the horizontal dividers between drawers fastened to the side? I think I see one exposed dovetail but how is the rest of this base for the drawers attached to the side?
A picture with the drawer out may help with clarify.
Gotta be a typo! They should be around $8 each rather than for a pack of 5.
FYI, the link field on this forum's software adds the http:// to your link, so when I simply clicked it got redirected to something firefox thought was appropriate. Using a different and less commercially clever browser (called brave) made the problem evident by simply showing the true URL without redirecting.
So the link is easy to fix if you can edit it still.
It may not have been clear in my post - the coffee warmer only gets up to around 130F in general. I had bought it decades ago to try to melt stonecutter's wax but it was shy of the required temp.
I'm not sure why the hide glue boils in it, and I'm not even sure that "boil" is the right term. Its been years since I had that happen since I now pay close attention and prevent it, seeing as I'm a horrible cheapskate and hate ruining and throwing out hide glue
The few times I saw this happen, as the glue became very thick (presumably due to more rapid evaporation of water from it) it would skin over quickly, eventually becoming a hard froth of bubbles. I think it may have been rapid drying more than cooking or boiling really. I never made a study of it or of the strength of the glue if reconstituted, it was more expedient to simply avoid the problem.
Perhaps the same thing happens with a double boiler, I don't know since I watch those like a hawk now too.
Though your local home big box or small hardware store is probably more expedient. I was mail ordering stuff they didn't carry so I tossed in some caps too.
Over 2" the caps get pretty pricey. I think that is as much lack of demand for bigger sizes as the increased amount of copper in them.
I'll post my pictures again too, I just soldered some copper wire on to make the double boiler out of a 1 1/2 cap and 2" cap. The support frame lifts off the bigger cap. Its a bit tricky to solder stuff like this with soft solder and a torch, but doable. A big soldering iron would have made it easier.
Those would make excellent ferrules for honking big tools. It's easy enough to drill a hole in the center of the end of the cap. For most people, smaller caps would probably be more practical. They are lighter weight and less expensive than the quivalent brass compression nuts I typically use.
130° F should be just fine. I can't think why the glue should boil at that temperature.
Worse than ruining it by cooking it is not knowing you've ruined it until a joint falls apart on you. There's a simple test. Put a drop between your thumb and forefinger and pinch them together quickly and repeatedly, opening them about a quarter inch between pinches. As the glue cools and dries, very fine fibers of glue should start to form between your fingers. If you don't get the fibers, the glue is no good.
That is a wonderful double boiler you've made from the copper pipe caps.
Re: This is where I got them. Copper glue pot... *LINK*
John Aniano in central NJ
Hello John,
Wonderful copper glue pot design you've made there! Excellent and stylish!
I'm sure you know, but since no one has yet mentioned it, copper acts as an anti bacterial- anti microbial agent for natural glues. Helps keep them from going bad, or at least it slows the process. I remember reading that woodworkers would drop a copper penny into their cast iron glue pot for the same reason. When pennies were real copper that is!
Stephen Shepherd's book on hot hide glue has all the details you would ever care to know about the history and use of this adhesive. I have the book on my bookshelf. A wonderful volume and an excellent read, IMO...
 I purchased an ebay rip saw and sharpened it to work for me. Drawers are all dovetailed as are the carcass sides. Curly Maple veneered fronts. A friend turned the knobs for me.