WoodCentral Forums

Est. 1998 — 27 years of woodworking knowledge

Dovetailing for Blood *LINK*

Posts

Dovetailing for Blood *LINK*

#1

Dovetailing for Blood *LINK*

Derek Cohen (in Perth, Australia)

This is a cross post from the Messages forum, where both Bill and I have been posting similar builds. Since it has so much hand tool content, it should be opened here for discussion. Warning for those with limited focus - it is long! :)

Bill and I have been discussing drawer-making. We have different approaches since our target audience is a different group. Bill is better aligned with production work, aiming to build a drawer as quickly as possible. He is less concerned with aesthetics (although his work always looks exceptionally good) and more focussed on finding shortcuts to increase speedier construction. My work is aimed at being the best I can, with a focus on traditional construction completed to as near perfection as I can muster (which sounds grander in words than in practice!).

I argue that my drawer-making is quite speedy. The speed comes from minimising unnecessary tasks by planning ahead. This is not immediately apparent in that I use techniques that appear to add extra work. In actual effect, they reduce errors and thereby reduce the time required to tune or repair joinery. My aim is to get it as right as possible - immediately. One example if this is that I do not check whether the drawer is square after glue up ... because the drawer will dry in the drawer case, and so fitting the drawer case is what is important.

Now the issue about fitting the drawer case is that this is only possible if the dovetailing is a flush fit, and ready to go into the drawer case. It is expected to be a tightish fit, which will need to receive just a small amount of final tuning. The level of expertise involved here is not really that high; it is more about the approach. I believe anyone can do the same, and this is the motivation to write this chapter. I am sure that Bill will likely do the same ... I look forward to learning from his approach, adding technique to my own.

The discussion started when Bill questioned why I had cut all the drawer parts (sans the drawer bottom) for this cabinet ...
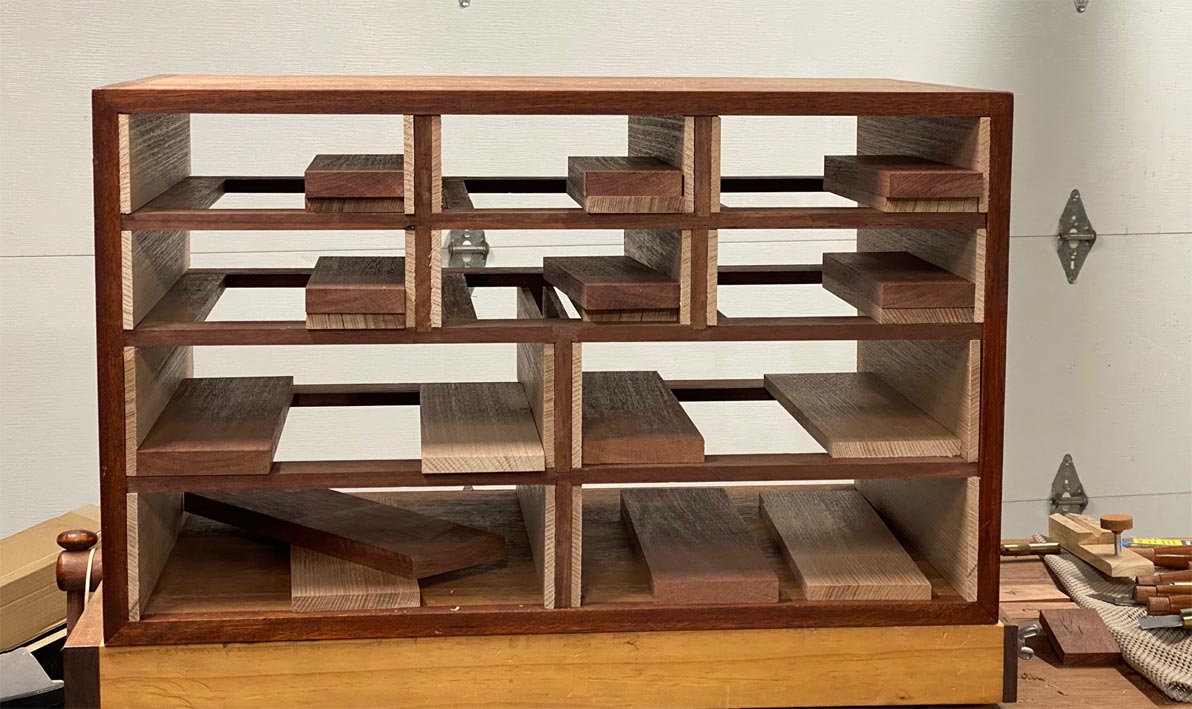

Bill makes one drawer at a time. He does this as he is concerned the wood will move .. warp or twist .. if it is allowed to rest. My argument is that speed comes from massed repetition: returning to saw all the parts separately is slow. I do not fear the drawer sides moving as I use quarter sawn timber for drawer sides, which is very stable. The wood here is Tasmanian Oak (which is actually an Australian Eucalyptus).

The drawer-making process is divided into three stages: first comes the (half-blind) dovetailing of the sides to the front. The groove or slips for the drawer bottom is added later.

Secondly, the drawer back is (through) dovetailed to the sides. This relies on the height of the groove, and the reason it is completed later and not up front.

Thirdly, the drawer bottom is made and inserted.

What I wish to demonstrate here is the first stage: dovetailing the front to the sides.

Here are the parts. The Tassie Oak sides are 1/4” (6.35mm) thick and the Jarrah front is 3/4” (18mm).
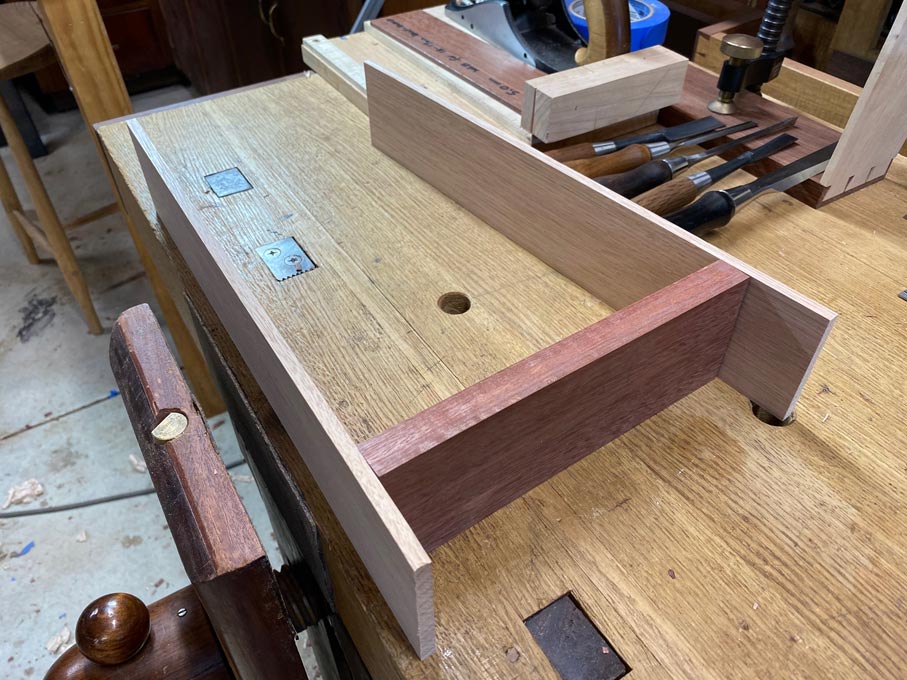

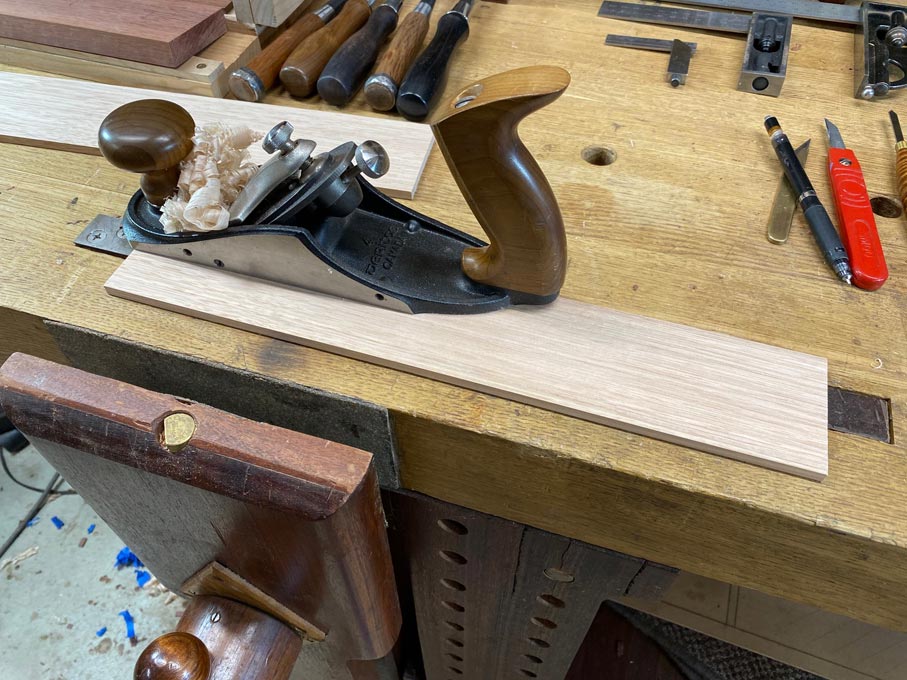
The inside face of the drawer sides is planed to remove any machine marks ...

We will cut Tails First, so mark the tail board ...
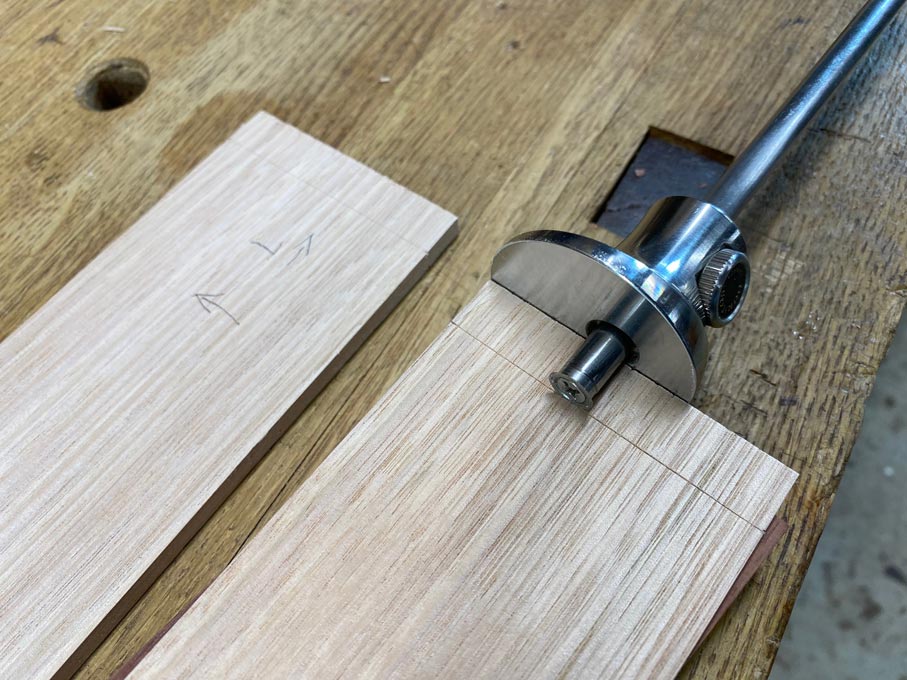

To speed marking of the tails, a template (or story stick) is made. This will set out the tails for the top two rows, six drawers in all.
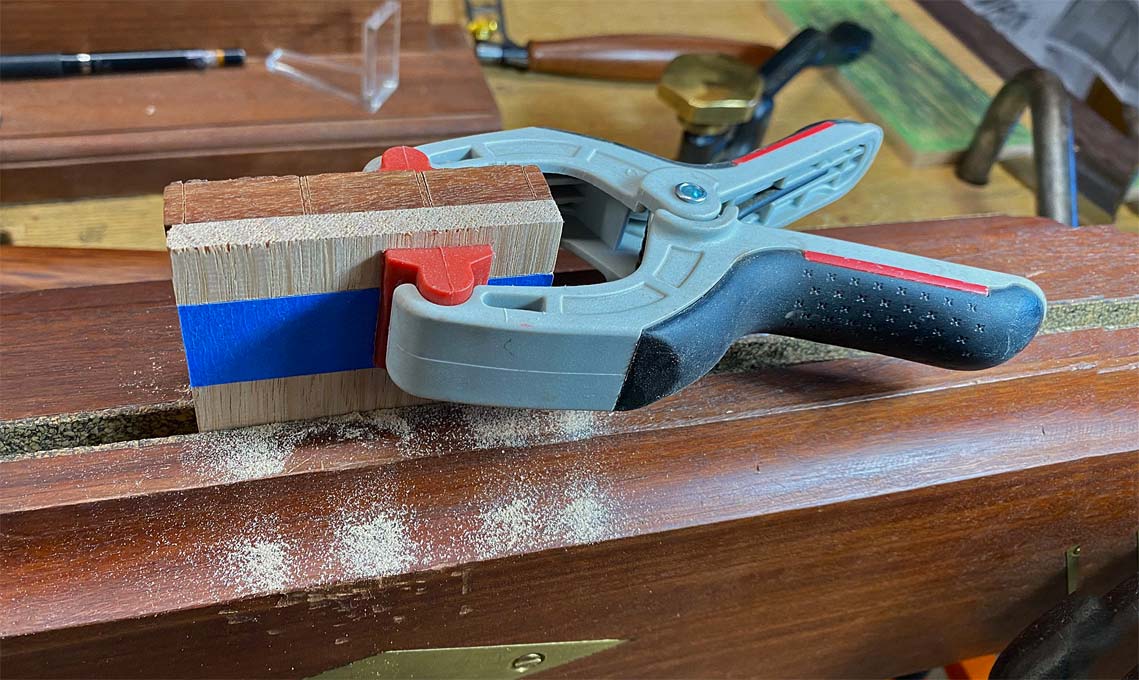

The tails are sawn. Note that there is a line of blue tape to help my aging eyes know when to stop cutting!
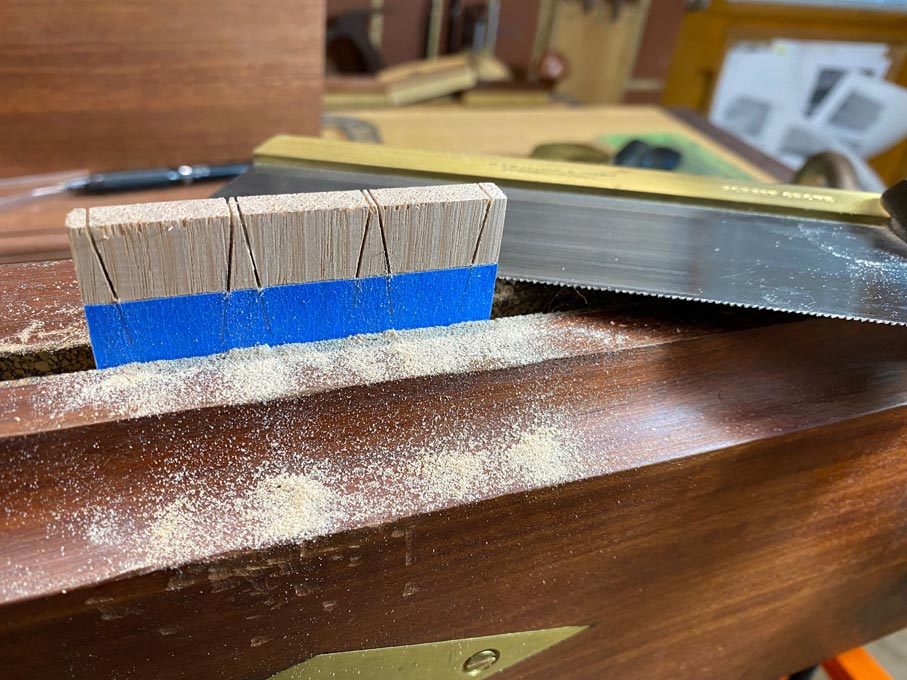

An important step is to undercut the baselines. This will increase accuracy when paring ...
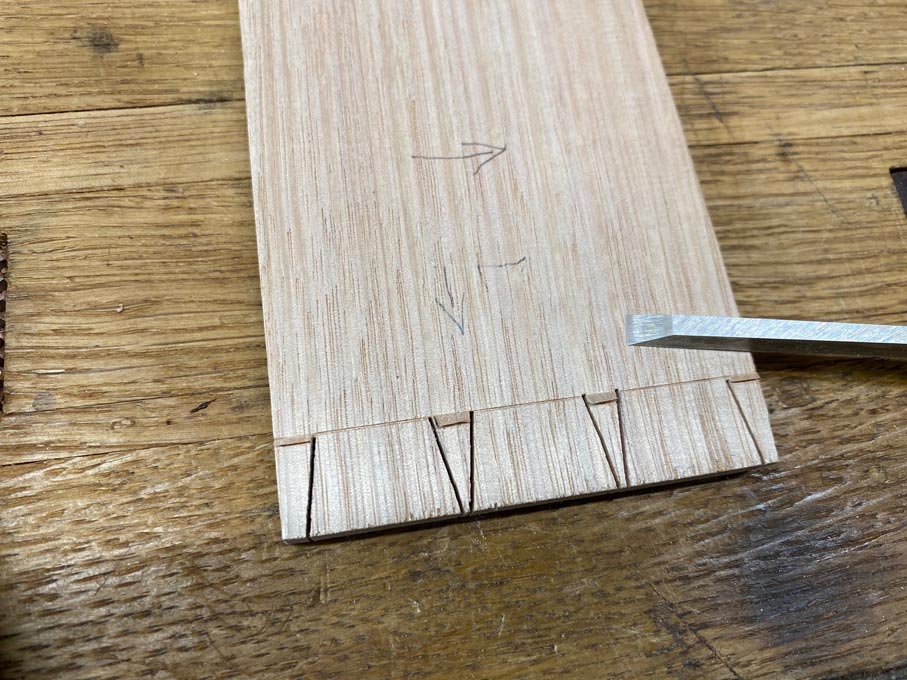

Fretsaw the waste as close to the baseline as possible. I generally leave about 1mm ...
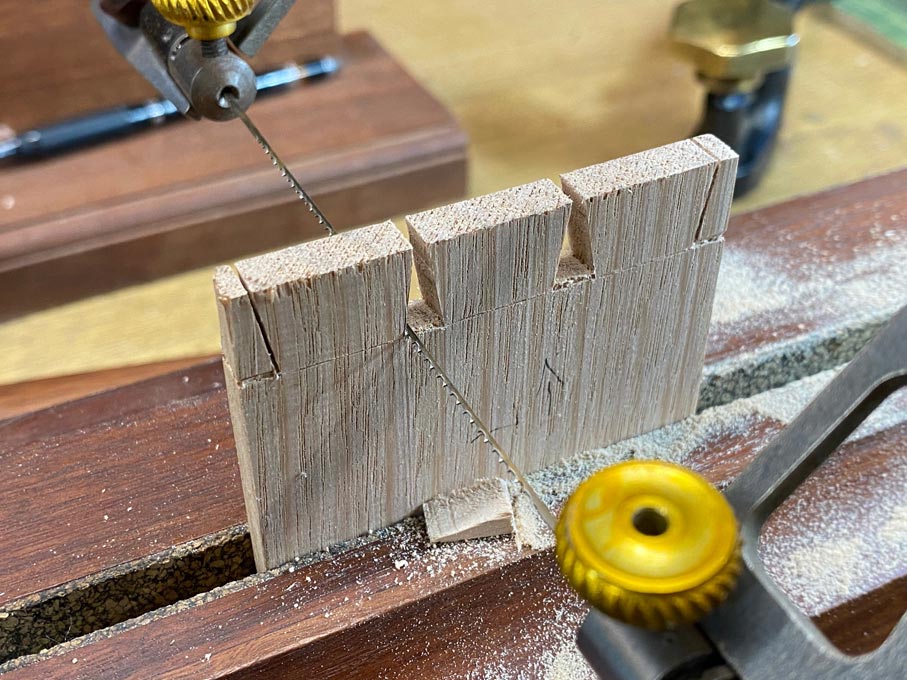

Saw away the half sockets at each side, as usual. But now possible to set the chisel in the chisel wall and use a single down stroke to sever all the waste in the internal sockets, leaving the tail board done.

Mark the web on the drawer front. For 18-19mm drawer fronts, I keep make this 5mm wide.
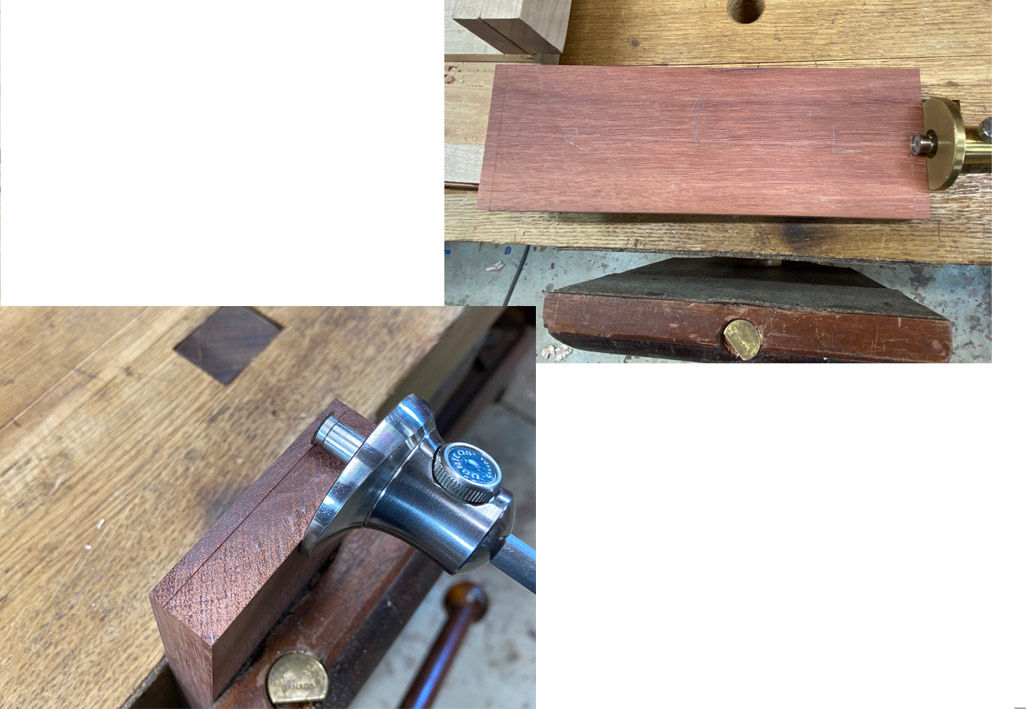

Once again, to aid visibility, blue tape is applied to underline the baseline ...
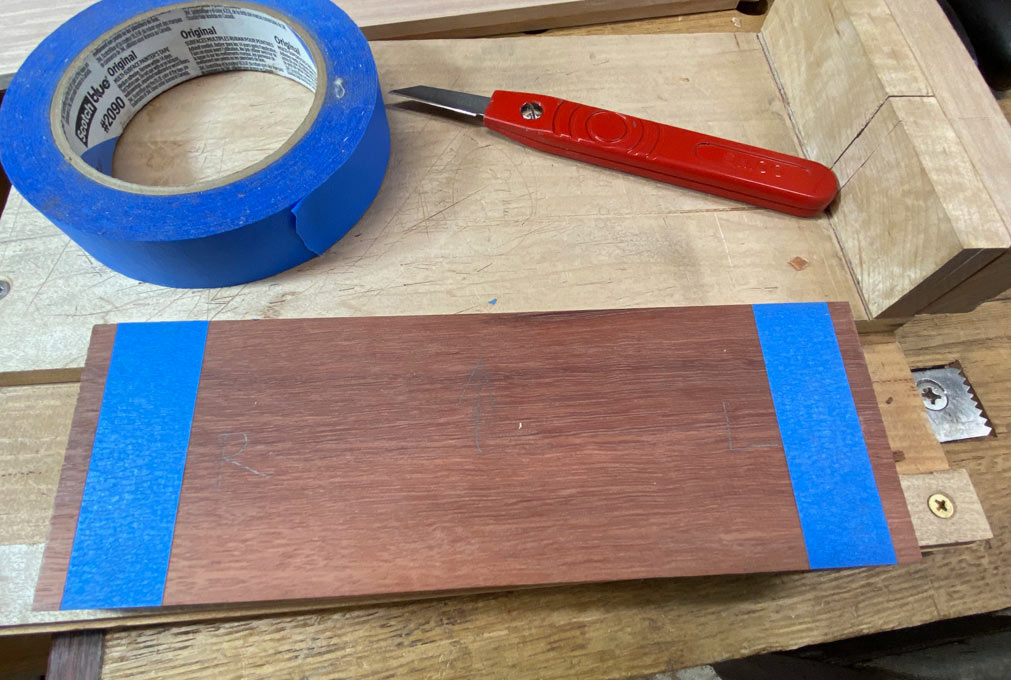

... and the pins. Here it extends to the web line ...
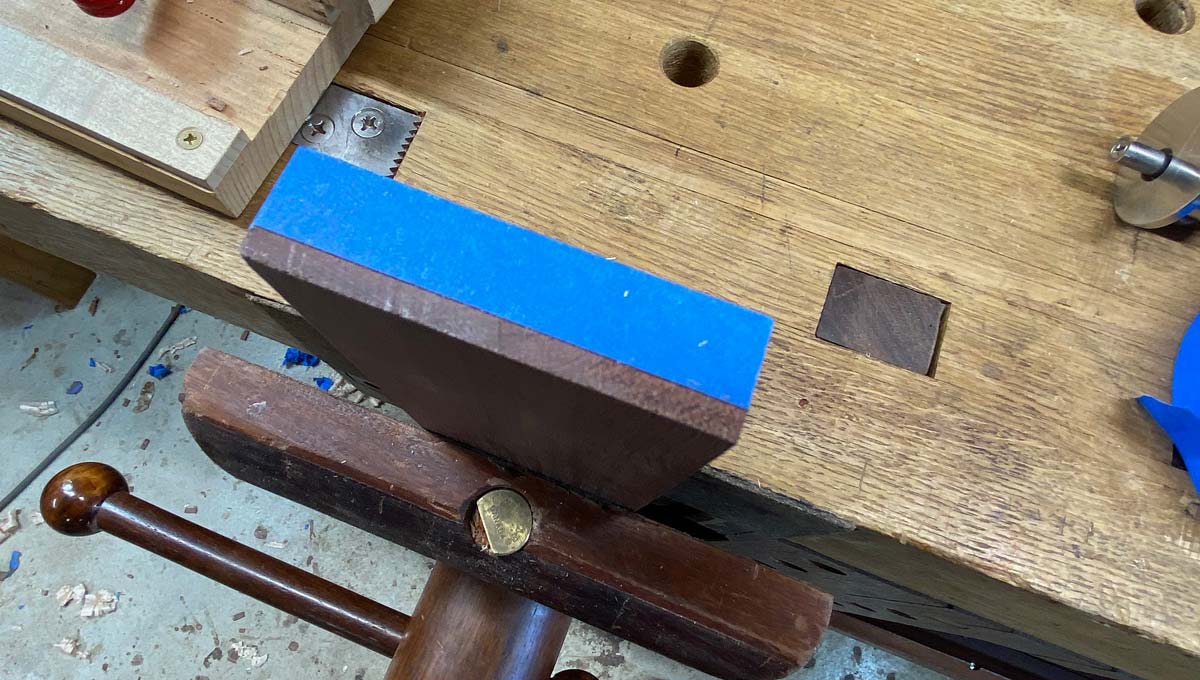

This next bit is extremely important, and can make-or-break the final result. The tails are transferred to the pin board. A single bevel knife is preferred. This will hug the wall of the socket, and slice the tape in a single stroke.

Secondly, the tail board is held firmly by a clamp, and is positioned squarely using a combination square. The square is placed along the reference edge, which is the lower edge of the drawer side. This will switch when the other side is marked out. The importance of this technique cannot be overstated: a squared joint is a prerequisite for a perfect fit. Anything that is not square will require planing, and a lot more tuning.
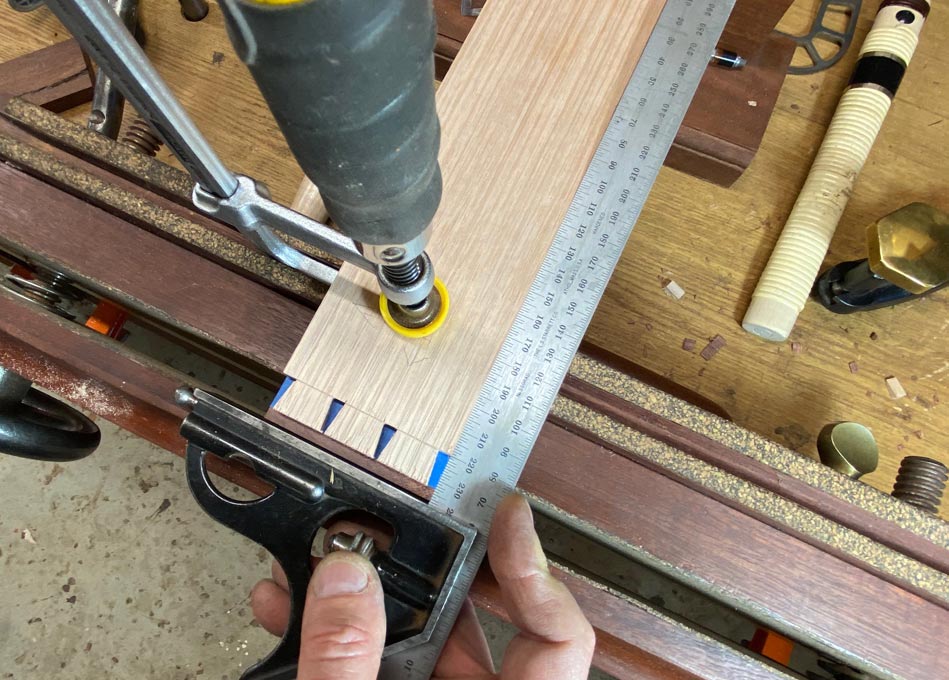

Below is the result of sawing to the line (is the sawing is more accurate than the dropped lines :) In practice, the dropped lines are unnecessary if you have a decent sense of plumb) ....
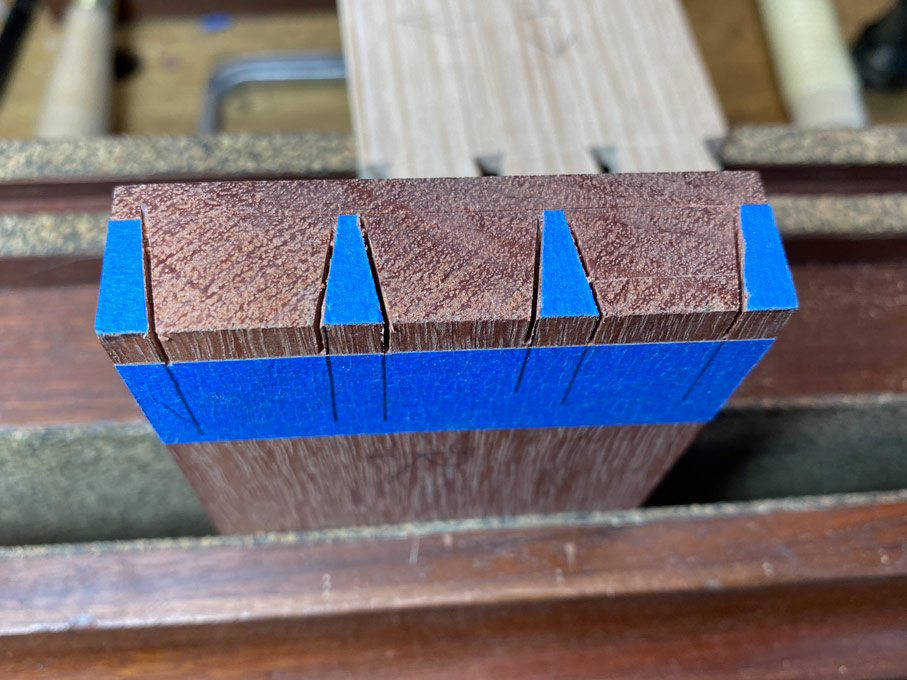

Another time saver comes in the form of deepening the kerfs. This is my version of Tage Frid’s scraper method, a “kerfing chisel”.
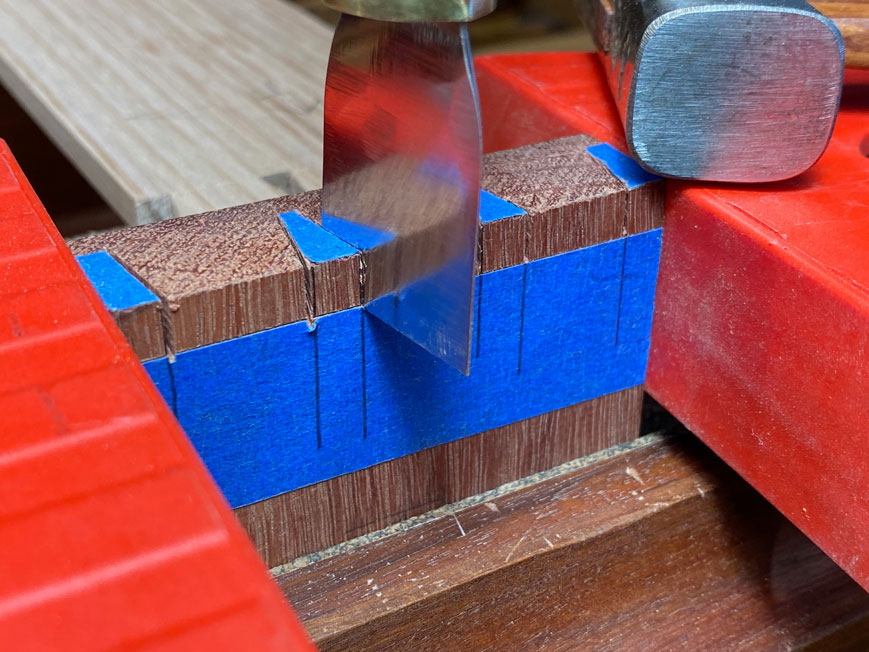

With the kerfs deepened, remove all the blue tape, and deepen the base lines ...
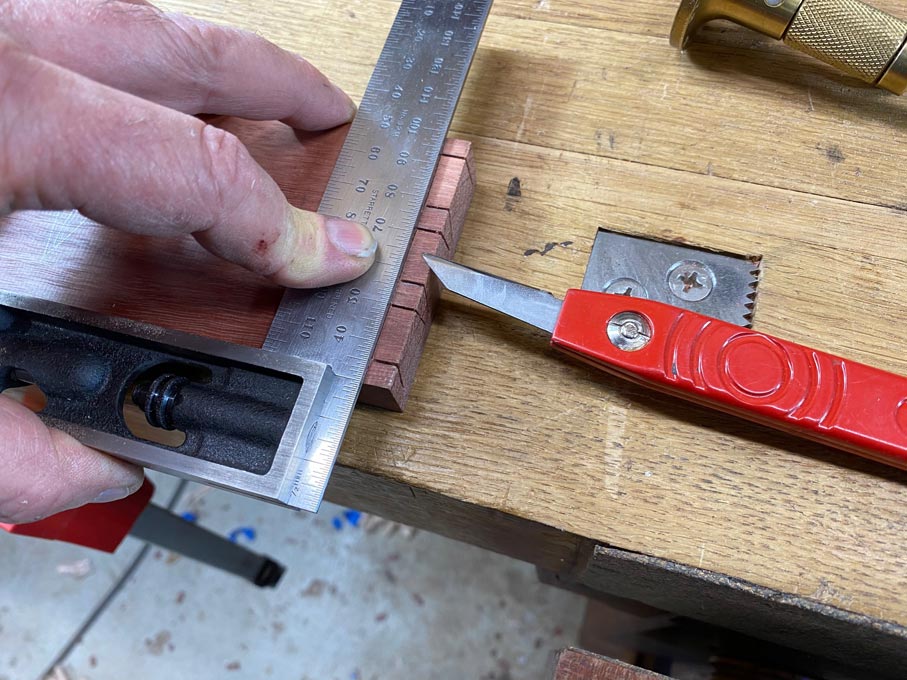

Undercut the baselines to create a chisel wall for each socket ...
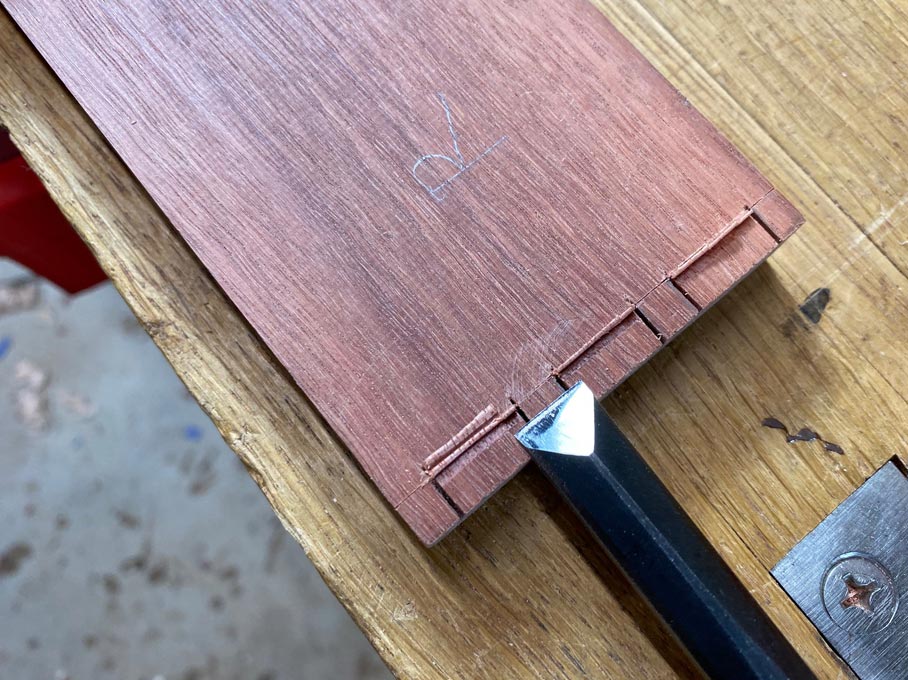

Chisel in the chisel wall and three moderately firm hammer blows. The chisel wall prevents the chisel moving backwards and over the baseline. This means that chiseling can start at the baseline, itself, and reduces later extra paring ...
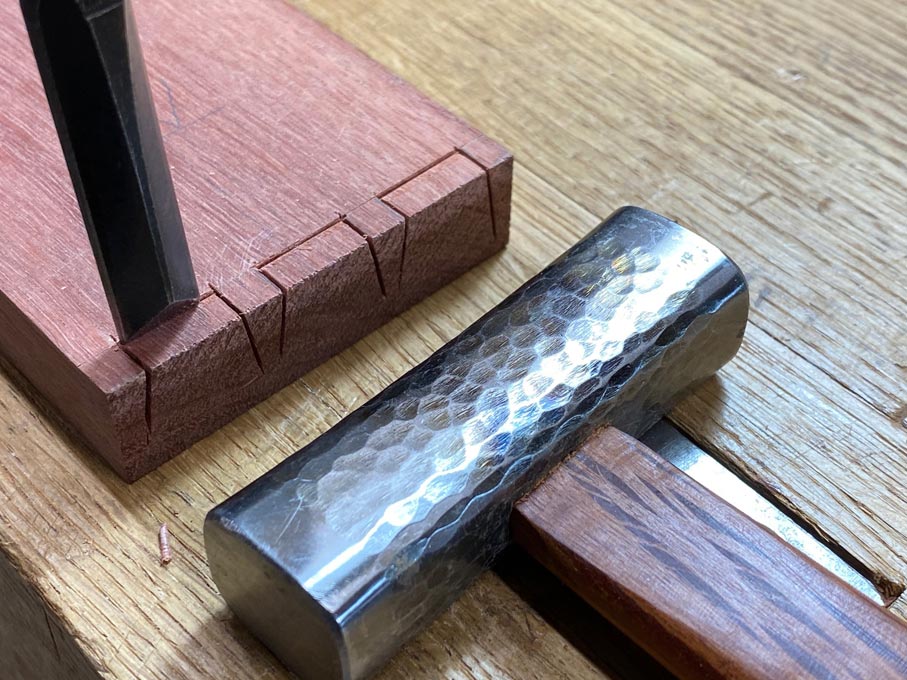

Split out the waste ...
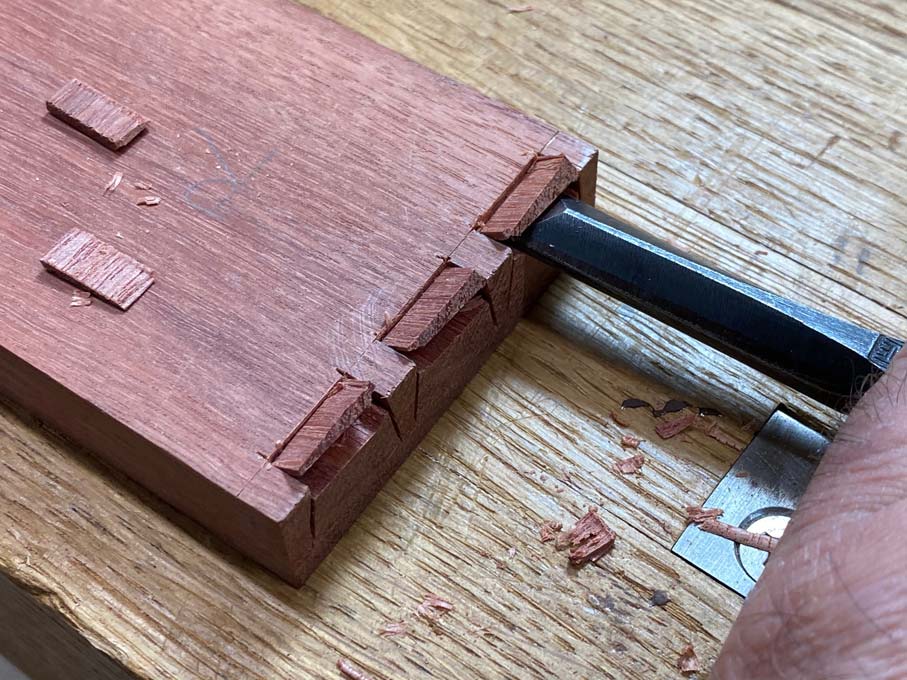

With hard Jarrah and a decent Japanese chisel, it takes me three rows to get within 3mm (1/8”) of the web line. I stop at this point ...
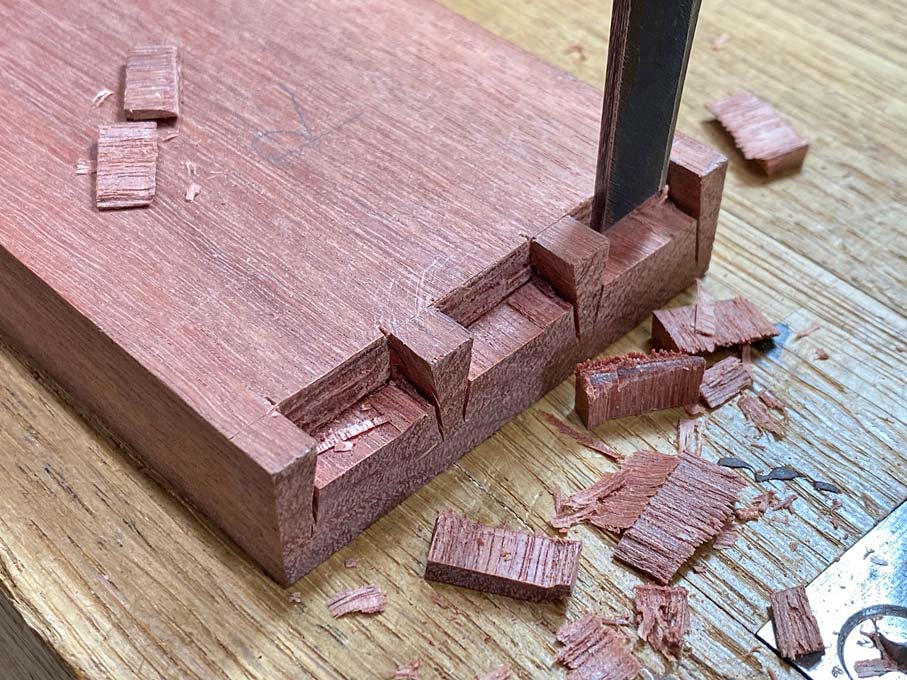

This is repeated at the other end of the board ...
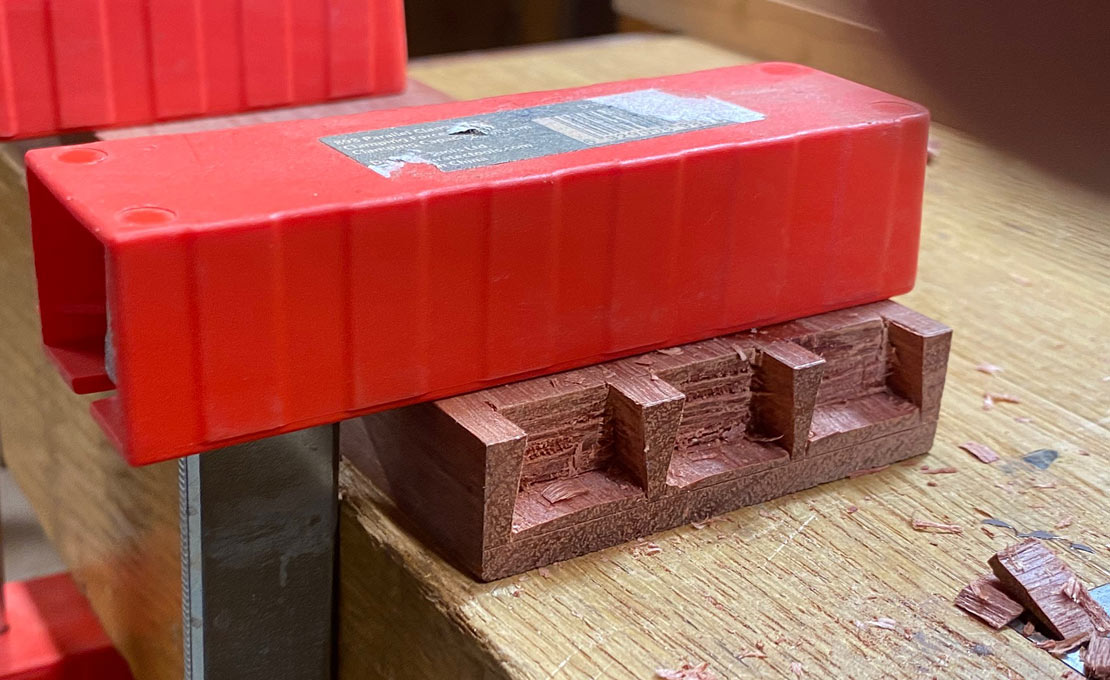

Back to the Moxon Vise: the sockets are cleared by paring the remainder in 1mm slices ..
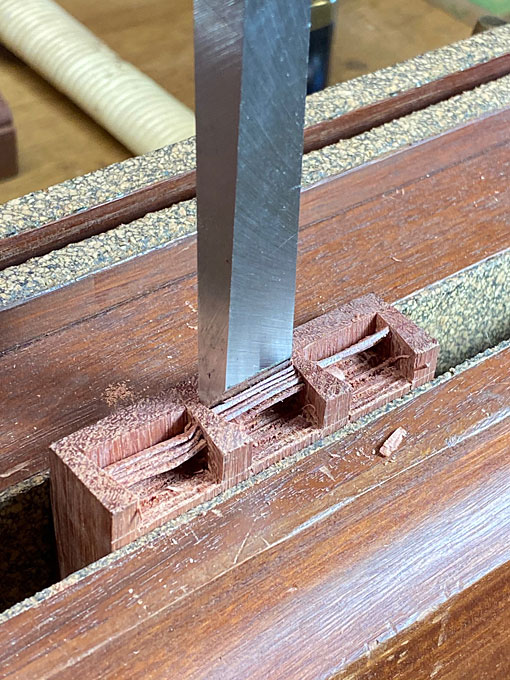

Cleaning out the socket was facilitated by earlier extending the kerfs, and now with a corner chisel ...
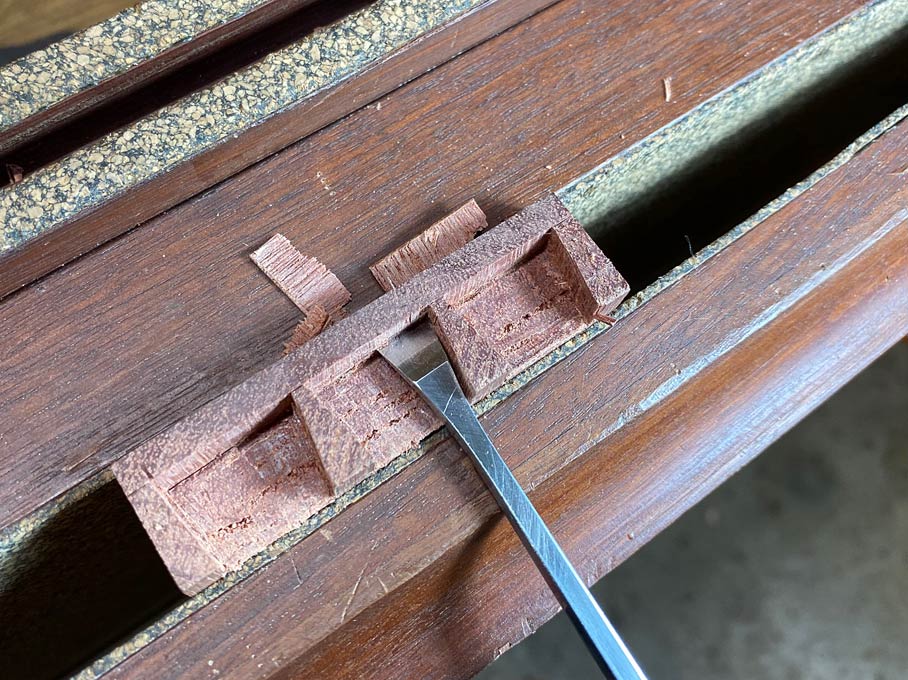

It is all about “release cuts”, as David Charlesworth has written in his articles over the years. Create a release cut, and waste will fall away without a fight. The deepened kerfs mean that there is no further paring needed at the sides of the sockets. Clearing the waste is a matter of splitting it out. The chopping is a release cut here.

Finally! The dovetailed sides are tapped into the sockets of the drawer front. The goal here is that they fit “off the saw”, and no further work is needed? Note that the small section here does not only protect the surface, but it ensures it is driven flush ...
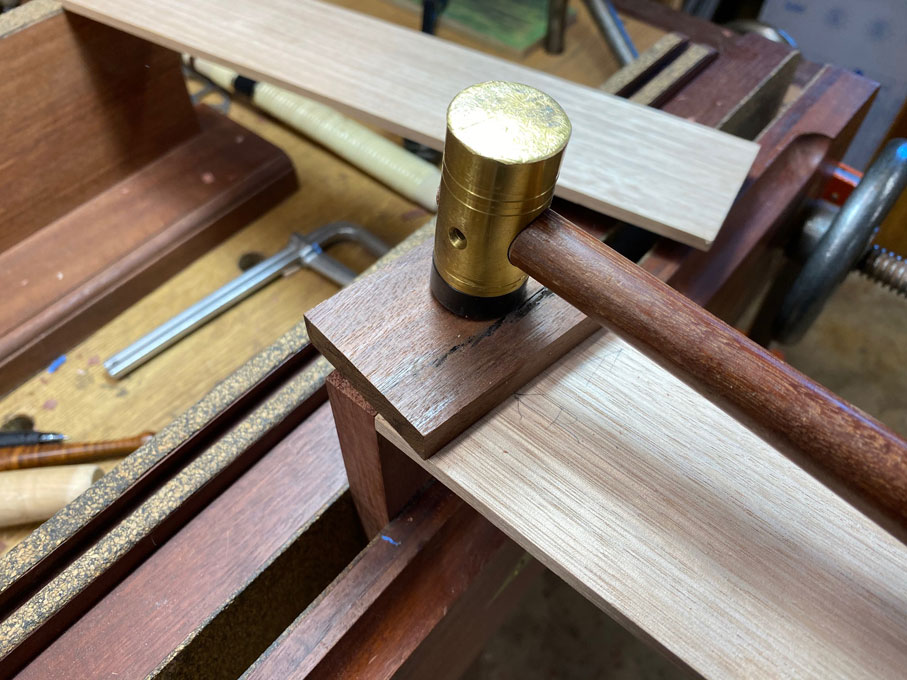

How did we do? Here is one side ...
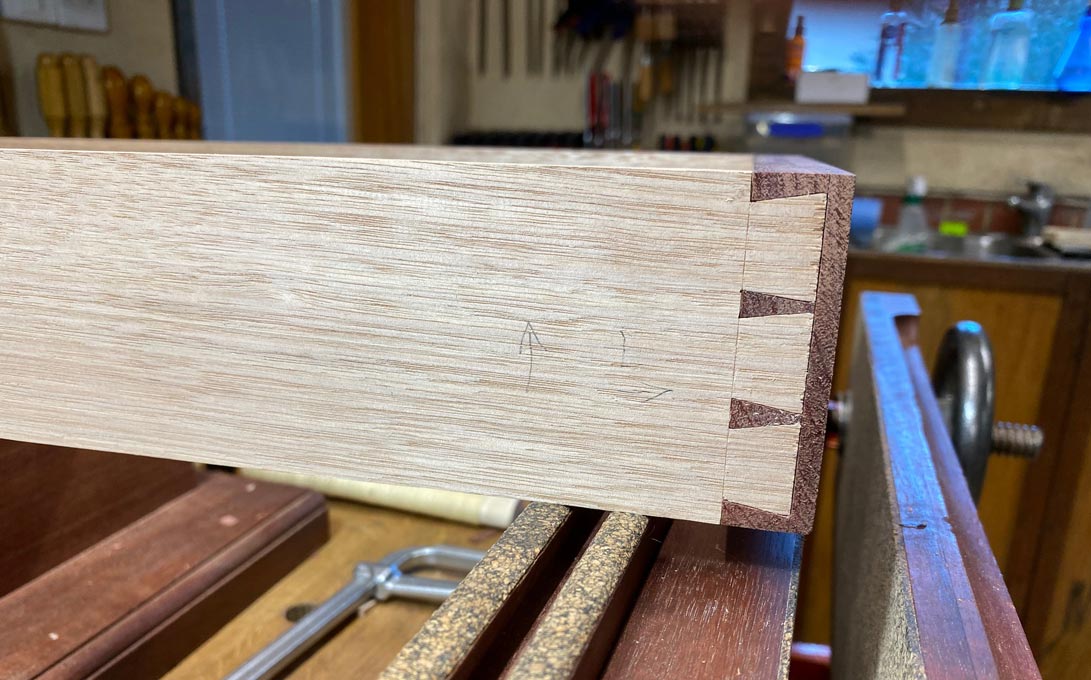

And here is the other side with the “drawer” inserted into the drawer case ...
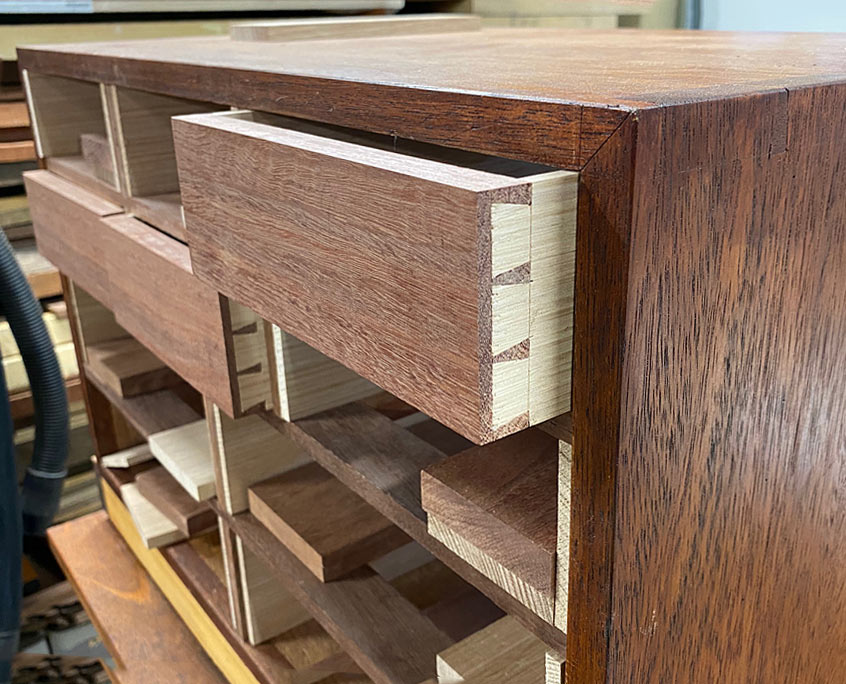

The drawer can be pushed flush into the drawer case, which was the target at the start ...
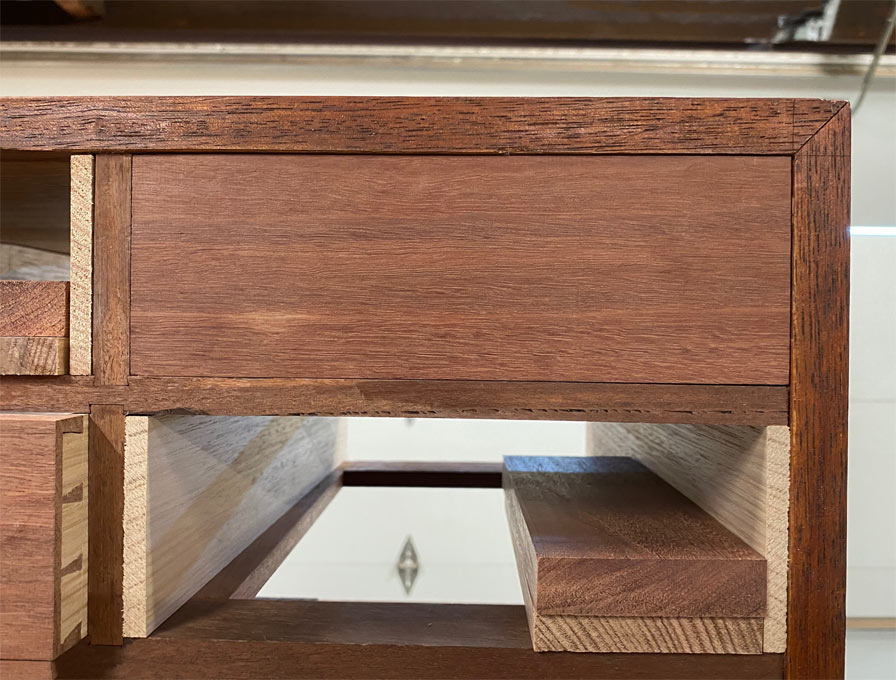

Regards from Perth

Derek


Make a kerfing chisel

Re: Dovetailing for Blood *LINK*

#2

Re: Dovetailing for Blood

gwold

Derek, it seems you're a firm believer in undercutting chisel lines. The undercut in your pin board looked fairly shallow--how deep do you feel these must be, to prevent "bruising," driving back the base line?

For a though cut like you tails, you use a fret saw to clean the waste, then pare. Do you find this faster (and as accurate, or more accurate) than chopping out the waste, side to side, with the undercut chisel lines?

Re: Dovetailing for Blood *LINK*

#3

Re: Dovetailing for Blood

Derek Cohen (in Perth, Australia)

Derek, it seems you're a firm believer in undercutting chisel lines. The undercut in your pin board looked fairly shallow--how deep do you feel these must be, to prevent "bruising," driving back the base line?

The undercut is as deep as the line, which is scored as deeply as possible. This may end up around 1mm. Whatever it is, you can deepen it by, firstly, placing a chisel in the undercut and tapping lightly, then undercutting a second time. The chisel wall prevent the chisel moving back over the line.

For a though cut like you tails, you use a fret saw to clean the waste, then pare. Do you find this faster (and as accurate, or more accurate) than chopping out the waste, side to side, with the undercut chisel lines?

Removing the waste with a fretsaw, leaving 1-2mm at the baseline, is far more gentle on chisel edges than chopping or paring waste in the full socket. Just less resistance and less force required when chopping down.

I always work from the non-show side first, chopping half-way, then turning over the board and finishing from the show side.

Regards from Perth

Derek

Re: Dovetailing for Blood *LINK*

#4

chiseling

Bill Tindall, E.Tn.

Derek, it seems you're a firm believer in undercutting chisel lines. The undercut in your pin board looked fairly shallow--how deep do you feel these must be, to prevent "bruising," driving back the base line?

You are going to find this detail differs by who is doing it. What is done is driven by what comes before and after. Yet what we all do is meet the same need. A wall at the baseline must be established to resist the inherent force from the chisel bevel driving the chisel toward this baseline as a chip is formed. Hence, what one does to prepare this wall depends on how much force one intends to create from mallet blows or paring force, coupled with how thick this chip is.

For example, if I have trimmed by one means or another to near the baseline I can stick the chisel in the baseline and simply push or tap to remove the sliver of waste. I do not have to prepare a wall to resist deflection for there is piddly deflection force to resist. In contrast if I am banging out utilitarian dovetails where I have not removed any waste I will stick the chisel in the baseline and tap it very gently to deepen it. Then chisel from the side to remove a chip. Repeat with ever stronger blows as the baseline is deepened and becomes more resistant.

I have a friend that makes and restores Period Furniture for a living. He begins by chiseling out the first chip with a paring cut to the scribe line to establish the initial wall at the baseline.

For a though cut like you tails, you use a fret saw to clean the waste, then pare. Do you find this faster (and as accurate, or more accurate) than chopping out the waste, side to side, with the undercut chisel lines? If you have a band saw nearby it will be the fastest. The bulk of the waste can be removed with conventional sawing. The waste left can be removed to near the base line by using the teeth of the moving blade like a power chisel (blade orthogonal to the base line, sweep board back and forth). In skilled hands little chiseling is left to do.

Re: Dovetailing for Blood *LINK*

#5

Re: chiseling

Derek Cohen (in Perth, Australia)

For a though cut like you tails, you use a fret saw to clean the waste, then pare. Do you find this faster (and as accurate, or more accurate) than chopping out the waste, side to side, with the undercut chisel lines? If you have a band saw nearby it will be the fastest. The bulk of the waste can be removed with conventional sawing. The waste left can be removed to near the base line by using the teeth of the moving blade like a power chisel (blade orthogonal to the base line, sweep board back and forth). In skilled hands little chiseling is left to do.

I will argue that I can fretsaw away the waste as fast, or faster, than someone with a bandsaw ... and leave less waste to pare away!

Here is a video demonstration (4 minutes long, so stick with the dreary introduction) ...

https://www.youtube.com/watch?v=M6O4rY_0zQs&ab_channel=DerekCohen

Regards from Perth

Derek

Re: Dovetailing for Blood *LINK*

#6

rising to the challenge

Bill Tindall, E.Tn.

I don't watch woodworking videos. At least this invitation was just 4 min. Someone on the other board invited me to spend 30 minutes getting to their point.


22 seconds on first one, 17 on second. Waste left can be pared with one chisel thrust from each side. The danger is going too close to the scribe line and loosing ability to secure a chisel in it.


35 seconds, wood density and thickness makes no difference. Again I could have kissed the scribe line in the same amount of time but it becomes risky loosing the vee to accept the chisel tip.

Re: Dovetailing for Blood *LINK*

#7

I don't care much for videos either... *LINK*

John in NM

But I do like Frank Klausz's in small doses. I enjoy his humor.

The first 5 minutes of the one in the link is worth watching. The initial demo in that one is his really quick, utilitarian dovetail, I think his practical approach to things would appeal to you. I remember reading about that corner turning saw years ago :D (and the vid is old, probably late 1990's?).
He does pins first of course, and makes things look very easy - a lifetime of practice.

PS -- only suggesting it because I know you have fiber now! :D


https://www.youtube.com/watch?v=vKuy3NdLhlE&feature=emb_title

Re: Dovetailing for Blood *LINK*

#8

Re: I don't care much for videos either...

Wiley Horne

I notice he punches down the saw kerf on the half blinds, using a scraper on edge.

The last time Derek showed this, I finally tried it, and became an instant convert. I use a rip dozuki, whose kerf thickness is 0.013”, so took a half length of a worn out M2 planer knife and ground it down to 13 thousandths at one end. Works great. But for normal people using a western dovetail saw with a 25 thousandths+/- thick kerf, a 0.6mm card scraper is perfect, and it’s one of the standard sizes.

People sometimes think of theoretical reasons not to do this, but almost anyone will adopt it instantly if they try it. It’s not a parlor trick.

Wiley

Re: Dovetailing for Blood *LINK*

#9

I remember reading that one years ago...

John in NM

Probably in the same FWW or other article where I read about that funny saw of his. When you see him do it, that's enough to just try it.

I kinda wonder that none of the dovetail saw makers have thought of leaving an inch on the front end with no teeth and a strike button on the top of the brass back :D

Re: Dovetailing for Blood *LINK*

#10

Re: rising to the challenge

Derek Cohen (in Perth, Australia)

Bill, since you do not watch videos:

You stated your time as 35 seconds for a pin. I took 18-20 seconds each for the second and third pins in the video (In the first I was explaining how it is done).

That was a pretty conclusive victory for a fretsaw over a bandsaw ... yes? :)

Regards from Perth

Derek

Re: Dovetailing for Blood *LINK*

#11

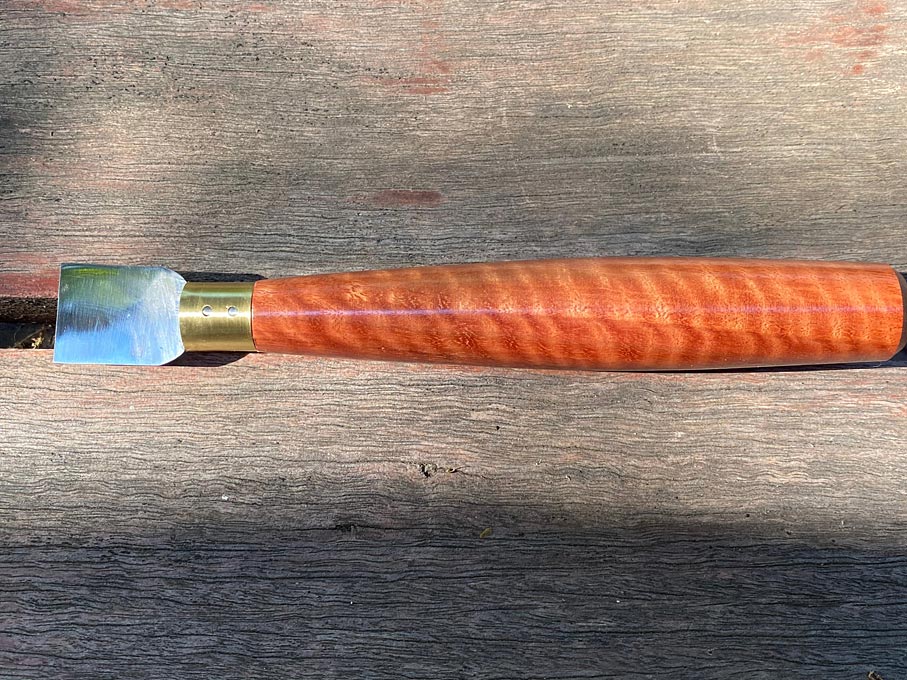
Kerfing chisel

Derek Cohen (in Perth, Australia)

Wiley, I don’t recall if I posted a recent article here on making a kerfing chisel. I was reminded about this by your comment about the thickness of your cabinet scraper plate.

The link to the article is here: http://www.inthewoodshop.com/ShopMadeTools/MakeKerfingChisel2.html

At the start, I suggested that scrapers as thick as 0.03” could be used with standard Western dovetail saws (which typically have a 0.02” plate, then add around 0.003” per side for set).

A reason I post this now is that, while it is possible to purchase card scrapers (LN, Lee Valley, Bahco) in thinner steel, using a paint scraper for steel can be disappointing as they are typically 0.03” and upwards. On the other hand, the paint scrapers are stainless steel, which is tough and likely to last longer than O1.


After some experimentation I concluded that 0.03” can be too thick if you saw as I do, that is, to the line. The thicker plate opens the kerf up enough to cause a looser fit with the tails. So, subsequently, I ground the plate down to 0.024-0.025”. This works very well.

Fiddleback Jarrah ...


Regards from Perth

Derek

Re: Dovetailing for Blood *LINK*

#12

Re: Kerfing chisel

Wiley Horne

Derek,

That’s a good clarification for the reason you cite.

And am glad you showed the short-bladed kerfing tool. Because harder woods do want a short blade on the kerfing tool, so it won’t bend when struck. Mr. Klausz is hammering a card scraper into pine, which is not challenging.

But if one’s drawer front is cherry or walnut or maple (not even going to jarrah!), a shorter blade is wanted. Also to remember: the blade only needs to be as long as the drawer side is thick. So if one’s thickest drawer side is going to be 3/8” or 1/2”, the blade only needs to penetrate that far, though it will be physically a little longer so you can see what you’re doing.

Wiley

Re: Dovetailing for Blood *LINK*

#13

two part challenge

Bill Tindall, E.Tn.

close to the line and time. You did not address the close to the line comparison. I believe I disproved the claim that the fret saw could saw closer to the line.

Time for fret saw depends on owning one that costs 1/5 of what I paid for a band saw, wood hardness, thickness, skill of sawer and length of the cut.

Band saw time depends only on whether there is a band saw sitting there and a minor factor of length of cut. The bulk of the band saw time is from establishing the vertical cuts on each edge of the pin board waste and the arced entry for the first cut to the scribe line. For narrow pin board waste removal the fret saw will be quicker if the person sawing is skilled at reliably sawing near the baseline.

What one gravitates to will depend on the above variables.

Re: Dovetailing for Blood *LINK*

#14

Re: rising to the challenge

Warren in Lancaster, PA

I use a coping saw for this work. I started the timer, removed the waste from two sockets on the tail board and turned off the timer. Seven seconds all together. Using a coping saw probably requires more skill.

On the pin board, time to remove waste between pins: two in 17 seconds, so about 8 seconds apiece.

Re: Dovetailing for Blood *LINK*

#15

Re: rising to the challenge

Derek Cohen (in Perth, Australia)

Good for you, Warren!

I wasn't chasing speed records, and simply timed my efforts in the video. Still, between us we have demonstrated how efficient and quick sawing out the waste can be. Coping saw or fretsaw ... choose your poison :)

Regards from Perth

Derek

Re: Dovetailing for Blood *LINK*

#16

One other thing

Wiley Horne

about sawing the waste.....It requires no new set-up, or clamping or unclamping. You’ve already got the two (or four) drawer sides ganged in the vise, and have just made the tail cuts. To saw the waste, just pick up the coping or fretsaw, and do it, with the drawer sides still clamped together.

Not taking sides in the challenge though. What Bill does is plenty fast and repeatable. As he says, what you do depends on your personal preference. And it’s all fast.

Wiley

Re: Dovetailing for Blood *LINK*

#17

Agree....

John in NM

The coping saw probably requires more skill - than the bandsaw, I've never owned a fretsaw so I don't know about comparing that to coping. I have an unused coping saw that I inherited from a friend who also never used it :D

But I am going to give it a shot on the pin board next time I cut dovetails. I tend to favor thin pins, so I doubt it will help much on the tail side, I do that with a couple more cuts of the dovetail saw. Less fussy than picking up another tool for me, but I only say that because the pins are thin. If they were more than 3/8" or so at the wide end I think I would try the coping saw for them too.

This has been a helpful discussion, at least from my view. Any discussion that shakes my habits is a good one :D

👍 This page answered my questions

Your vote helps other woodworkers quickly find the answers and techniques that actually work in the shop.