Home Articles Forums Gallery Marketplace Videos

WoodCentral Forums

Knowledge You Can Build On — Est. 1998

Hollows and Rounds.

Posts

Hollows and Rounds.

#1

Hollows and Rounds.

Joe in a Cleveland suburb

I've always wanted a set of hollows and rounds, or even a half set. That's not something I could afford. But I was at an outdoor antique thing over the weekend and a guy hand a table full of old wooden planes.

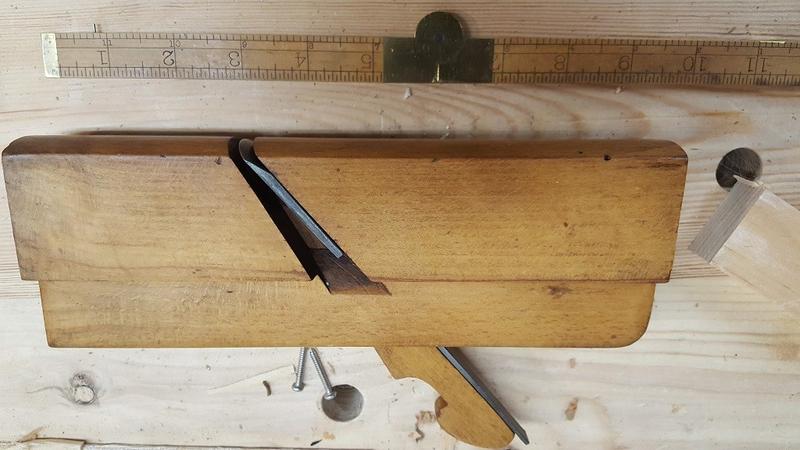
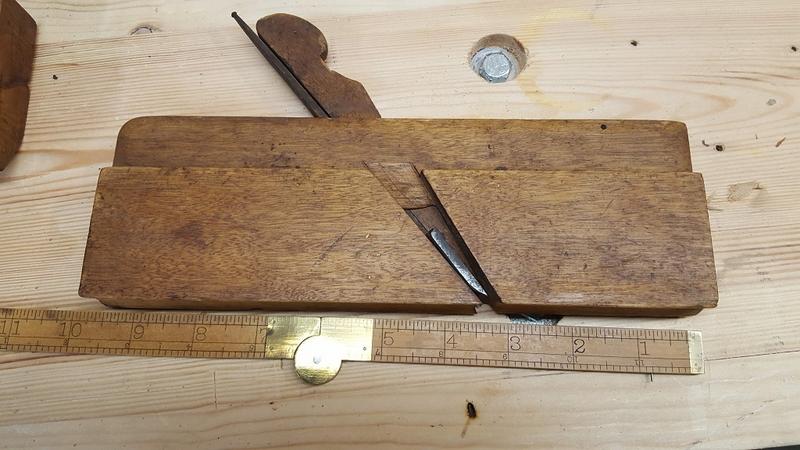
I found these two. They aren't matched (the hollow is a little bigger than the round) but seem to be in decent shape. They were cheap enough I bought them.

I figured I could play around with them and learn a bit.

Sorry the pics are all bass akwards.

Maybe I'll ask Santa for “Mouldings in Practice” by Matthew Sheldon Bickford this year.

Couple questions-

First.

So, I can sharpen my regular plans well enough to plane the woods I use; cherry and walnut mostly, but I don't know how to sharpen an iron with a profile. I presume you would begin with flattening the back, how to do the profile.

I have a wood beading plane I tried to sharpen and ruined with my dremel a couple years ago...

Second.

Once sharpened, how do you use these? How do you adjust and so on?

Thanks for any feed back.

#1
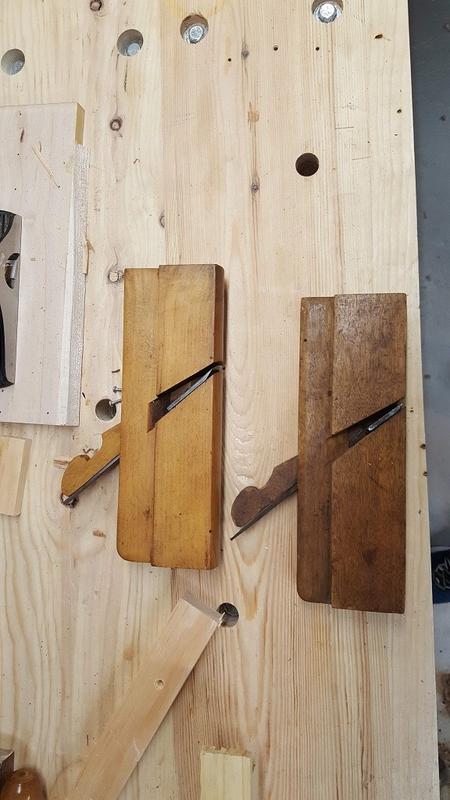

#2
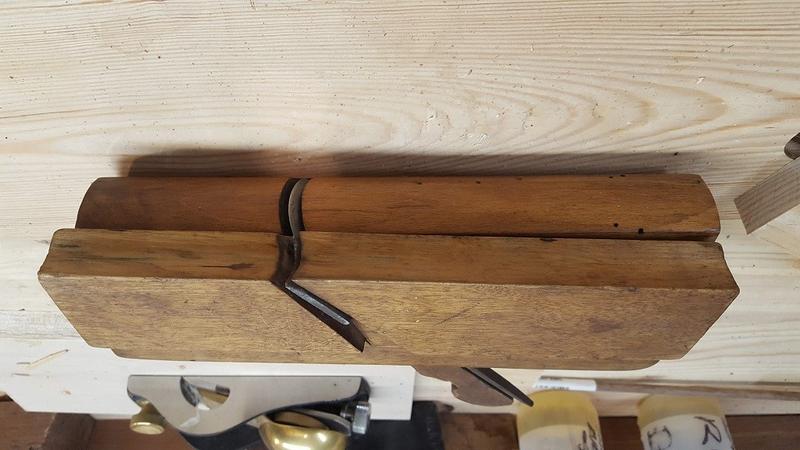

#3
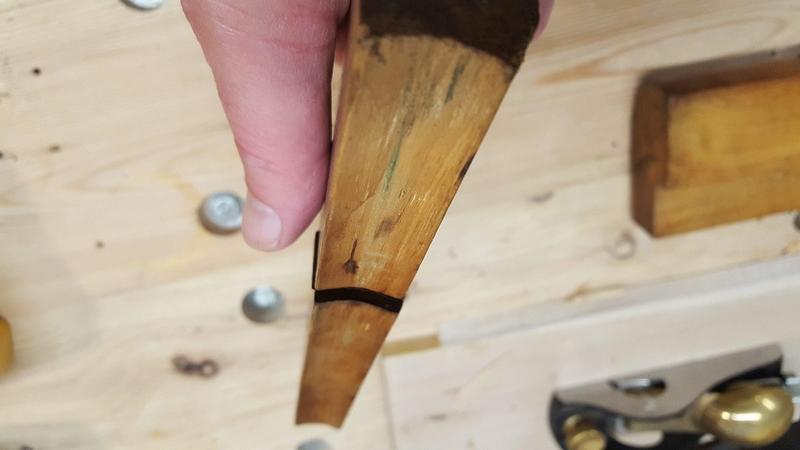

#4
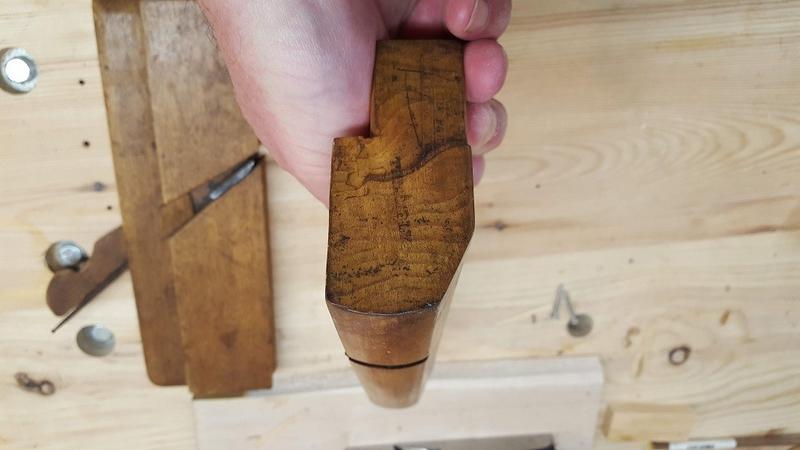

#5

#6

Re: Hollows and Rounds.

#2

Re: Hollows and Rounds.

david weaver

For starters, I'd get some light weight sandpaper in 220 grit or something and take the irons out of them and then "plane" the bottoms of each to match the others on the sandpaper. as in, stick one upside down in a vise and use the other with sandpaper wrapped around tightly to sand the one in the vise, back and forth until they match.

That's assuming they're close in profile and the round is in pretty good shape.

Then, you can get an initial grind on the edge of the iron to match the sole by putting the iron in the plane and dragging the plane backwards until you've matched the profile of the sole with a flat across the edge of the iron. Take off no more than you need to while doing this, because grinding the profile with a coarse stone, grinder (whatever you have that will work) or coarse sandpaper wrapped on a dowel isn't easy work.

You can do a lot of the work grinding the bevel again by putting sandpaper on the opposite plane and holding the grind angle shallower than the plane bed, but some finish work has to be done by hand.

Larry williams advises using a cone in a rotary tool, and you can do that, but it's not necessary and it's easy to run over the corners on an iron doing that. Slow and steady wins the race in this case. You don't need perfect results, just "really good" results.

Once everything is cleaned up (back flattening before or after, doesn't matter -I'd do before) you install the iron and set it like any other wooden plane (a tiny amount of iron projection even across the sole), and sharpening isn't that frequent because you'll do most of your work with these planes after something simpler has removed as much waste as possible.

Re: Hollows and Rounds.

#3

Re: Hollows and Rounds.

Bill Houghton, Sebastopol, CA

David's got some good ideas. For the hollow iron, a suitably sized dowel and sandpaper can also be helpful. For the round iron, it's mainly a matter of learning how to move your honing medium - stone or whatever - and the bevel to maintain the curve. Some people like to hold the iron and move the stone; others the reverse.

Those look close enough in profile that I'd try sharpening the irons first and trying them out before matching the profiles, as David suggests. Depending on the kind of work you find yourself doing with them, an absolute match may not be needed.

Re: Hollows and Rounds.

#4

Re: Hollows and Rounds.

Ron in Sterling, CT

Are there any numbers i.e. 6,8, 10, etc. stamped on the rear end of the planes? If so, this would give you a clue as to the initial size (radius) of the plane.

Ron

Re: Hollows and Rounds.

#5

Re: Hollows and Rounds.

Jim Matthews

These are fine examples : complete and in good condition.

I also use dowel rod wrapped in fine sandpaper for the concave blades.

As DW suggests, a corresponding "trough" is needed for the convex blades.

The first sharpening may require some gentle filing, until you can make the trough.

I use diamond hones for this, the kind that are mounted on plastic "paddles".

To get these cutting well, the sides of the blades should be a little back bevelled.

http://musingsfrombigpink.blogspot.com/2011/01/sharpening-window-into-my-basement.html

Re: Hollows and Rounds.

#6

Re: Hollows and Rounds.

Warren in Lancaster, PA

For sharpening round planes we use a bench stone. Sharpen back and forth on the stone while slowly rotating the stone (over a dozen strokes or so) to sharpen the whole bevel evenly. Or if the edge is too convex or whatever, sharpen somewhat more in the areas that will improve the fit to the plane.

For hollow plane irons we use slip stones. These are oil stones 2"X 4" with a rounded 3/8 to 1/2 on one long edge and roughly 3/16, also rounded on the other long edge. You will want some India stones for coarse work and An Arkansas stone for polishing.

Re: Hollows and Rounds.

#7

Re: Hollows and Rounds.

Joe in a Cleveland suburb

Great link. Bookmarked. Thank you.

Re: Hollows and Rounds.

#8

Unfortunately no. 


Re: Hollows and Rounds.

#9

Re: Hollows and Rounds.

Joe in a Cleveland suburb

Thanks everybody for the information and ideas.

Much appreciated.

One the weather turns and the 9 months of Cleveland winter begins, I'll get back in my shop and start tuning these up a bit.

Thanks again.

Re: Hollows and Rounds.

#10

Re: Hollows and Rounds - maker's marks?

John Aniano in Central NJ

Joe,

In one of your photos, there appears to be at least one maker imprint on the toe (front) of the planes. Can you read the maker name on this or both of the planes? At first glance they appear to be middle/late 19th century examples.

John

Re: Hollows and Rounds.

#11

Re: Unfortunately no.

William Duffield

Typically, though not always, there is a fixed relationship between the radius and the width of the edges, 1:1. Another way to state this identity is that the arc of the edge (convex or concave) is 60°.

Re: Hollows and Rounds.

#12

Matt Bickford is an excellent resource

Jim Matthews

I highly recommend his book.

"Mouldings in practice" from Lost Art press

The class he teaches relies heavily on using a finely tuned Rabbet plane to remove waste and make "ledges" to register the round blades.

Any Rabbet will do, so long as it's sharp - I prefer wooden bodies in principle.

https://blog.lostartpress.com/2012/07/26/moulding-planes-where-to-start/

Re: Hollows and Rounds.

#13

Yes...

Joe in a Cleveland suburb

this book is on my Santa wish list this year. :D

Re: Hollows and Rounds.

#14

Update

Joe in a Cleveland suburb

I was asked about markings.

The hollow has no markings I can see.

The round has:

On one end is stamped - T. HAMBLY and a number 8.

On the other end is stamped - MADE FOR DERICKSON and something I can't read along with T. HAMBLY

Quick Google search found nothing for HAMBLY.

Thanks.

Re: Hollows and Rounds.

#15

Re: Update

TomD

You can map out the edge of the blade by stretching it a given amount from the radius. As was mentioned the radius and the width are the same . You need to stretch that arc 1.44 for a 45 degree, 1.56 for the 50, and 1.74 for 55. I did a drawing from a 1 inch blade that one could size to any blade, but I can't remember my flickr account. It is pretty easy to do in any cad program. It is basically a single step change from the arc where you just enter one of those values for the X axis. It really gets useful when you get more complicated shapes as you can't just eyeball those, as easily.

Re: Hollows and Rounds.

#16

Trigonometry

Warren in Lancaster, PA

Your mathematics is a little mixed up, Tom. The curvature on an iron becomes less extreme as the pitch is increased. The figures should be:

45 degrees 1.41:1

50 degrees 1.31:1

55 degrees 1.22:1