New WoodChat!
Home Articles Forums Gallery Marketplace Videos

WoodCentral Forums

Knowledge You Can Build On — Est. 1998

Support WoodCentral when buying things you need

The Devil lies in the details

Posts

The Devil lies in the details

#1

The Devil lies in the details

Derek Cohen (in Perth, Australia)

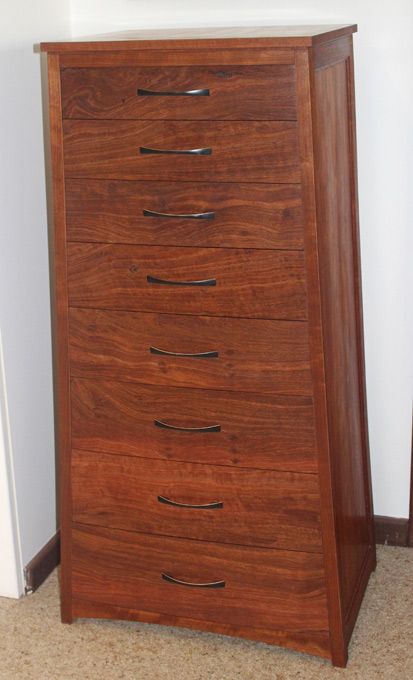
I completed the Lingerie Chest this weekend, and moved it to our bedroom to recuperate from the cold of the workshop.

It was comforting to see the pieces still looking quite good …
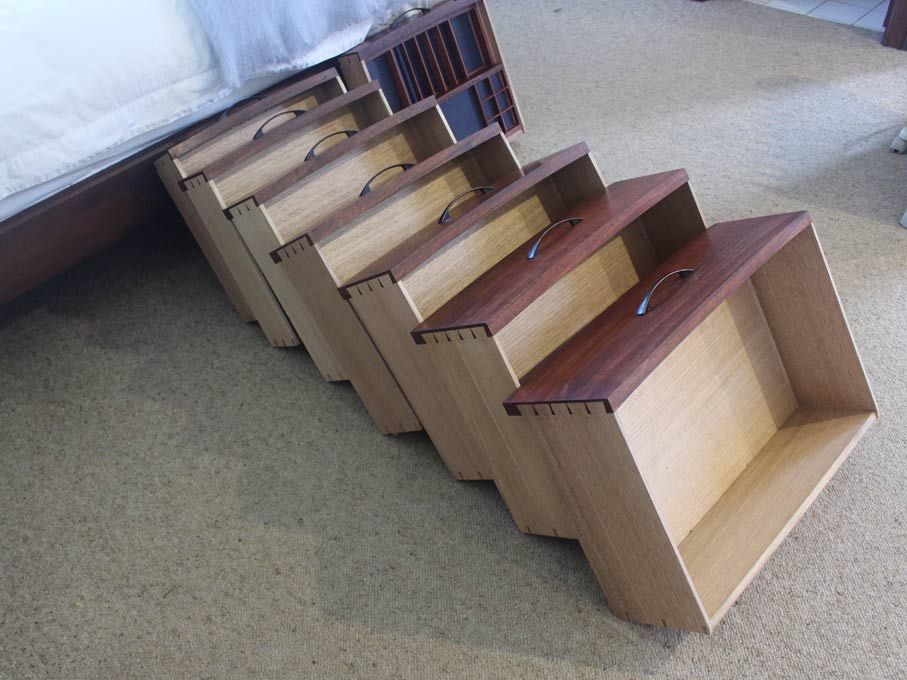

Here it is in the nook that was always to be its home.
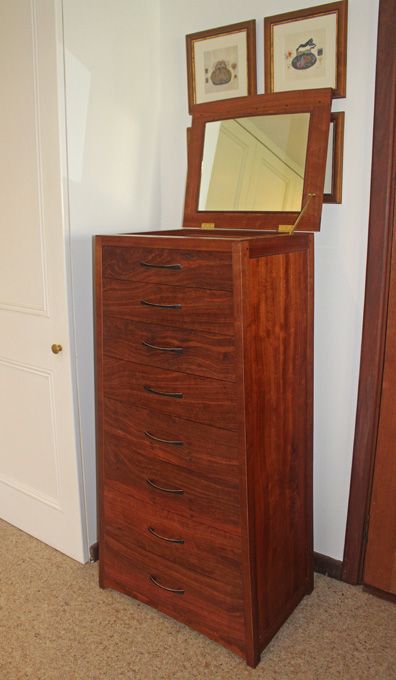

What I would like to share with you are the details that I have been working on over the past few weeks. These have been fun to do, especially as they were planned right at the outset, but left until the end.

The first task was not so fun, if I am honest. In fact I wanted to avoid the risk I needed to take, and enquired of a few people whether they could spot the problem. I was reminded that, if you have to ask, then there is an issue. What was the issue? It lay with the fitting of the handles.

Here is an older picture of the drawers taken after the handles were fitted ..


What is difficult to see is that the drawers are bowed, while the handles are designed for a flat drawer face. As a result, there are gaps at each end …
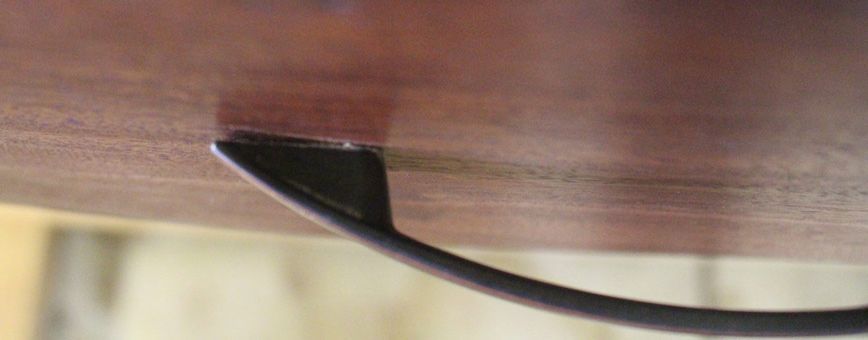

I dreaded having to chisel into the drawers to seat the handles. In the end, I knew I could not leave them like this. Fortunately I came up with an alternate plan, which was to file the raised sections of the handle into a profile that matched to drawer fronts.

To do this I build a profile of the bow, taped on 120 grit sandpaper, and lapped the handles on this …
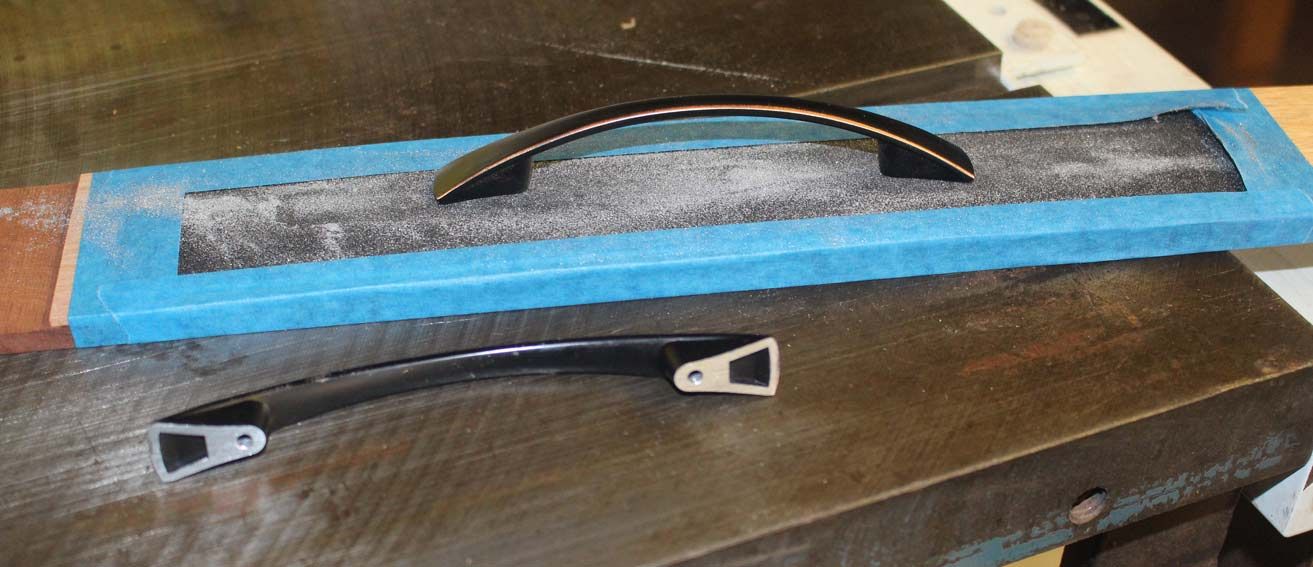

Despite fantasies of the handles disintegrating, it turned out all good.

The second area involved the “jewelry drawer”.

Facing the chest (48” high), my wife is tall enough to look down into the top drawer.
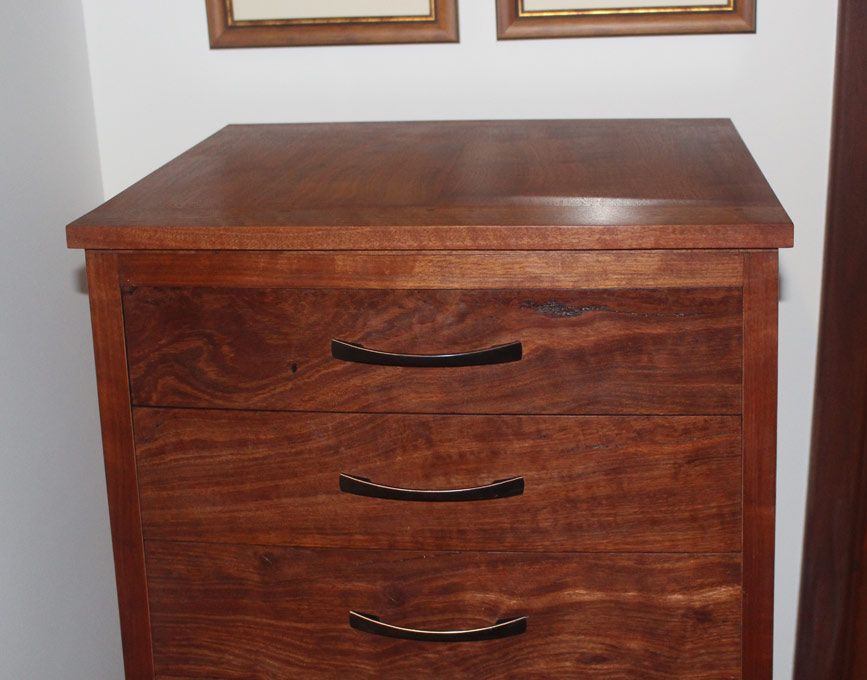


Since this drawer is to hold jewelry, it needed to be locked. I did not wish to add more hardware than necessary and so, instead of a lock-and-key, added a Quaker Lock.

A Quaker lock is simply a spring-loaded wedge under the drawer. It is made of the following parts: thin, flexible (straight-grained) strip of wood, a thin wedge, and screws …
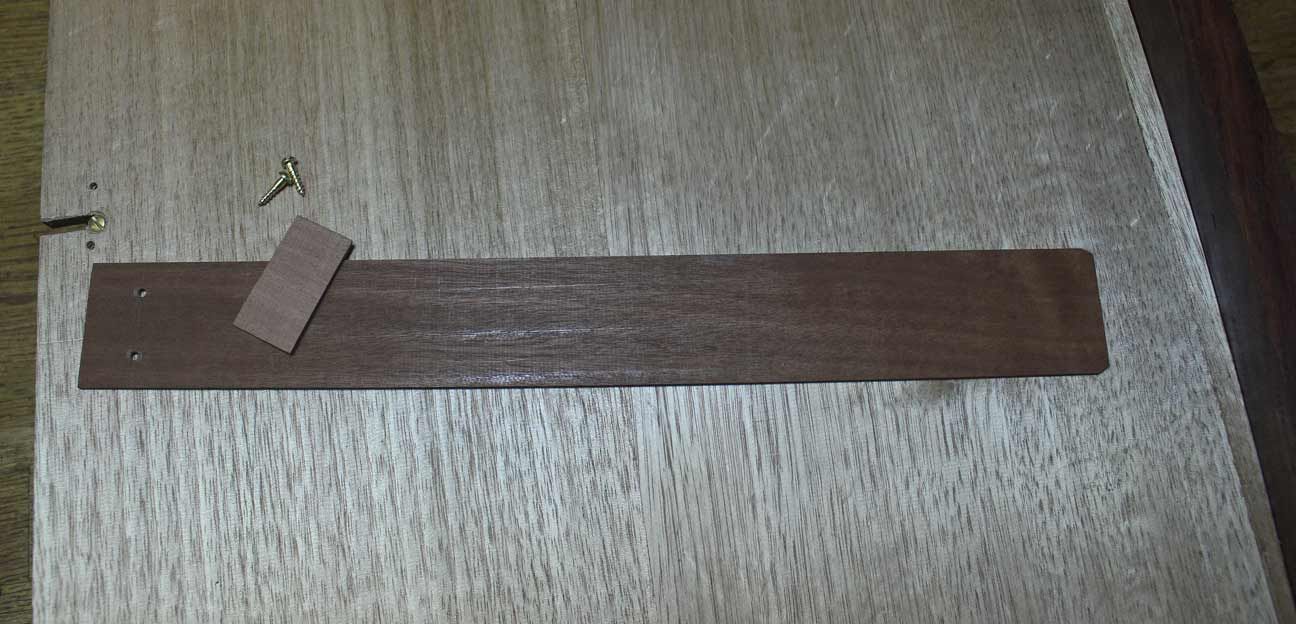

These are put together to create a spring wedge, which extends to the rear of the drawer blade ..


To release the Quaker lock, first open the second drawer, then reach underneath and push up the spring while simultaneously pulling out the drawer.
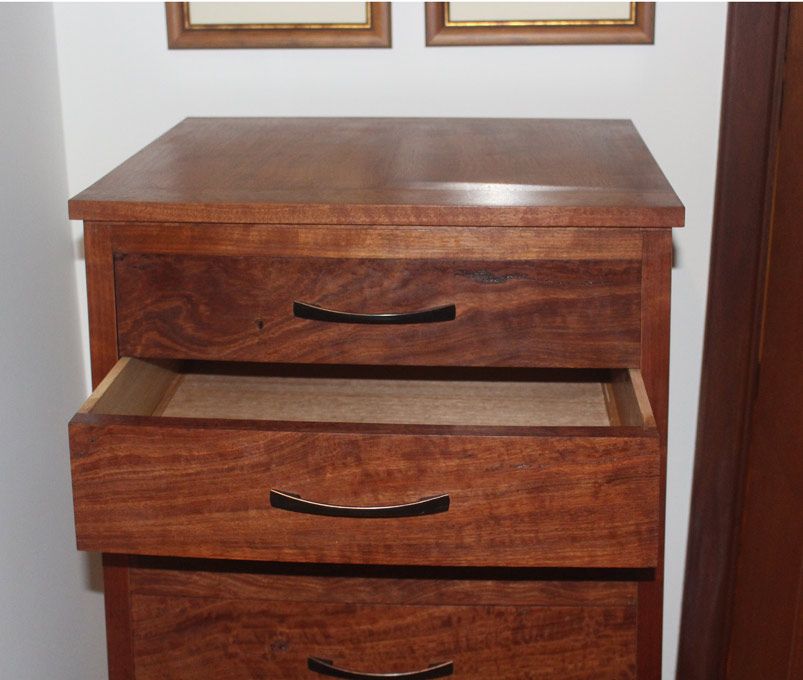

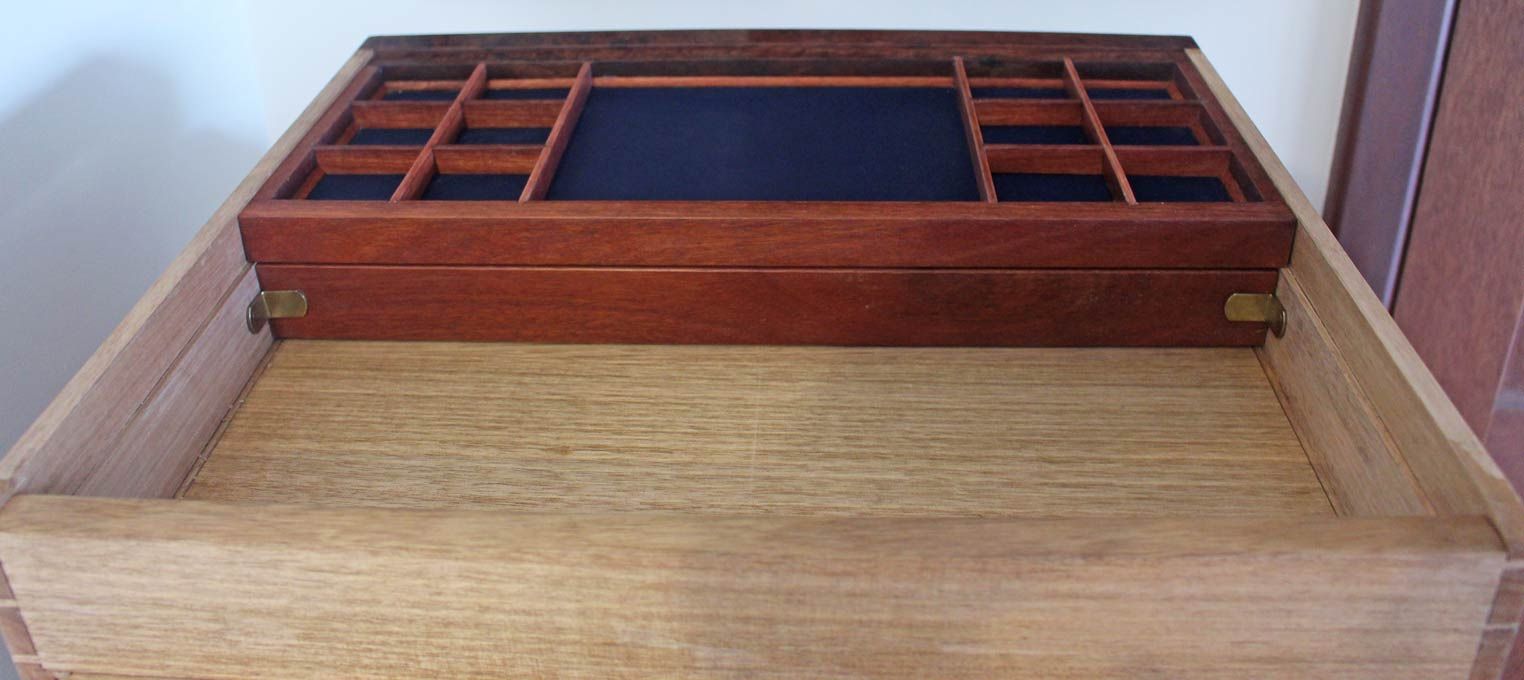
The top drawer opens to reveal the upper jewelry tray (spaces for ear rings) …
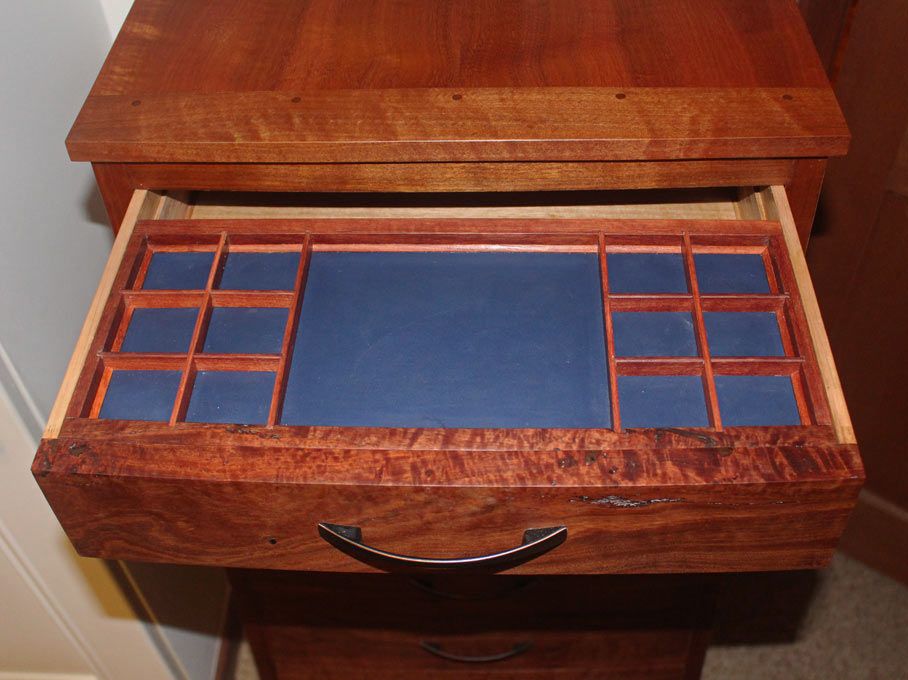

Sliding it back reveals the lower jewelry tray (spaces for necklaces and rings) ..
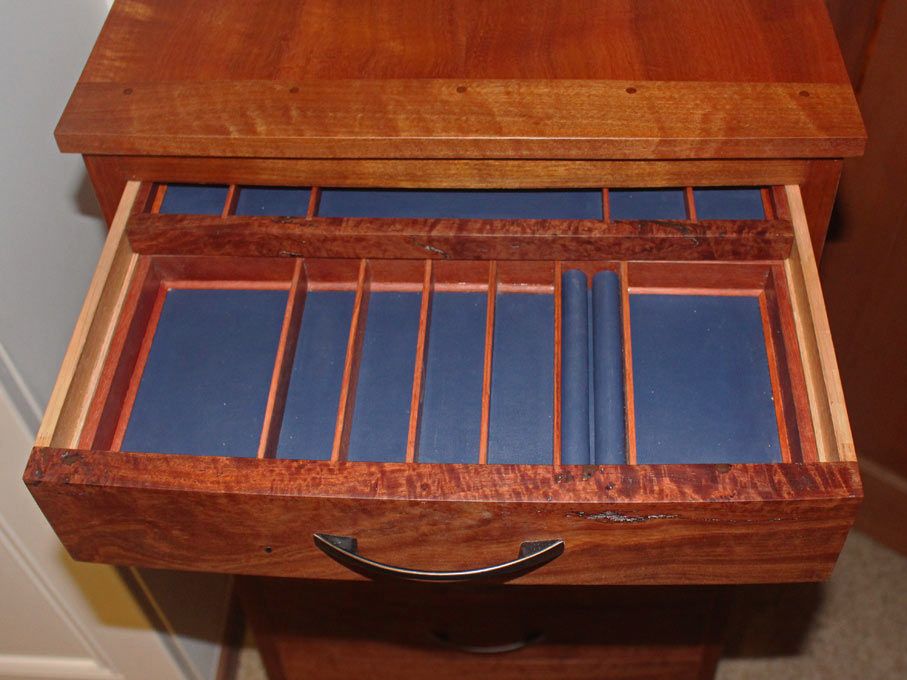

The construction of these trays was based on a different design to the drawers. Slips were used in the drawers, but the trays needed to maximize the space inside, which left the 3mm (1/8”) thick drawer bottoms 3mm from the lower edge.
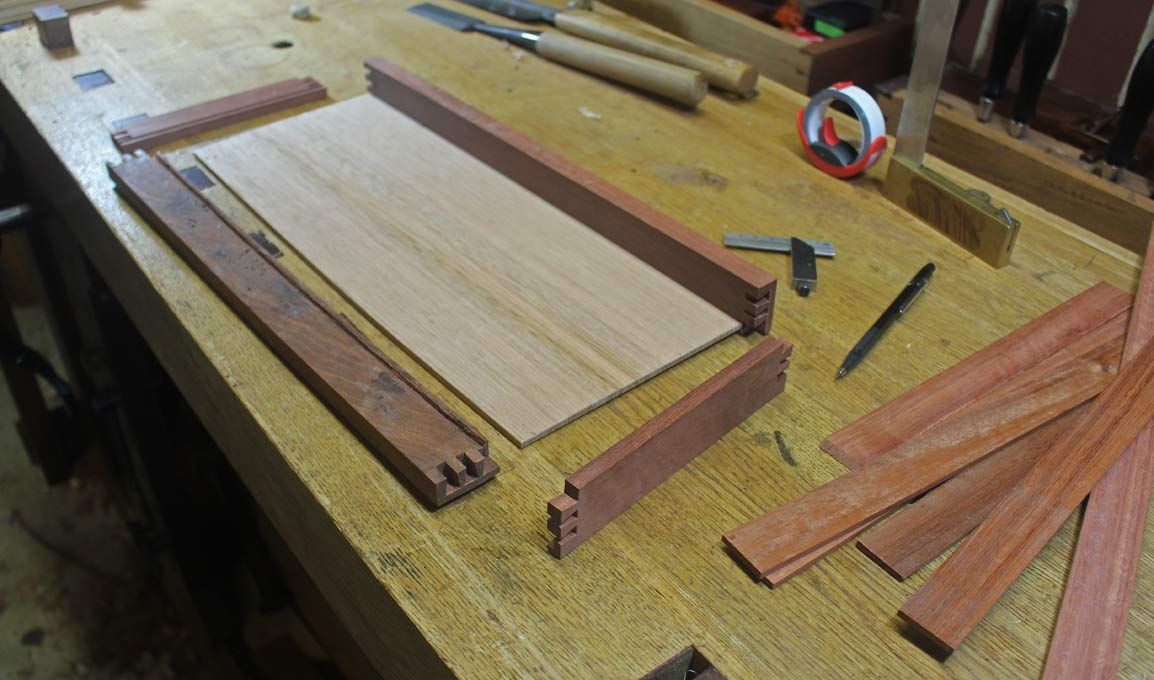
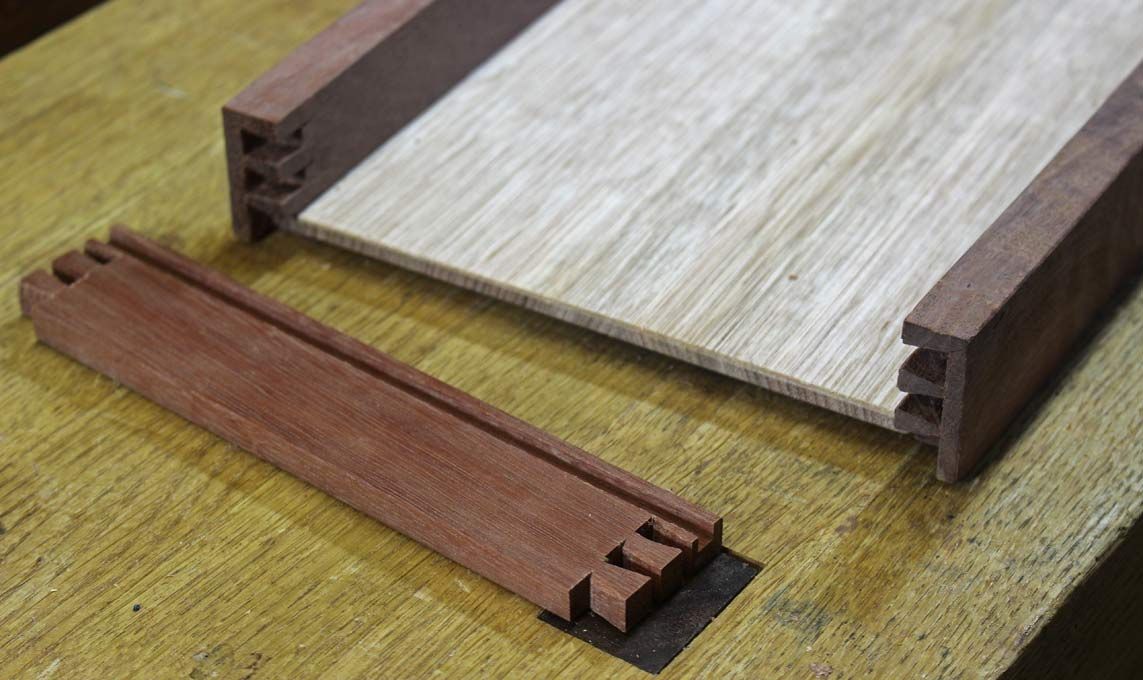

As can be seen below, the lower pin is not enclosed, which allows more space for the drawer bottom groove ..
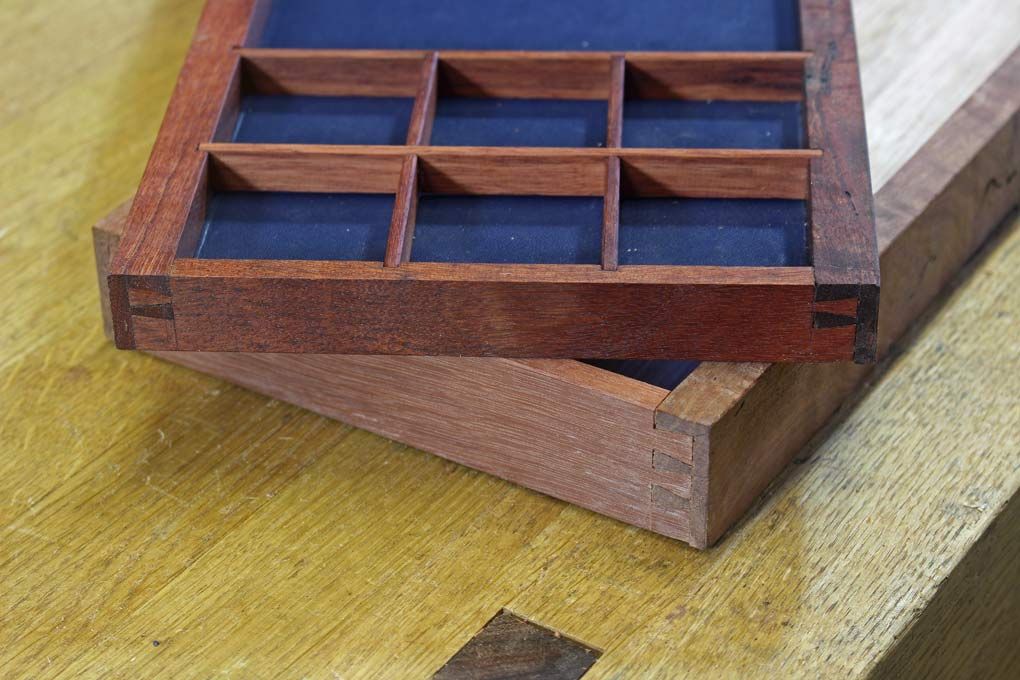

The drawer bottoms were covered in 1.2mm thick leather. This was attached with contact glue (I used a brand that permitted some movement for repositioning up to 3 minutes after placement). The edges were tidied up with coved beading.

That coved beading was a real bugger to make and fit as it was so tiny. The drawers were for the most part easy to fit. However, the compound curves behind the drawer fronts and at the top of the mirror (which curves to match the bow drawers) required extra attention.

The jewelry trays are easy to lift out of the drawer. The idea for fitting them came from the sliding tills in tool chests. To do this with these drawers, the inside of the drawer sides was squared up with filler pieces. To ensure that the lower drawer does not slide away from the front position, clips were added to the rear (they are shelf rests and just push into the sides). These can be removed if needed. There is now hidden space behind the lower tray.

The third area involves the mirror recess. This was also covered in leather …
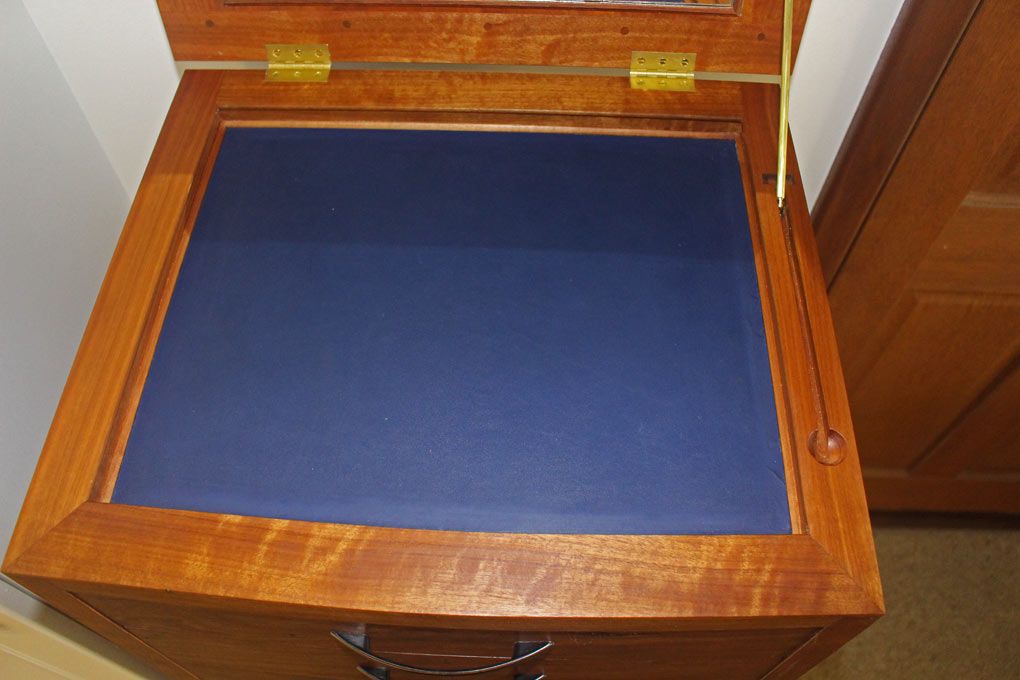

Here is one example of the coved beading around the mirror (so difficult to photograph owing to the reflections) ..


And so we come to the end of this build. All-in-all, it stretched over 18 months (closer to 14 months of actual build time on weekends), which is my longest project to date.

Thanks for looking.

Regards from Perth

Derek

Re: The Devil lies in the details

#2

Re: The Devil lies in the details

david weaver

A really lovely result, Derek. Clean and tidy, and great looking wood.

Re: The Devil lies in the details

#3

question and comment

Bill Tindall, E.Tn.

It looks at home in its location. It will attract attention from passers by.

I like descriptive titles on posts like this one.

How did you attach the tiny cove?

What adhesive was used for the leather?

Any risk of tanning chemicals affecting jewels?

What's next?

Re: The Devil lies in the details

#4

Re: question and comment

Derek Cohen (in Perth, Australia)

It looks at home in its location. It will attract attention from passers by.

I like descriptive titles on posts like this one.

How did you attach the tiny cove?

What adhesive was used for the leather?

Any risk of tanning chemicals affecting jewels?

What's next?

Thanks Bill

The cove around the mirror is attached with epoxy only. Epoxy and clamps. I plan to add pins when I can source tiny enough types. These will be drilled and tapped in. For the jewellery trays only hide glue was used. The dividers reinforce the mouldings in place.

For the leather I chose a furniture grade from a local supplier. I wound up buying about 4 times too much (expecting to screw up, but got it right the first time. Damn!).

I used SikaBond, which is a high strength spray contact adhesive, which can be de-and re-attached for 2 minutes. It was possible to lay on a thin coat (sprayed to the leather, and brushed on the wood). Only about 1/2" in from the edges was glued. I was concerned about bleed through, so first prepared the upper side of the leather with Dubbin (which is waterproof). I was more interested in gaining purchase than a permanent bond since the leather is also held down by the edge beading and the dividers. These were attached with hide glue so that they may be removed at a later time.

I discussed the tanning issues with the supplier. The leather is chrome cured. Apparently this holds colour better than vegetable curing. The supplier was adamant that silver and gold will not be affected by the process. In any event, the leather was treated (by myself, as mentioned above) first with Dubbin and then later finished with Renaissance Wax.

What's next? Ha! I now have to return to all the maintenance that was ignored on the house. Painting it throughout the inside, restoring all the brassware hardware (stripping and lacquering), and then re-modelling the kitchen. The latter requires about 25 Maple frame-and-panel doors in the Shaker style. No, I shall not be using traditional mortice-and-tenon joinery made by hand. Instead, I have purchased a Festool Domino 500 machine. Horses for courses - kitchens have a lifespan of about 15 years, and I last built ours (in Tasmanian Oak) 22 years ago!

Regards from Perth

Derek

Re: The Devil lies in the details

#5

Re: The Devil lies in the details

TomD

Nice solution for the handles, and you now know how to fit the bridge on a guitar!

Re: The Devil lies in the details

#6

Re: question and comment

TomD

I can do the Festool deal (or the thing I have of the type). I start with an understanding of whether I am producing, or doing craft for my own entertainment.

I have a harder time with chucking out good stuff every 15 years (you are living in the real world which is admirable). What a crock that people haul out fifteen year old stuff to replace it with imitation stuff from past centuries that never would have got off the ground had it been hauled to the dump every 15 years. The woodworking I would support in that regard is riding the dude out of town on a rail who first invented the idea of the "look".

Re: The Devil lies in the details

#7

Re: question and comment

Derek Cohen (in Perth, Australia)

The woodworking I would support in that regard is riding the dude out of town on a rail who first invented the idea of the "look".

Tom, I am comfortable with the cabinet doors in our kitchen. This change is driven by my wife (who else?). She wants a more "modern" look.

This is similar to what we have at present (in Tasmanian Oak) ..


And this is what the intended change is (but in Maple) ..


I will have a lot of doors to either repurpose or sell.

Regards from Perth

Derek

Re: The Devil lies in the details

#8

Thanks

Derek Cohen (in Perth, Australia)

My thanks to everyone for their encouragement, question and answers, and feedback. I wish there was a "like" button so that I could do this individually.

Regards from Perth

Derek

Re: The Devil lies in the details

#9

Shop Cabinets

Brian Holcombe

I'd hate to dump those oak doors for very similar maple doors, but if you need more shop cabinets.... :D

FWIW, I've been in Nakashima and Maloof's kitchens and both had been in their respective houses for a quite a long time (since 1960's~) and only the appliances looked dated.

My wife has been delaying me on building kitchen cabinets for some time as she knows that once I build them they are for life.

Re: The Devil lies in the details

#10

source tiny nails

Bill Tindall, E.Tn.

the "nails" that are used with a pin nailer are as tiny as they get, 23 ga I think. Either borrow a pin nailer or buy a pack of nails and separate them with small wire cutting pliers and drive by hand after drilling pilot holes with the right sized number drill.

You are about 15 years behind the times! :) Maple followed oak here in Kitchens but now its cherry and walnut. Light/dark/light/dark etc. goes the fashion.

If you haven't finished maple before there is an issue to be concerned with. It is not trivial to keep the "white" look of freshly finished maple. The commercial shops have access to finishes that keep the maple from turning brown and the finish from turning yellow. Any yellowing of the finish can make maple look ugly unless it is stained. Whatever you decide to use get a test piece prepared and do some accelerated aging in a sunny location, or get advice from a commercial shop.

You are used to working with difficult wood so I presume you won't find maple hateful. Depending on the details of where it grew it can be miserable to work (hard brittle texture, or not). Consider ash for a modern look.

Re: The Devil lies in the details

#11

Clint Searl

Re: The Devil lies in the details

Clint Searl

IMHO, the handles do not rise to the elegance called for by the piece.

Re: The Devil lies in the details

#12

Re: The Devil lies in the details

Derek Cohen (in Perth, Australia)

Hi Clint

You have no idea how I went around and around for months and months on the handles. The main criterion was that they blend in and not dominate. Originally I had planned not to have handles at all.

Regards from Perth

Derek

Re: The Devil lies in the details

#13

Re: The Devil lies in the details

Sgian Dubh

Derek, your circuitous deliberations on the pulls for your chest of drawers only reinforces the importance of that hoary old design development mantra that suggests you should always try to ... design from the handles back, ha ha.

And my contribution here in no way offers a negative opinion on you choice of pull because I'm neutral on their aesthetic contribution to the piece. Slainte.

Re: The Devil lies in the details

#14

Clint Searl

Re: The Devil lies in the details

Clint Searl

Derek, it's your work and your call, and I admire it greatly...at least you didn't try to come up with some handmade wooden objects. Nyuk nyuk

Re: The Devil lies in the details

#15

Re: The Devil lies in the details

Paul in NJ

Derek,

Very, very, nice. I have to admit I was hoping you would have gone with the idea I threw at you (Corset lingerie chest :D ) when you were designing your project.

regards from NJ,

Paul Dzioba