New WoodChat!
Home Articles Forums Gallery Marketplace Videos

WoodCentral Forums

Knowledge You Can Build On — Est. 1998

Precision you can feel — woodworking perfected with Lee Valley

Update on chest

Posts

Update on chest

#1

Update on chest

Derek Cohen (in Perth, Australia)

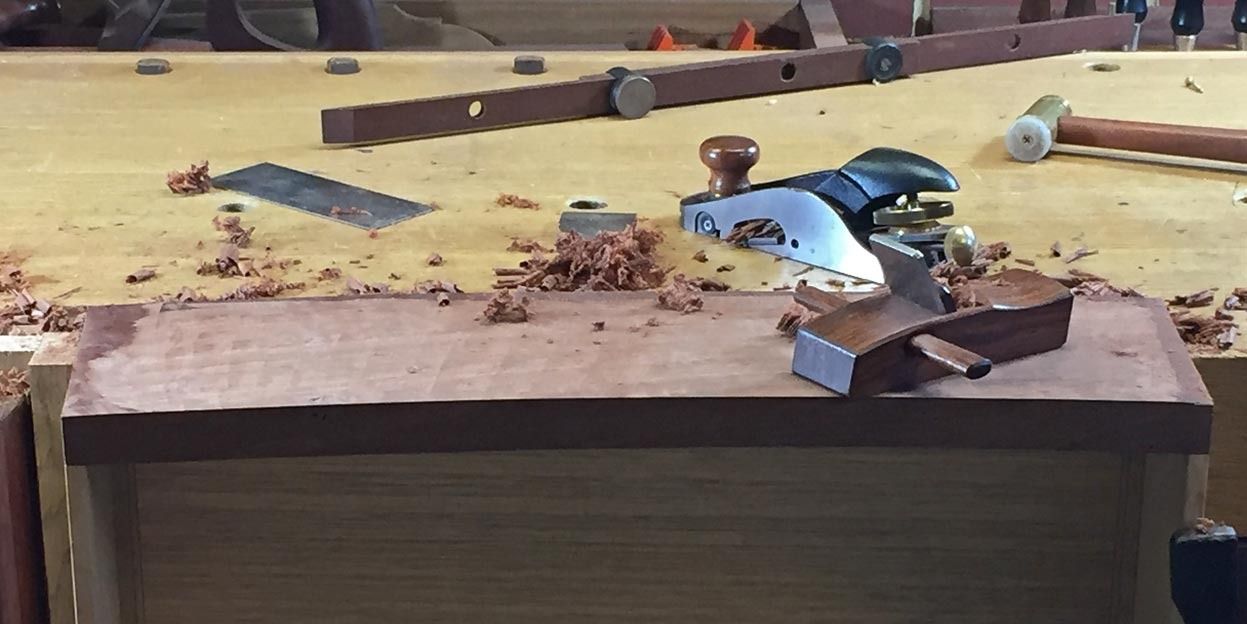
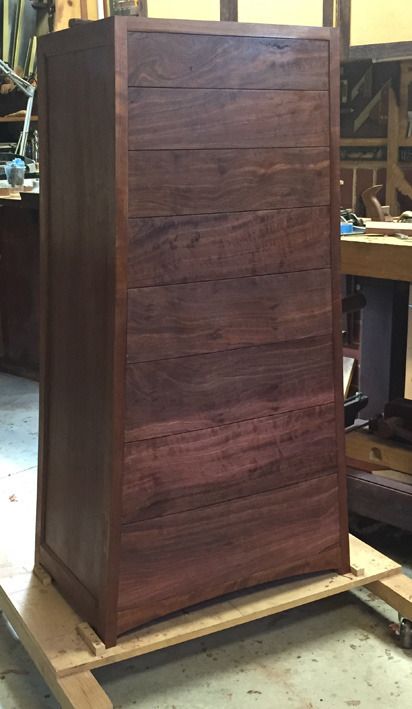
This weekend I returned to the Lingerie Chest to flush the drawers fronts and seal all with white, dewaxed shellac.

The drawers are now complete (coplanar) save for the drawer handles and waxing .. which will be done this coming weekend. And then it will be time to start the top section.

In the end I did not use sandpaper to level the drawer fronts, but simply marked off the high spots and planed/scraped them.

It is difficult to see the bow fronts in this photo.


Regards from Perth

Derek

Re: Update on chest

#2

Points of interest

Derek Cohen (in Perth, Australia)

The figure on these drawer fronts was both a source of pleasure and frustration. I love the wildness of it. On the other hand, it was important to achieve a flow from board-to-board, and I only had just enough to make these drawer fronts. If I screwed up one, I would have had to start all over again.

The Jarrah fronts were also difficult to work. Very hard wood, with grain that went all over the show - reversing ... even end grain showing through. Planing these boards really demonstrated the value of the double iron as it was less affected by grain direction. It was necessary to scrape at the end since I needed to level small areas, and fortunately the scrapers worked very well.

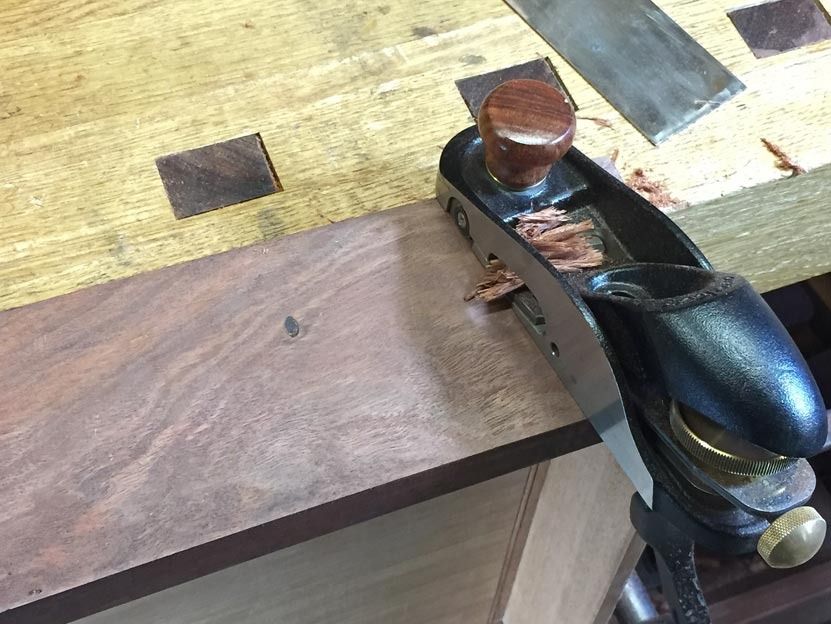
Traversing with a LV Skew Block plane to level the faces ..


Followed by a HNT Gordon palm smoother (60 degree bed) ...


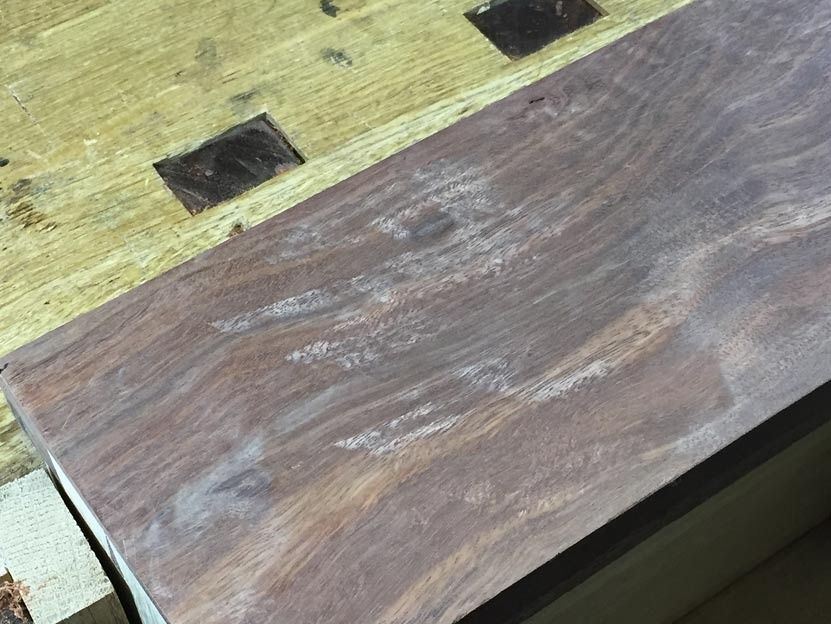
This is the type of tearout from this plane (which is a fantastic very small smoother) ..


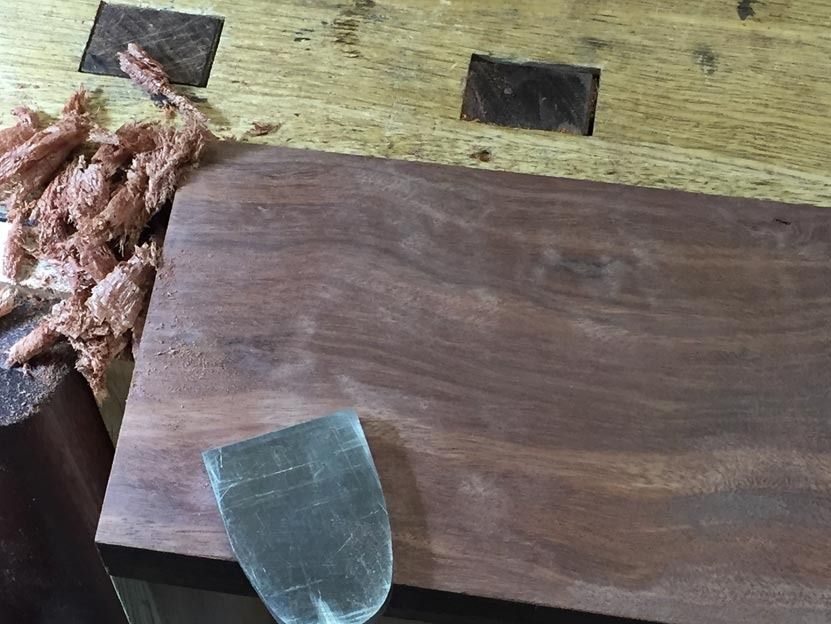
Removed by scraping ...


Then sanded (!) to remove marks (this is a Mirka Abranet hand sander, using dust extraction - I hate sanding, but this excels) ...


And finally scraped for a fine, burnished finish (you can distinguish the scraped from sanded sections) ..


Lastly, two coats of White Shellac (by Ubeaut) to finish. This is a concentrate of dewaxed shellac that is thinned with methylated spirits (alcohol).

Regards from Perth

Derek

Re: Update on chest

#3

question

Bill Tindall, E.Tn.

"And finally scraped for a fine, burnished finish (you can distinguish the scraped from sanded sections) .."

can you after the finish is applied?

It seemed the finish changed the appearance a lot, especially the color. Is that the case or is it the picture.

Re: Update on chest

#4

Another question and comment about sanding

Bill Tindall, E.Tn.

Why did you use a power sander and not hand sanding- a practical as well as philosophical question?

Let me counter one potential response from the start. I have never seen any evidence that there is any difference in appearance in a planed vs sanded surface after a finish is applied that has the typical build of a shellaced, lacquered or varnished surface. So I don't accept that there is any practical final appearance advantage of one over the other unless the finish is minimalist and not typical of high end Period Furniture.

Personally I get as much satisfaction refining a surface to be finished with a sanding block as with a block plane and more so than with a scraper. I don't get any personal satisfaction from scraping. But then I don't like sharpening or using scrapers.

A sanding block enables one to become as engaged with the developing surface every bit as much as with a plane, and maybe more so. While sanding up the grit progression I am scrutinizing every detail of the surface, looking for duller spots or defective grain that need to be refined. By the end I know the details of the surface of that piece of wood every bit as well as the planer, and for me that is what it is all about.

Re: Update on chest

#5

Re: question

Derek Cohen (in Perth, Australia)

Hi Bill

I have found this piece extremely difficult to photograph. The lighting in my workshop is not good enough to capture the colour of the wood and the details of the grain without a flash. The photo above completely misses the vibrancy, but I used it as it shows the figure and details better than my Canon using a flash. The photo was taken with an iPhone 6 on a tripod.

Is the finish better with scraping than sanding (to 400 grit), you ask? I do not know since I have not compared the two. What I can state is that the surface is better after scraping. One can see through the mist into the grain.

I'll add more in my reply to your other question.

Regards from Perth

Derek

Re: Update on chest

#6

Re: Another question and comment about sanding

Derek Cohen (in Perth, Australia)

Why did you use a power sander and not hand sanding- a practical as well as philosophical question?

Let me counter one potential response from the start. I have never seen any evidence that there is any difference in appearance in a planed vs sanded surface after a finish is applied that has the typical build of a shellaced, lacquered or varnished surface. So I don't accept that there is any practical final appearance advantage of one over the other unless the finish is minimalist and not typical of high end Period Furniture.

Personally I get as much satisfaction refining a surface to be finished with a sanding block as with a block plane and more so than with a scraper. I don't get any personal satisfaction from scraping. But then I don't like sharpening or using scrapers.

A sanding block enables one to become as engaged with the developing surface every bit as much as with a plane, and maybe more so. While sanding up the grit progression I am scrutinizing every detail of the surface, looking for duller spots or defective grain that need to be refined. By the end I know the details of the surface of that piece of wood every bit as well as the planer, and for me that is what it is all about.

Hi Bill

I did a lot of planing throughout with a double iron. This planed against the grain without tearout, leaving a good finish. It still required some scraping to produce an even surface ...
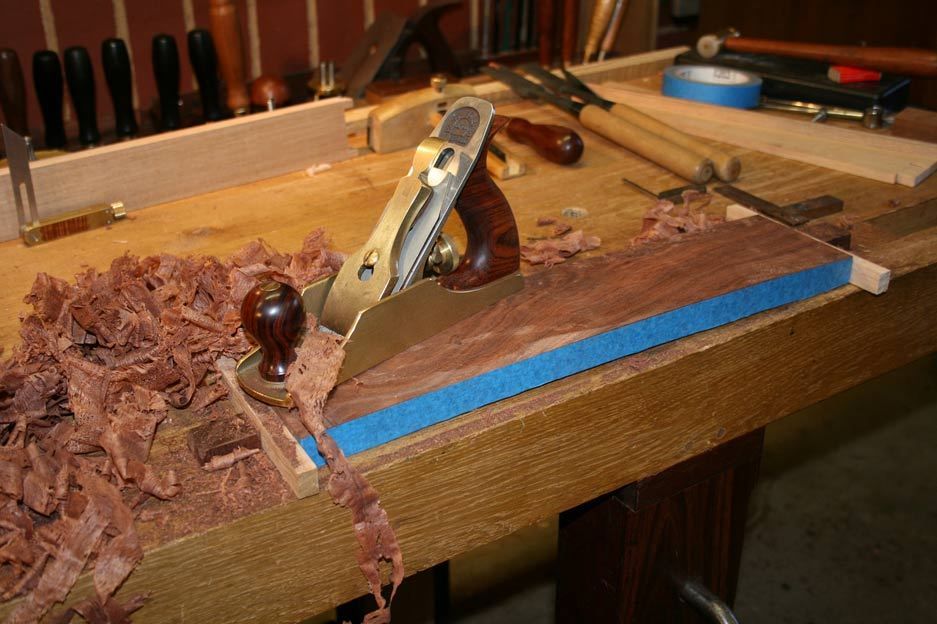

It is relevant to clarify that the aim of the last session was to level (make coplanar) the 8 drawer fronts. Although I worked to lines traced from a template I used for all the drawers, it is not possible to produce exact replicas with hand planing. There will always be some variation. This is most noticeable where the drawers join, where the levels did not match. In other words, the drawer fronts required fine tuning. Some needed a little removed in spots, and others (such as displayed) required flattening across the width.

The small Palm Smoother came out now to concentrate on smaller sections. For the most part it did a good job, but it was obvious when it hit reversing grain - as one expects not just from Jarrah, but also as the boards are bowed with the grain, effectively altering the grain direction. That was when the coarse scraper came out. This was smoothed off with a card scraper, then sanded, and then scraped again. (I chose not to explain this before since it sounded more complex that I imagined anyone would want to hear).

The sanding I did was with a hand block, NOT a power sander. It was used to refine the surface - just as you mention above.

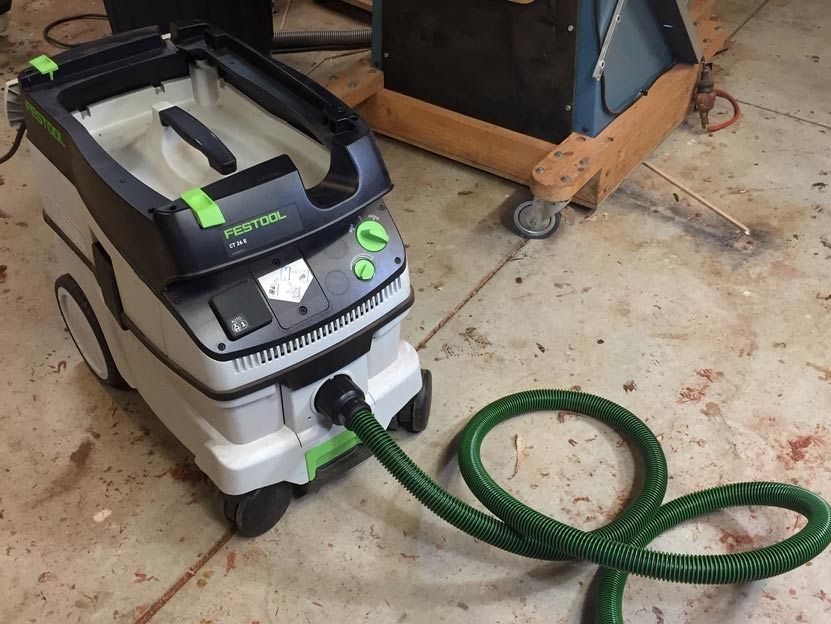
The sanding was quick: I ran through 120/220/400 grit. The Mirka grits are amazing. With the vacuum cleaner connected, it is extremely efficient. There is no waste dust to clog up the sander to slow things down, and the Mirka grit, itself, lasts and lasts.
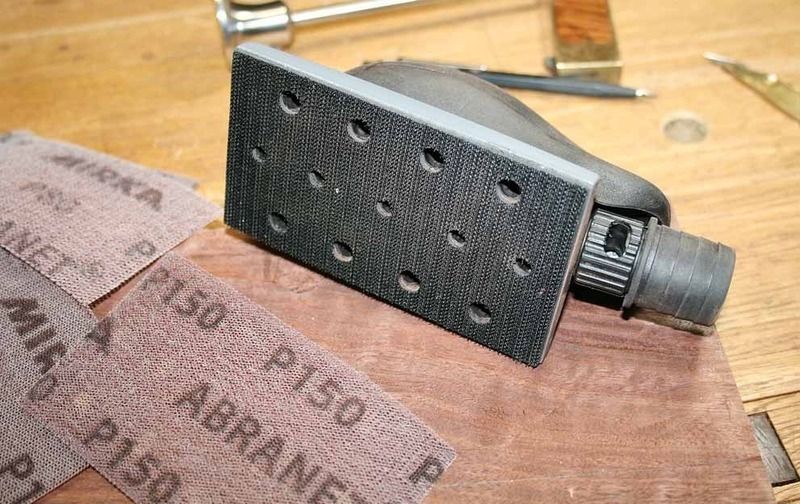
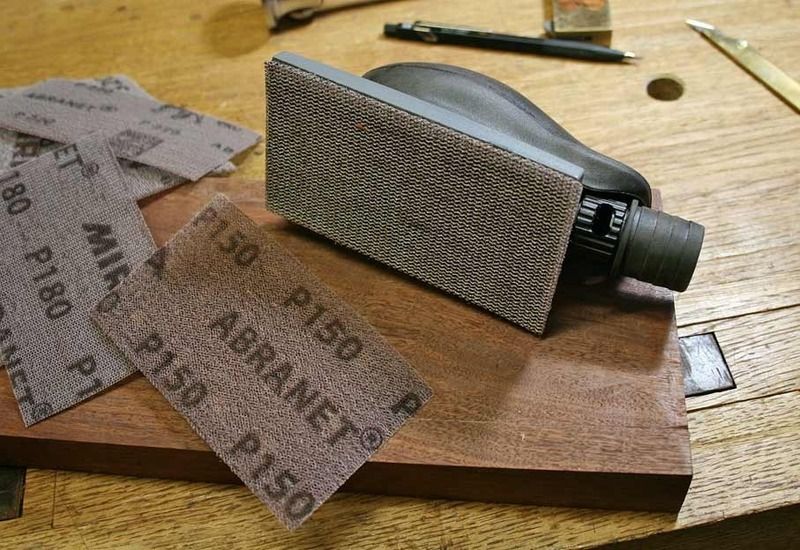
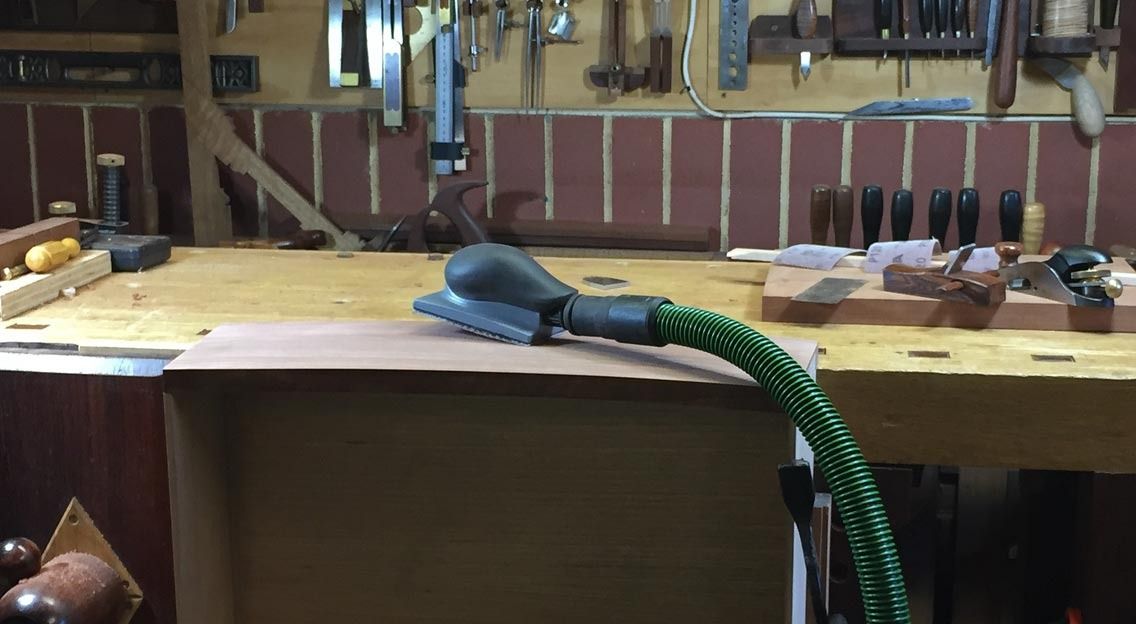

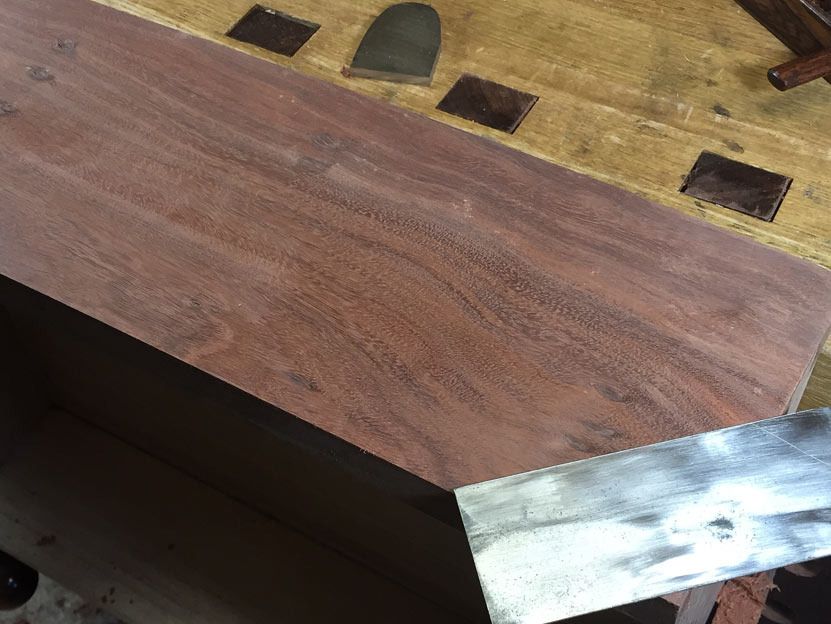
But even 400 grit is not as clear as the scraped finish I showed earlier (below again), and the reason why I scraped after refining the surface with sanding.

Regards from Perth

Derek
Re: Update on chest

#7

curious grit sequence

Bill Tindall, E.Tn.

A vacuum sanding block....who would have guessed? I live a sheltered life. I wasn't convinced to retire my old fashioned version. I don't think I could tolerate being tethered to a vacuum hose, or the expense. I keep blocks loaded with 100, 120, 180, 220 and 360 or 400( for finish leveling).

You encourage discussion so to that end......I would have gone from planing to a 120 block (or 100 if needed) and skipped all (most of) the scraping. I believe the end result would have been equivalent. I understood the relatively faster material removal by planing was essential. It is in the refinement where we differ.

Knowing nothing about the abrasive product you used, it is recommended for sheet abrasives to skip at most one grit size in a sequence. There is no need to go beyond 220 grit for a surface to be finished with a finish that will build as is the case with most finishing schedules employing lacquer, varnish, shellac.

I prefer to start with 120 grit as you did. 100 grit scratches can be difficult to remove in some cases, though in other cases it is less annoying for me to deal with 100 grit scratches than the card scraper. (I do use a card scraper enough to continue not liking it. When necessary it is faster than 100 grit paper). Then I jump to 180 (from 120) and quit for an open grain wood. I may go to 220 for close grain wood like cherry.

I should mention that I stain almost everything I make and that fact drives my surface refinement process. I prepare the surface more for the requirements for staining (which are more demanding) than the requirements for the top coat.

Re: Update on chest

#8

Re: I would..

david weaver

... do something close to what derek has done, but in my case, as much as I can do with the plane.

I don't stain much (I won't lie and say I haven't stained anything), but if I was staining, I would sand.

If spraying finish, sanding or not doesn't matter much as you blast layers on.

Something interesting to try, though, if you're padding finish, is to sand a board to 220 grit by hand. The pad finish until you're satisfied.

Then plane or scrape/burnish the same board so that it's fresh again but with a brighter surface. Count the number of coats of padding that it takes.

It usually takes several extra coats to get a uniform finish on a sanded board vs. one that has been planed, or scraped/burnished.

Re: Update on chest

#9

Re: curious grit sequence

Derek Cohen (in Perth, Australia)

Hi Bill

My preference when sanding is to roughly double the next grit in the sequence. Consequently, I went 120/220/400. The Abranet/Mirka mesh is superb. It lasts many, many times longer than anything I imagine you have used. You owe it to yourself to try out what I show here. I think that you will be so impressed that you will not go back. It is not expensive. The sander was around $25. The Abranet mesh stays sharp, and you can jump grits as I do.

I have little experience of staining (outside of ebonising). Why would I want to stain the woods I use? 400 grit may be overkill, but so is green compound when sharpening. Nevertheless, these add a level of smoothness that makes further work easier. The scraping that followed was very light - the shavings were so fine that they were nearly dust. The result is in the photo I posted. This is not a usual method - it was needed, I believe, to finish these curved surfaces.

Regards from Perth

Derek

Re: Update on chest

#10

just to be clear for those unfamiliar....

Bill Tindall, E.Tn.

....with sanding. You are jumping over two grit sizes in your procedure, at least by sheet sanding standards.

100,120,150,180, 220/240, 320/360, 400, 600, 1000, 1200, 1500, 2000.

The difference between 220/240 is so small I lump them as one and 360 could likewise be lumped with either 320 or better with 400.

The bigger the jumps one makes the longer it takes to sand. I spend about 80% of my sanding time on 120 and 20% on higher grits.

Re: Update on chest

#11

A new Jarah question

Bill Tindall, E.Tn.

What we see in your projects are fresh Jarah surfaces which appear to be red by lighting and camera. What happens to the color over time? Does the color fade, darken, lighten.....? I am thinking of something I made from Purpleheart. It is now chocolate brown, a very nice chocolate, but not remotely purple.

Re: Update on chest

#12

Re: A new Jarrah question

Derek Cohen (in Perth, Australia)

What we see in your projects are fresh Jarah surfaces which appear to be red by lighting and camera. What happens to the color over time? Does the color fade, darken, lighten.....? I am thinking of something I made from Purpleheart. It is now chocolate brown, a very nice chocolate, but not remotely purple.

The colour of Jarrah varies from pink through reds and browns to very dark chocolate.

Although taken with a flash (my old Canon 400D is not the best with low light), these colours are pretty accurate. Jarrah drawer and Makore carcase ...


All timber is affected by sunlight, but most - if not all - the West Australian woods I have used do not alter colour once finished when indoors, even if exposed to sun and sunlight through windows.

Regards from Perth

Derek

Re: Update on chest

#13

Re: just to be clear for those unfamiliar....

Derek Cohen (in Perth, Australia)

....with sanding. You are jumping over two grit sizes in your procedure, at least by sheet sanding standards.

100,120,150,180, 220/240, 320/360, 400, 600, 1000, 1200, 1500, 2000.

The difference between 220/240 is so small I lump them as one and 360 could likewise be lumped with either 320 or better with 400.

The bigger the jumps one makes the longer it takes to sand. I spend about 80% of my sanding time on 120 and 20% on higher grits.

Hi Bill

I agree, the important grit is the coarsest grit. Get the foundation sorted first, then move up. This is the same with grinding and sharpening blades.

My take on sanding - 20 years ago I would have sanded everything rather than planed it - is that there is a similarity to sharpening blades. That is, it is easy to leave scratches behind if the next up media used is inefficient. This may be due to inefficiency on the part of the media, or it may be due to the media being used for too little time. There is nothing wrong with a double - or treble - jump if the scratches can be removed.

The Abranet mesh is different from sandpaper. It is an open weave and it permits dust to move through. The Mirka hand sander is flat (important for edges) but importantly the vacuum sucks away the dust, leaving the grit/media clean to continue sanding. It is very efficient, and the mesh is also hard wearing. A little goes a long way.

I consider this set up to be a game changer (in the same way I view CBN wheels to be over white or pink wheels on a grinder). As I mentioned it earlier, the Mirka hand sander is cheap, and the Abranet mesh is also when its durability is taken into account (I have used the same three meshes for all the drawer fronts so far, and they are still going strong).

Regards from Perth

Derek

Re: Update on chest

#14

Re: I would..

Derek Cohen (in Perth, Australia)

... do something close to what derek has done, but in my case, as much as I can do with the plane.

Hi David

A comment here ..

I try to do as much with a plane as possible. If it was possible, all would be done with a plane. Sometimes a scraper is added. Rarely is a sander (I have a Festools ROS in a cabinet that has not been used in a decade. Indeed, mine is called a Festo, the name that predates Festool). The Mirka/Abranet combo is a new addition to the tool chest, purchased at the end of last year, and the plan was to use it for this very situation.

The situation is having to refine a curved drawer front. A flat drawer front is a different kettle of fish - a plane has no difficulty maintaining registration with the grain over an end. The problem with a curved face is refining the ends of the drawers without rolling the edge. I want crisp ends. Think of a handplane on a curved surface being like a round bottomed spokeshave on a flat surface. It is difficult to maintain registration. It is even harder to smooth drawer ends with a scraper.

A flat and long sander can cover the ends and does not lose registration. The ends of the drawer stay crisp.

Regards from Perth

Derek

Re: Update on chest

#15

Re: The best thing from this...

david weaver

...I didn't know that the sander you were using was a hand sander.

I have asthma, which is excited by some types of wood dust. I very very very rarely hand sand because of that.

I think I will pick up the mirka gadget and give it a try.

Re: Update on chest

#16

Re: Update on chest

Tony - Memphis

Looks great! And much thanks for taking the time to post all the info you have. I enjoy following along. I am inspired by your joinery and hand tool prowess. Enjoy your web site too.

No excuses, but my shop time is so limited that I tend to rush and skip through the fundamentals in an effort to hurry to the good part instead of just enjoying the journey! Getting better though. I want to try the blue tape dovetail thing soon. The last dovetails I cut were my worst ever. Not sure what went wrong. Fortunately, they were at least functional (quite tight - just ugly) and they were blind and hidden - purely structural (cabinet I made for the wifey for Christmas).

Been working on a barley twist. Made a prototype and proved to myself I can at least do it. Learned something too....I had been using typical rasps and files for the "trough" part but the diameters were smaller than what I wanted. Found a Microplane tool that is just right and that thing cuts!

Anyway, NO criticism here...just wow!

That wood is really nice.

Thanks,

Tony

Re: Update on chest

#17

Re: Points of interest

don stephan

My preference is to use my Lie Nielsen planes absolutely as often as possible, because it is so much faster than sanding through a number of grits. And the surface is very flat. And I prefer a card scraper when needed for the same reason.

Really hurts to admit, but a few months ago I hand planed both sides of a cherry board, then crosscut into two pieces. One I thoroughly hand sanded the planed surfaces with 400 grit, other piece I thoroughly hand sanded the planed surfaces with 150 or 180 grit, can't remember.

One side of both pieces received several coats of shop mixed Danish oil, the other side of both pieces several coats of blond dewaxed shellac.

The painful part, neither I nor several other woodworkers can tell which surfaces were sanded with 400 grit and which the 150 or 180 grit.

I'm continuing to hand plane surfaces anyway because of the efficiency. Then I'm hand sanding with 400 because I can. I think customers feel they are getting a better product when it has been sanded to 400 grit than to 150, too.

Re: Update on chest

#18

Re: Points of interest

Sgian Dubh

"The painful part, neither I nor several other woodworkers can tell which surfaces were sanded with 400 grit and which the 150 or 180 grit ... I think customers feel they are getting a better product when it has been sanded to 400 grit than to 150, too."

But Don, how do they know if the majority of people can't tell the difference between both levels of preparation after the surface is polished? If you have to tell the client you've sanded to 400 grit rather than stopping at 150, but it's undetectable, I find it hard to see how the product has been improved in a meaningful way. Don't you think you're just making unnecessary work for yourself? Slainte.

Re: Update on chest

#19

Re: Points of interest

John in NM

The last shop I worked for (20 years ago now) sanded everything to 600 grit - a complete waste of time and effort. In some cases, I saw that the sanding staff would over do it on the finer grits (poor training was a problem there) and end up making the surface worse for it - too much time with fine papers tends to preferentially erode the softer areas of the wood.

When sanding, I usually go to 220 and 4/0 steel wool and leave it at that.

Re: Update on chest

#20

Re: Points of interest

TomD

The only reason to oversand would be if the customers are actually asking I guess. Real chraftsmanship is knowing what needs to be done, not slavishly doing things that don't need doing. When using the kind of finish that reduces over time, a finely sanded finish may end up exposed the raw surface which may look less dull if it was really polished like heck. But if the finish builds you are never going to get down to that level so it won't mater.

There was this Flameco guitar maker who was a real master finisher, guy from California. He actuall scratched across the grain fairly heavily, and somehow it gave the surfaces chatouyance (SP?). Don't you just hate it when people can get away with stuff that would wreak one's own work.

I ahve told this story before, had this great time with a myrtlewood turner in Gold Beach. He wanted to be shown how to cut with a gouge because he had read that was how one was supposed to do it. I was a pretty good turner at the time, and did a demo for him, but there were a few tiny marks in it. I didn't have my own tools at the time, and maybe I could have sheared them out. But there was no way I could really compete with his scraping and sanding routine. He was turning at some incredible RPM, and power sanding. Of course the numberr of shapes he could form were not that great, but they worked fine for people who were buying the myrtlewood as much as any shapes. It was an interesting lesson in humility, as well as the craftiness in craft. Not humility in the sense of anyone getting put down, or in the sense that I thought I knew it all. I know what Iknow from having an open mind, but there is always more room to learn. And I thought it was cool that a guy who made his living was also willing to take some time to see what a guy like me out of the blue knew.