Cabinet build continuation
Brian Holcombe
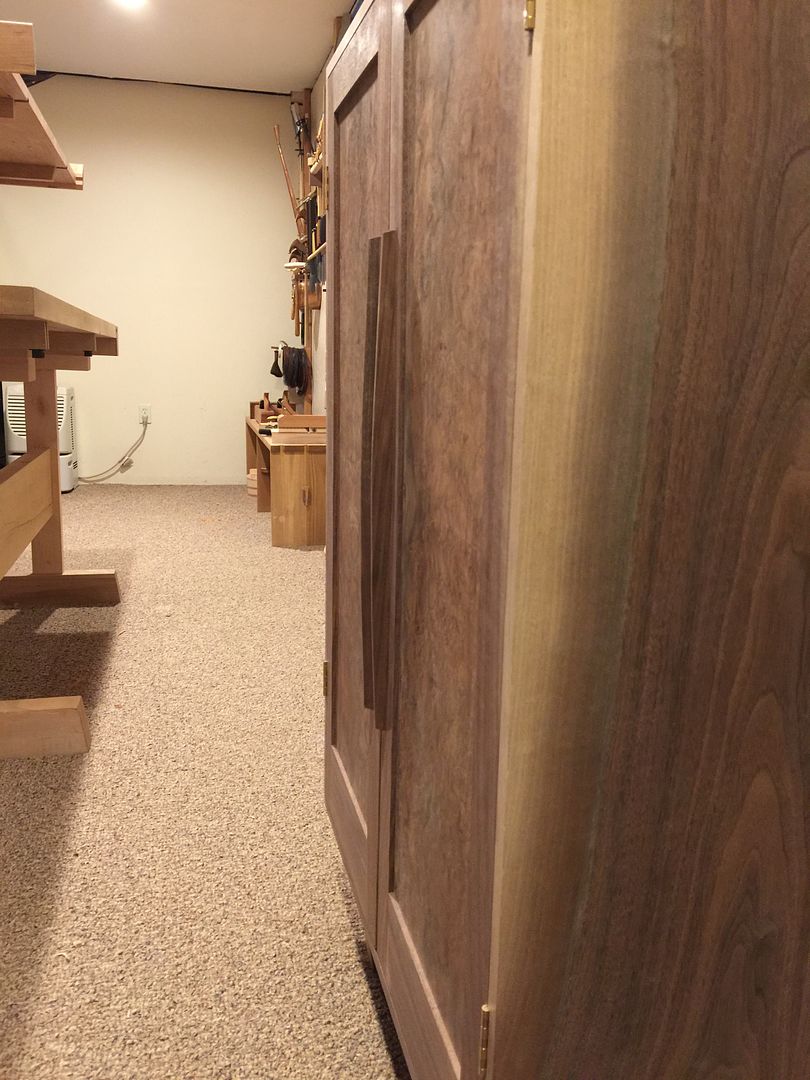
Ready for finish.
I cut 1/4" deep grooves to house the handles and finished up planing the drawers and case.

Knowledge You Can Build On — Est. 1998
Cabinet build continuation
Brian Holcombe
Ready for finish.
I cut 1/4" deep grooves to house the handles and finished up planing the drawers and case.
Re: Cabinet build continuation
Bill Tindall, E.Tn.
I like the handles. They look like they belong there and add a lot to the appearance. How did you make the groove they fit into? Was the groove necessary? I would have considered it a risky operation at this stage and just screwed the handles on. But then I am cautious, maybe to a fault.
What are you going to do about the sap wood? I would have been inclined to orient it on the back of the sides where it didn't wind up framing the doors with a light colored "frame". A artist brush, or air brush, and some sap stain will improve the situation.
Curiosity question. How did this project begin? Did you make scaled or full sized drawings, or mock-ups of the various ideas that led to this piece?
Re: Cabinet build continuation
Brian Holcombe
Thanks Bill, I debated the groove, but it was one of the only ways to ensure the handles would sit right without blocking it up when gluing it.
I cut the groove with a router, then cut the corners with a chisel. It was incredibly nerve-wracking, but I wanted to ensure that the depth would be consistent. I hate using routers, but didn't have another method in mind that would leave a perfect floor, all of the strength of the handle is in the lamination.
I don't mind the sap wood, so much of my furniture has sap wood, it darkens over a few years and the remainder of the wood will lighten.
I draw out the designs in scale, then details like joinery in scale. On this I left the handles to the last minute and came up with them in the fly. Originally I had planned full length Ebony handles, but later decided to scrap that idea. Seeing the piece 90% finished left me thinking that I wanted the handles to be tone on tone with the cabinet.
My father wanted to show my mother what the cabinet would feel like, so he drew a full scale image of it. I don't usually do anything like that, but it was cool seeing it full scale before starting.
Re: Cabinet build continuation
Bill Houghton, Sebastopol, CA
Am I seeing the base correctly as round legs set in front the edges some, currently sitting on a piece of black fabric? Or is that my cataract-y eyes fooling me again?
If it is round legs, they look inconsistent with the cabinet, now that I see it whole. A square pedestal base, maybe flaring at the bottom, would seem to fit better.
I'm with Bill T. on the handles - very nice.
Re: Cabinet build continuation
Brian Holcombe
They're not round legs, the base is two large 'legs', that taper toward the ground and a stretcher along the floor.
I'll post up some better pics of it later on.
Thank you!
Re: Cabinet build continuation
Brian Holcombe
Hi again Bill,
Here is a shot of the base;

And up close on the edge of the stretcher;

Ah. That's a righteous base for that
Thank you!
Excellent design and detailing, Brian!
Thank you!
Re: Cabinet build continuation
William Duffield
I'm liking it more and more all the time.
How are the handles mounted? Just inset into a groove, or something more complicated to keep the edge from showing? Do they rely on pinching the sides to pull them open, or are they slightly hollowed?
Re: Cabinet build continuation
Brian Holcombe
Thank you! They are just inset in a groove, they're tight to walls of the groove so it's practically invisible.


