New WoodChat!
Home Articles Forums Gallery Marketplace Videos

WoodCentral Forums

Knowledge You Can Build On — Est. 1998

Urban Salvaged Hardwood Slabs, Milled In-House from Rare Trees. Shop Unique Walnut Stock.

Lingerie Chest: a stage completed

Posts

Lingerie Chest: a stage completed

#1

Lingerie Chest: a stage completed

Derek Cohen (in Perth, Australia)

Well, it has been a lot of work to complete the drawer runners. Everything is now done preparatory to building the drawers. I've really been looking forward to this stage, since it will be another challenge.

The drawer runners, themselves, required a great deal of finicky work. Getting them in square and coplanar is straight forward in a straight construction, but curves and compound angles change all that.

We left off last time with the basic frames in ...


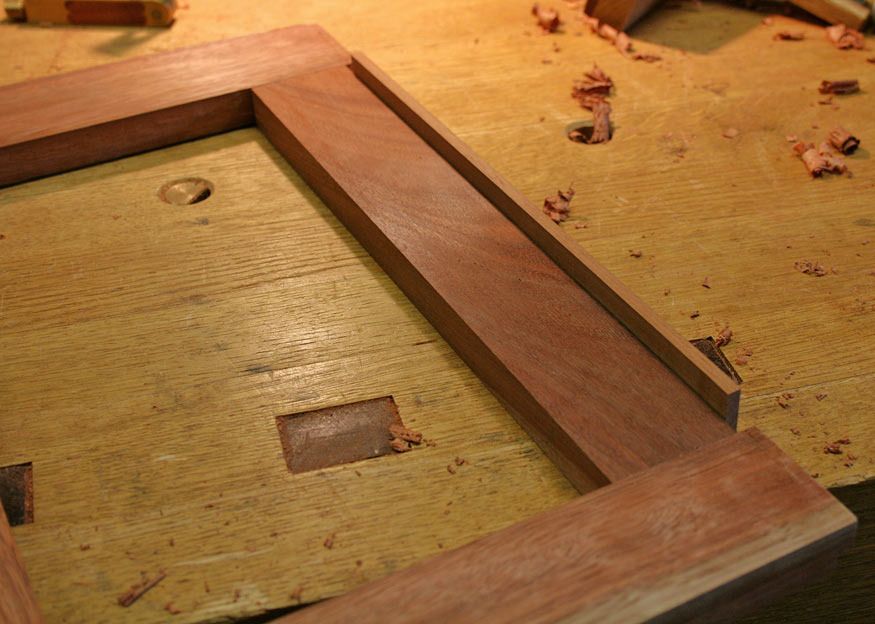
To the front of each drawer blade was added a bow.
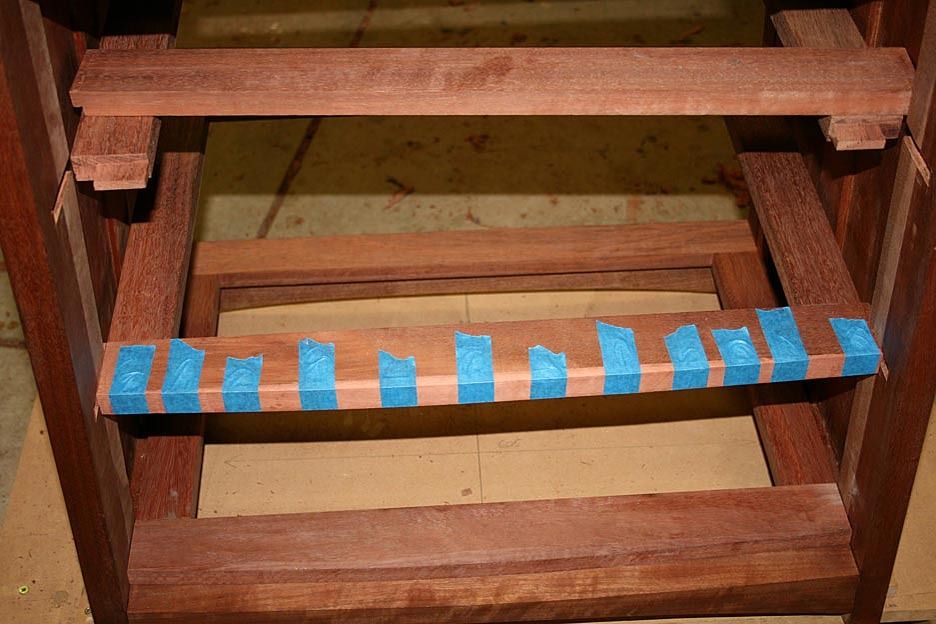

I was asked early on why I did not just shape this directly on the blade. The reason I chose to do it this way was just that I felt I had more control over the result. Every drawer is a different width, and needs to project in a coplanar line from top to bottom. I drew up a template to shape a consistent curve ...


That is the Jarrah for the drawer fronts at the rear.

The upper most drawer will have a secret lock (since this drawer will be a jewellery box). I decided to use the Shaker method. My variation consists of cutting a slot in a centre mullion ..
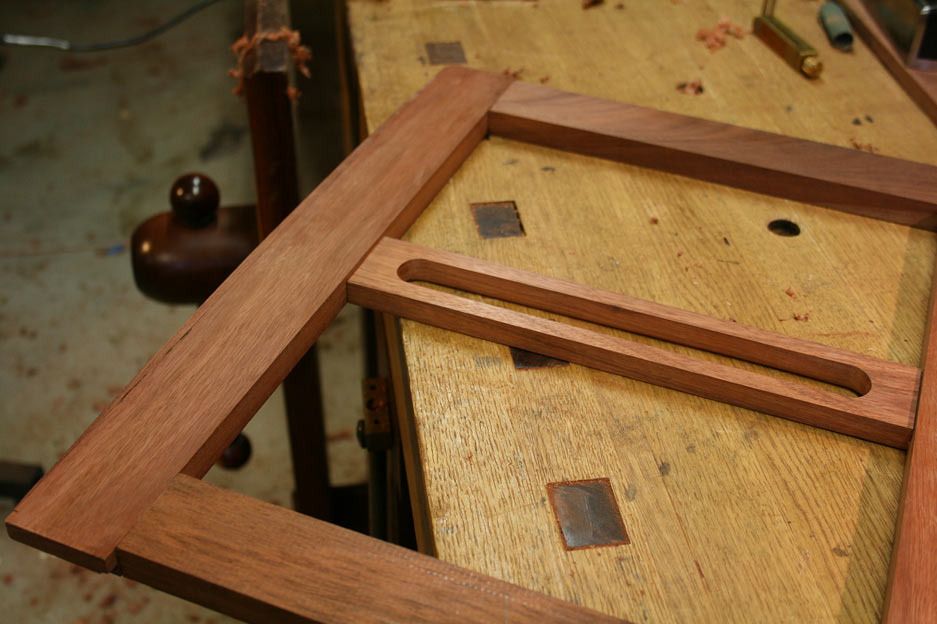

... which is lowered below the rails ...
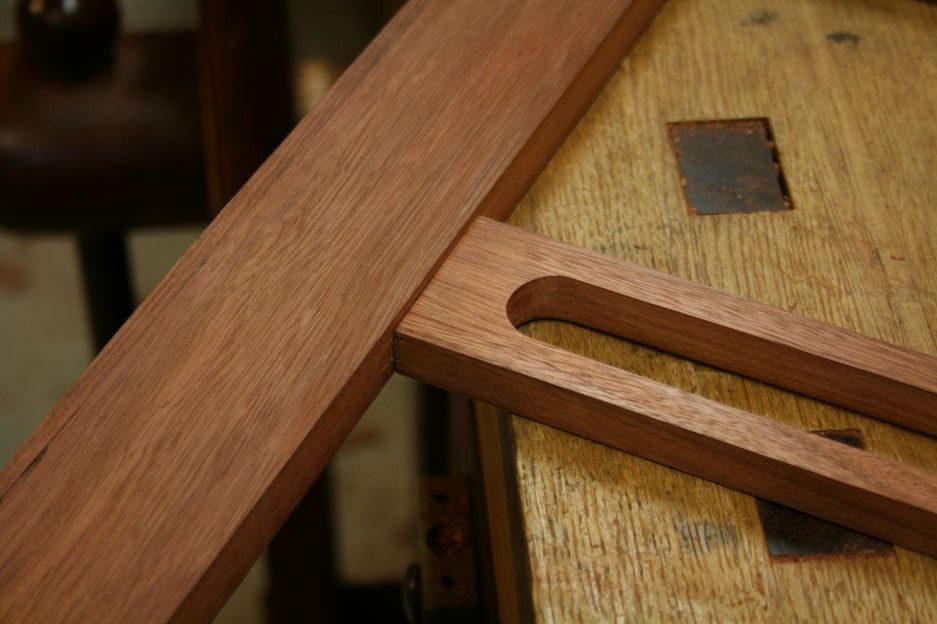

There will be a spring (probably in mild steel) beneath the drawer that will drop down and lock into the rear of the front drawer blade ...
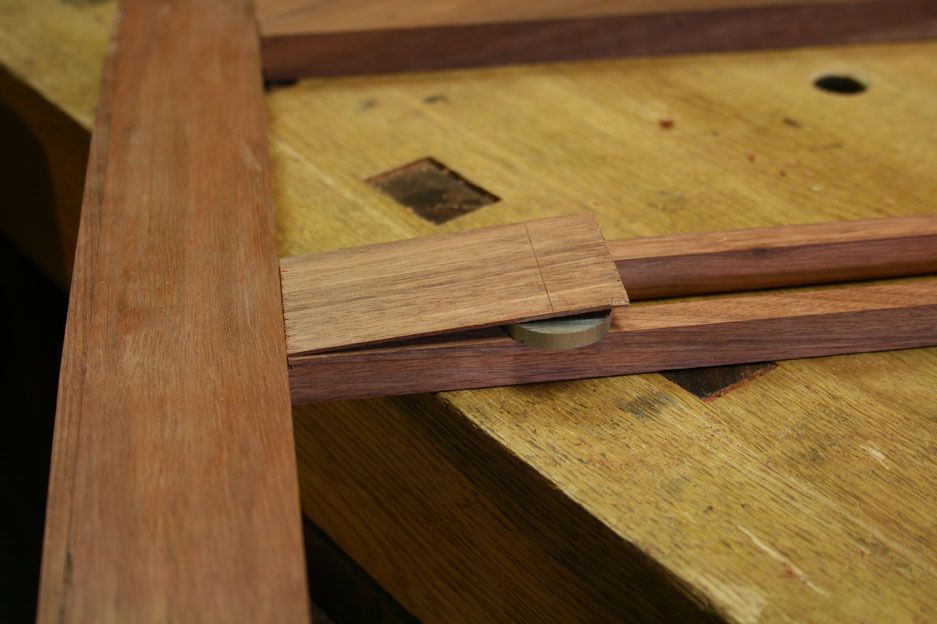

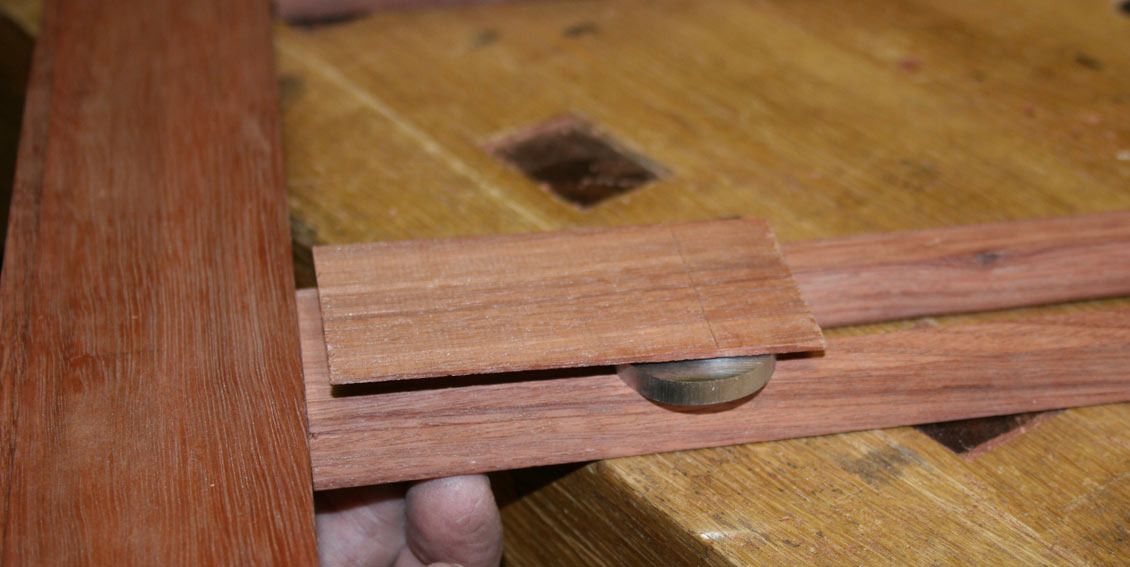
A finger (through the slot - which will hide the mechanism from below) will lift the spring to permit the drawer to slide forward ..

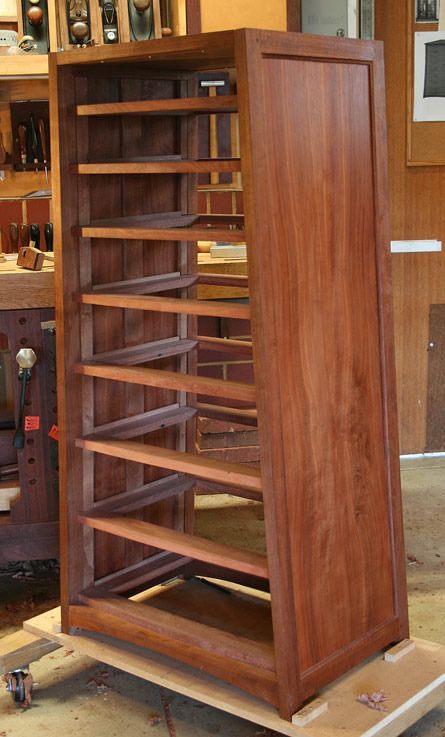
Since the casework is a framed panel, guides are needed for the drawers ...
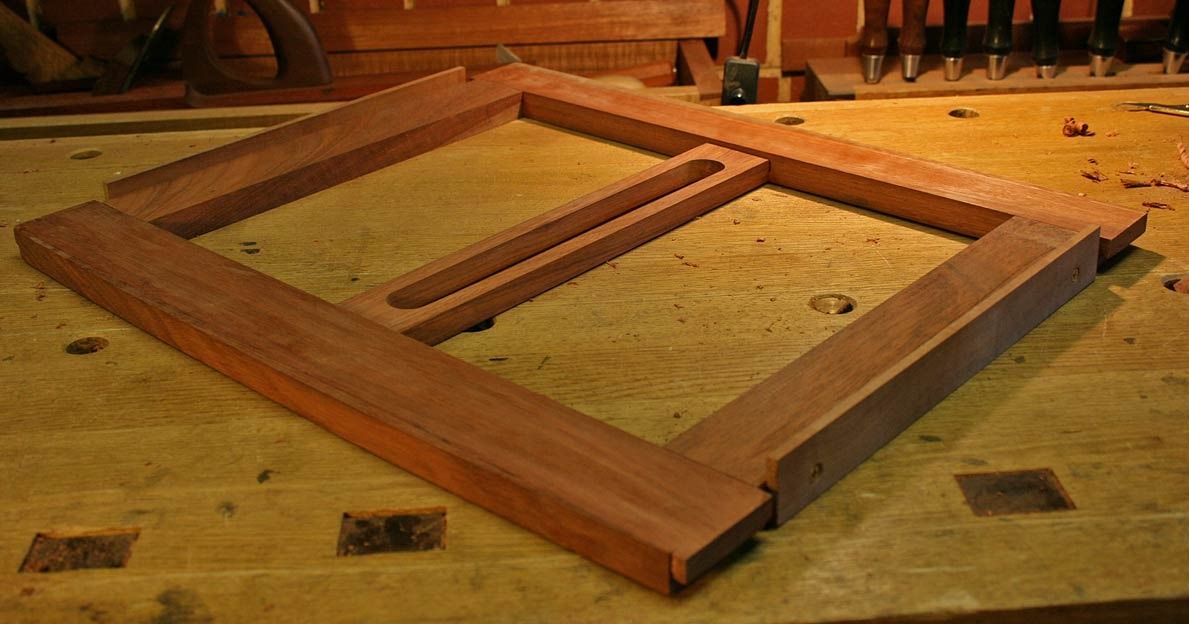


Here are they installed. Perhaps you can begin to see the how the slight bow will form ..
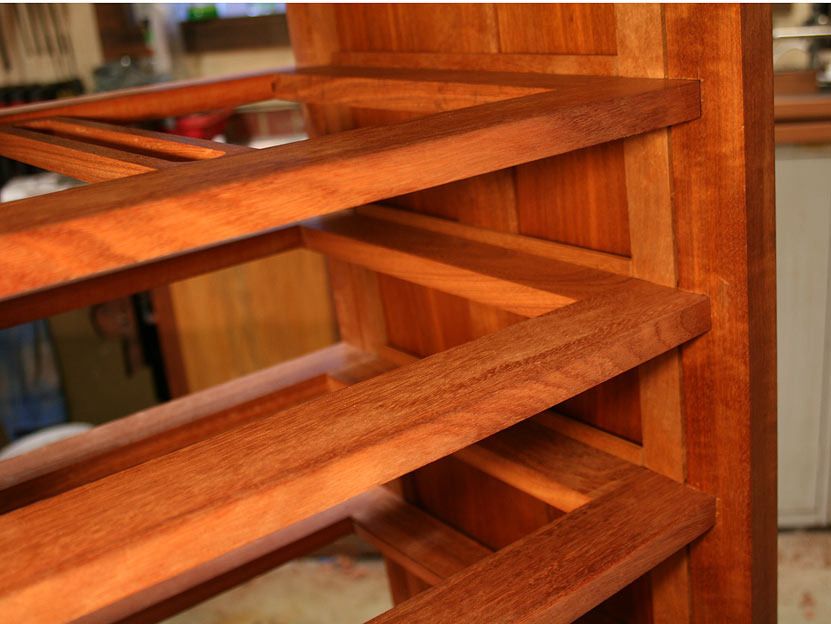


Now I need to figure out the drawers construction - coping it into the sides. Any thoughts?

Regards from Perth

Derek

Re: Lingerie Chest: a stage completed

#2

some questions and comments

Bill Tindall, E.Tn.

1. This is a long and complicated build. I have forgot where it is headed. The drawers will be bowed out and additionally curved to match the arc of the side I gather. Are they going to be additionally inset?


2. Related to 1 I don't understand the internal framing. What is the purpose of the lighter colored vertical piece in the picture? Gluing this all together is going to be fun! :) Suggest taking a stress pill first.

3. I'm not smitten by the clever locking mechanism. In my hands over time it would become more annoying than useful. I have abandoned clever locks and hidden compartments in stuff. The owners either never use the feature (hidden compartment) or it gets in the way of everyday use (locks)

4. How are you going to open the drawers? This design seems to call for a plain front. Hardware could detract.

5. Ditto for a lot of figure. There is a risk of getting the front too busy and the graceful shape would become lost. I would have made this shape in plain rift cut something and figured the side panels.

6. I never faced fitting a drawer into something like this piece . I think I would fit a chunk of drawer front into the opening and scribe the shape from the frame. Then I would do the dovetails and finally shape the front to the scribe lines. Keep in mind that the grain appearance is going to change dramatically as the front is sculpted. I would be using rift cut lumber here.

Re: Lingerie Chest: a stage completed

#3

additionally picky point

Bill Tindall, E.Tn.

I am facing a similar situation with a demilune table. You used flat sawed grain for the divider edges. As a result there are vertical stripes where the rings run out along the arc. In my case I used rift grain which leaves horizontal grain lines along the arc. I think the latter less distracting from the shape.

Sculpting curves on flat grain is an unpredictable adventure. You aren't gong to know what the drawers are going to look like till you shape them and the risk is that they may clash dramatically. A way to avoid this unpredictability is to veneer the fronts.

Re: Lingerie Chest: a stage completed

#4

the utility of cock beading

Bill Tindall, E.Tn.

When I made my first bow front piece I was fretting over fitting the drawers. An experienced cabinet maker pointed out that cock beading the drawers hid irregularities in the match of drawer to frame. He was right. Where as 1/32" mismatch would be outstanding without the cock beading it was not noticeable with it. (of course my drawers were fit much better than in this example :) )

Re: Lingerie Chest: a stage completed

#5

Re: some questions and comments

Derek Cohen (in Perth, Australia)

Thanks for the response Bill. It has been a while before anyone has discussed any part of this build.

1. This is a long and complicated build. I have forgot where it is headed. The drawers will be bowed out and additionally curved to match the arc of the side I gather. Are they going to be additionally inset?


The drawers will lie flush with and fit outside the rail, somewhat like this ...


2. Related to 1 I don't understand the internal framing. What is the purpose of the lighter colored vertical piece in the picture? Gluing this all together is going to be fun! :) Suggest taking a stress pill first.

The "internal framing" is at the front and rear. These sections are glued to the panels. Attention has been given to movement, and there is an expansion slot at the rear "frame". Note that the "frames" have not yet been given a finish. They are the same colour at the rest of the carcase.

The purpose of these "frames" is (1) to extend the length/support for the sliding dovetails, which join the drawer rails to the case sides, and (2) enabled accurate placement of the drawer rails and blades in a case with curved sides. See here: http://www.inthewoodshop.com/Furniture/TheProofOfThePudding.html

3. I'm not smitten by the clever locking mechanism. In my hands over time it would become more annoying than useful. I have abandoned clever locks and hidden compartments in stuff. The owners either never use the feature (hidden compartment) or it gets in the way of everyday use (locks)

This is still under consideration. I wanted a choice, but to do so I needed to build it in from the outset. The top drawer needs to be locked. I do not want to add a lock, per se. I do have another option for a secret lock. It would be built into the top (where there will be a mirror inside a moulding) and easier to access.


4. How are you going to open the drawers? This design seems to call for a plain front. Hardware could detract
.

Indeed. My initial plan was to use mechanisms that popped the drawers out with a push. However that is not going to stand the test of time. So it looks like I will build simple handles, something slimline, that will not detract from the lines.

5. Ditto for a lot of figure. There is a risk of getting the front too busy and the graceful shape would become lost. I would have made this shape in plain rift cut something and figured the side panels.

The figure on the drawers will run horizontally, and therefore should reinforce the bow.

6. I never faced fitting a drawer into something like this piece . I think I would fit a chunk of drawer front into the opening and scribe the shape from the frame. Then I would do the dovetails and finally shape the front to the scribe lines. Keep in mind that the grain appearance is going to change dramatically as the front is sculpted. I would be using rift cut lumber here.

Some of the drawers can just be built slightly oversize, with close-to-regular-thickness sides, and then coped to fit. I think that this will better suit the upper drawers where the slope is least. The lower drawers, with the most slope, will likely need to be built oversize, but with sloped sides to minimise the thickness of the side boards. The drawer fronts will be 22mm thick, and I am aiming for 6 - 8mm (completed) at the top of the drawer sides.

Regards from Perth

Derek

Re: Lingerie Chest: a stage completed

#6

Re: additionally picky point

Derek Cohen (in Perth, Australia)

I am facing a similar situation with a demilune table. You used flat sawed grain for the divider edges. As a result there are vertical stripes where the rings run out along the arc. In my case I used rift grain which leaves horizontal grain lines along the arc. I think the latter less distracting from the shape.

Sculpting curves on flat grain is an unpredictable adventure. You aren't gong to know what the drawers are going to look like till you shape them and the risk is that they may clash dramatically. A way to avoid this unpredictability is to veneer the fronts.

Bill, the drawer blades will be hidden behind the drawer fronts.

The added bows will receive a tint to blend the colour. I doubt that anyone will notice that grain direction.

Regards from Perth

Derek

Re: Lingerie Chest: a stage completed

#7

Re: the utility of cock beading

Derek Cohen (in Perth, Australia)

When I made my first bow front piece I was fretting over fitting the drawers. An experienced cabinet maker pointed out that cock beading the drawers hid irregularities in the match of drawer to frame. He was right. Where as 1/32" mismatch would be outstanding without the cock beading it was not noticeable with it. (of course my drawers were fit much better than in this example :) )

One of my aims is to achieve coplanar drawer fronts. That is part of the design.

It has been exacting getting the drawers and bows to match. While not critical, it should make it easier to get the drawers coplanar. I expect to be planing them crossgrain at the end.


Regards from Perth

Derek

Re: Lingerie Chest: a stage completed

#8

the reality

Bill Tindall, E.Tn.

While you may fit the drawers with aerospace precision the person closing them may not close them to this ideal state. The reality in my house would be that each drawer would be more or less closed and the perfect surface I imagined for the front would have only existed in my shop. I know you are not keen on cock beading but for the bystanders it is something worth considering for bow fronts. It has a practical purpose beyond a fashion statement or something to protect the edge of a veneered drawer.