New WoodChat!
Home Articles Forums Gallery Marketplace Videos

WoodCentral Forums

Knowledge You Can Build On — Est. 1998

Have a question? Ask Woody!

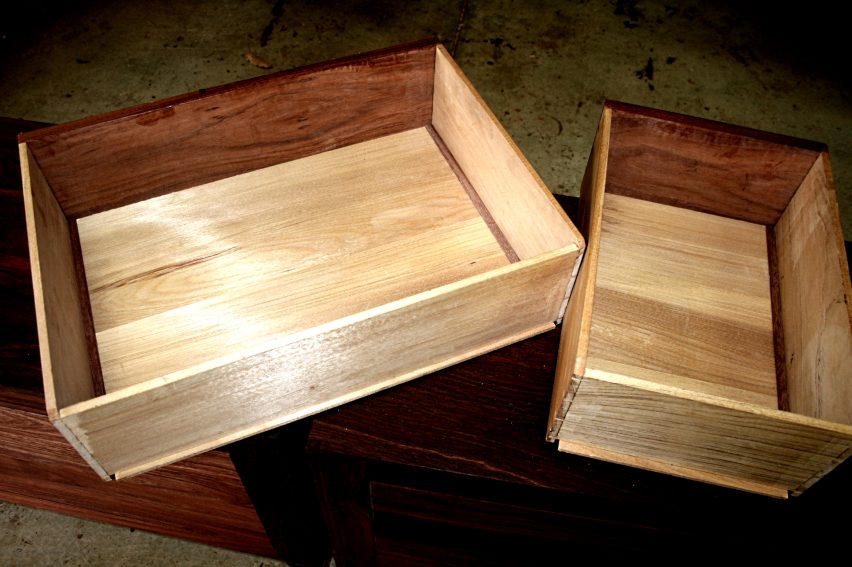
Drawer back detail

Posts

Drawer back detail

#1

Drawer back detail

Wiley Horne--So. Calif.

Illuminati,

I'd like your opinions if you will on a small detail about drawer construction. Namely the way the back is fixed to the sides. Looking at the top, where the side and back are dovetailed together, do you prefer a half-tail (from the side) or a half pin (from the back) at the top of the join?

Thanks,

Wiley

Re: Drawer back detail

#2

Re: Drawer back detail

Tom

half tail in the sides, full pin in the back. I looked at some of my drawers and I had done the reverse. Sometimes the back is dropped a little, so that works better with a pin in the back.

Re: Drawer back detail

#3

Re: Drawer back detail

Paul in NJ

Wiley,

Half tail on the sides. I don't know if you can live with the cross grain construction shown by Jack Plane in the linked blog. I just finished 6 drawers for a couple of night tables and his method made the fitting a breeze. I particularly like the wide bearing surface on the bottom.

http://pegsandtails.wordpress.com/2012/07/22/constructing-a-mid-eighteenth-century-drawer/

Regards,

Paul Dzioba

Re: Drawer back detail

#4

Re: Drawer back detail

Wiley Horne--So. Calif.

Thanks Tom, that's interesting. One gets so used to seeing those 'bookend' pins at top and bottom, that it seems really natural to do it.

I do think I'll use a half-tail on top, as you suggest, so there's no seam to snag.

Wiley

Re: Drawer back detail

#5

Re: Drawer back detail

Wiley Horne--So. Calif.

Paul,

That's such a fascinating essay by Jack Plane. There's a world of things to think about in there. For example, using the runners (I thought they were called 'slips') to achieve even relief of the drawer front in the case, top and bottom. And using tapered cockbeads to make for a tight-but-not-tight fit.

On the cross-grain thing--I assume you mean where he glues the bottom into the side rebates. Do you suppose that's why one sometimes sees olde-tyme drawer bottoms oriented front-to-back (like the one in his photo sequence)? I'm missing something, because I don't see the necessity to glue the bottom itself into the rebate. Other than the thinness of the 'runners' or slips. If the runners were, say, 3/8" thick (by maybe 3/8" wide), would the drawer side-to-runner glue join be sufficient to just let the bottom float? Or would that would result in the lowest pin in the drawer front being too high? I know it would narrow the bearing on the bottom, but would still be pretty husky.

One potential advantage I can see to half tails at the bottom is that you can arrange for the lowest practical placement of the bottom. For example, the drawers I'm making now (3 of them for a desk--3-1/4" gross height) have beefy pins top and bottom on the drawer front. I always want to make the pins beefy when there is cockbeading. Since the bottom needs to slide into the front between pins, I end up with the bottom, which has a 3/16" tongue in front, placed 11/16" up into the drawer. Not a big thing in this case, because the drawers are overly deep anyway for their purpose, but there are times when one really wants to max out the usable drawer height.

You mentioned appreciating the wide bearing on bottom. I agree. I'm using slips for the first time, because my drawer sides are approx. 1/4" thick. These are the flush slips, which leave the drawer bottom flat all across. They provide a wide bearing as well.

Thanks for the advice and the reference! I will use a half tail in the upper back/side join.

Wiley

[Edit at 3pm: runner width 3/8" in paragraph 2.]

Re: Drawer back detail

#6

Moses Yoder

Re: Drawer back detail

Moses Yoder

I am not really the guy to ask but I always put a half pin at the top of the back. I do this because the force on the back of the drawer is towards the back. Logically it makes sense to me, although technically it would not make a hill of beans difference one way or the other. You might as well do what looks right to you.

Re: Drawer back detail

#7

Re: Drawer back detail

Derek Cohen (in Perth, Australia)

Hi Wiley

Images of 1 of 18 cabinet drawers ...


The drawers are set in slips as the drawer sides are a touch over 1/4" thick ...


Regards from Perth

Derek

Re: Drawer back detail

#8

Ellis Walentine

Design concerns

Ellis Walentine

I'm going to voice some skepticism here. Jack Plane's blog is full of good tricks and techniques, but I'm having a hard time buying the idea of nailing and gluing the bottom into the sides. My primary concern would be that something would have to give, most likely the bottom would want to crack somewhere. This might be mitigated by using very dry wood for the bottom, so the majority of the movement would be expansion, but he doesn't mention moisture content except in terms of the drawer front being suitably acclimatised. He also nails the bottom to the back, so any expansion would push against the back as well. Partially floating the drawer bottom wouldn't work with his slip arrangement, with those 5/16" x 3/4" pieces glued on edge to 1/8" thick pine sides (after the 3/16" rabbet). The whole thing would depend on all the glue and nails to hold together. It would make for a very sound drawer, but I'm wondering what kinds of problems typically arose with this type of construction. I can only imagine.

On another note, I personally am not a fan of 1/4" thick drawer bottoms, especially for larger drawers like the ones in his George II chest. It's not so much that they wouldn't be sturdy enough, glued and nailed as they are, but thin bottoms always seemed tinny to me, if that makes sense -- rattly, underdesigned somehow, subject to more sagging and deforming over time. I like to set the torture-test bar a little higher, not that people are going to be storing their barbells in their dressers.

Which leads to my last observation, which is that I believe that drawer parts, like all furniture parts, need to be consciously scaled to the purpose at hand, taking into account the mechanical properties of the woods being used, the forces that will be brought to bear on them, and their shrinkage characteristics and grain orientation. Quartersawn sides and bottoms shrink less, oak sides and runners would glue up stiffer than pine, wide drawers need thicker parts, etc. At least, those are the kinds of things that I chew on when sizing drawer parts.

Ellis

Re: Drawer back detail

#9

Re: Design concerns

Paul in NJ

"I'm going to voice some skepticism here. Jack Plane's blog is full of good tricks and techniques, but I'm having a hard time buying the idea of nailing and gluing the bottom into the sides".

It will be interesting to see how my night table drawers hold up with this historical construction. I will report back in a couple of years! I am not too worried, I think the worst that will happen is that the drawer bottom might split. The bottoms are only roughly 10" deep and are of quarter sawn white pine. I glued everything with hide glue so it won't be too bad to repair if they completely fail. It wouldn't be too much of an effort to convert them to slips and a floating drawer bottom.

Regards,

Paul Dzioba

Re: Drawer back detail

#10

Re: Design concerns

Sgian Dubh

"I'm having a hard time buying the idea of nailing and gluing the bottom into the sides."

It's typical traditional British construction from the eighteenth and nineteenth centuries, including the switch in grain orientation in the drawer bottoms. Also the materials Jack Plane described, and their dimensions are typical.

Given that these methods were quite normal you won't be surprised to learn that over the decades I've been in this game I've lost count of the number of split drawer bottoms I've repaired, and the number of runners in cabinets I've had to give some serious attention to because the pins used to fix the slips and bottoms in place have scored the hell out of them, and the slips themselves are well worn and in need of replacement. All these repairs are to be expected of course, given that a couple or more centuries have passed since the items were built.

Whilst the methods described by Jack Plane are period correct in every way that I can see, I don't think they represent some sort of ideal or pinnacle of drawer making technique. They were what was considered normal at the time, and even high quality, but those old makers were generally working with wetter wood to start with, had very different working conditions and tools, and their furniture was going into habitable building with a different set of seasonal RH and temperature fluctuations than are found in most houses, even old houses, nowadays. Slainte.

Re: Drawer back detail

#11

Re: Drawer back detail

William Duffield

I prefer not to do half tails anywhere, because they are more likely to split during fitting and assembly.

Re: Drawer back detail

#12

Re: Design concerns

Paul in NJ

Would I be correct in assuming that the environment would be harsher to the furniture before central heat, air conditioning, and humidity controls? I would imagine large seasonal humidity swings: humid in the summer and very dry in the winter due to wood/coal heat further drying the drier winter air?

Regards,

Paul Dzioba

Re: Drawer back detail

#13

Ellis Walentine

Re: Design concerns

Ellis Walentine

Maybe in light of Richard's testimony, it wouldn't hurt to set the nails to keep them from scoring the runners when/if the wood wears (which probably won't happen in our lifetime). At 10" in depth, I wouldn't be that concerned about the wood movement, though a more flexible glue might be an advantage in this situation.

Ellis

Re: Drawer back detail

#14

Re: Jack Plane take away

Bruce McCrory

My take-away from Jack's 'period correct' construction was a general "glue and nail drawer bottoms" without being specific. I am constantly deconstructing drawers with glued bottoms (although breathable); even nails to reduce Ellis's "tinny" sound.

The killers for drawers are mismatched slips/bottoms/slides/and runners/dividers/kickers. Any conifer or softer hardwood in these uses will wear down quickly. A nail anywhere in a wear situation is a dull chisel. Jack was too period perfect with those.

Naturally, building a pine bedroom kit over 30-years ago has yielded not a single split or crack, even though every loose joint/contact was snugged up with Elmer's [probably, white]. I removed the plastic drawer glides years ago because they were nailed in.

It's hard not to pooh-pooh all this worry about wood swelling and splitting.

Re: Drawer back detail

#15

Re: Design concerns

Sgian Dubh

"Would I be correct in assuming that the environment would be harsher to the furniture before central heat, air conditioning, and humidity controls?"

That's hard to say Paul. Looking at UK conditions we have a temperate maritime climate, which basically means cool and damp. In an oversimplification it's cooler and damper on the western side of the country than it is on the eastern side. I suspect that furniture built in the eighteenth and nineteenth century and placed in habitable buildings (houses, for instance) back then had an easier time of it than they do now with all out climate controls, including insulation, heating and even air conditioning in some cases. Even old houses have generally been worked on to improve insulation and heating since they were built perhaps back in the 1600s or 1700s, or even earlier.

So, for us, internal conditions in old poorly insulated houses with inefficient heating would have been wetter in the winter than they are now, but probably about the same as is found currently in our houses, although A/C, which has become more common, may be having an effect on that.

And don't forget there was a mini ice age that only ended about 200 years ago, so overall I suspect seasonal swings in RH and temperature in this country were probably less dramatic than they are now, so perhaps conditions were a little less harsh then than now.

North America has many more climate zones than we do, from dry arid areas such as Arizona, to fairly maritime climates on the east and west coast, for example. Of course if you go back 200 hundred years on that continent I rather suspect quite a bit of it was uninhabited by westerners really, except the Atlantic coast, a few bits in the middle, and people venturing west to the Pacific coast to join those that had already made it there. But, I suppose anything that was built following or inspired by "European" styles or fashions had to endure whatever conditions prevailed in the area where they were situated. Slainte.

Re: Drawer back detail

#16

Re: Design concerns

Tom

"On another note, I personally am not a fan of 1/4" thick drawer bottoms, especially for larger drawers like the ones in his George II chest. It's not so much that they wouldn't be sturdy enough, glued and nailed as they are, but thin bottoms always seemed tinny to me, if that makes sense -- rattly, underdesigned somehow, subject to more sagging and deforming over time. I like to set the torture-test bar a little higher, not that people are going to be storing their barbells in their dressers."

I agree with you, not least of all because the ply is actually 5.X mm, so you have something like 2/3rd the strength and a little over half the stiffness of 1/4". However, the ply, even as to type, is the same stuff we use in ocean going yachts up to 30', for the hull. If you feel any better about that.

The thing is also, that one needs to orient the ply for maximum strength and stiffness, which is usually a mater of the top sheet direction across the narrowest span. This is not always the traditional direction. But engineering wise ply is a panel not an element, as a solid bottom. Plywood can be fully enclosed on all four sides, and that would be a good idea. Also, look for black glue.

Of course the better way was always to make a frame and panel bottom. The frame can be configured to do a number of additional things.

Re: Drawer back detail

#17

Re: Drawer back detail

Sgian Dubh

To answer your original question Wiley, the images below show a typical construction with half pins at the top and bottom edge of the drawer back. At the bottom edge it would make no sense to angle the bottom of the pin because it needs to be in line with the top edge of the drawer bottom groove which is found either in the drawer side itself, or in the slip- see final image. Slainte.

 photo RearDovetailHand-700px-web.jpg

 photo 01DrawerTypical2-700px-web.jpg

 photo drawer-07-700px-web.jpg

Re: Drawer back detail

#18

Ellis Walentine

Re: Drawer back detail

Ellis Walentine

Sweet reply, Richard, thanks. Beautiful drawings. I'm not sure I understand the rationale for the half pin at the top of the drawer back. Why this instead of a full pin? I could see it if you are continuing a flat top edge of the back as the top of the pin, but not if you're rounding over the top of the back as shown in your drawing. What am I missing?

Ellis

Re: Drawer back detail

#19

Re: Drawer back detail

Sgian Dubh

In my case it's primarily personal preference Ellis. I was taught it that way and I've stuck with it, even though I recognise there's no real technical reason for it. The joint would surely be a little stronger if the top half pin had a raked upper surface, and I've seen that done but it somehow doesn't seem to visually be in balance with the necessarily straight line of the bottom half pin. So I prefer to sort of put a top and bottom frame to the joinery if you will, and my half pins are straight across at the outer limits. I also think that because they are half pins, they just don't look right when compared with the wider pins across the rest of the corner if that top face is angled. Slainte.

Re: Drawer back detail

#20

Re: Drawer back detail

William Duffield

Maybe it has something to do with my explanation above? Maybe whoever taught you knew that, at least for less experienced apprentices, half tails are much easier to split the drawer sides if one's layout, sawing and paring are not quite as precise as they should be, and as they will be with experience and practice?

Frank Klaus's admonition to "use a bigger hammer" doesn't work for half tails. DAMHIKT! but at least they are easy to fix, invisibly.

Re: Drawer back detail

#21

Re: Drawer back detail

Wiley Horne--So. Calif.

Richard,

Thank you very much! Those drawings are wonderful--I know, I know, I repeat myself every time you show one of them. But they are.

For me, the through half-pin up top is a good aesthetic touch. It announces the end point and balances the bottom (as you said). I didn't get why until you showed this drawing, but that full pin under a half tail has always looked (to me) kinda floating and incomplete, even though it may be the technically best thing to do.

One more question: Is there a functional purpose to making the back lower, or is it aesthetic? I could see how a lower or notched back could let you place a drawer stop on the upper rail in front.

Again, thank you,

Wiley

Re: Drawer back detail

#22

Re: Drawer back detail

Sgian Dubh

" Is there a functional purpose to making the back lower, or is it aesthetic? I could see how a lower or notched back could let you place a drawer stop on the upper rail in front."

It's to let air escape. In the case of a tightly fitting drawer in a fairly airtight carcase you will sometimes see, especially if the drawers aren't loaded, that by closing one drawer quickly other drawers in the stack pop out a bit. The slightly lower top edge of the drawer back ameliorates this somewhat: or at least that's what I was taught, but there may be other reasons I'm not aware of. Slainte.

Re: Drawer back detail

#23

Re: Drawer back detail

Bruce McCrory

For me the lowered back board regulates the amount of "stuff" that can be put into the drawer. Stuff starts spilling over onto the floor, or dust panel if such luxury is provided. :D This is especially effective with paperwork uses.