New WoodChat!
Home Articles Forums Gallery Marketplace Videos

WoodCentral Forums

Knowledge You Can Build On — Est. 1998

Find a woodworking club near you

The journey of a new project. *LINK*

Posts

The journey of a new project. *LINK*

#1

The journey of a new project. *LINK*

Derek Cohen (in Perth, Australia)

I am interested to know how others plan their projects, and about the interesting discoveries they make along the way.

For the past month or 6 weeks, I have been accumulating information about Wegner's "The Chair".

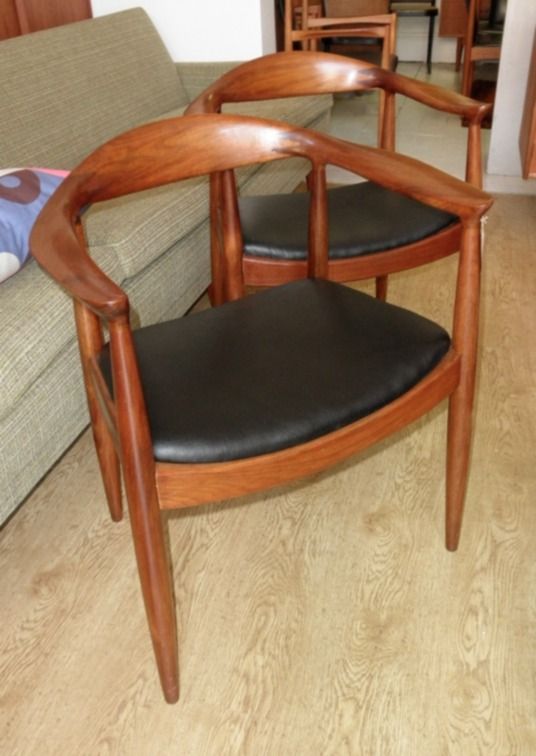
I plan on building this ...

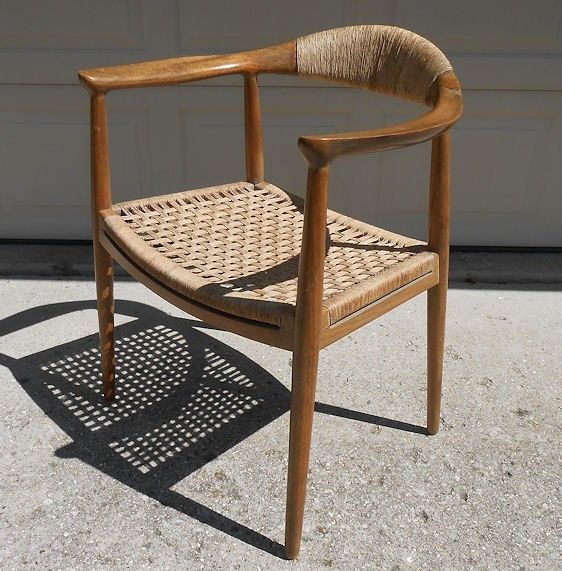
... but with this seat ...

Usually I create a basic plan consisting of a few dimensions, with the image and details locked inside my head, decide on the build sequence, and then just start working.

This time it is different. For a start I am copying a famous chair and the details are important. Never mind that I do not have one at hand to measure and work from, but I have not actually seen The Chair in the flesh. I've been fortunate to obtain several important measurements, which have enabled me to draw up full size plans ...
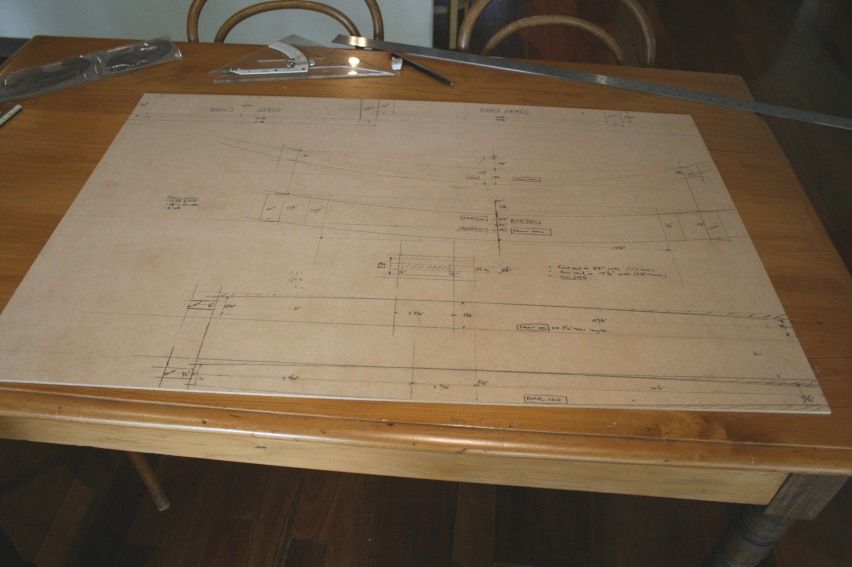

Measurements have become important as the drawings unfold a picture of complex curves built from solid wood, and the realisation that bigger chunks of timber are necessary than I had imagined at the start. I needed 6" x 6" posts.

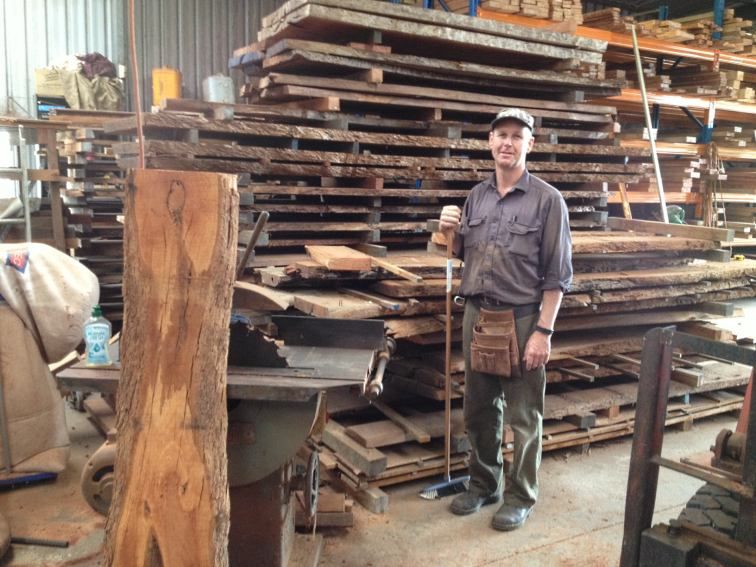
I went looking for wood ... and met Derek The Timber Bloke. Yes, another Derek. Derek (the other one) flies helicopters in his day job and spends his spare time and weekends salvaging urban trees. He stores, resaws, and sells some very exotic West Australian timbers. I called Derek, and he said that all he had was 13 feet (4m) of fiddleback (curly) Jarrah in this size that was from the same tree, dry and ready to go.

I must admit that I had mixed feelings. I had recently completed a kist in curly Marri, and it was a real bear to work - not just because the wood was hard, but because there is the added complexity of matching the direction of the curl as well as the colour of the wood and the grain. I really wanted to get on with the build, and so I decided to have a look at it. Anyway, I had not visited Derek before, and this was a good excuse. How many of us need an excuse to look over a new wood supplier. And just 30 minutes from my home.
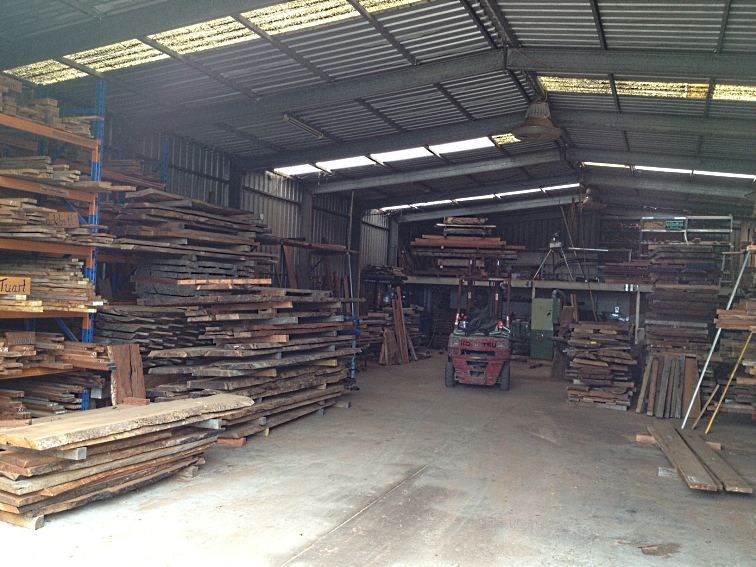

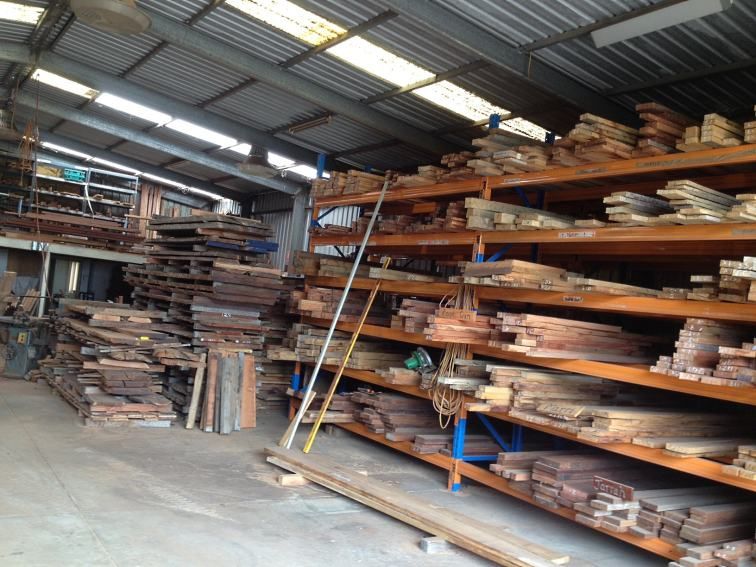
The storage was impressive. This was just one of two warehouses ...

Derek The Timber Bloke (no, not me) ...

I bought the curly Jarrah. Derek gave it to me quite cheaply ($150) as there was a good deal of checking and it would be necessary to saw around this. I guess that is somewhat expected with 6" x 6". I loaded it into my wife's Golf, feeling shocked at the incredible weight of each section, and wondering how I was going to manage this in my shop.
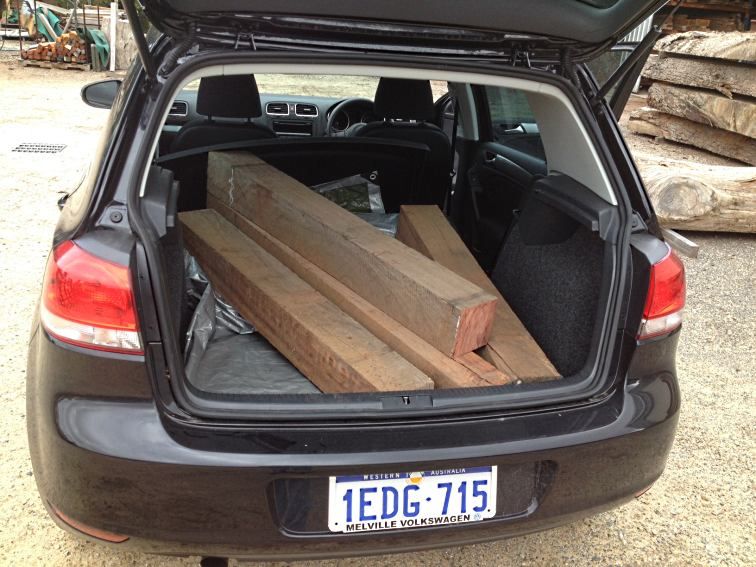

About two weeks have passed while I plotted and planned. Today I began sawing the timber. This represents the 4 legs and the 4 rails.
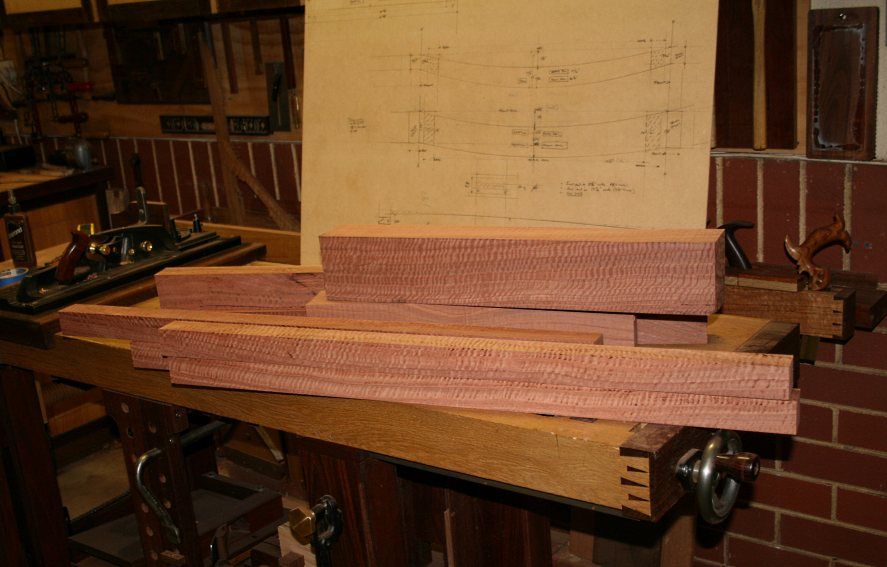

My plan is to build the lower section of the chair first. The chair back and arms will be easier to size and position this way. Onward to the lathe ...

Any thoughts or stories of your own?

Regards from Perth

Derek


Derek the Timber Bloke

Re: The journey of a new project. *LINK*

#2

Re: The journey of a new project.

Patrick Gibbons

The wood is beautiful. Looking at the first chair example you show, it appears the arms/back assembly is constructed from three pieces of wood. I'm not sure why you need 6" x 6". I would also say you don't need what you're asking for. You have a very good game plan already put forward. Full scale drawings will give you all the info you need. On two occasions I have built something and had clarity come only with doing it wrong. I should have built second pieces with the newly-gained knowledge but found myself uninspired to do so.

Re: The journey of a new project. *LINK*

#3

Re: The journey of a new project.

Derek Cohen (in Perth, Australia)

Hi Patrick

Why such thick wood? The back rest is 4 1/2" wide, but on an angle. The front and rear rails of the seat not only angle down 3 1/2" but angle out by 3".

I was not looking for 6 x 6. That is what was available. However there was nothing in my stack that came close to these dimensions.

Regards from Perth

Derek

Re: The journey of a new project. *LINK*

#4

Clint Searl

Re: The journey of a new project.

Clint Searl

I will beg the question by raising the philosophically rhetorical issue of why copy a design that, in this instance is perfect, and is available in the current market? Certainly, work that you have shared leaves no question that you are capable of reproducing the form and joinery of the original. So, if the product of your efforts is structurally indistinguishable, represents no design enhancement, and anonymizes your presence in its execution, what is the motivation?

Re: The journey of a new project. *LINK*

#5

Re: The journey of a new project.

Derek Cohen (in Perth, Australia)

Hi Clint

Thanks for the vote of confidence. I tend to look for something that pushes my envelope and then feel over my head.

Why build and not buy? Partly it is that these chairs are Expensive new (over $4500 each) and partly because it is the challenge.

I have never built anything from a plan, ever. I doubt I ever will. I asked myself why I have been attempting to follow the dimensions that Wegner uses. The answer, as I mentioned at the start, lies in that I have never seen an original, only a reproduction (in which I had little faith), and photographs. I know that what will eventuate will still be Wegner-inspired, that it cannot be an exact copy, and that it will be an interpretation at best. I am OK with that.

Two factors inspire me to try and follow the original dimensions. The first is something that David Haig said to me when I asked him for guidance in building a desk he designed, which is the only other piece of furniture I have wanted to copy (OK, a Maloof rocker is another). This desk is just one of the most stunning, flowing designs I have seen - filled with complex curves. It will be a future project. Anyway, David asked that I make the desk as close as possible to his design since he had put in a great deal of thought into it, and felt that he wished to preserve the integrity of the design. The design was more important to him than the fact that I wanted to copy it.

The same is not completely so for the Wegner chair. The curves on the chair will reflect how I believe a curve should flow, because I will be the one spokeshaving it, but the design does still need to be true to Wegner's original view since this is what I am paying homage to.

David's desk ...


The second factor is that this is a CNC-built chair, and therefore a challenge to build with handtools. Only one person (I recently discovered) has done this, and that is Jeremy Broun, a UK furniture maker and film maker. He built one at age 17 years (!), which is amazing for someone that young, but the result is a simplified design.

http://www.youtube.com/watch?v=lP5p1aZEDaM

It is interesting to contrast what one would do with machinery and do with hand tools.

Regards from Perth

Derek

Re: The journey of a new project. *LINK*

#6

Re: The journey of a new project.

Patrick Gibbons

I see no problem wanting to do this. You feel challenged to do it. Part of that challenge is to get it right.

Re: The journey of a new project. *LINK*

#7

Clint Searl

Re: The journey of a new project.

Clint Searl

Derek, thanks for the explanation. I'm looking forward to vicariously experiencing your re-creation of a work by the master of 20th century chair design.

Re: The journey of a new project. *LINK*

#8

Re: The journey of a new project.

William Duffield

If you eventually want to build a Maloof inspired rocker, why not start with a pair of Maloof inspired low back rocking chairs, instead of the Wenger? All the philosophical issues you state, as well as the technical challenges, are still there. An advantage is that all Sam's chairs were hand made, and all were unique (no CNC involved). Having someone else build a chair or any other piece of furniture from one of his designs never bothered him at all. The only thing he thought was wrong would be if someone put Sam's name on a chair they built. There's also lots of information available on how to design and build chairs in the Maloof style, at least here in the U.S. One instructor who comes immediately to mind is Chuck Brock.

Back to the Wegner chairs: If you are planning to build more than one of them, there is a good possibility the some material could be saved by nesting parts, especially the front and back rails. There is also the possibility that the crest rail could be gotten out more efficiently if it were rotated 45°, or if more than one could be rotated and nested.

Since Wegner's Round Chair was designed in 1950, I doubt seriously that CNC was considered in the design.

Re: The journey of a new project. *LINK*

#9

Re: The journey of a new project.

Derek Cohen (in Perth, Australia)

Hi William

You wrote:

If you eventually want to build a Maloof inspired rocker, why not start with a pair of Maloof inspired low back rocking chairs, instead of the Wenger?

Because it is a Maloof rocker I wish to build (some time in the future), not the Maloof chair. The rocker has flowing lines that the chair does not capture. Similarly, I think that The Chair has a simple, but appealing flow.

Since Wegner's Round Chair was designed in 1950, I doubt seriously that CNC was considered in the design.

Here is a video of The Chair being built ...

http://www.pp.dk/index.php?page=gallery&cat=14&id=173

Regards from Perth

Derek

Re: The journey of a new project. *LINK*

#10

Re: The journey of a new project.

William Duffield

Oops, I meant low backed dining chairs, not rocking chairs. Of course, I'm not at all meaning to suggest that you build something that you don't like.

The video you provided the link to, was very interesting, and also well executed.

Personally, my predilections for Maloof low back chairs have probably been unduly influenced by the opportunities to sit in a couple of them, one at the behest of Sam Maloof himself, and the other one of a pair of love seats at RISD. Alas, I have not had the opportunity to try out one of his rockers.

I suppose, if one wanted to, one could reverse engineer a particular Maloof rocker and code it into a CNC machine, and produce some beautiful chairs, as the guys in your video have done with the Wenger design. I'm sure the results would be much more pleasing than some examples of Maloof inspired rockers where the person making it just couldn't appreciate the subtle details of Maloof's designs.

I suppose it won't be too long before someone will choose one of these beautiful, comfortable and iconic (may not be the right word?) chairs, whether by Wegner, Maloof, Nakashima, or even Chippendale, and clone a likeness in ABS or HDPE on a 3D printer. While it would feel just a little bit out of place in my parlor, and the machine that executed it would feel just as out of place in my garage/shop/studio, I would not begrudge anyone building it or relaxing in it, especially if they could not afford an original, or a reproduction made by hand from real wood, or a reproduction carved by a CNC machine.

I really like this one (and I have more photos, if you need them). I could easily imagine you executing it in curly marra.


It's in the Renwick Gallery of the Smithsonian Institution in Washington DC. I have not had the opportunity to try it out. It was at the Renwick that I had the opportunity to meet Sam Maloof and sit in one of his chairs.

Re: The journey of a new project. *LINK*

#11

Ellis Walentine

Thoughts

Ellis Walentine

Hi Derek,

What an exciting project you're undertaking! That chair is going to look wonderful in that curly wood. I did have a few thoughts and questions about it...

First, I think I've said it here before that whenever you imitate an iconic piece of furniture you have a special onus to get the visual aspect right, because viewers are conditioned to see the precise combination of curves and nuances that are so well known in the original. The eye is capable of extremely fine percception of this sort of thing.

The other challenge I see is how you will actually render those transitions with hand tools. As that video you linked to shows, the main parts of those curve are all very closely replicated by a modified gunstock lathe, which is an analog machine but capable of CNC-like precision. Joining the pieces in exactly the right relationship is also controlled by jigs and fixtures, and then the arms and back are further refined by CNC routers. (The originals would have been faired with spokeshaves, like the necks of Martin guitars before the age of CNC.) There's no good way to define those transitions on a full-size drawing except with section views at different points along the curve, and those are going to be mighty tricky to gauge as you are working on the chair, so you'll be relying on your eyes and hands to duplicate them. That may prove to be the greatest challenge and the greatest reward of the entire project, besides the joy and satisfaction of seeing and sitting in the finished product. Because of this reliance on your eyes, it would be great if you had an original chair to look at while fashioning the curves.

Regarding the woven seat and jute-wrapped backrest, personally I would prefer the solid wood and leather upholstery of "the Chair." The wrapped back rest in particular would seem to be a target for dust and sweat, and might not be as comfortable as you'd like. I'm just supposing here.

Anyhow, I applaud your enterprise and look forward to seeing and hearing about the adventure of making it.

Ellis

Re: The journey of a new project. *LINK*

#12

Re: The journey of a new project.

Derek Cohen (in Perth, Australia)

Hi William

What I like about the work of Wegner and Maloof is their use of sweeping lines. However there is a flow in The Chair and the Maloof rockers that does not work well in the Maloof chair. It just seems a little busy to me. I had been considering building one for a few years, and even purchased plans.

I envisage building The Chair in a way similar to the methods used by Maloof. Some of it is best done with power tools, such as a router for the mortices and a bandsaw for the rough shaping. Then it will be spokeshaves and scrapers.

The measurements and templates I am building will help get close. And then it is by eye.

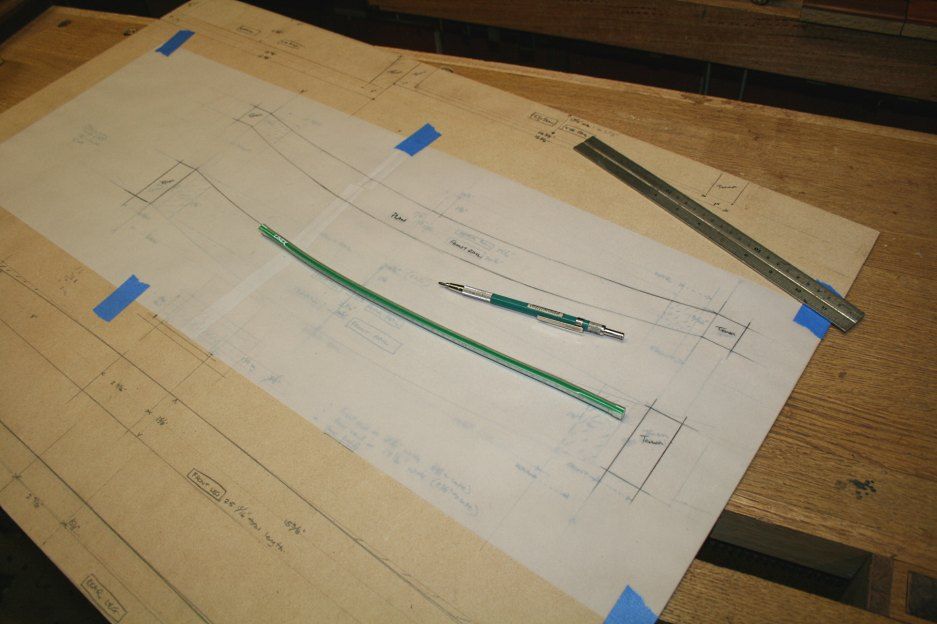
Tracing the drawings onto templates ...


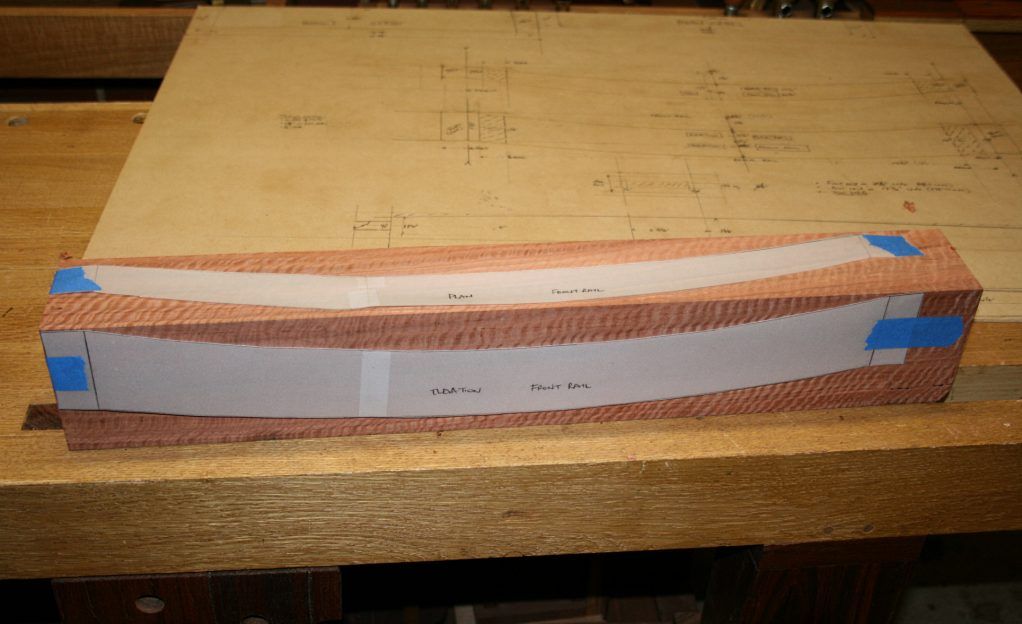
Just to show the templates. Which would you saw first, the top or the bottom?


Regards from Perth

Derek

Re: The journey of a new project. *LINK*

#13

Re: Thoughts

Derek Cohen (in Perth, Australia)

First, I think I've said it here before that whenever you imitate an iconic piece of furniture you have a special onus to get the visual aspect right, because viewers are conditioned to see the precise combination of curves and nuances that are so well known in the original. The eye is capable of extremely fine percception of this sort of thing.

Hi Ellis

Yes. I mentioned something similar earlier - paying homage to a design does mean retaining the integrity of the design.

Personally, I think that this is much more difficult than creating one's own design - everyone will see how accurate the build has been! Perhaps I should not be posting any of this :O

My wife also like the solid seat version. However, I think that the cord seat creates a warmth. I shall not cord the seat back however. I want to see the wood.

Regards from Perth

Derek

Re: The journey of a new project. *LINK*

#14

Jesper, Denmark

Re: Other thoughts.....

Jesper, Denmark

Derek, as you may well imagine, The Chair - actually "Stolen" is well known and appreciated here, although few people can afford an original.

I have seen and sat in one at the Tønder Museum and have seen and sat in several copies/knock-offs or whatever you might call them. Although the knock-offs are visually very similar to the original, with only a few details changed to avoid infringing on the design rights, the seating comfort is remarkably different for such small changes.

It only goes to show that Wegner really was the master of chair design, and that very small changes in dimesions and curves have a detrimental effect.

I am also wondering whether a figured wood will add or detract from the design. The original was and is built from straight grained oak - originally planted to provide lumber for sailing warships.

Re: The journey of a new project. *LINK*

#15

Re: Other thoughts.....

Derek Cohen (in Perth, Australia)

Hi Jesper

I do not think that it is possible to single out features that affect comfort. The whole is greater than the parts. Nevertheless ...The "easy" part of this build are the legs and the rails/seat. I have received details from an original chair, and made templates. The part I have been agonizing over are the arms and the back. I have the angles, but the parts need to function as one.

Chair designers are a special class unto themselves.

Curly Jarrah instead of Danish Oak? Well, it is an Australian intepretation! :)

Regards from Perth

Derek

Re: The journey of a new project. *LINK*

#16

Re: The journey of a new project.

William Duffield

Several tips on making curved parts the old fashioned way (like Sam Maloof did, mostly*) using a bandsaw, rasps, files, scrapers, sanders, etc.:

Make your templates from something sturdier than paper. MDF, doorskin, or tempered hardboard work well, as does mahogany offcuts. You may want to reuse them (hopefully on another chair, and not because you have to remake a part). Mark the wood from the template with a pen. If you don't get them exactly right, you can modify the templates while you are shaping the parts of the chair.

Cut and fit your joinery first, while you still have reference surfaces.

Cut the concave faces first, because your offcuts will come off in one piece, instead of several. Then tape them back onto your stock (using 3M blue painter's tape, but you knew that) to provide support and reference faces for subsequent cuts, and also to preserve the marks you made from the pattern.

*However, there was one technique that Maloof used, for shaping parts on the bandsaw, that I would never recommend, and that he would not recommend either. That was sculpting freehand, without the stock being completely supported on the bandsaw table. He figured it out for himself and mastered it before he realized how dangerous it was. In this video, the first three cuts are safe enough, but then it gets really dicey, because a small twist of the stock can cause the blade to bind, pulling the stock down onto the table, ruining the blade, and often getting fingers crushed between the stock and the table. It happens just as quickly as a tablesaw or lathe accident, and no sawstop accessory has been invented for a bandsaw.

http://www.youtube.com/watch?v=l272IFKogHU

Re: The journey of a new project. *LINK*

#17

Jesper, Denmark

Re: Other thoughts.....

Jesper, Denmark

The back and arms clearly give the appearance as being both the most complex and significant elements of the chair. On the other hand, the seat angle front to back is also very significant for the seating comfort. If the back of the seat is too high - a more horizontal plane - you have a tendency to figet in the seat. On the other hand, if the back of the seat is too low, you tend to feel clamped or constrained in the chair. The angular difference between the two is very small.

Wegner spent a lot of time at the prototyping stage getting this just right.

Re: The journey of a new project. *LINK*

#18

A little luck ...

Derek Cohen (in Perth, Australia)

Hi Jesper

Today I won an auction for an original Wegner The Chair. These were made under license in Australia for a short while in the 1960's. The price was low, so I am feeling quite pleased. This is a solid seat, in Tasmanian Blackwood and Teak.

I am going to put any sawing on hold until it arrives so I can check the measurements I have. It is on the other side of Oz, and will take a few weeks to get here (I have to arrange shipping).

Now I will have a proper model to compare to. That should make a very big difference. Importantly, I shall have the seating to explore first hand.

Regards from Perth

Derek

Re: The journey of a new project. *LINK*

#19

Ellis Walentine

Couldn't be more timely

Ellis Walentine

Good work, Derek. Now you'll have a model to copy directly. What a coup!

Onward,

Ellis

Re: The journey of a new project. *LINK*

#20

Re: Couldn't be more timely

Kees

That's good planning!

A project like this is completely beyond me. So, nothing usefull to add. Only that I look forward to your reports.

Re: The journey of a new project. *LINK*

#21

Joinery

Derek Cohen (in Perth, Australia)

Cut and fit your joinery first, while you still have reference surfaces.

Cut the concave faces first, because your offcuts will come off in one piece, instead of several. Then tape them back onto your stock (using 3M blue painter's tape, but you knew that) to provide support and reference faces for subsequent cuts, and also to preserve the marks you made from the pattern.

Hi William

Using the bandsaw the way Sam Maloof did is something I just shake my head at. My Hammer 4400 scares me at times as it is so powerful that an unsupported board can be (has been!) ripped out of my hands. A thinner blade than I usually use - 1/4" rather than 1/2" - may help. Sam's looks like 1/4".

The issue of joinery first or later is one that I have been thinking about for some time.

The given for most joinery is to work/mark from a reference side. The joinery here is (1) mortices in the round legs and arms, (2) tenons on the stretches, and (3) finger joints on the chair back/arms.

The mortices on the legs will be cut after the legs are turned. I could do this before (have done this in the past), but I am concerned the wood will chip out too much even with the mortice plugged with a filler piece. Further, there are intersecting mortices, and these are not at right angles. In fact I will only be sure of the second angle when there are parts to fit together.

The reason for a router for the mortices is that the tenons are haunched, that is, the mortices will have two depths each. That is difficult to chop accurately. Of course I could use a different joint, but I did want to explore what Wegner designed.

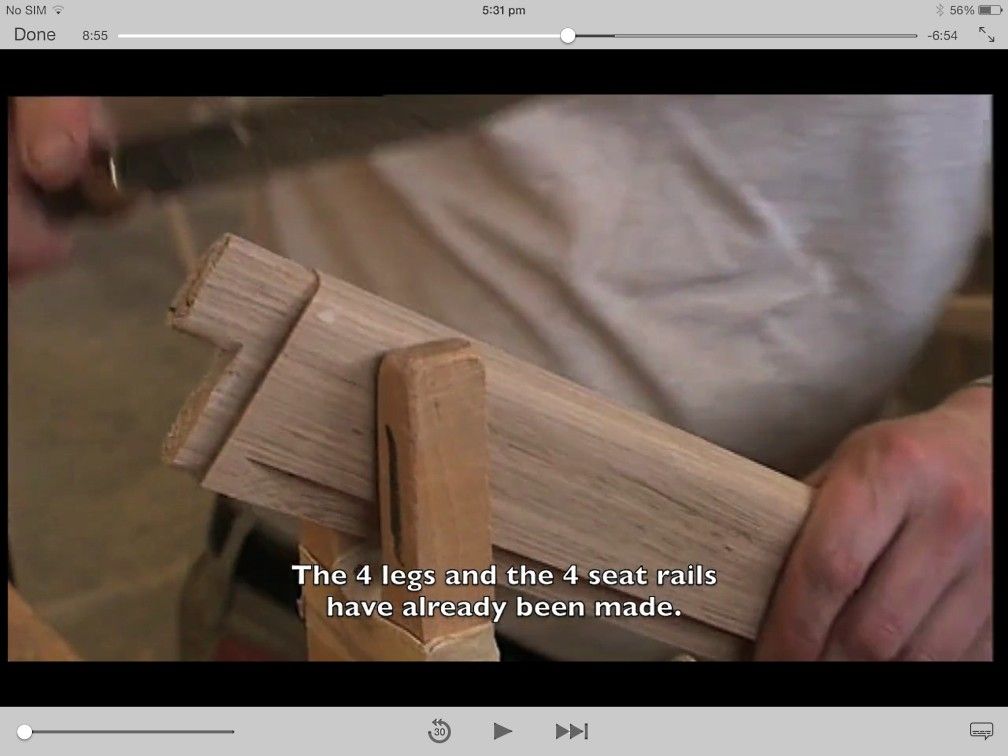
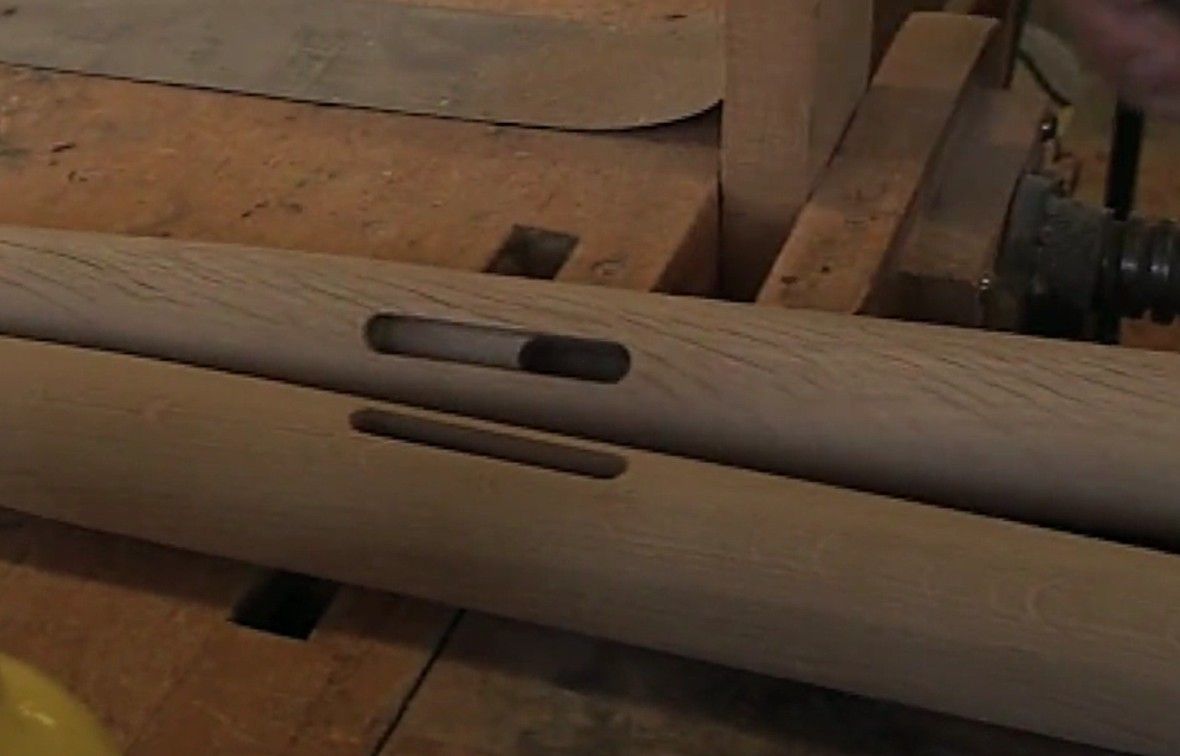
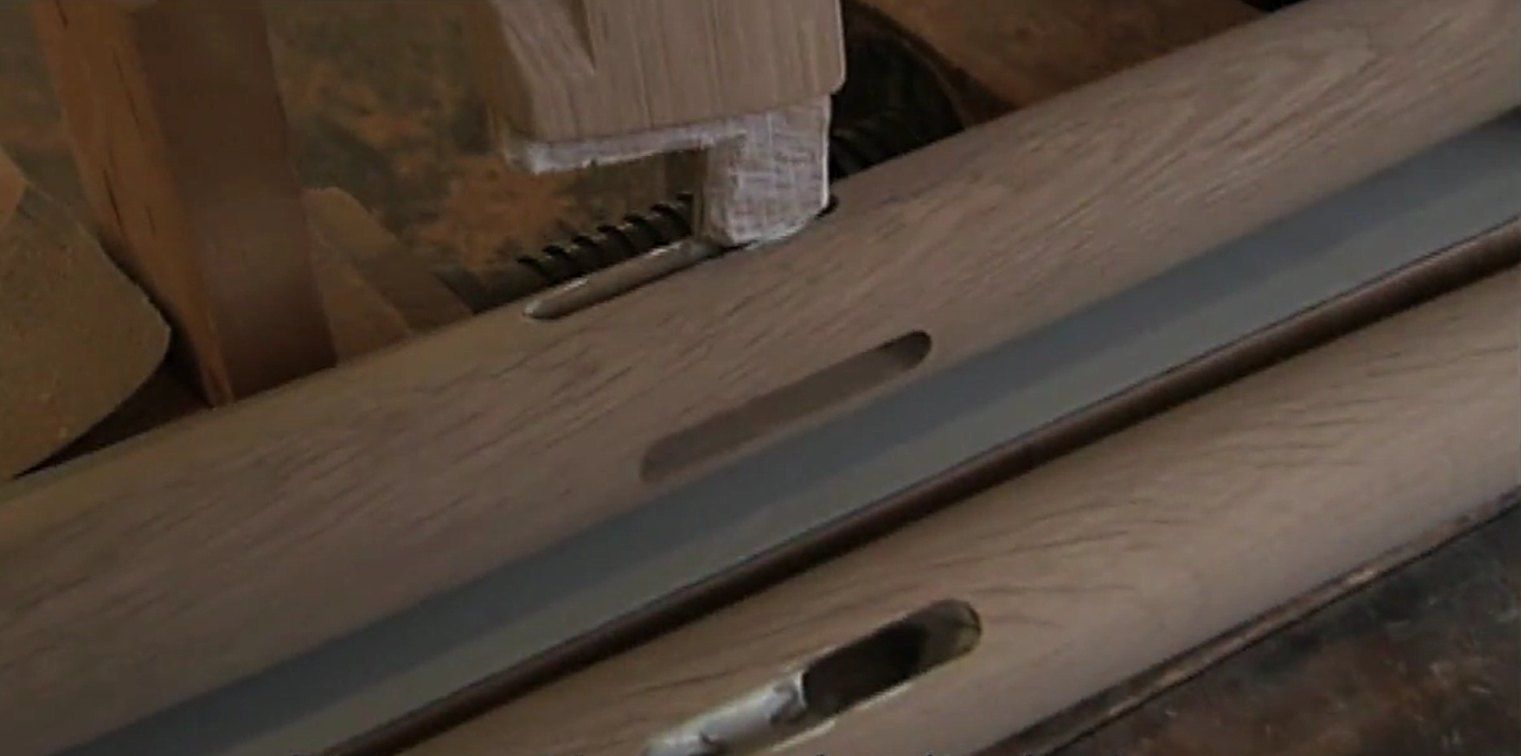
Here is the mortice and tenon joinery used on The Chair (stills taken from the video):

Tenon ...


Mortice ...


Tenon into mortice ...


Regards from Perth

Derek

Re: The journey of a new project. *LINK*

#22

Re: Joinery

William Duffield

Well, your dilemma certainly comes equipped with sharp horns. One is faced with similar problems when fitting crest rails and back splats to Chippendale chairs. Splitting a pierced back splat during glue-up is no fun, and there is no way to recover from a too deep mortise in a crest rail that you discover with your rasp.

You might consider starting with extra long stock for the turnings and leaving the ends square. Then when you measure the necessary joinery angles, you could mark them on the end blocks and plane them to the appropriate angles. Cut the blocks off when you are done cutting the mortises.

Re: The journey of a new project. *LINK*

#23

Re: Joinery

Derek Cohen (in Perth, Australia)

That sound an excellent idea, William. It will help maintain a reference for one mortice.

My plan has been to first mortice and tenon, then fit, the front and rear rails. Only then can the exact positions for the side rail mortices be determined. This is the other reason why the legs have to be turned first. The side rails are angled, and fitting them will require some coping.


Regards from Perth

Derek

Re: The journey of a new project. *LINK*

#24

Re: Joinery

William Duffield

If you get an angle a little off, there's always epoxy and microfibers. I had it happen to me, due to a problem with a Delta tenoning jig. The same set of joints taught me to hate Gorilla Glue. Epoxy is a lot easier to use and a lot stronger when you need to fill gaps.

Congrats on the chair auction win! Is the chair in the photo the one you bought?