New WoodChat!
Home Articles Forums Gallery Marketplace Videos

WoodCentral Forums

Knowledge You Can Build On — Est. 1998

If you sell to woodworkers, your customers are already here

Kist update - designing the base

Posts

Kist update - designing the base

#1

Kist update - designing the base

Derek Cohen (in Perth, Australia)

When we left off last time, the lid had been largely completed. The breadboard here is unfinished. It is not yet attached and will be made narrower and shaped with a curve on the underside (more on that later).
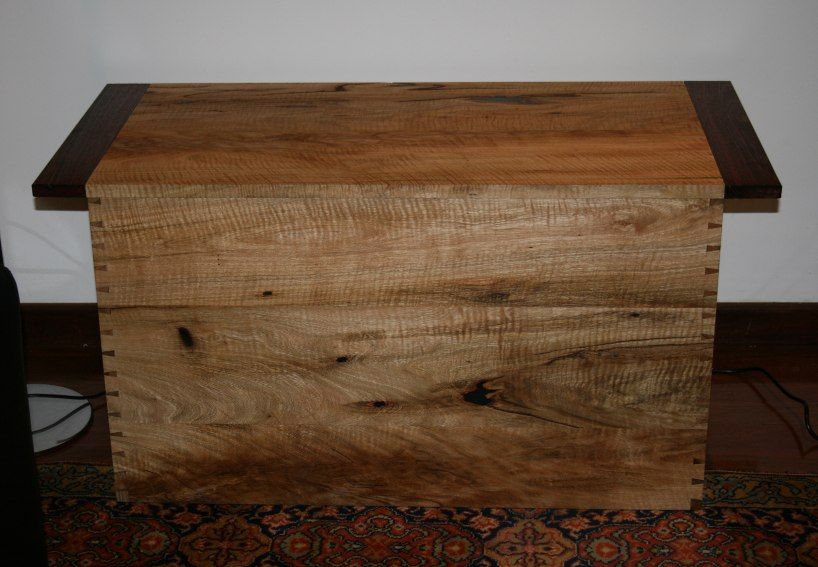

I had a little time over the weekend to begin the base. This is the interesting part of the build as it will contain a drawer(s) built into the base, itself. Building it this way was to conceal the drawer(s), so as to create an uncluttered face.

Some of you will have a problem with the way I design and build. I rarely draw up any plans, and basically wing it with just a idea and a mental image. I do try and think it through, attempting to plan in as much as I can. However here I only had a rudimentary idea of the way in which I would build the drawer(s), and I had reached this point where it was time to make it work.

I was not sure whether I would build one large single drawer or split this into two drawers. The advantage of a single drawer was that there would be fewer breaks at the front, and it would be easier to make the drawer "disappear". The downside is that one wide drawer is likely to rack and the drawer bottom would have to be thick to avoid flexing, even with a munton.

I would like some input here. The drawer opening is 30" wide. The depth available is 20" (It is not planned to use the full depth since that would make it difficult to reach the rear of the drawer). Anyone build a 30" wide drawer that does not rack?

The other feature of the drawer that complicates is that it will be very shallow as it must fit within the base (the drawer is to house a magazine or a remote control, or something else that is slim - why build it when it is this shallow? I liked the challenge). There is a total depth of about 2" available. To maximise the internal drawer height the drawer bottom may be attached to the underside of the drawer sides (screwed/nailed in a rebate) and not in a side groove.

The drawer will not run along a runner, as the runner takes up depth. Instead it will have to hang from, and run along, side rails.

What I love about hand tools is that they allow one to change horses in mid gallop - when a base is dovetailed together, it is still possible to chop grooves/mortices for a runner.

Here is the Jarrah dovetailed base. The box will sit on top. The opening at the front is for the drawer. Actually, that is likely to be drawers as I am leaning towards building two smaller ones rather than one large one.
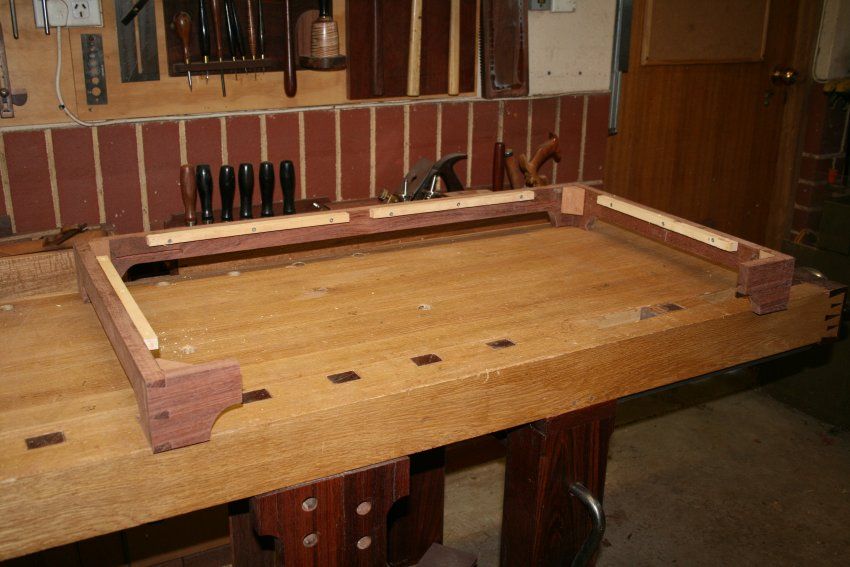

With the box upside down, the base is attached ...
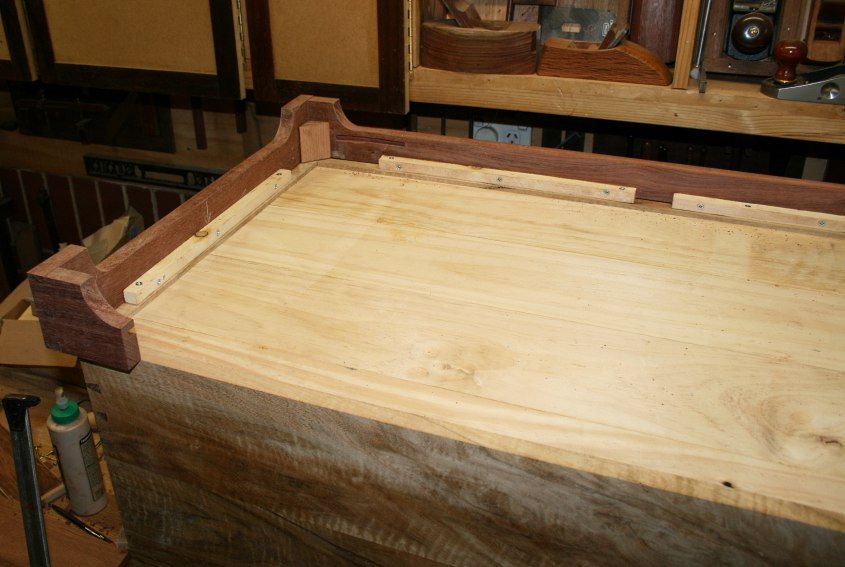

If you look carefully at the rear cornes you may make out the mortices I chopped for the rails. Below is a picture of one rail. Note that this is a dry fit as the rail will be narrower than it is here.
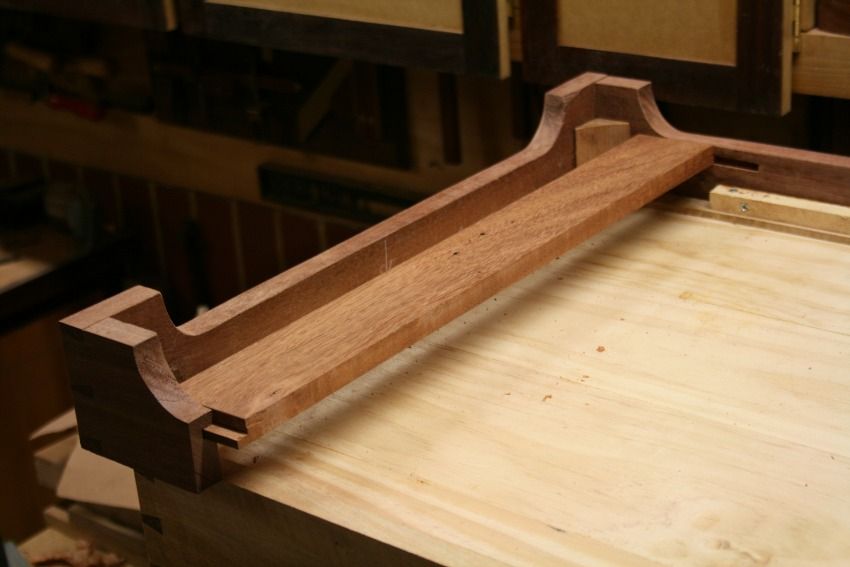

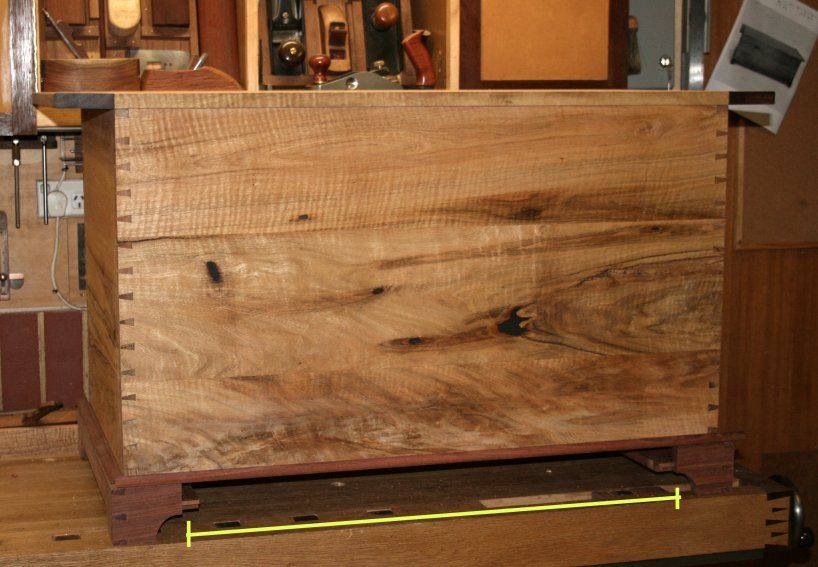
And here was a photo of the kist plus base. in this guise it could take a single drawer hanging from the rails. Alternately, I could add a centre rail and hang two drawers. (The picture also includes the mouldings I made. These have not been attached).

Regards from Perth

Derek

Re: Kist update - designing the base

#2

Re: Kist update - designing the base

Bill Houghton, Sebastopol, CA

Continuing interesting, this project.

My parents had a Victorian-era or possibly Edwardian-era chest of drawers (huge mirror, marble top, and so on) with a drawer hidden in the base. I didn't even realize it was there until we were cleaning out the house after Mom went into a care home. It was quite wide, but I didn't examine how it was installed, alas.

The base of the chest of drawers had moldings at the corners that rather neatly concealed the presence of the drawer. Not sure how you'd achieve that with this rather more austere design.

Re: Kist update - designing the base

#3

Jesper, Denmark

Re: Maybe there is something I have not understood

Jesper, Denmark

Aren't the overhanging breadbords a risky design? In use, someone will sit on them and they are prone to break off. the sides of the kist make a near perfect stress point at the bas of the tenons in the kist top.

Re: Kist update - designing the base

#4

Re: Maybe there is something I have not understood

Derek Cohen (in Perth, Australia)

Hi Jesper

Your concerns are valid but unnecessary.

The breadboard is to keep the lid flat and act as a grip. The tenon is either 3/4" or 1" deep (I cannot recall at this point). Currently, the breadboard is 2 1/2" wide. It will be cut back to 1/4" over the mortice. That will ensure that it is as strong as the remainder of the lid, should anyone actually sit on it. I cannot imagine anyone actually doing so. The kist has a spot in the family room between two built-in bookcases. There is no reason to seek it out to sit on (however I understand that someone may do so in the next 100 or so years).

Regards from Perth

Derek

Re: Kist update - designing the base

#5

Re: Kist update - designing the base

Tom

That base doesn't seem to go with the top. It is all pretty spectacular though, so I look forward to seeing it's final for

Re: Kist update - designing the base

#6

Re: Kist update - designing the base

Patrick Gibbons

For the drawer, I would have it run in grooves, either the sides grooved or the carcass, and run the bottom grain from front to back. A division in the middle of the drawer would work against racking.

Re: Kist update - designing the base

#7

Re: Kist update - designing the base

Derek Cohen (in Perth, Australia)

That base doesn't seem to go with the top.

Hi Tom

You may be right. It does change when looked at from different angles. I keep reviewing the design, trying to find a balance. The base is more important to me than the top. I can remove the breadboard ends and (1) shift them inward, (2) make them much narrower (reduce the tenon, slice off a bit of the groove/mortice), (3) replace the Jarrah with Curly Marri, (4) make it thicker .... lots of options.

I really do need to take time to master Sketch Up.

Regards from Perth

Derek

Re: Kist update - designing the base

#8

Re: Kist update - designing the base

Derek Cohen (in Perth, Australia)

For the drawer, I would have it run in grooves, either the sides grooved or the carcass, and run the bottom grain from front to back. A division in the middle of the drawer would work against racking.

Hi Patrick

I am considering runners, either with a groove in the sides of the drawer, or butting the sides of the drawer against the rails and adding a guide to each side. The advantage of the former is that the drawer will not tip. The advantage of the latter is that it will be easier to fit.

I am seriously considering plywood for the drawer bottom as it is stable and unlikely to move. I would like to achieve the maximum height inside the drawer, and my thought is that I could glue and screw a board into a rebate that runs around the lower inside edge of the drawer. Can anyone come up with a reason why this is a bad idea, and/or come up with an alternate idea?

Also comments on a single 30" wide drawer with a munton? Viable? Drawer bottom thickness?

Regards from Perth

Derek

Re: Kist update - designing the base

#9

Re: Kist update - designing the base

Curt Putnam

Do not dividers in the interior of a 30" drawer negate the purpose of wide drawer?

Re: Kist update - designing the base

#10

Re: Kist update - designing the base

Patrick Gibbons

I think the bottom can be surprisingly thin with plywood. Good Finnish birch plywood with no voids and 5 to 7 layers of ply will work well. 1/8" to 3/16", reinforced in the middle, should be just fine for a shallow drawer. The best so-called Baltic birch plywood apparently comes from Finland. The more plys the better. The Chinese plywood is considerably poorer in quality. I assume, Derek, you already know this so I'm just really saying I think your plan sounds good to me. Molding on the inside of the drawer can give a larger surface to glue/nail the bottom. A solid-wood bottom of 1/4" stuff tongue and grooved together and running front to back is the only other alternative except for making two drawers rather than one. Your shallow drawer is not unlike the tills of a tool chest. Both tongue and grooved bottoms and plywood bottoms, both recessed as you suggest, were used successfully. These tills supported a lot of weight with no problems.