A big groove, or maybe it�s a really long mortise
wilbur
One of the last things I needed to do before flipping my workbench over is to make the groove to receive the upper tenon on the sliding deadman. Originally I thought about this in terms of being a deep groove, as it is 5/8" wide and needs to be 1-1/2" deep. So I thought about using some sort of plow plane, except that none of the planes that I have that would be suitable for this task will make a groove that deep. Then I started thinking of this less as a groove, and more like a really long mortise.
I used my Japanese plow plane to establish the sides of the groove. The groove is 5/8" wide, and the plane cuts a groove 1/4" wide, so I did one side and then the other.
After the sides were established, the groove was about 1/4" deep. It needs to be 1-1/2" deep when its done. To do the rest, I tried a few approaches, but the most efficient seemed to be to use a 1/4" mortise chisel to continue the grooves that the plane left. I chopped down at the far end of the groove so that it was at final width and depth, and then started working back along the tracks left by the Japanese plow plane, first one side, and then the other. There was one section of the groove where I tried drilling out the waste with a 1/2" brad point bit and cleaning up the sides, but this seemed to be easier overall, and not much slower.
Here's an in-progress shot of the groove.
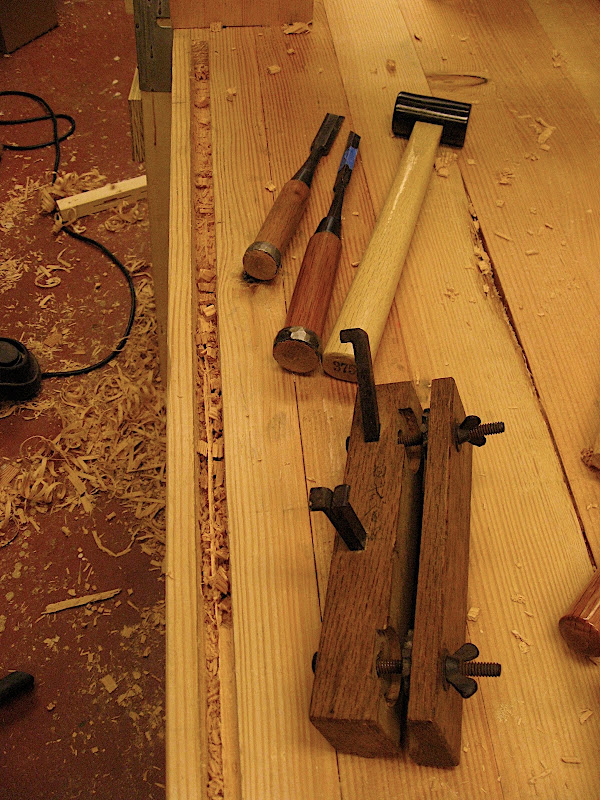
This may sound like a lot of work, but it's actually not as bad as it may seem. The key, I think, is that by establishing the end of the groove, I gave the chips someplace to go as I chopped, which makes mortising go much faster. As a result, I can work back going about 1/4" at a time, and it takes me about 5-10 seconds of chopping to drive the mortise chisel down to the depth that I want. This goes by much more quickly than it sounds.
Of course, a router would be faster, but what's the fun in using that? In the end, it will be way cooler to say that I made this groove by hand. Stupider, maybe, but still cooler.
Plus, I don't have a router. Not the electric kind, anyway.
After finishing the chopping. I used a router plane to finish leveling out the bottom of the groove, checked the groove with a straightedge and square, and pared the sides of the groove to make sure that they are the correct width and square.
Here's the final result, along with the tools that I used during this process.

Between this and making the 1" wide mortise and tenon joints for the stretchers and leg-to-benchtop joints, I've done a lot of mortise making. This is what I learned while doing all this chopping:
-- Again, I think the key to making the mortise chopping easy is to first give the waste somewhere to go. Either work on one end and make it full width and depth, or simply drill out a hole at the end of the mortise to give you clearance. It's surprising how much faster the chopping goes.
-- When chopping, many light hammer blows is easier, and not really that much slower, than a few big hammer blows.
-- It seems that the conventional wisdom is that chopping the mortise takes a lot of time. Actually, the final paring and checking the sides of the mortise for square probably takes up just as much time.
-- Whenever I was having trouble with making the mortise, without a doubt the problem was either a tool that could be sharper, or I thought something is square when it really was not.
-- It's unbelievable how useful a big wide 2" chisel is. I've put a 2" wide paring chisel on my shopping list.
Now that this groove is finally done, I think I've cleared a major milestone, because now I can turn this bench over and use the top. After flattening it, of course.  Then I can use the bench to make the other parts: the deadman, and the leg vise assembly.


