Home Articles Forums Gallery Marketplace Videos

WoodCentral Forums

Knowledge You Can Build On — Est. 1998

Combination Press Plough Plane

Son of Stanley #52

Posts

Son of Stanley #52

#1

Son of Stanley #52

Derek Cohen (in Perth, Australia)

Blame it on two days of painting walls, ceilings and trim. The mind gets to wandering to preserve sanity, such that is left.

I had been thinking about the Stanley #51 shooting board plane replica that Lie-Nielsen are planning to bring out some time (hopefully) soon. I had a brief discussion with Thomas LN about this a couple of years ago. At the time I think that the intention was to produce the entire #51/52 combination. About a month or so ago Chris Schwarz released information on his blog that LN may just produce the #51 plane. This would be used on a shooting board of your choice. The #51 would be able to be used on the Stanley #52 shooting board, and I would be keen to get one as it would be a more durable version than my vintage original. But that is another matter.

I had been thinking about a wooden version of the #52 shooting board. In particular, the fence. Making a shooting board is a simple matter when the design is kept basic. This one took me about 5 minutes. It is ply glued and nailed to veneered MDF.


Well I managed to get into the shop this afternoon and needed a building fix, sooo ...

Here is my restored Stanley #52 fence ...


This is a superb design. Not only does it have the capacity for variable angle settings, but it has fixed stops at 45- and 90 degrees, and these are always spot-on. The fence slides to adjust for the angle changing - angling the fence reduces the distance to the blade. This is a very solidly built fence. Wonderful tool altogether.

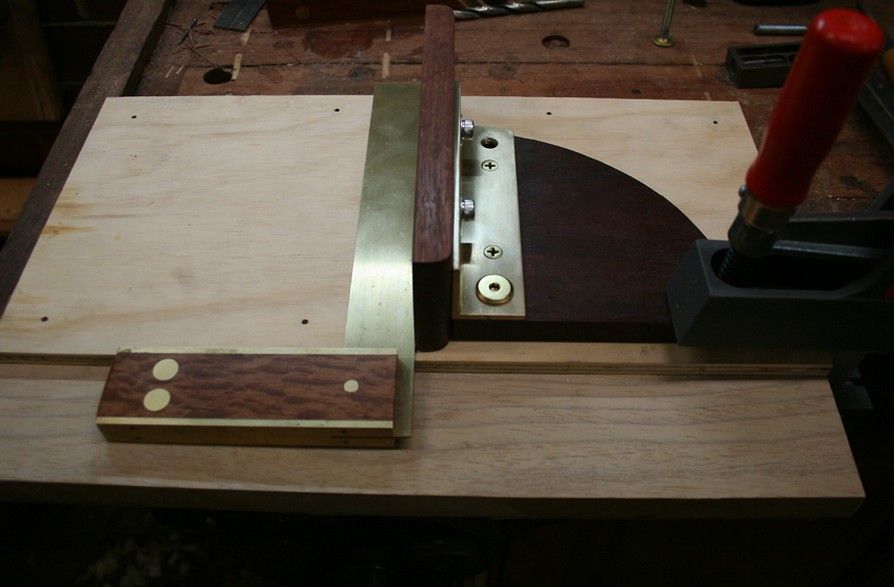
I wanted to come up with something that worked in a similar way - the minimum of adjustments and parts, with the maximum of settings. Here's what I came up with ..


Features:


Details:


The base has a 5" radius, while the fence is 7 1/2" long (the original is about 7").

I have a few mods in mind, such as lengthening the slots for the subfence, as well as adding the extra angles.


Regards from Perth

Derek

Re: Son of Stanley #52

#2

Re: Son of Stanley #52

Dan Donaldson

Beautiful. Could you put a bit more detail for the angles other than 45 and 90? I can see from the pictures how you would get those, but not the others. (Probably just blind in one eye and cannot see out of the other);)

Re: Son of Stanley #52

#3

Re: Son of Stanley #52

Derek Cohen (in Perth, Australia)

Hi Dan

You are not blind - they are not there yet. Just ran out of time to finish the extra angles. It works spot-on with 45 and 90.

Regards from Perth

Derek
Re: Son of Stanley #52

#4

Re: Son of Stanley #52

Dan Donaldson

Whew! Thanks. Wondered if there was something wrong that I could not see ;)

Re: Son of Stanley #52

#5

Pretty cool Derek

Scott Burr in Ben Lomond CA

I would think it would be awfully hard to make these parts with standard ww tools to get the tolerances needed to get angles "spot on". How did you or how do you plan going about this?

Nifty idea!

Re: Son of Stanley #52

#6

Re: Son of Stanley #52

Todd O. Cronkhite

LN is gonna make a #51?! Oh gosh, I have a feeling that this is gonna hurt the wallet. :\

Re: Son of Stanley #52

#7

Re: Pretty cool Derek

Derek Cohen (in Perth, Australia)

I would think it would be awfully hard to make these parts with standard ww tools to get the tolerances needed to get angles "spot on". How did you or how do you plan going about this?

Aahh Scott, that is the trick and really the essence of this post! I was waiting for someone to ask (if anyone was interested). That is what preoccupied me while I was painting ceilings (and breathing paint fumes). :)

Actually it is very logocal when you discover the solution ... which I will share with all. Give me a little time to get the pics together.

EDIT: to make this more interesting - is there much else going one? - how about the forum members trying to solve this. How would you do it? :D

Regards from Perth

Derek
Re: Son of Stanley #52

#8

Re: Pretty cool Derek

Scott Burr in Ben Lomond CA

OK, I think I got it...

Had to go into the shop and do some huffing to get into your mind set :b

I can't wait to see if I have it figured out!

Re: Son of Stanley #52

#9

Re: How I'd do it

Tom MacGregor

I'd complete the board with a finished pivot point and a single counterbored hole sized for a 1/4" shoulder bolt. With the plane and fence in place I'd use drafting and/or machinist's angles to establish where I wanted to be able to set the fence. Then I'd install a press-fit 1/4" drill guide bushing in the bolt hole. Using a 1/4" drill bit I'd drill into the board, then enlarge the hole for a threaded insert. The fence could then be bolted exactly in place. Repeat for other angles. I would consider using drill bushings in the board and the pivoting fence support to use a piece of steel rod instead of a bolt. It could also be done with simple drilled holes and dowel, but wouldn't be as rugged or long lasting. There would be lots of ways to do it if you accurately set the angle and then drill it with everything clamped in place. Good clear plastic drafting triangles are inexpensive, accurate and very handy. I own 30/60/90 and 45/45/90 angles in several sizes. And there's a Lee Valley/Veritas polygon available for setting many common angles including 22-1/2 degrees. McMaster-Carr has assorted drill bushings.

Re: Son of Stanley #52

#10

Re: Son of Stanley #52

Wiley Horne--So. Calif.

Hi Derek,

Great project!

To answer the 'how would you do it?' question, I break it down into two parts:

Part 1. Most accurate initial setting of the fixed angles....You've already drilled your variable hole in the darker wood. Using an accurate protractor (I have two electronic ones from LV that I like a lot!), get the fence to the selected angle and lock up the assembly with clamps so nothing moves. Use the single already-drilled hole as a drilling guide, and drill through the base. Tom McGregor has already covered the hardware better than I am able.

Part 2. Microadjust. No matter how good your fixed drilling is, wood can and will move, and every drilling operation has a tolerance. Including drill skating and drill press runout, etc etc. I would suggest putting two stiff springs between the brass angle iron and the fence, at the two points of connection. And put a thumbscrew on each connector. The springs could be stiff coil springs let into the wooden fence, or better yet, disc washers or disc springs to give you just a little bit of play.

When setting up, use your protractor in coordination with the thumbscrews to zero in on your selected angle.

Beautiful project--all your projects show nice attention to detail, including hardware in this case, and selection of a stable native wood for the fence assembly.

Wiley

Wilely

Re: Son of Stanley #52

#11

Manual for setting up a multi-angle fence

Derek Cohen (in Perth, Australia)

I prepared a pictorial to aid others installing a multi-position fence such as this. Note that this fence requires only two inserts in the shooting board for the fence to cover any amount of angles you may wish to use. I will show you how this is achieved.

As I mentioned at the start of the thread, blame this on the boredom of painting ceilings.

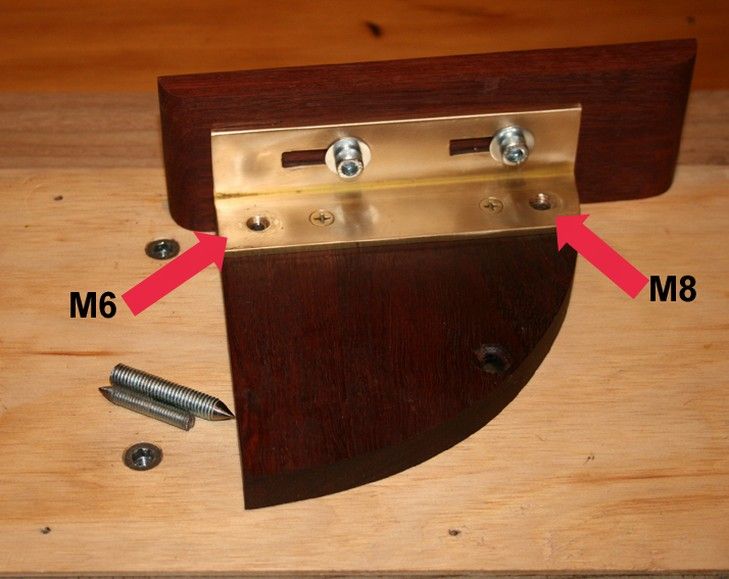
The first picture shows the fence with the two main threaded holes. The one on the left is a threaded 6mm (M6) that acts as a pivot. This is a snug fit (nil slop). The threaded hole on the right is 8mm (M8). This acts as a micro-adjuster for a 6mm bolt � in other words, 1mm movement either way. I may change this to a M10 threaded hole, which will double the adjustment. At this time it is not needed as the method for installation creates a very precise placement of the holes.


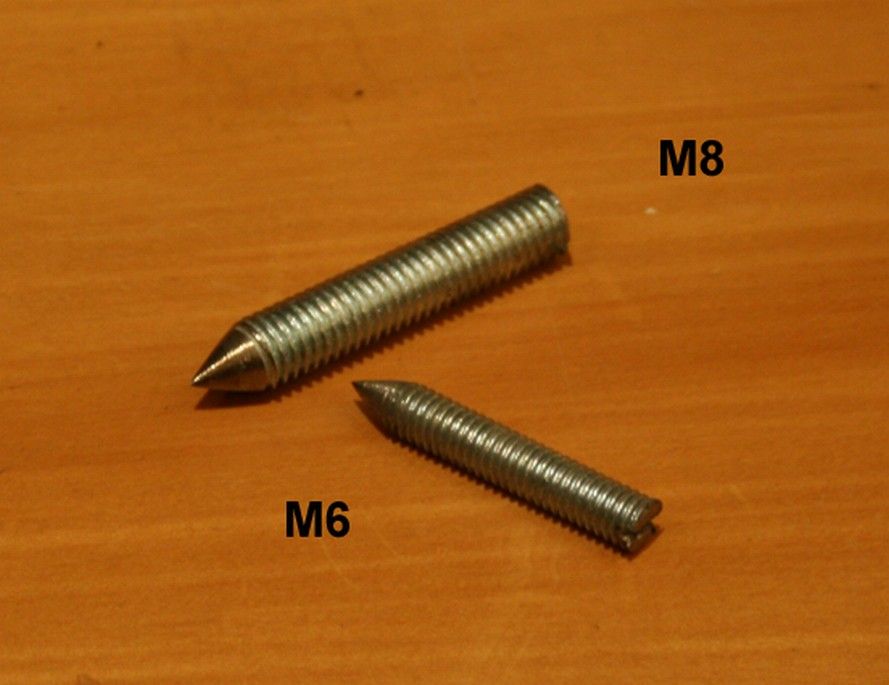
I made two �tools� to aid accuracy in placing the holes. These are simply two bolts that were turned to points at the end (on a disk sander).


Installing the fence

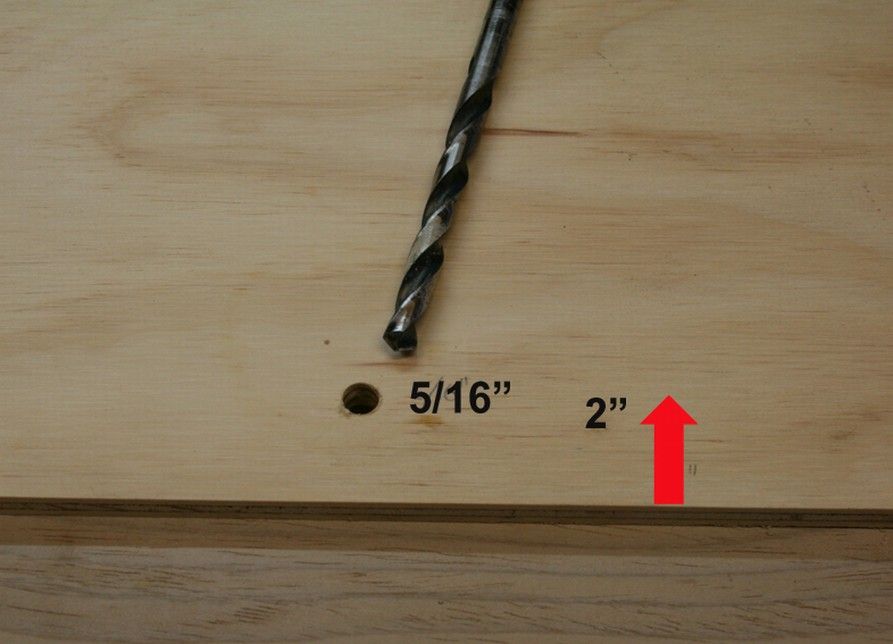
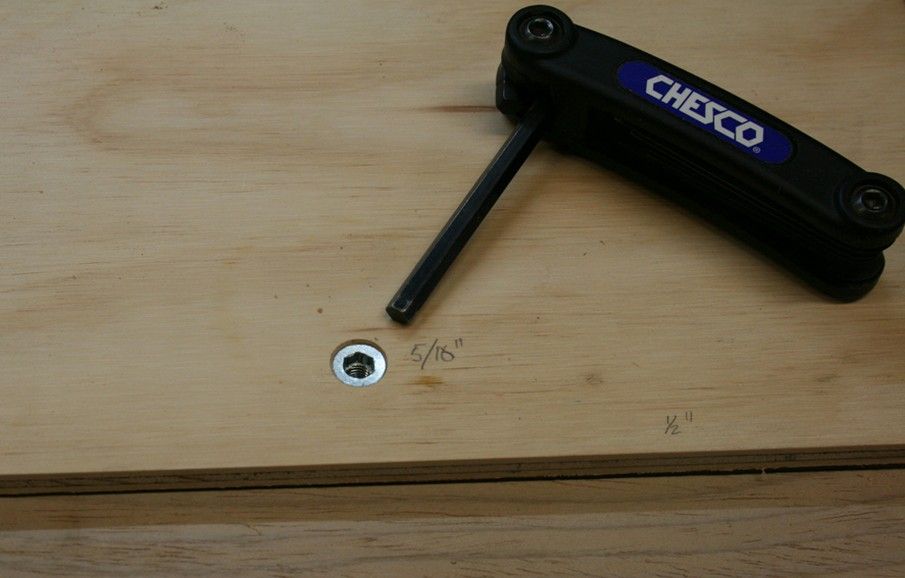
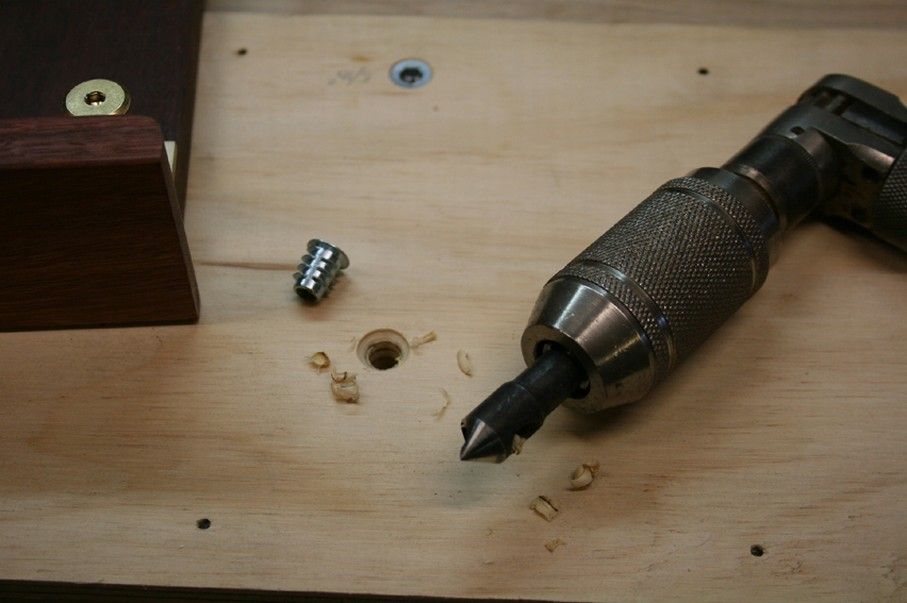
I began by drilling a 5/16� hole for a metal insert 2� off the side of the board.


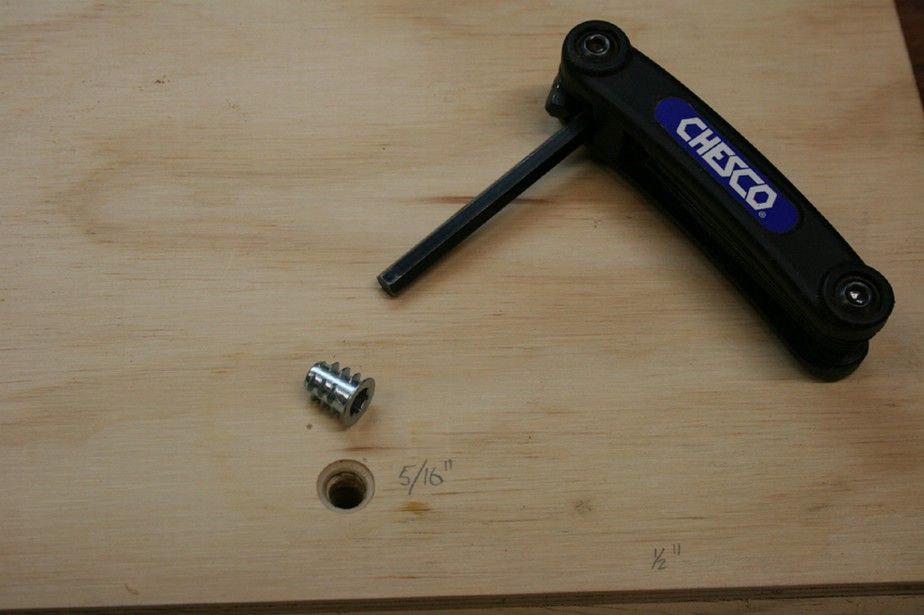
Chamfer the inside edge to enable the insert to sit flush with the table top.


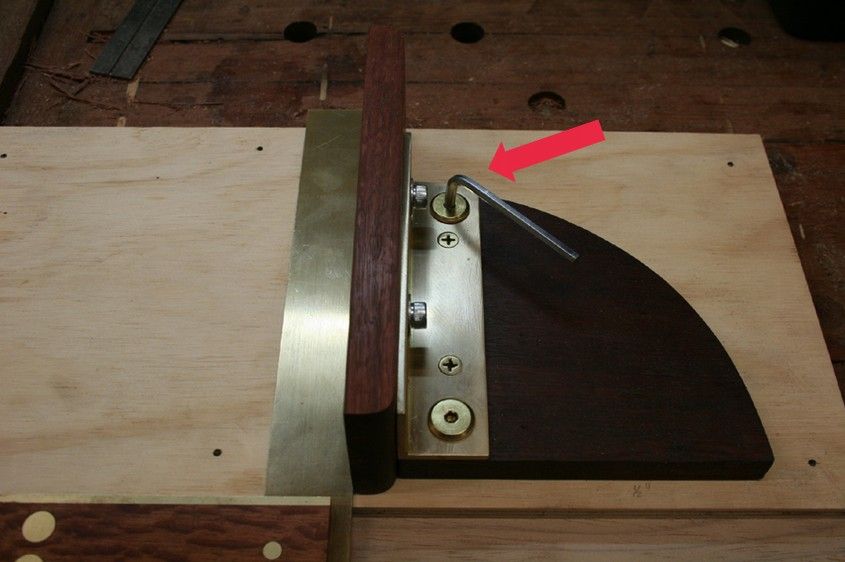
Now attach the fence at this point, square it to the side, and clamp it in place.


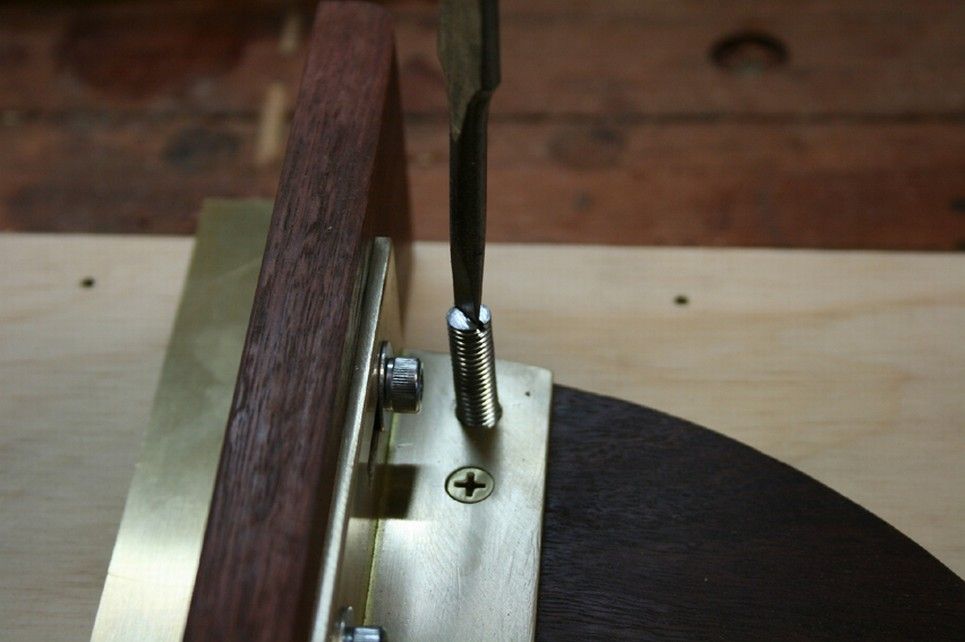
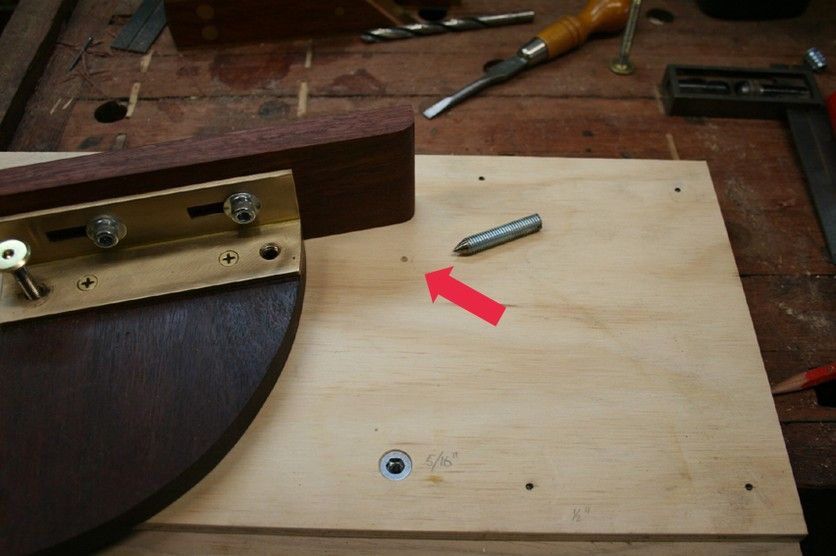
Using the M8 centering bolt, thread this through the far hole until it pieces the table top.


Again drill this out with the 5/16� bit and insert the thread for a M6 bolt.


You can now use a M6 bolt to use the fence in the 90� mode. Attach with a hex key ..


Setting up angles

Here I demonstrate setting up a 45� angle. Other angles (30- and 60 degrees) are completed in the same manner.

The first thing to do is unlock the 90� hex bolt, and clamp the fence at 45�. Be accurate.

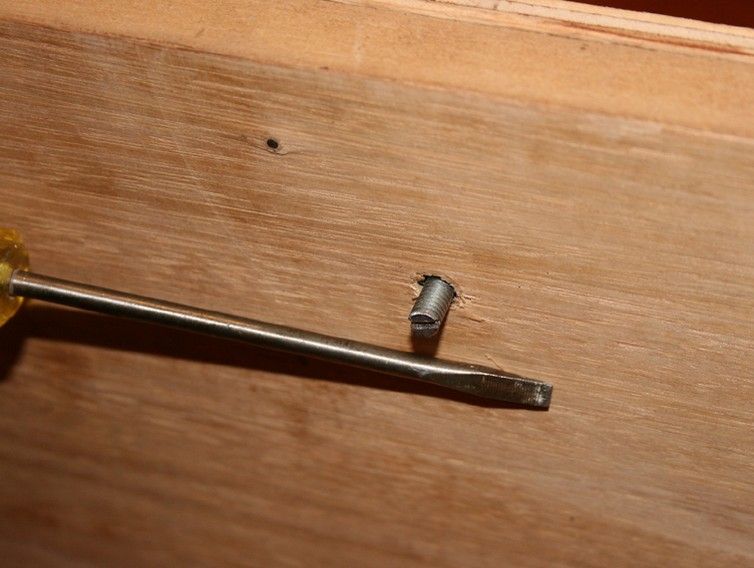
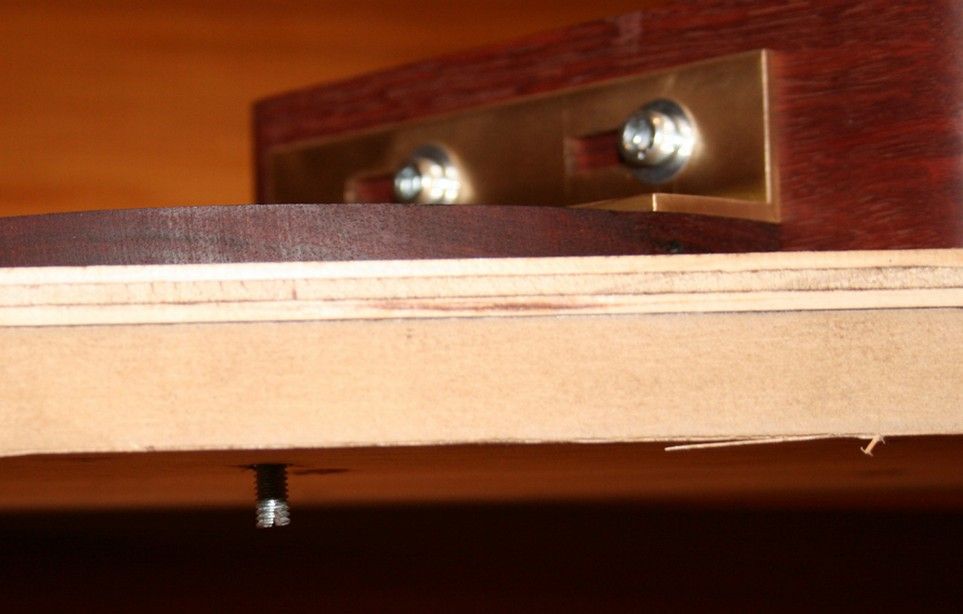
Carefully place the board on its side and � from underneath � thread the pointed M6 bolt up and through the empty metal insert ..


Here is a side view ..


That marks the precise position where you need to drill the fence base for the 45� setting. This hole should be drilled with an 8mm bit to match the micro-adjustment on the 90� setting.

Do the same for other angles.

Installation of your fence is now completed.

Regards from Perth

Derek
Re: Son of Stanley #52

#14

The only thing I'd change

Andrew F in Australia

Hi Derek,

Looks good.

The only thing I'd change through experience (having school students use shooting boards in place of disc sanders finds a lot of unexpected issues,) is to make the fence tall enough to cover the whole of the plane sole. This way, you can't shave the top of the fence off with the plane and the plane has to stay square to the base.

Cheers,

Andrew