Home Articles Forums Gallery Marketplace Videos

WoodCentral Forums

Knowledge You Can Build On — Est. 1998

A natural, durable finish with minimal coats and fuss popular among woodworkers, flooring professionals, and furniture makers

The armoire is finished! *LINK*

Posts

The armoire is finished! *LINK*

#1

The armoire is finished!  *LINK*

Derek Cohen (in Perth, Australia)

>When I began building the armoire I decided to post the steps here with the hope that it created interest and discussion, and that out of these discussions we could debate different ways of design, construction and technique. It was also my intention to include some of these discussions - or at least the ideas - in a series of articles on my website. I have started collated the information and posting it. It has been a huge task trying to find a balance between a build sequence and all the detail that has been offered up by forum members. So feel free to say if you feel something has been omitted or needs to be emphasized. Link below ..

Well we are no longer in the home straight - the armoire is complete (save for one tiny modification, which came to light as I printed these images).

Possibly the biggest headache at the end was designing the handles (used on the doors and drawer). I must have built a dozen in all. The handles that Lynndy liked just did not work, and in the end she agreed. Fortunately she likes the ones that I ended with. I wait with bated breath to hear your opinion.

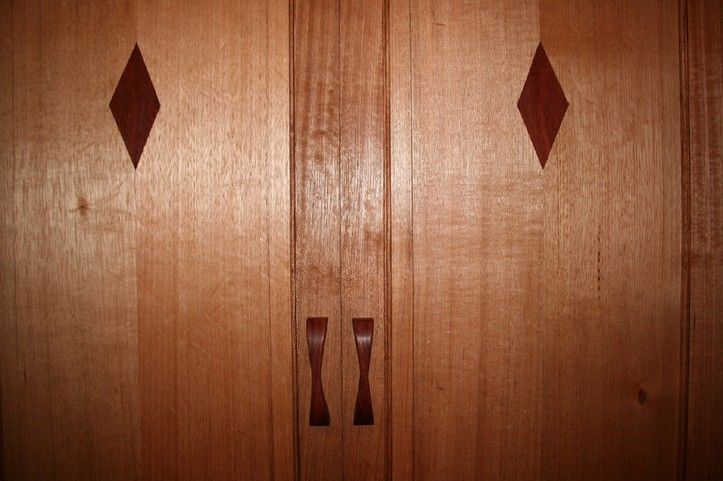
The reason for the difficulty was the diamond inlay that I added to the doors. It created a theme, and simple round handles now really looked out of place. The diamond added a spark of interest in what otherwise might have become "just another country style armoire" (I built one similar to this several years ago, and for that one used Jarrah raised panels in a Hoop Pine carcase. Of course, that one was largely build with power tools, where this one has been largely build with handtools).

The other change was to the mirror that was planned to go over the top of the armoire (the armoire is just 53" high from top to bottom, so the top was intended as a dresser for guests). The mirror was built ... but more on this shortly.

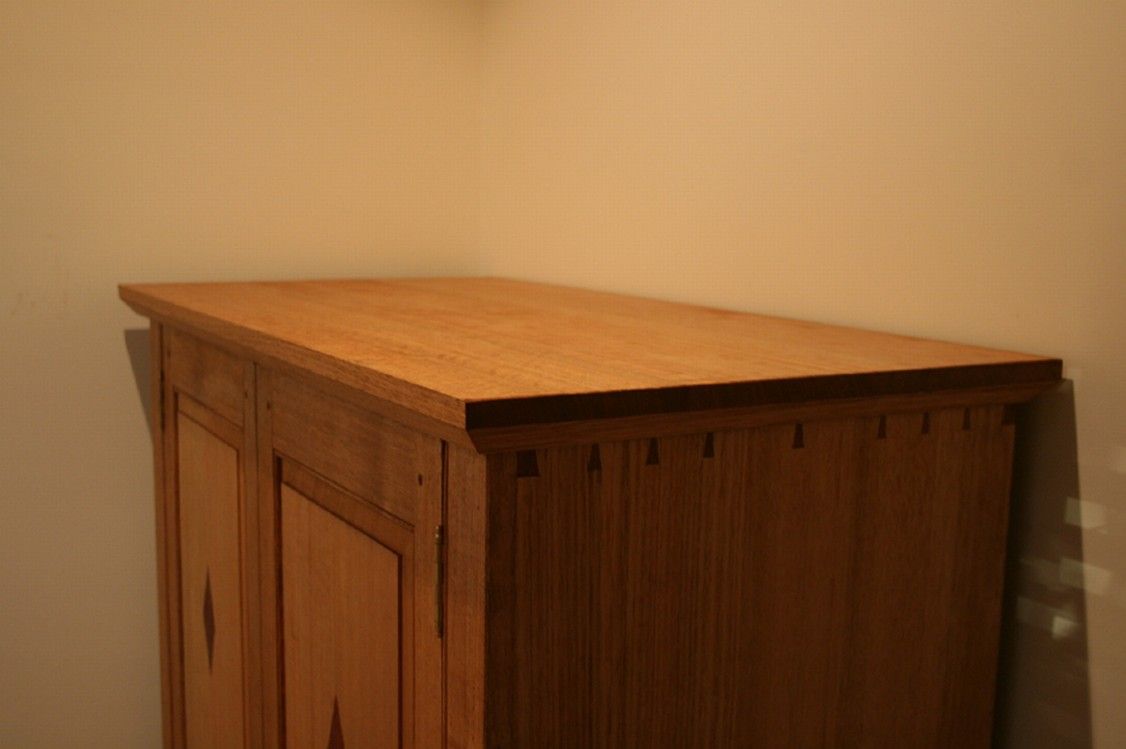
In addition to the handles and the mirror, I have added a top to the cabinet.

OK, so here is the result ...


The top has some really nice fiddleback Tasmanian Oak ..


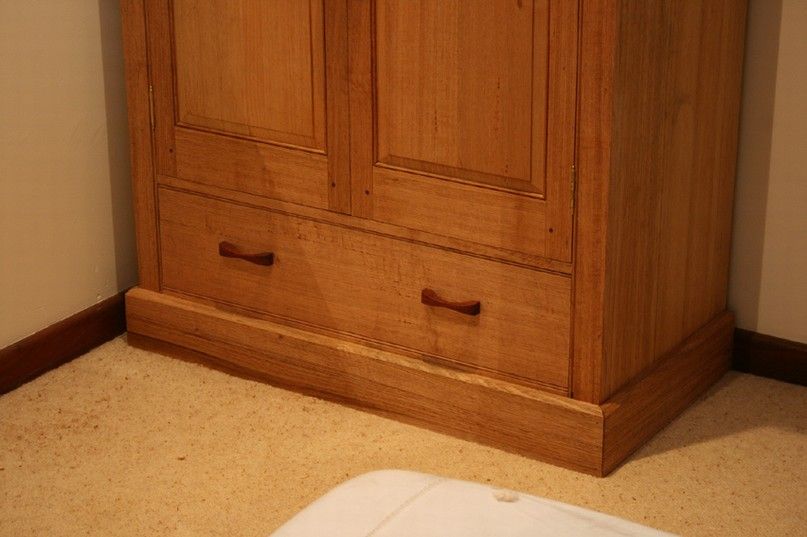
A closer look at the drawer ...


And the handles .... ! You have no idea just how difficult these were to shape (tutorial coming).


The armoire is shallow to save space as the guest bedroom is on the small side. The design placed the hanging direction forward rather than sideways. This is where I have a slight modification. My original build just rounded the face of the hanger. It occurred to me later than this was not in keeping with the diamond and the dovetails, so I reshaped the front. I left the back round as it cannot be seen at the dark rear of the cabinet. Of course, when I took the pictures, I could see the round back, and it now, too, must be altered ..


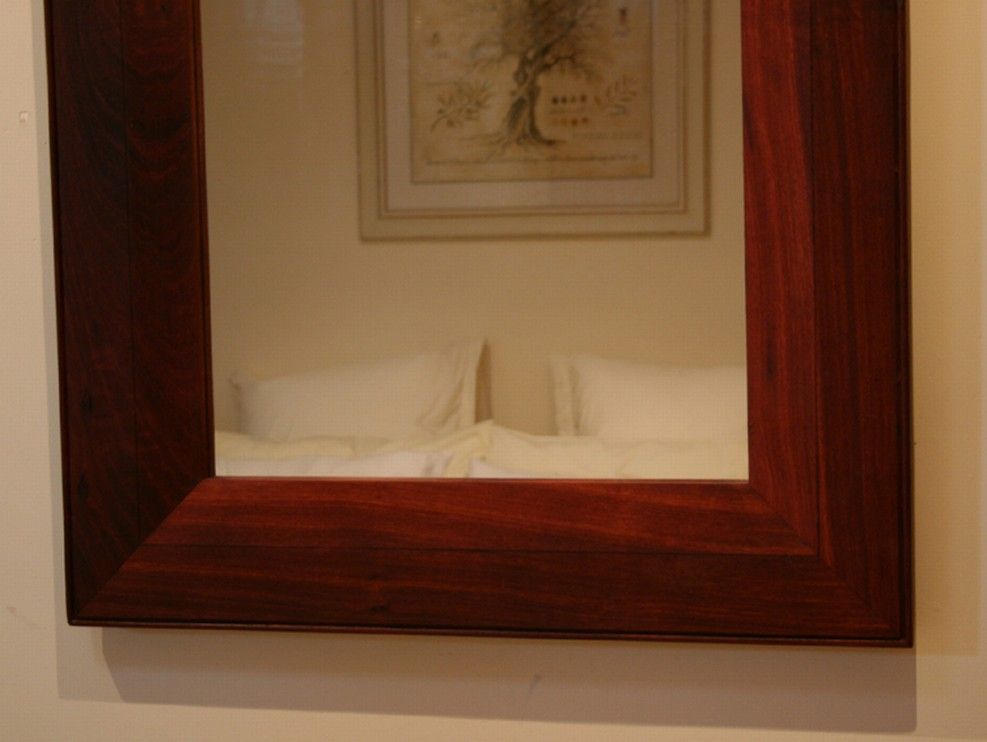
What of the mirror? The mirror!!

I fell in love with the mirror .. or to be more correct, the wood. This is Jarrah at its best! What started off as recycled waste turned into a stunning piece of art (in my eyes, at least :) ). Origonally I had planned to place it over the top of the armoire. It was sized to fit exactly when hung on the horizontal. However, when I tried it there it both dominated the armoire and made the combination feel too tall in the room. So I hung it in the vertical alongside the armoire. I think that guests will be charmed by it (and if not, then they will be shown the door!).

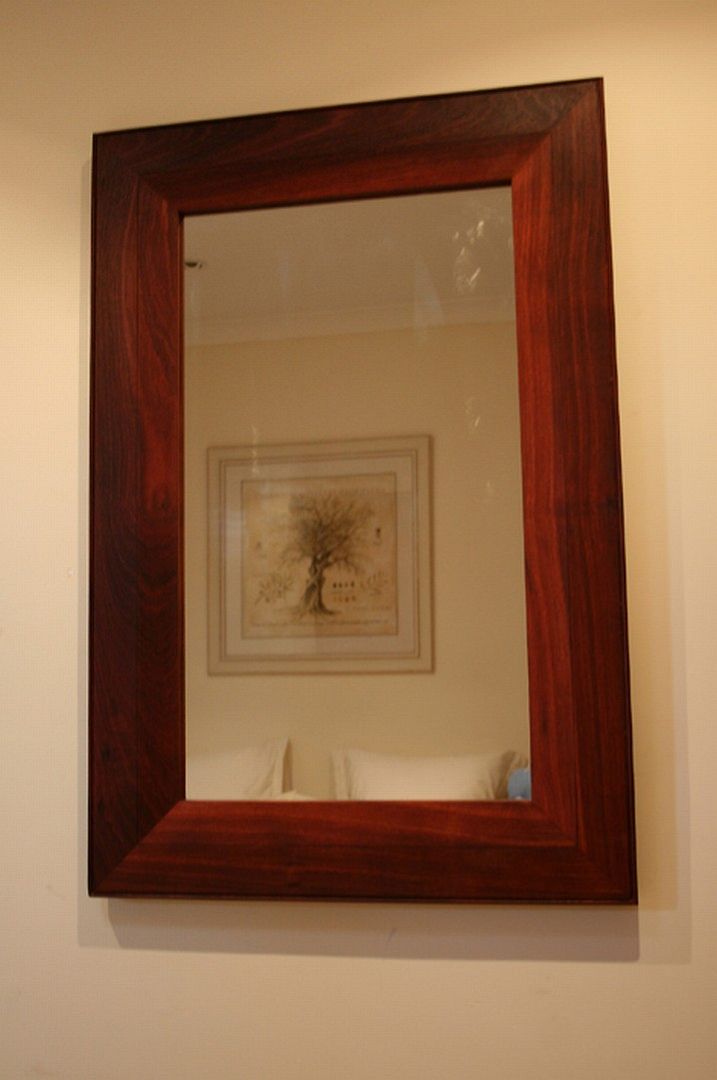

The figure is just stunning and these picture do not do it justice ...


So there you have it. Done. Finally.

My most sincere thanks to all of you who contributed with your advice and critique (and don't stop now).

Regards from Perth

Derek


Armoire Project

Re: The armoire is finished! *LINK*

#2

Re: The armoire is finished!

Bill Houghton

>Lovely work, as always. Tasteful and subtle.

And thanks for talking, all the way through, about the design decisions and building process. As Ellis pointed out when this (hand tool) forum was established, as a place for Badger Pond refugees, we spend a lot of time just talking about the tools, not the work. Good to talk about the work.

Re: The armoire is finished! *LINK*

#3

Re: The armoire is finished!

Wiley Horne--So. Calif.

>Hi Derek,

The step-by-step project build has been a great source of ideas and inspiration! Thank you very much for putting so much effort into this shared experience.

The pulls are perfect, making the inverse image of the diamonds, and making harmony with the diamonds. No conflict or competition between them.

Another thing I just noticed, that I hadn't noticed before....Tops are always difficult. How thick? What kind of profile or edge treatment? How much overhang? It's like there are three ways to lose on every top.

I think that top is just right, because the weight of it balances the drawer on the bottom, but the big chamfer lightens it. And the overhang looks right to me. This is all opinion of course (and everybody has one :) )--but I just see a lot to like, when I look closely. The chamfer on the bottom mold works well, too.

There are only two types of ornament on the armoire, other than the wood figure--the beads and the angular diamonds/chamfers/pulls.

It makes the whole piece pull together. Am sure Lynndy is very happy with it, along with the striking mirror, which is also of a piece with the armoire.

Thanks again,

Wiley

Re: The armoire is finished! *LINK*

#4

Re: The armoire is finished!

Stuart Hough

>Thanx Derek! As usual, your work looks gorgeous! I really like the proportions and style. Thanx for posting your thoughts and experiences along the way.

Re: The armoire is finished! *LINK*

#5

Re: The armoire is finished!

Derek Cohen (in Perth, Australia)

>Hi Wiley

I will try to take a few more ... better ... pictures. These were taken at the end of the day, with fading light and a handheld camera. Better light would help with crisper resolution. And the details do warrant that.

The plan had been to place the mirror above the top. My idea was that the mitred corners and the bevelled inner edges would follow the theme of the diamond, and lift the eyes upward. That might make it possible to use the round, brass pulls that Lynndy liked. However, when I tried it out, the mirror was so powerful that it simply created a unit that was too large for the room. So to Plan B (new handles).

The dimensions for the top were based on the thickness of the bevells of the base. I needed to link the two ends. I also needed to keep the design similar - one choice was to hollow the bevel into a radius, but that would have added yet another design element. The diamonds/mitres are hard edged and the beading serves to soften the total .... or as my mind works.

I plan to just soften the hanger a little. I will cut the rear to a diamond/dovetail shape, but but remove more off the tip than I have so far. It is too pointy (you likely cannot see that it is not a point but echoes the dovetail above).

Then onto the next project: turning a pair of reading lights for a set of small sofa tables (if I can find enough Jarrah for that - think of a "ships decanter").

Regards from Perth

Derek

Re: The armoire is finished! *LINK*

#6

Re: The armoire is finished!

Thomas Skaggs, Foothills of Mount Level

>Very nice piece Derek. By chance were any hand tools used? ;-) Interesting that the armoire looks taller in some photos than others. The handles look good but just one question....do they allow sufficient spaces for fingers to grab and hold? All and all a nice piece of furniture I'd say!

Tom

Re: The armoire is finished! *LINK*

#7

Re: The armoire is finished!

Thomd

>Very, nice! Nice piece of work. I would have left the diamonds out, but I can see how you wove them through. That's what it is all about pleasing oneself (and key family).

Re: The armoire is finished! *LINK*

#8

Re: The armoire is finished!

Derek Cohen (in Perth, Australia)

>The handles look good but just one question....do they allow sufficient spaces for fingers to grab and hold?

Hi Tom

Thanks.

And yes, there is plenty of finger space to grab. I will put together a short tutorial, and this can be seen more clearly.

Regards from Perth

Derek

Re: The armoire is finished! *LINK*

#9

Re: The armoire is finished!

Derek Cohen (in Perth, Australia)

>Hi Thom

Thanks for the kind words.

... if I had to do it again, I'd also leave out the diamonds. That created an unnecessary headache!

Regards from Perth

Derek

Re: The armoire is finished! *LINK*

#10

Yeabutt...

Scott Burr in Ben Lomond CA

>Then you wouldn't have had sooo much fun making the pulls :D

BTW, I like the negative diamond shape of the vertical doors pulls. They accent the inlays in the drawers, you pulled it all together!