Making big mortises for my workbench
wilbur
>To paraphrase the Thing, it's mortising time!
So my modifications to Chris Schwarz's Roubo bench plans included making a bunch of 1" wide mortises for the stretchers, and to set the legs into the top. That's why I asked a few days ago about how you all make mortises. I really appreciated the all the input and suggestions, and after trying a few different methods, I thought I'd show how I wound up making these things.
The mortises for the leg stretchers are going to be 1" wide by 3-1/4" long by 2-1/8" deep. To make a mortise 1" wide, you need a 1" mortise chisel. Here it is, next to my normal sized 1/4" mortise chisel.
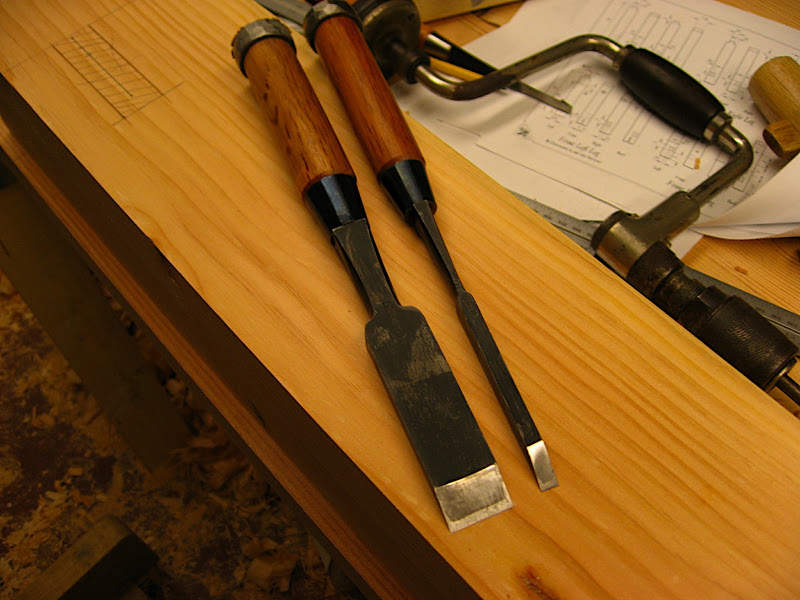
Now that's a mortise chisel! :@)
By the way, if at this point anyone thinks I'm nuts for trying this, it's all Wiley's fault. :@) I'm sure that he doesn't remember, but a while back we had exchanged some emails about making big mortises, and one of my plans was to drill and pare these 1" mortises, and then had this crazy idea about getting a big honking mortise chisel instead. He said, and I quote, "I'm not the best one to ask, because I tend to aid and abet these big dreams." He also suggested that it would be fun to document the process. As it turns out, getting a big chisel was the thing to do. So thanks, Wiley! And this write up is for you.
Now, I've been chopping 1/4" mortises by hand without much problem, and I thought it was pretty quick work. To my surprise, after making some practice runs, it seemed that my 1" mortise chisel was cutting much more slowly. I couldn't figure out why that would be so -- after all, bigger is better, right? It took me a while, but I finally realized that since this chisel is 4 times as wide, the force from the hammer is going to be spread out over a wider area, leading to less penetration. Here's a little experiment I did to prove this to myself. I took a piece of wood, and made a mortise chop with each chisel, with the same number of hammer blows. Then I sawed the cuts in half to get a look at the cross section. You can clearly see that the wide chisel won't penetrate to the same depth as the narrower chisel.
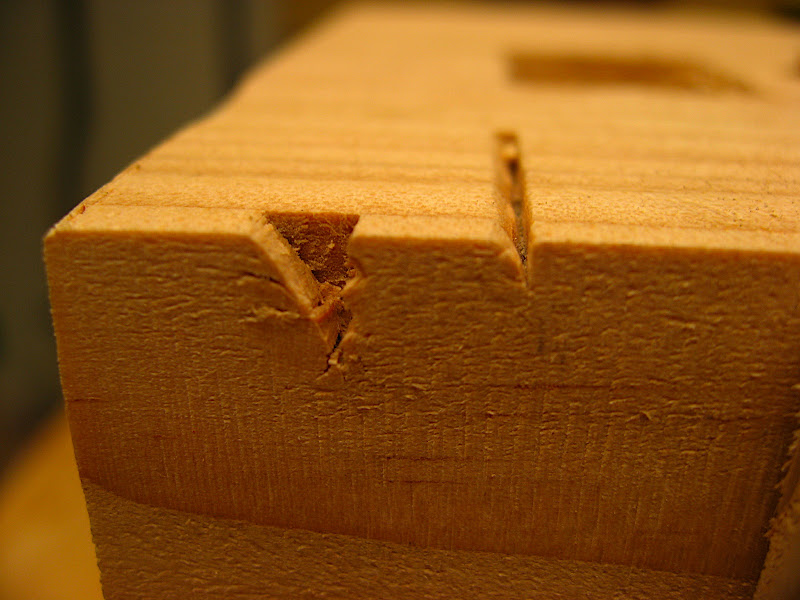
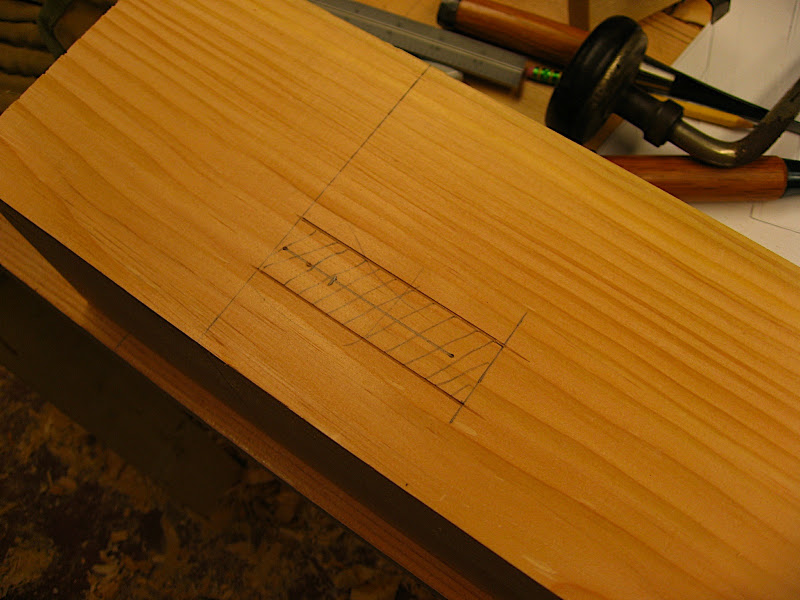
So now I had some perspective on how my big mortise chisel was going to perform, and learned to have some patience. Here's the layout.
And here's my secret weapon for making mortises.
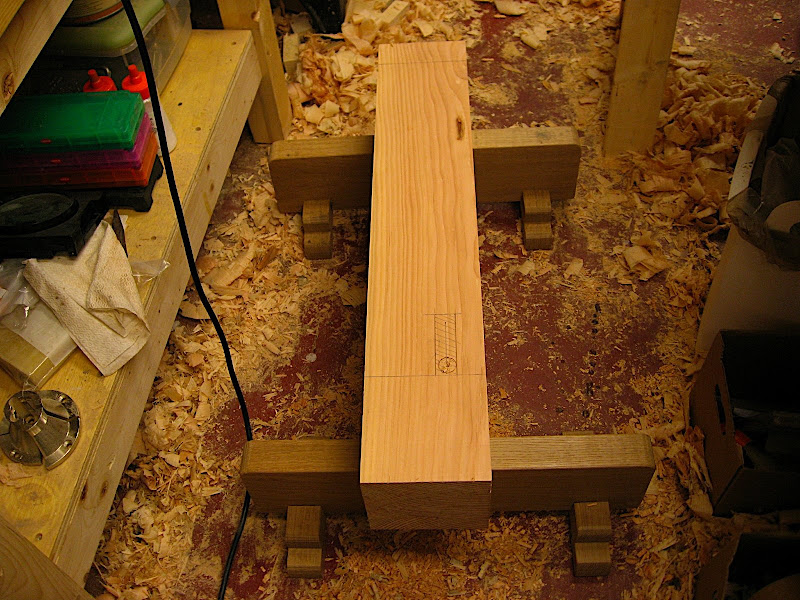
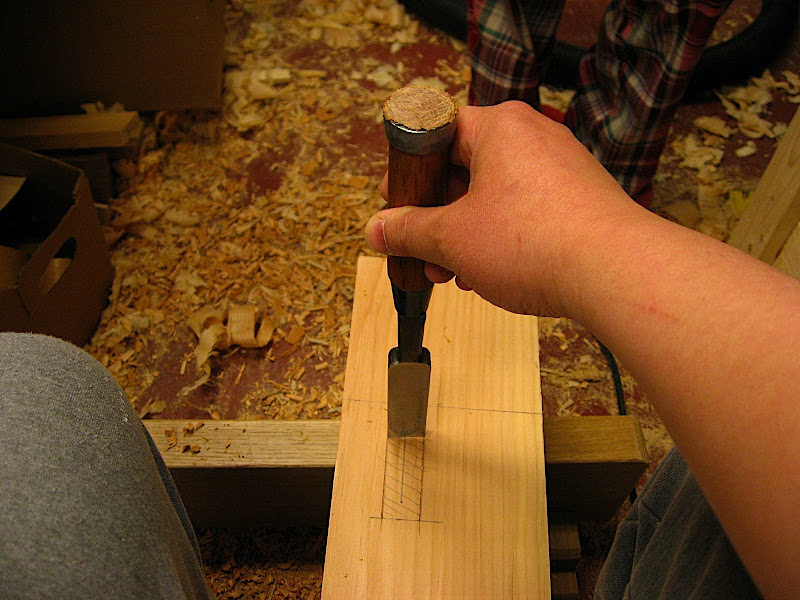
This is a pair of low horses. By putting the workpiece on these, I can sit and chop the mortises. Since I'm sitting on the workpiece, I can straddle it, which means that I don't have to twist my body and strain my lower back leaning over a workbench, and making sure that the chisel is straight is easy. Also, sitting on the workpiece makes the ergonomics of pounding with a hammer much better.
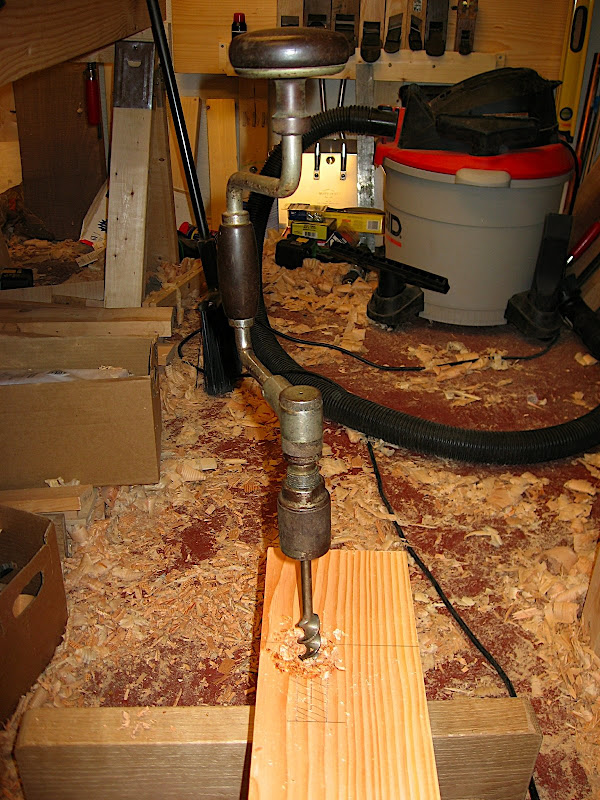
The first thing I do is drill a hole towards one end of the mortise. The line in the middle of the mortise is centered, to help me with locating the drill bit. I made a mark on the drill bit so that I knew when I had drilled a hole 2-1/8" deep or so.
Then I start chopping. As I mentioned above, sitting on the workpiece with the mortise between my legs makes holding the chisel straight very easy.
The hole I drilled gives the chopped waste a place to go. The first few chops are mainly to get the walls of the mortise straight. Here's what it looks like after the first few chops.
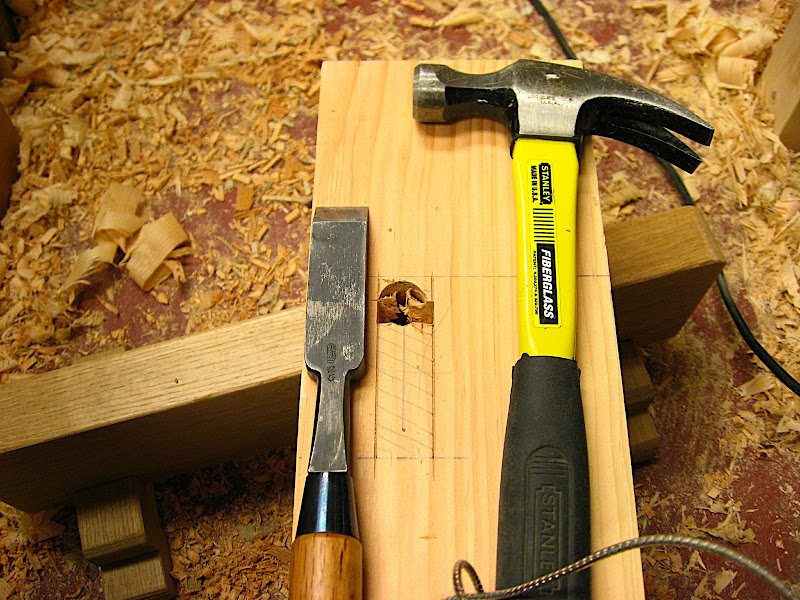
Note the fancy mortising hammer! ;)
The bevel of the chisel is facing the drill hole. I tend to do 8-10 hammer blows, and then wiggle the mortise chisel to break the chips free, then hit the chisel again 8-10 times. I'm not really pounding away with the hammer. My guess is that I'm hitting the chisel with about 75% of the force that I would use if I was hammering a nail. You don't need the hammer blow to be forceful -- if there is an issue with penetration, sharpening the chisel is better. What you want is the hammer blow to be controlled, because at this point it's more important to make sure that the walls of the mortise are straight.
At some point it will get difficult, since even though I have a drill hole that the waste can go into, it's not completely the width of the chisel, so then I stop. As I work back along the mortise, I start the next set of chops about 1/8" back.
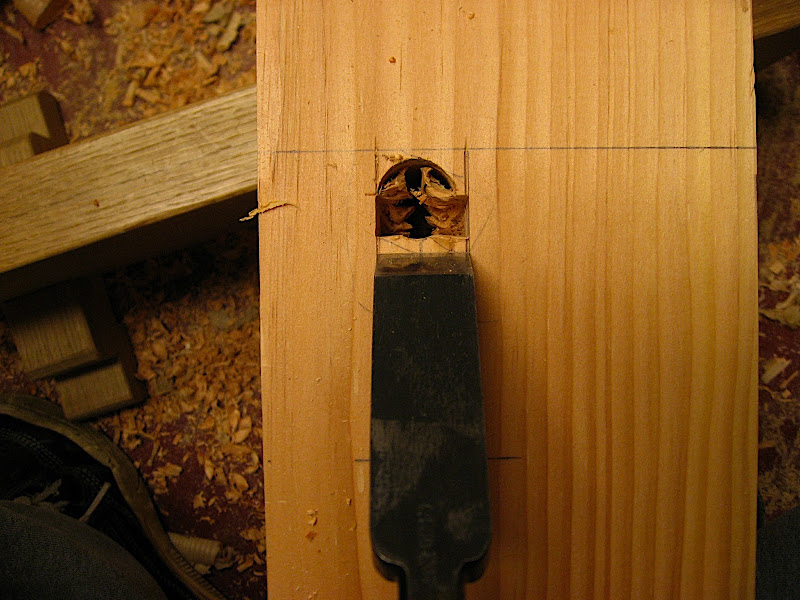
And this is where I'm at after 4 minutes of chopping. It may not be completely clear from the photo, but I'm already 1" down.
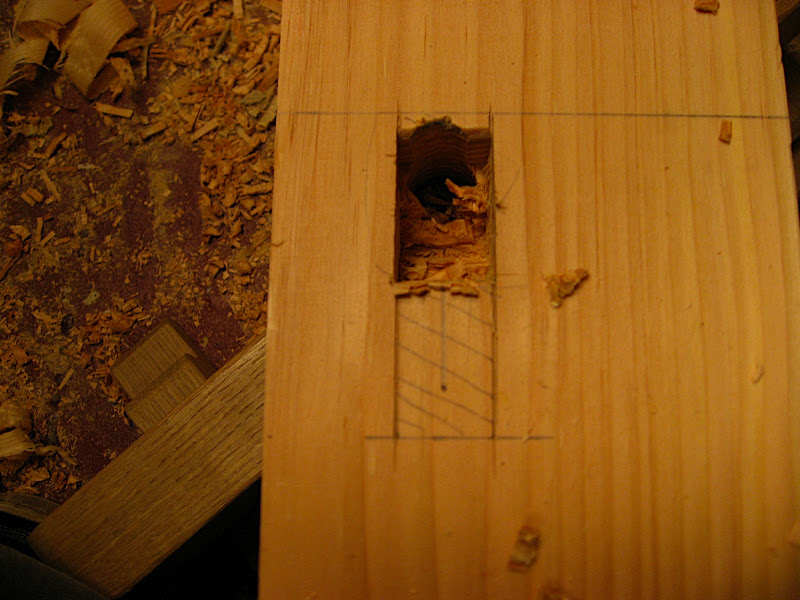
Now, I'll go back over the section I've worked on, and chop down until I'm at the depth that I want. This takes about 4 minutes as well.
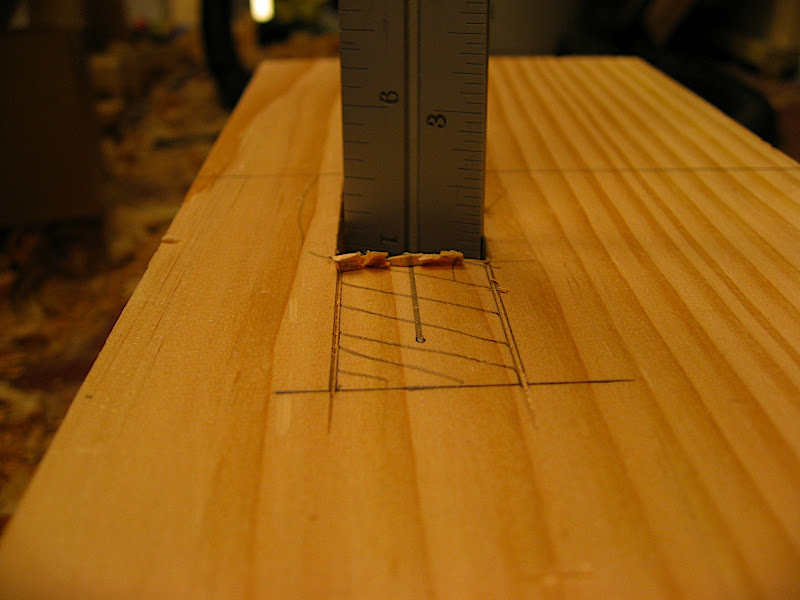
At this point, I have a decently sized section of mortise cut down to full depth. This makes chopping the rest of the mortise really easy. I move back about 1/8" at a time. Again, I do 8-10 hammer blows, then wiggle the chisel to break the chips, chopping all the way down. I used a Sharpie to mark on the side of the chisel so that I know when I've hit bottom. Here you can really whale away on the hammering, since the walls of the mortise are already established. I keep going until I hit the end of the mortise. This takes me about 5 minutes.
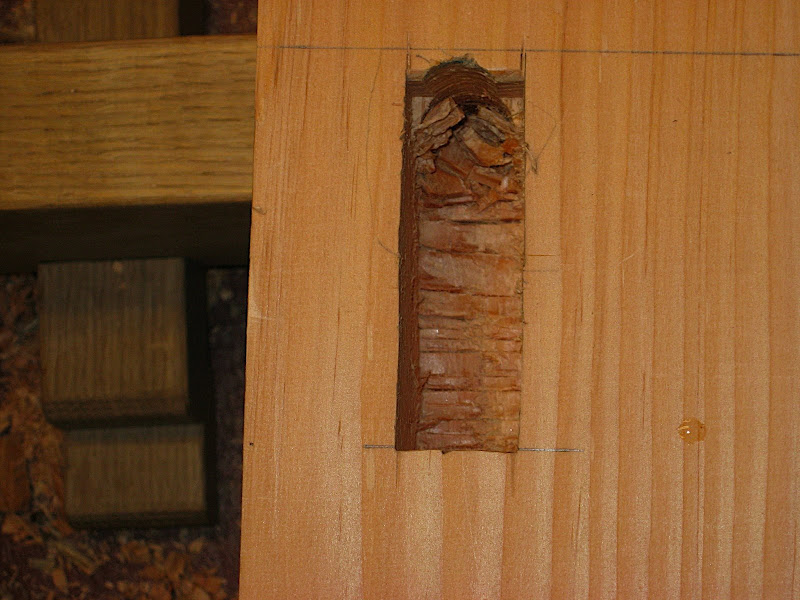
Then it's just a matter of cleaning up the other end. Here I'll reverse the chisel so that the bevel is facing me. A little more work, and I'm done.
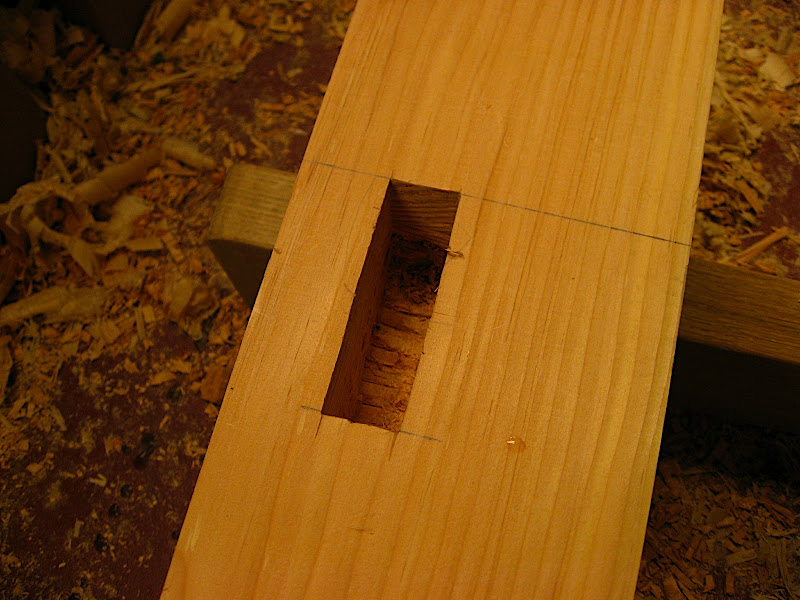
Total time, about 15 minutes. Not bad, I'd say. My first mortise took me about half an hour. I'm definitely getting faster with practice.
Now, I'm sure that using a mortising machine would be faster, but there isn't a 1" wide mortising bit that I know of. So with a mortising machine I'd have to make one run along one side of the mortise, and another along the other side, and then waste out the middle. Over the several mortises that I need to make for this workbench, I'm sure some amount of error will creep up. This way I know all my mortises are the same width as my chisel. In addition, I have to make mortises in the underside of my workbench top, and there's no way I'm getting the benchtop in a mortising machine.
One thing is for sure -- next time I make some more normal sized 1/4" wide mortises, it's going to go a lot faster.
Hope that was entertaining, and thanks again, Wiley! :@)


