WoodCentral Forums

Est. 1998 — 27 years of woodworking knowledge

For you frustrated infill kit guys *LINK*

Posts

For you frustrated infill kit guys *LINK*

#1

For you frustrated infill kit guys *LINK*

woodburnbob

>I just stumbled into this link on the web and hadn't seen it before. Seems like a reasonable alternative to the now unobtainable Shepherd kit.

Years ago I bought the 3 back issues detailing the SMT smoother from a St. James Bay casting. Can't remember the magazine name...HomeShop Machinist?


St. James Bay show and tell

Re: For you frustrated infill kit guys *LINK*

#2

Kinda...

Scott Burr in Ben Lomond CA

>All the SJB plane kits are castings I do believe. You can get them finished or rough also. I've heard it's a PITA to start from a rough casting if you don't have your own mill. Also what fun would it be not to have to pein together dovetails? Naaa too simple ;^)

Yes, it was home shop machinist.

Re: For you frustrated infill kit guys *LINK*

#3

Re: For you frustrated infill kit guys

Dan Clermont in Burnaby

>I talked to them years ago and they told me the rough castings are allot of work and those that I heard from who build kits said they wouldn't do it again. Next time they would buy the cleaned casting.

Still a worthy option if you want to build an infill and I believe they got a good review in FWW last Decemeber

Cheers

Dan C

Re: For you frustrated infill kit guys *LINK*

#4

Re: For you frustrated infill kit guys

Bruce, a MN Galoot

>I have the SJBT smoother kit, and it's in the final stages of finishing. I've been working on it, off and on, mostly off, for a long time. The need for a really good smoother is what's driving this final push.

IMHO, you don't need a mill to do the outside sides or the bottom. I flattened the sole by hand, using a machinist's scraper. It took a while, but it's dead flat. The sides I did with a strip sander.

However, it was a real PITA to try to fit the stuffing until I took the casting to work and machined the inside sides parallel and flat. All the rest of the parts just fell into place. Well, kinda...

I guess it depends on whether you want a good plane fast, or whether you want a good project to work on. I like projects.

Bruce
Re: For you frustrated infill kit guys *LINK*

#5

Darrell in Oakville

Cool. I had forgot about that page...

Darrell in Oakville

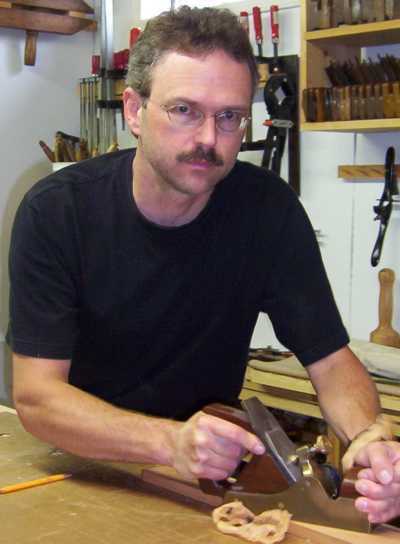
>Every once in a while I get a query about the stuff on that site. The SJBT infill was kind of a Group project for the Galoots on the Oldtools email list back then. I know of at least a couple that were finished besides mine. I also know of a couple that still aren't done ;^)

That plane is still my go-to smoother, as well as a prime candidate when I need something "for scale" in a shop photo.

Darrell

Wood Hoarder, Blade Sharpener, and Occasional Tool User

Re: For you frustrated infill kit guys *LINK*

#6

Re: Did he ever start drawing his blades' temper?

John in NM

>I was in Mesa for a day several years ago, right after there was an article in FWW that kinda panned SJB's blades. I was talking to the proprieter about things in general, and asked him what temperature the blade I was buying was drawn to. He merely said it wasn't. Easy enough to do though, depending on the use I guess. Any one have thoughts on the subject?

John

(owner of one of those "project" planes, bullnose in this case, to be finished one of these years)

Re: For you frustrated infill kit guys *LINK*

#7

question for you, Darrell...

Bruce, a MN Galoot

>When you pinned your stuffing into the plane, did you use sleeves or just drill holes through the wood and peen away? Is it necessary to taper the holes in the casting so the pins fill them for a better hold?

While I'm at it, is it worthwhile to bed the stuffing in epoxy?

Thanks,

Bruce, one of the original unfinished infill project galoots.

Re: For you frustrated infill kit guys *LINK*

#8

Darrell in Oakville

Re: question for you, Darrell...

Darrell in Oakville

>Bruce,

I put sleeves through the infill to prevent the pins from bending and splitting the wood. The 3/16 brass rod I used fit perfectly in the brass tubing I found (the tubes are for connecting the float to the valve in a toilet tank - cost me all of 25 cents). When I countersunk the holes in the castings I made the countersinks way WAY to big. Turns out that you need only the smallest little countersink to hold the rivets/pins in place. When you have to hammer on brass too much it gets work-hardened, and then it starts to crack and chip and you end up with little divots around the edges of the countersink, DAMHIKT. If you had a very shallow tapered reamer that might be better than the 90 degree countersink I used, or then again, maybe not..

Epoxy won't necessarily fail on you, but it might (like mine). The stuff makes a great gap filler if it's thick enough. You will get a much better fit if you bed the infill in epoxy, and that can only help with a high-end smoother.

HTH

Darrell

Wood Hoarder, Blade Sharpener, and Occasional Tool User

Re: For you frustrated infill kit guys *LINK*

#9

Chris Scholz

Number of Infill Planes Sold

Chris Scholz

>Does anybody have an idea how many infill planes are being sold (kits/finished planes)?

Thanks

Chris in Atlanta, GA

Re: For you frustrated infill kit guys *LINK*

#10

Re: question for you, Darrell...

Wendell @ Murphy, TX

>I've been told by both Ben Knebel and Wayne Anderson that it is better to use a tapered reamer rather than a counter sink on the rivet holes.

Wendell

Re: For you frustrated infill kit guys *LINK*

#11

Re: Number of Infill Planes Sold

Ben Knebel

>Hi Chris;

We sold just over 1000 kits and 150-175 finished planes in 4 years.

Regards

Ben

Re: For you frustrated infill kit guys *LINK*

#12

Haven't even put "build infill" on my list yet

Bill Houghton, Sebastopol, CA

>but a comment: General Hardware sells a little tapered reamer intended for enlarging holes in sheet metal, I suspect, that would give you a very shallow taper. Any hardware store that sells General products should have or be able to get one. There may be other makers, too, but General's products are pretty decent.

Re: For you frustrated infill kit guys *LINK*

#13

Re: question for you, Darrell...

C.R. Miller

>Either works fine - metal countersink or reamer. Reamers used for violinmaking (as in peghole reamers) will also work fine.

Re: For you frustrated infill kit guys *LINK*

#14

Re: Pins

barryvabeach

>I built a SJBTC panel (that is the larger one) from the rough casting and the parallel sided smoother from the machined set and the machined set is the way to go. While I obsessed about a number of thing ( I made dozens of different handles - shape, width, angle etc) IMHO follow KISS rules for the pin, don't counterbore, install collets or try to peen the ends. I drilled the pin holes with a drill several sizes smaller than the pin, and then used each of the next sized drill bits in order to get the hole to the right size. I had read that gets a much truer hole than starting with a 1/4 drill bit. Then I tapped in the pins with a very light hammer taps and by the end it was a very tight friction fit. I did not counter bore the sides at all thinking that there is no lateral pressure on the pin trying to force it out either side, as long as it is snug, it isn't going anywhere. Plus, when you file - sand the sides, you will likely put a slight burr on the pin anyway so you don't have to worry that it will come flying out. None of the pins in either plane had moved the slightest - except for the one time I needed to take it out - and that was pretty easy. If I had countersunk it, that would have made it tough to remove. So keep it simple and just drill for a tight friction fit. As to epoxy, I would reccomend that if you use it, use it as a bedding compund with a release agent so if you have to get the infill out it will come out. Again, once it is pinned, the bed should stay in place. Good luck Barry

Re: For you frustrated infill kit guys *LINK*

#15

Re: For you frustrated infill kit guys

ThomD

>I bought four of those kits. I bought one of their biggest planes in an unfinished casting. And it is still unfinished, likely to remain unfinished, in fact, come to think of it I have been loooking for a piece of U-channell to use as a 2 way door stop, but had been resisting steel because of the rust. I think I have a solution!

The really stupid part is that at least when i got my parts the milled parts were very well priced. Why I sprung for the raw castings is a bit of a mystery. I guess I am looking forward to the warm feeling of superiority that will flood over me when I figure out how to do the interior with the minimal tools I have... Still waiting for that to happen.

Also, within reason, you can specify how you want your parts delivered. I got a special groove milled for free, for fly rods. Nice people to work with.

Re: For you frustrated infill kit guys *LINK*

#16

Re: Did he ever start drawing his blades' temper?

ThomD

>I read the same article, his problem seemed to be he wasn't getting enough hardness on his blades. All this being what ten years ago? I only have one of his blades, the other planes were supposed to have Hock blades made for them, but in the end I'll do it myself. The heat treat info for O1 is on the packet so he must know what is involved. I'm not sure you have to temper O1 for planes. I do, but I have had blades come out too soft at even in the 300s. Since most of the blade will not even get hardened, I'm not sure it maters.

👍 This page answered my questions

Your vote helps other woodworkers quickly find the answers and techniques that actually work in the shop.