WoodCentral Forums

Est. 1998 — 27 years of woodworking knowledge

Need help with boring and reaming

Posts

Need help with boring and reaming

#1

Steve Kubien

Need help with boring and reaming

Steve Kubien

>Afternoon everybody,

Last night I gathered the needed tools and courage to begin boring and reaming the leg mortises for my Welsh stick chair. In general, things went much easier than I expected. One error though.... I was WAAAAY off on the angles. The legs are in line with the sighting line but the splay is not nearly wide enough.

As I bored the mortises, everything looked ok. Same when I reamed them. I used a resultant angle of 12 degrees for the front legs and 16 for the back, just like Langsner says. The reamed holes are very round and not oval as I had feared they would be. But, when fitting the legs, things were way too 'upright'. As I said, everything looked ok during boring/drilling but it obviously wasn't. So here is the question I have...

Where is the angle more likely to get messed up, boring or reaming? This afternoon I plan to plug the holes and take another shot later this week. Any tips from you chair-buildin'-types?

Thanks,

Steve Kubien

Re: Need help with boring and reaming

#2

Rent a porno...

Scott Burr in Ben Lomond,CA

>Ahhh, I'm no help. Sorry, I can't controll my dirty mind sometimes...;^)

Re: Need help with boring and reaming

#3

Re: Need help with boring and reaming

mikew

>Hi Steve,

Here is Alf's journey to a Welsh stick chair.

http://www.cornishworkshop.co.uk/album/thumbnails.php?album=20&page=1

Her blog has more details, starting in February.

http://cornishworkshop.blogspot.com/2006_02_01_cornishworkshop_archive.html

Take care, Mike

Re: Need help with boring and reaming

#4

Re: Need help with boring and reaming

Alice Frampton, UK

>Yeah, but Mike I haven't even trial fitted my legs yet - I may have exactly the same problem having gone with Langsner too (although not reamed). I'm really trying not to think about that now... :~S Hope you get it sorted satisfactorily, Steve, and I'll be looking at the advice you get very, very closely!

Cheers, Alf

Re: Need help with boring and reaming

#5

Re: Need help with boring and reaming

john jesseph

>Seems like the reaming stage is where things can make a turn for the worse for me. I don't worry nearly as much about the drilling, although it is pretty easy to keep that straight and true.

I am curious what reamer you are using, and your technique? As I gain experience, I find myself checking the angle less frequently as I go, but it helps to make some checks in progress.

Most recently, I have been setting a square on the sight line just past the mid-point, so the long edge is touching the sight line. I can see when the edge of the square and the distant part of the slght line converge, they should line up with the middle of the brace-top. Getting the resultant angle, the tilt, is a little tricker, and also where problems occur. If I am off, it is usually too upright (as you note). Then, the further off you are, the more correction needed, and then you get a mortise that is super sloppy if you panic and just crank on the brace to try and steer it.

I have been using a small adjustable bevel for the angle, set right as close as possible near the reamer. I have as much of the shank of the reamer exposed as I can, and try to use that to gauge the angle with the bevel. Alternatively one could put the bevel to the side, and line up the rearmost edge (exactly 90 degrees to the hole) with the middle of the brace pad.

Anyway, I recommend in general to put the leg in a few times as you go and check your angles as you go. Side to side shift can be corrected by leaning on the brace, but for dropping the angle back for more rake and splay I use a different technique. I loosely put the reamer in the mortise with the cutting edge at the 9 o'clock position, and drop right to the angle I want to correct to. I insert it only enough for the nose of the reamer to cut, only on the far side of the seat. Half a turn to three o'clock, and then back off the pressure totally for the rest of the 180 degrees. Repeat until the far side of the mortise is reamed, then continue with full turns until the reamer is fully seated. This is a fairly simple operation, and I may not be clear- I could snap some photos and put together a better description. This technique takes all the guesswork and worry out of the process, and you can make just the right amount of correction confidently, without introducing slop.

Hope this makes at least a little sense and is helpful...

John Jesseph, turning stretchers today.


img

Re: Need help with boring and reaming

#6

Re: Need help with boring and reaming

Pam Niedermayer - Austin, TX

>The John Alexander tape shows how to do this stuff, using a small level on a brace.

Pam

Re: Need help with boring and reaming

#7

Re: Need help with boring and reaming

mikew

>What can I say? Until Steve posted, I thought you were the only one venturing into Welsh stick chair country...

And I'm no help. I've only built stools and chairs using jigs on the drillpress for boring. Though I suppose if I were to mount the angle-jig on the bench it would aid in boring with a brace as it would allow one to "simply" keep the brace vertical in both planes.

From looking at other posts, though, it sounds like the error may creep in when reaming, which I assume is how y'all taper the holes? If so, I suppose just paring the taper into the holes with an appropriate in-cannel gouge wouldn't work? Like tapering square mortises with a chisel?

Take care, Mike

who is going back to making drawers...they're square...

Re: Need help with boring and reaming

#8

Re: Need help with boring and reaming

Edward Damewood, Northern Alabama

>I'm not too familiar with the Welsh stick chair, but it sounds like you're trying to socket tapered chair legs into a plank seat at some prescribed angles -- same operation as for a Windsor chair. I'll try to help, as I have legged-up a couple of American sack-back Windsors.

The legs are in line with the sighting line but the splay is not nearly wide enough.

Okay, that's one angle right out of two. You're half-way there. Or maybe a third of the way, depending on how you look at it. You need to (1) get the leg along the sightline, (2) get the right angle off of vertical from the seat, and (3) go deep enough, but not too deep.

As I bored the mortises, everything looked ok. Same when I reamed them...The reamed holes are very round and not oval as I had feared they would be...But, when fitting the legs, things were way too 'upright'. As I said, everything looked ok during boring/drilling...

It sounds like you were very concerned about elongating the holes -- so much that you may have lost focus on the angle itself. Did you use a bevel square to check your angle as you went along? It sounds like you were on the sightline, so I'm guessing you had that marked on the seat plank itself.

Where is the angle more likely to get messed up, boring or reaming?

I don't know how big a bit you used when you bored the initial leg-hole, but I would say that the initial hole only gets you in the ball-park -- it basically gives you a reference and a starter-hole for where you do the reaming. The optimistic way of looking at this is that you can adjust the hole with the reamer if it isn't at exactly the right angles. The pessimistic view is that it doesn't matter how well you bore the initial holes, because you can really mess them up during the reaming.

For most of us -- meaning those of us who haven't made tens or hundreds of chairs -- I would consider this an iterative (ream a bit, test, adjust reaming, test, etc.) process. Drill and ream the legs in pairs (both the back legs, then the front legs, or vice-versa). Get one of them like you want it, then try to make the other look right with it. Test the legs in the holes as you go and be very careful not to remove too much stock with the reamer, because you can get too deep in a hurry.

You're doing handwork on a chair, so there is a lot of testing, eyeballing, and adjusting involved. If it looks right and works well, it won't matter if the angles are off a smidgen from the original. If you're making a set of four and your brother-in-law is going to line them up and critique them...well, that might call for tighter tolerances.

I fear I may not have helped, but I did try. Good luck, and keep us posted.

Regards,

Ed

(remove the DEL for e-mail)

Re: Need help with boring and reaming

#9

Re: Need help with boring and reaming

Scott in Douglassville, PA

>Hi, Steve -

Sorry to hear things are going awry. Are the angles so off that you really have to plug and start over? Do you have enough room left that you can adjust the angles a bit with the reamer?

I have more of a problem (from my meager experience) drilling the hole accurately to begin with than with reaming. My reaming's not stellar, but things seem to work out. How are you lining up with the resultant angle?

FWIW, Jim Rendi had me sight by eye on the chair I made with him. "You start here at vertical, lean it out a bit, back a bit more, yeah - drill it there." Surprisingly, works out pretty well - nail the first one, insert a dummy leg/dowel to help you visualize, and drill the complimentary hole. Adjust with the reamer.

That said, I'm using sighting lines now...

Scott, saddling today

Re: Need help with boring and reaming

#10

Re: Need help with boring and reaming

Greg B�tit, Crown Point

>Edward, John, Scott, etc. had some good ideas, I'll mostly be reiterating their advice- Like check your angles while reaming! It helps if you have a straight dowel with the taper turned on the end to use to check the angle, instead of using a leg. Like John, I find that I can have the holes just right, and goof it all up while reaming. Once the first hole is reamed, put the leg in to give you an additional visual reference. Continue doing this as you drill the 3rd & 4th. It's not as easy clamping the seat when you have the legs in, but it's worth the extra fussing if you're having a hard time getting the angles right.

Another idea is to have someone come in and help you sight while reaming. Of course you need to consider who you ask, preferably someone who accepts the way you behave when under stress.

Greg

Re: Need help with boring and reaming

#11

Steve Kubien

My first thought was...

Steve Kubien

>...to go and check the Alexander tape (thanks again Secret Santa/Pam) but then I thought through the task... I am trying to bore the holes into a solid seat plank (this is a Welsh stick.Windsor chair, not a post-and-rung). To make things harder, the holes are at a compound angle.

Thanks Pam but John isn't going to help me through this one.

Cheers,

Steve Kubien

Re: Need help with boring and reaming

#12

Steve Kubien

Thanks everyone

Steve Kubien

>Some great advice in the responses and for them I thank you. I am using a small sliding bevel to help me line up both the drill and the reamer. Someone opined that I spent too much time NOT elongating the holes and wound up messing the alignment... You may be correct. Scott (I think)...I never thought about trying to re-ream the holes. I was too worried about messing up and having a REALLY sloppy fit. I will try this approach next time. Greg, in order for me to find someone who can tolerate me when things are going poorly, well, I probably shouldn't say this in case the boss is listening, but I would have to get me a Marine drill sgt. SWMBO is definately out of the question (Steve = happily married and wishing to stay that way).

Thanks everyone.

Steve Kubien

P.S. As for the reamer I am using, well, let's just say it is a prototype and I am really happy with it.

Re: Need help with boring and reaming

#13

Steve, You sneaky so and so......

Dave Anderson Chester, NH

>I don't know whether anyone else caught your little inuendo, but I sure did. You are now pulling the same kind of teases as your at work boss.

Hey Rob, isn't that intruding into your territory?

Re: Need help with boring and reaming

#14

Re: Steve, You sneaky so and so......

Rob Lee

>Well -

It's close .... but he was testing that before he was hired....

I can still make the odd drive-by though... just made one on the UK board a few minutes ago... :)

Cheers -

Rob

Re: Need help with boring and reaming

#15

That's not fair!!! *LINK*

Dan Clermont in Burnaby

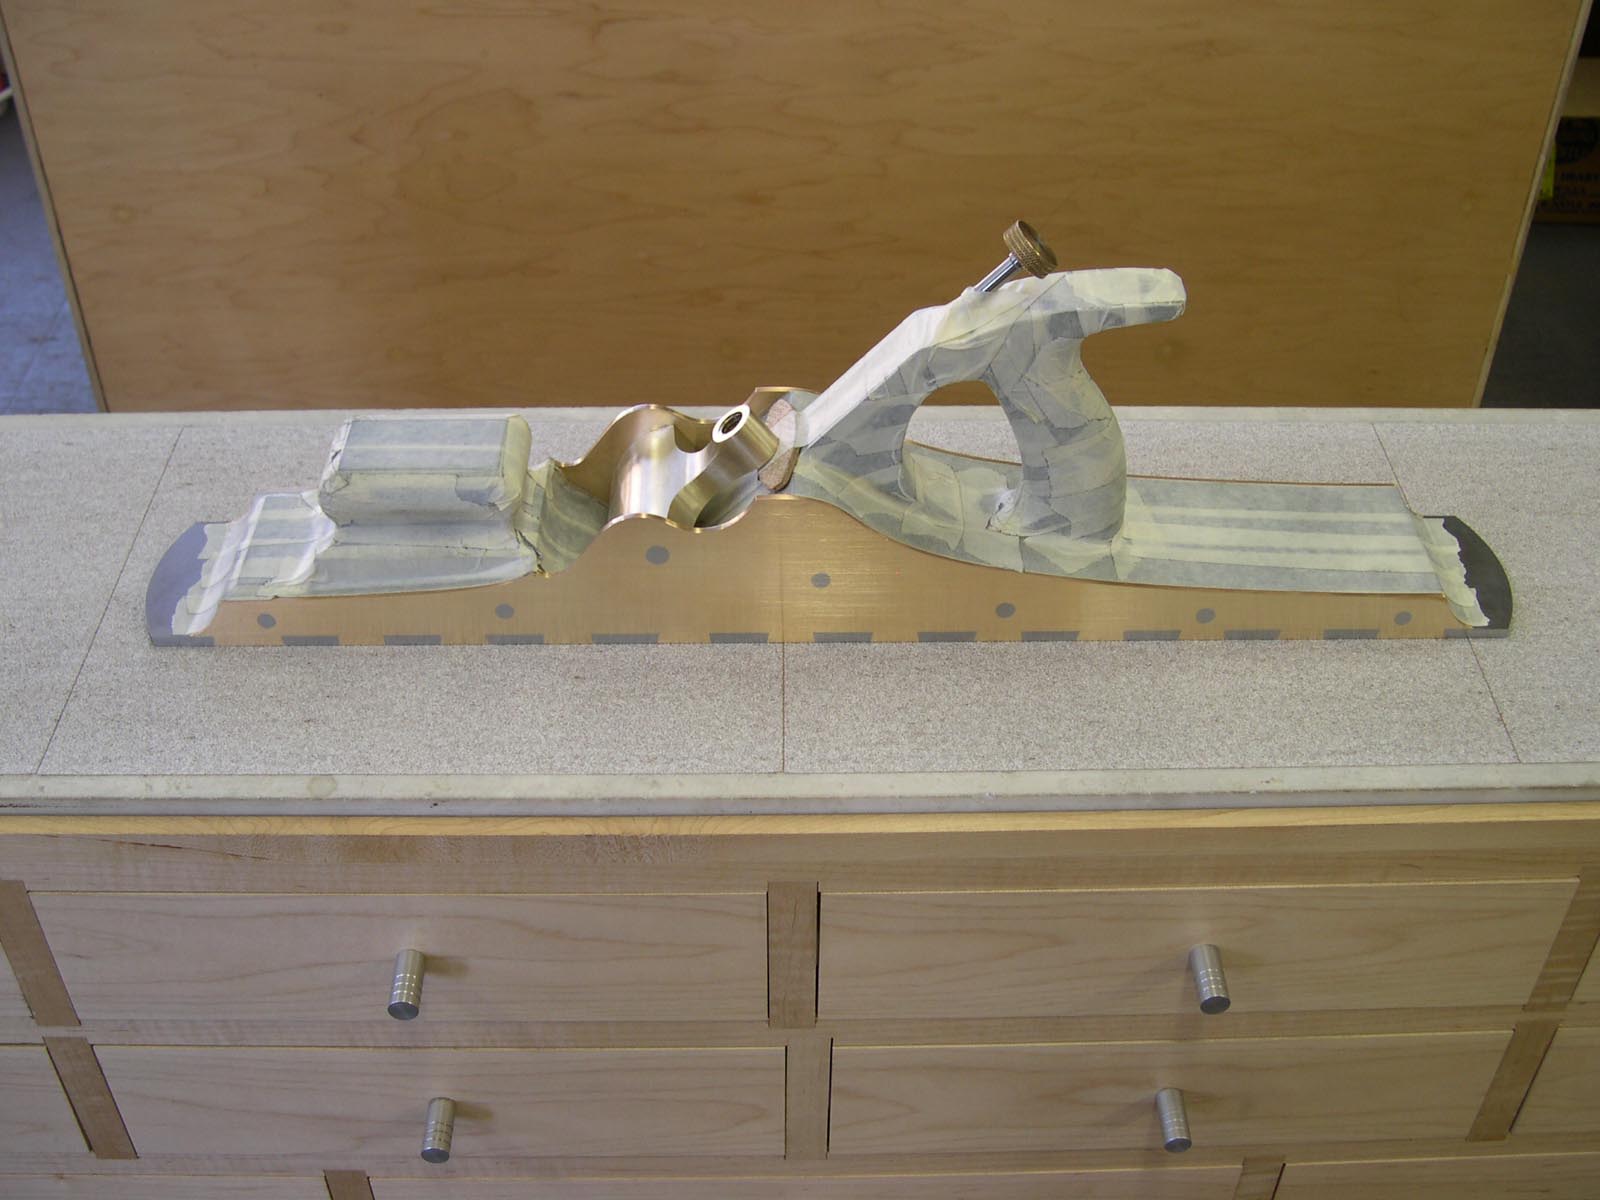
>Where did you get that plane? Or is that the newest LV BU??

Where did you get the masking tape for the infill?

Dan Clermont


Infill with masking tape

Re: Need help with boring and reaming

#16

Re: That's not fair!!!

Dan Clermont in Burnaby

>YOu know it's missing the blade. You should send it to me and I'll take care of that for you.

Dan CLermont

Re: Need help with boring and reaming

#17

:)

Rob Lee

>Well Dan - strictly speaking, it's not our plane ....yet!

Just a WIP picture I got this morning...

Cheers -

Rob

Re: Need help with boring and reaming

#18

I Saw It Live

Jim Shaver - Oakville, Ontario

>Ha,

I saw it Live this weekend at Konrad's.........you lucky Devil You!!

But I do not understand why you got it in Toronto Maple Leaf colours, what's with that???

Take care,

Jim

Re: Need help with boring and reaming

#19

Re: Need help with boring and reaming

ThomD

>It depends on your tools. I use the single line one angle system and try to hit it with the spoon bit, there is a little bit of steer at the start. Then I use the reamer to make the final adjustment as required. One can't be blas� about the reamer, because if one relied too heavily on it one could end up with the hole being perfect for angle and alignment, but in the wrong place. But a few degrees back online is child's play, and every one I have done has turned out really well from the beginning which I put down to the tools entirely, since there was zero learning curve. But traditional tools do not seem to allow this approach, in my hands anyway.

Re: Need help with boring and reaming

#20

Re: That's not fair!!!

William Duffield, on the Cohansey

>It's not missing a blade. This is something else entirely. Note the little beech spacer behind the lever cap. This is a prototype of the Neanderthal Biscuit Jointer.

Re: Need help with boring and reaming

#21

Neanderthal biscuits

Bill Houghton, Sebastopol, CA

>made in a Dutch oven over a campfire, I suppose?

👍 This page answered my questions

Your vote helps other woodworkers quickly find the answers and techniques that actually work in the shop.