WoodCentral Forums

Est. 1998 — 27 years of woodworking knowledge

Aligning the sides of a mortise...

Posts

Aligning the sides of a mortise...

#1

Aligning the sides of a mortise...

Mick Foley

>Hey all -

I was pounding out some test mortises today and I realized that I don't have a good way of insuring that the sides of the mortise are aligned correctly.

(Bear with me here, this is easier to sketch than describe.)

For example, if I am doing a mortise that is 1/2" wide by 3" long but 1 1/2" deep, how do I make sure that the long sides (3" by 1 1/2" deep) are properly perpendicular to the surface of the wood. I would think that if I get this even a little wrong, I would have problems when I assemble.

Does anyone have a good technique for insuring this? Or is there a good way to fine tune the tenon and correct for minor inaccuracies here?

I am using morise chisels, and my samples are not wildly off (no more than a couple of degrees), but even that small of an error worries me.

Any thoughts?

Thanks,

Mick Foley

Berkeley, CA
Re: Aligning the sides of a mortise...

#2

Re: Aligning the sides of a mortise...

Tim of Dublin

>You can clamp square blocks along the mortise to keep your chisel vertical. Or you can simply hold the chisel vertical.

One "benefit" of longer mortise chisels is that it is easier to see if you're perpendicular to the work or not. Your visual perception is very very accurate at determining if you're holding the chisel at other-than perpendicular. I have no problems seeing this with bench chisel length mortise chisels (9 to 12 inches long).

It also helps to make sure your work surface is flat and level....I also use a 4 inch combo square or a 6 inch double square to double check on critical joinery.

Tim

Re: Aligning the sides of a mortise...

#3

Re: Aligning the sides of a mortise... *LINK*

Bob Smalser, Seabeck, WA

>Besides longer chisels, which I think are the cat's meow, there are a couple things you can do, because you are correct, a degree or so off times 4 corners equals out of square.

The shoulders contribute, so ameliorate that by paring them inward like in the link below so they don't interfere....then use diagonals and a dead flat indexing durface like one of your machine tables when clamping up to pull it all in square and plumb until the glue cures.


M/T Fit

Re: Aligning the sides of a mortise...

#4

Re: Aligning the sides of a mortise...

Sam Simpson

>Hi Y'all,

Mick, Tim's advice is right on the money. I will add by stressing the importance of good honing. If your chisels have even a slight bevel on the back they will tend to drift away from the face, as they proceed downward. It is difficult to keep mortise chisels in perfect condition, when they get whacked and abused by constant pounding. Therefore many joiners will keep a good pearing chisel handy for the fine tuning of the joint. This is a wide chisel that is never pounded on, very carefully honed and never sees the hand of another joiner.

Pound out the joint, then fine tune by pearing fine shavings until you have what you want. Using a square to check your progression until you get the hang of it.

Regards Sam Simpson.

Re: Aligning the sides of a mortise...

#5

Re: Aligning the sides of a mortise...

GolfSteve in Calgary

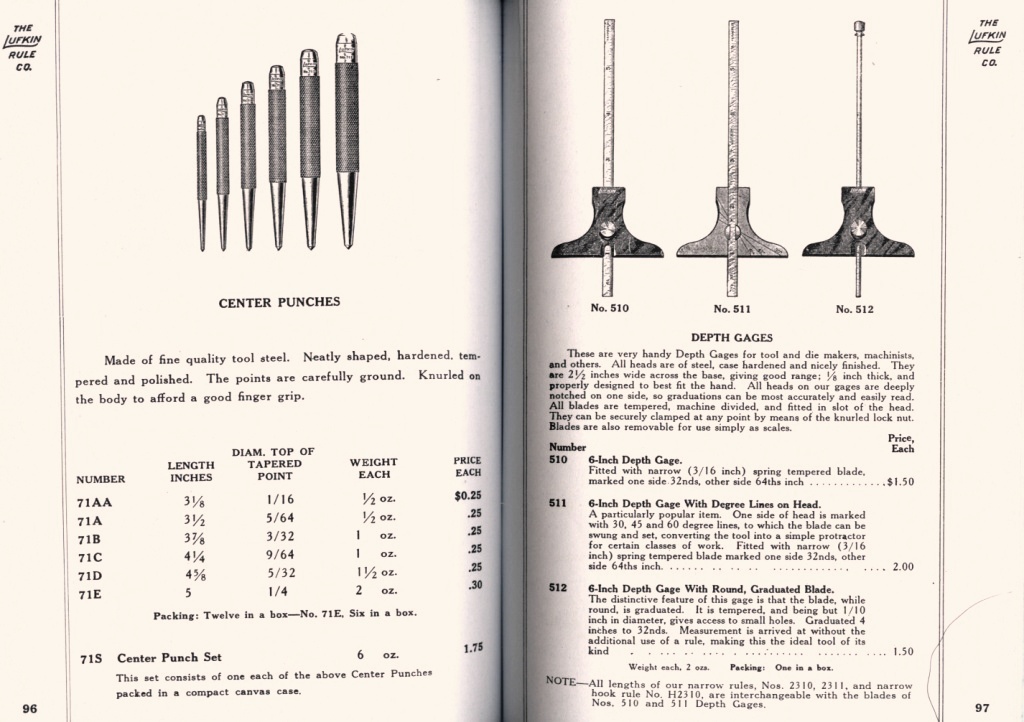
>I picked up one of these #510's at a flea market. I find it's perfect for checking the squareness of mortise walls and ends.

If I didn't chop my mortise perfectly square, I touch it up with a paring chisel.

I've found that as my mortise technique gets better, the less paring I need to do.

Re: Aligning the sides of a mortise...

#6

forgot the picture

GolfSteve in Calgary

>

As an aside, when looking for a picture of a depth gauge, I ran across this version:


While the above gauge looks good, I think that the large fancy rosewood head would get in the way of seeing down into the mortise. The #510 has a small, narrow head making it easier to see down into a dark narrow mortise.

Re: Aligning the sides of a mortise...

#7

Re: Aligning the sides of a mortise...

Alan Hamilton

>Mick,

You've gotten good advice so far, so to maintain the tradition, I thought I'd try to steer you wrong and confuse you. I don't really want to muddy the waters, but passing along traditional, confusing methods, is one reason I like using hand tools.

After I've marked out my mortises I remove a sliver, or so, from within the lines. This gives me an easy way to register my chisel and keep all my chops in a straight line. Then all that's left to do is to be sure I'm holding the chisel at 90�.

The length of my almost-new Two Cherries mortise chisels helps a great deal--in fact, the length makes it pretty easy. But back when I had shorter chisels, I would put a try square on the bench next to the mortise-to-be. This gave me a visual reference that helped me ensure I was pounding straight and true.

Confused yet? I can post more.

Alan

Re: Aligning the sides of a mortise...

#8

Re: Aligning the sides of a mortise...

Adam Cherubini, NJ

>Mick,

If you use the paring technique I have described before, this ceases to be an issue. You must ensure the edge is square with the blade, and the side opposite is parallel to the back. If so (this condition is typical*) you can simply ride the bezel and the parings will be uniformly thick and the mortise will be automatically square.

The sides of a good mortise should never be pared. Its extremely difficult to "correct" an angled mortise and be left with a high quality fit. Using the paring technique, the walls are both straight and very nearly reflective of the tolerance of the width of the chisel blade (a few thousandths of an inch). This is what is required for a glue-only mortise.

Intentionally cutting an angled mortise is a matter of making the first few passes with the aid of a gauge. Once the angle is established (and maybe 1/4" deep), the mortise can progress as usual with typical speed and precision.

Adam

* The sides of the mortise chisel are never square with the back. I check parallel with a micrometer.

Re: Aligning the sides of a mortise...

#9

Re: Aligning the sides of a mortise...

Mick Foley

>First of all, thanks for all the responces. It does seem clear that getting the mortise properly aligned is important.

Yesterday, I cut a sample tenon to match the best of the sample mortises that I chopped. I intensionally cut the tenon slightly wide - it would go into the mortise, but took considerable effort. With that, I determined the mortise was slightly off the perpendicular. By carefully choosing how I tuned the tenon, I was able to get a joint that was square and should still glue up well - there is enough friction between the tenon and mortice that my 5 year old son can get them apart, but he has to put a little effort into it. I think I can repeat this level of accuracy on with both mortises and tenons - we'll see...

Thanks again,

Mick Foley

Berkeley, CA

Re: Aligning the sides of a mortise...

#10

Re: Aligning the sides of a mortise...

joel

>"The sides of a good mortise should never be pared."

I'm going to disagree with Adam here for both historical and practical reasons but on the next sentence..

"Its extremely difficult to "correct" an angled mortise and be left with a high quality fit."

I would most certainly agree. The reason for paring to scribe lines is simply to get the right sizing and so the chopping can be faster. Trying to correct an angle by paring a mortise or tenon is an exercise in futility. THe mortise should be chopped square - sighting down the mortise chisel works well, and of course with practice it becomes a non-issue.

the goal should be practicing for consistency. So that the finished mortise is to the scribed size and the sawn tenon is also to the scribed size. THe idea that every time you make a joint it has to be tuned to fit makes for a lot of extra work and certainly isn't the way it was done. Sure once in awhile correcting a joint is essentile but not as regular practice.

👍 This page answered my questions

Your vote helps other woodworkers quickly find the answers and techniques that actually work in the shop.