WoodCentral Forums

Est. 1998 — 27 years of woodworking knowledge

Power and Hand Together (10): Skyhooks

Posts

Power and Hand Together (10): Skyhooks

#1

Power and Hand Together (10): Skyhooks

Last time the nightstand build ended with a mock up of one nightstand ..
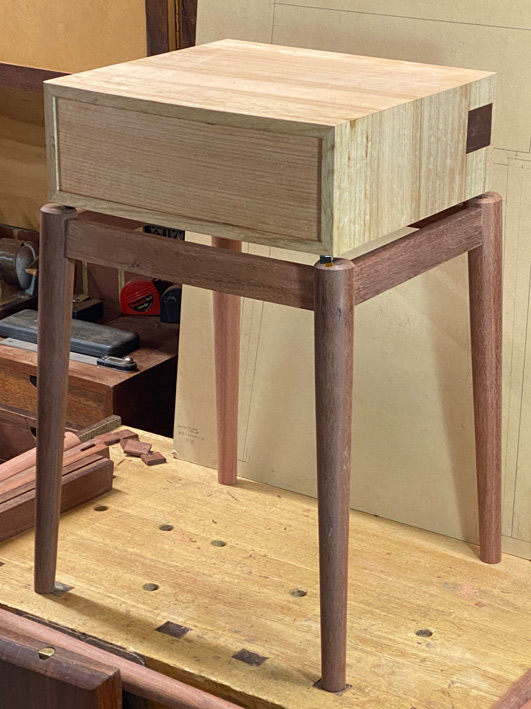


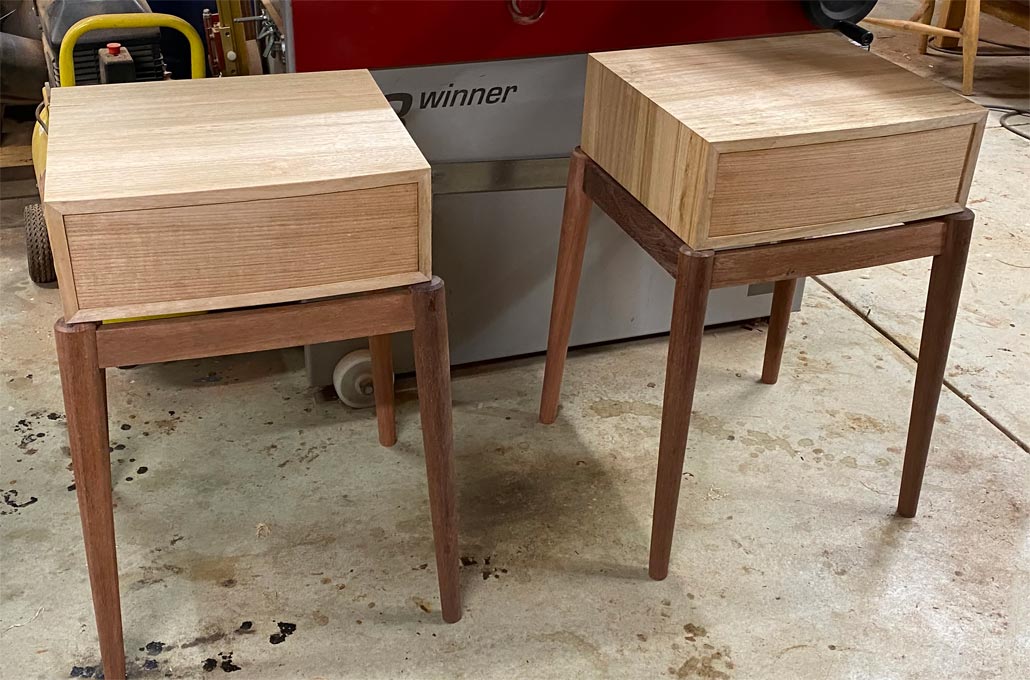
Here steel nuts were used to lift the cabinet off the base. This weekend I completed the second base. Here are the two with the cabinets resting on the bases ...


I had been planning to construct the floating appearance by using a slight variation of this construction ...
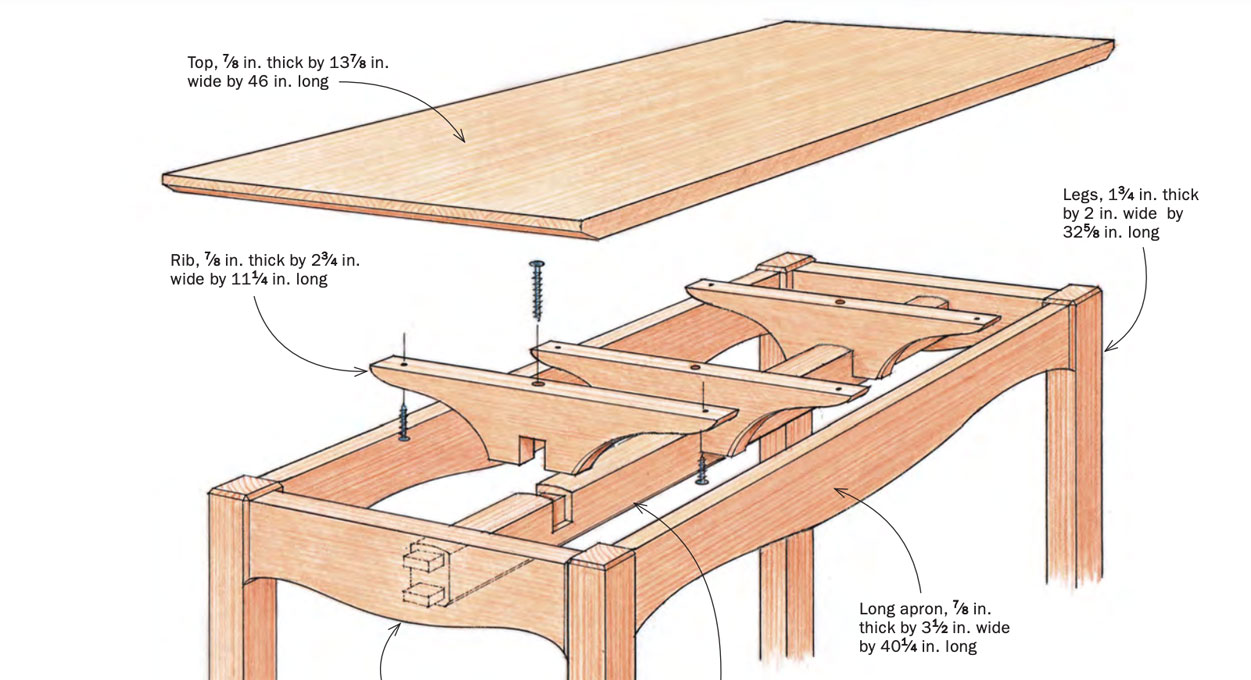


... but the example with the nuts had me thinking if there was another way, one less observable from the side.


Here is a mock up again, taken today ...
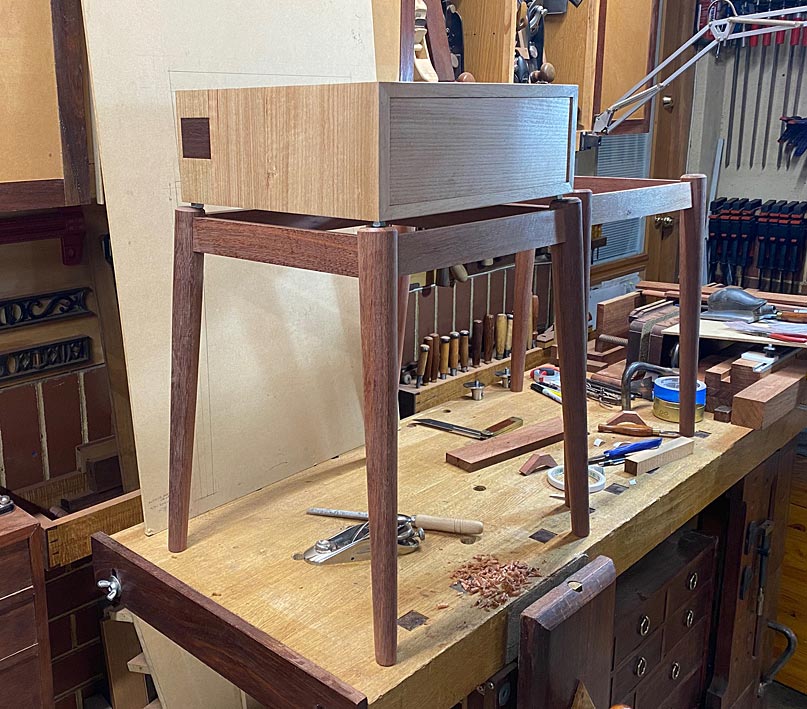


I came up with this linkage, and what I am after is some opinion as to how secure you imagine it will be.


These simply began as Jarrah triangles, and were shaped to reduce unnecessary bulk (which might be visible). All legs are 10mm thick x 18mm wide ...


For greatest strength, the grain runs across the bracket.


The one side was coped to fit flush with the round leg ...
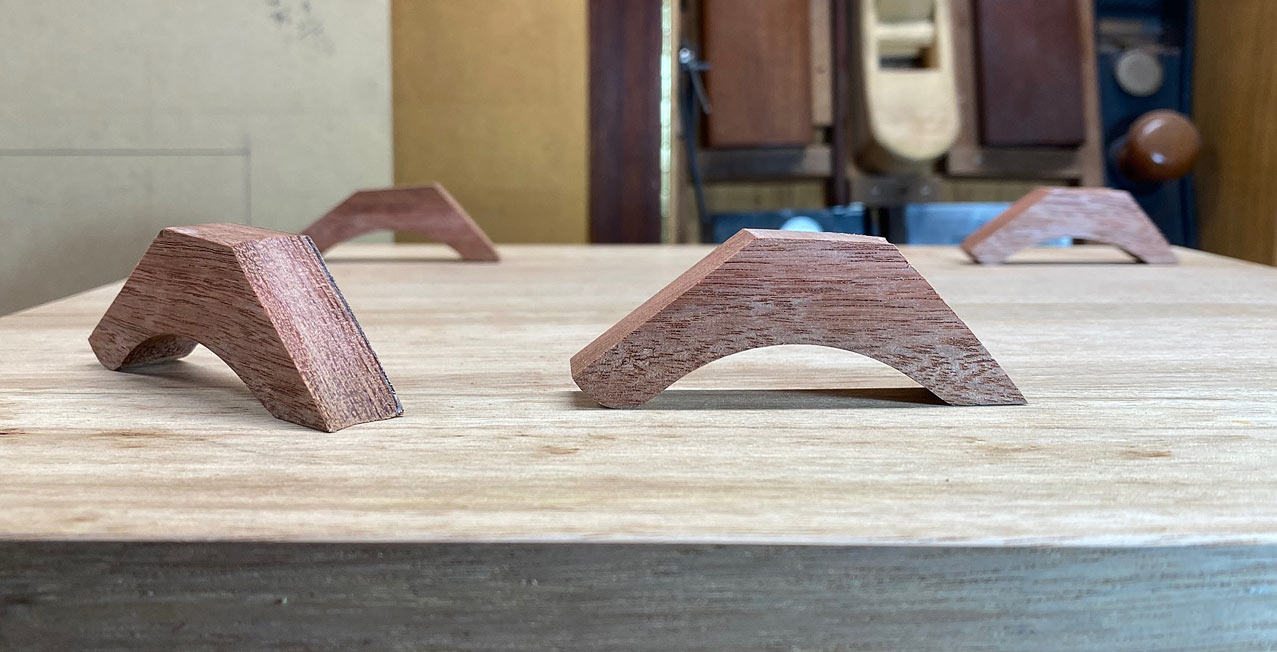


This is how it is intended to be fitted ...
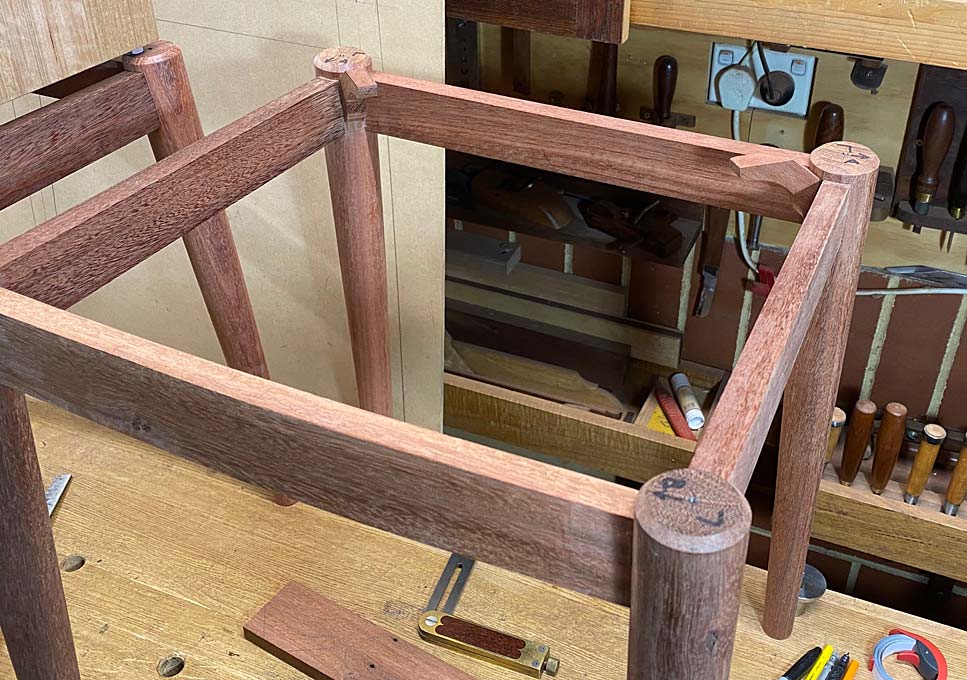
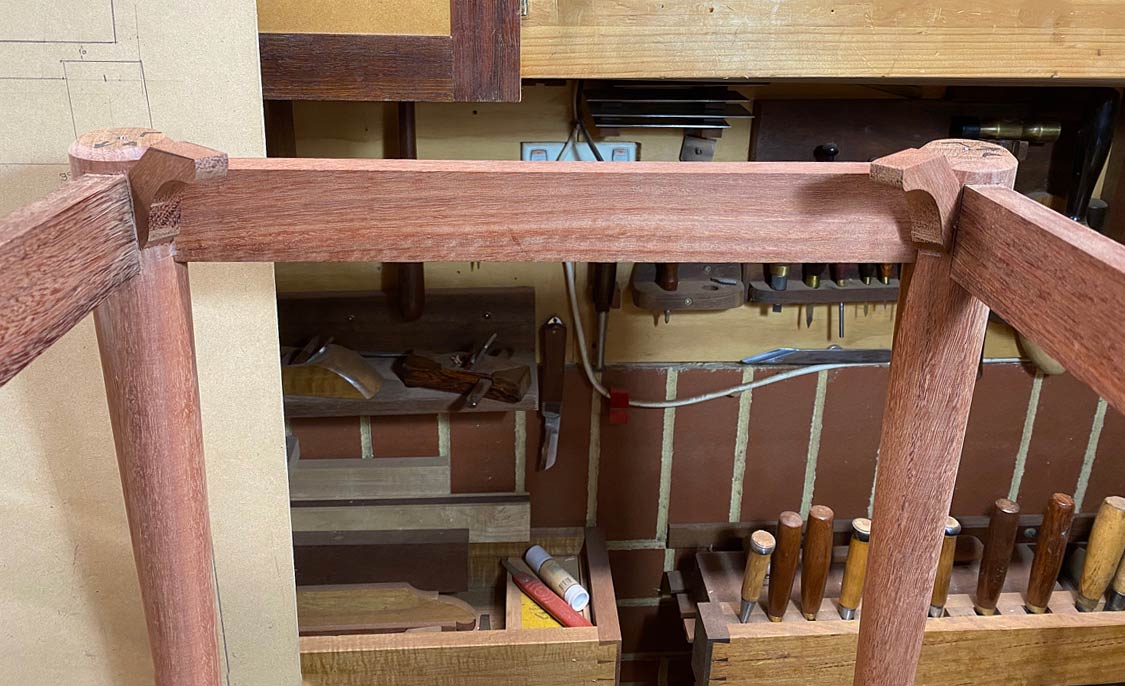


Here is the mating of the coped inside with the outside of the round leg ...
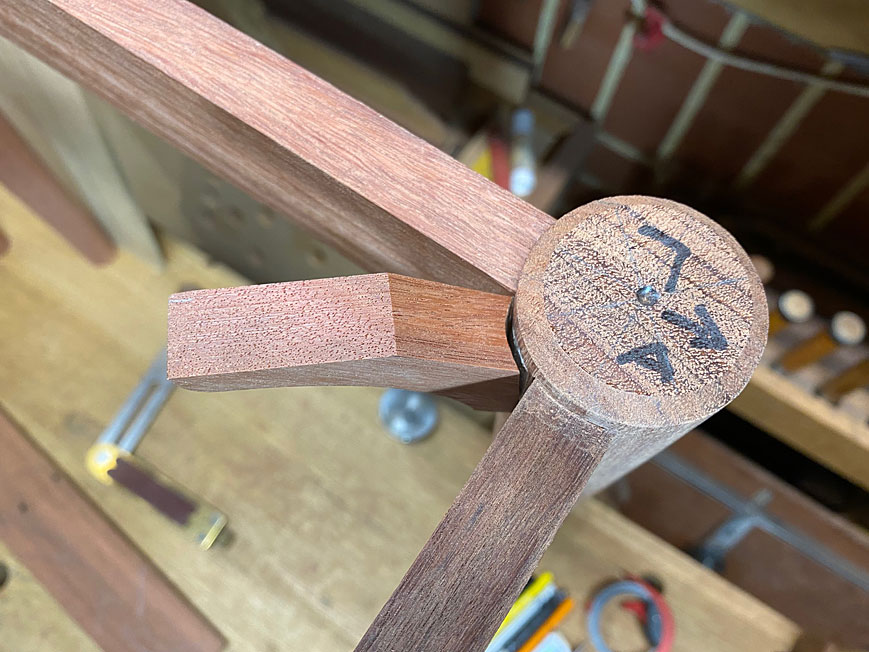


The plan is to glue and screw the coped side. The glue joint should create a strong connection, and a screw will just provide extra support. The cabinets will be screwed to the top of the bracket.


Opinions and ideas?


Regards from Perth


Derek


Re: Power and Hand Together (10): Skyhooks

#2

Re: Power and Hand Together (10): Skyhooks

I know you will make a foolproof attachment of the case to the legs, but subconsciously I would always feel like it was just set precariously in place, and I would be afraid to open a drawer or set something on top or even bump it in passing.


Re: Power and Hand Together (10): Skyhooks

#3

Re: Power and Hand Together (10): Skyhooks

William, this is my unease. I believe it will be strong, but why take the risk? Perhaps I should make form the bracket from steel and oxidise it black?

Regards from Perth

Derek


Re: Power and Hand Together (10): Skyhooks

#4

Re: Power and Hand Together (10): Skyhooks

Thomas Moser continuous air Windsor chairs use a similar brace on the legs, as seen in this pic.  They are screwed to the underside of the west but mortised into the legs.  I used that design in building a chair nearly 40 years ago and the leg doesn’t budge.  The difference is that the brace is a laminated curve, so there is no short grain 


Re: Power and Hand Together (10): Skyhooks

#5

When floating the trick is....

. .. . to keep that illusion front and center. The gap above the legs is generous which is doubled over the rails. You can't hide the internal framework and "float" in the present configuration. Second, the brackets will never provide strong durability on their own. Solid or cross braced framework will provide the strength, if only psychological. The float will need to be modified.


Re: Power and Hand Together (10): Skyhooks

#6

Re: When floating the trick is....

I literally woke up in the middle of the night (it happens when one is 73) and considered what would happen if the construction was tipped over on its side. The strength of the bracket is weak in lateral movement - perhaps not these, but in design. Consequently, this is not the connection I want to use, and I will go back to Plan A.


Regards from Perth
Derek


Re: Power and Hand Together (10): Skyhooks

#7

Ellis Walentine

Re: When floating the trick is....

Hi Derek,

I'm not fond of either Plan A or Plan B. Both of them could articulate too much under relatively normal conditions. Plan A would be better with two bearing rails instead of the one in your illustration, but what a lot of work. Simpler and more to the point would be two front-to-back rails.

Ellis


Re: Power and Hand Together (10): Skyhooks

#8

Re: When floating the trick is....

Hi Ellis

That is essentially what I had in mind originally (before being seduced by mini brackets in the corners). I do not like the brace example I posted, but could not find one as per my own design. The one posted has, in my opinion, limited stability since it is centred on a single rail. In mine, there are two rails. The rails will incorporate raised sections at the centres to attach the cabinet. So, just two (raised) rails, attached with sliding dovetails (from underneath). 

Regards from Perth

Derek


Re: Power and Hand Together (10): Skyhooks

#9

Tabla Levitosa

I view your problem as more of a design issue than a structural solution.

There is a conflict between the cabinet and the legs.  In short, the cabinet box is too small for the leg set.  To float, the support portion should not project beyond the box.  In your present situation the box is visually "subservient" to the legs.  Having worked with floating top design, I find the opposite enhances the illusion and makes it much easier to do.

Example 1:  Entertainment Cabinet

Example 2:   Bathroom Vanity:

In the vanity, I could have darkened the support "ring" to further separate the stone from the cabinet, but decided that might become too visually busy.

As a night stand, the main element of your design must be the box.  After all your fine work on the legs, I'm sure you'd rather not make new ones, but if you want the box to float, you'll need to tuck the leg element under the box.  This will also make it much easier to hide the supports.

Just my view, of course.  Your mileage may vary ;)


Re: Power and Hand Together (10): Skyhooks

#10

Re: Tabla Levitosa

Mark, personal aesthetics matter, and everyone is entitled to their own. So I am not disagreeing with you. I happen to like what I have done.

There are several factors that will influence a look. In fact, one you point as overhang as responsible for the floating effect is not really about overhang as the part of the table top which is said to be floating here is actually in line with the base.


Here is one nightstand again, but taken from a more representative perspective...

I am not trying to convince you. I like this aesthetic. I think it is balanced. I dislike those you use as examples. Their tops look heavy and clumsy to me. Some will agree with you and some with me. That's the way it is.

Regards from Perth

Derek


Re: Power and Hand Together (10): Skyhooks

#11

Ellis Walentine

Aesthetics...

... are personal, as are opinions about them. Thankfully, there are no absolutes except that the customer is happy.

Onward.

Ellis


Re: Power and Hand Together (10): Skyhooks

#12

Re: The Way It Is

Is, of course, the way it should be, especially when you will be living with the final result.  More than once I've done a piece as a design "sketch" but a week/month/+ later decided to trash it.  I may scribble a bit on paper, but then changes happen during the making as relationships develop in 3 dimensions in the piece as a whole.

For instance, the whole vanity is fairly light.

As before, your mileage may vary.  Enjoy!


Re: Power and Hand Together (10): Skyhooks

#14

From a person

with your skills and body of work, your compliment is much appreciated.


Thanks for New Jersey


👍 This page answered my questions

Your vote helps other woodworkers quickly find the answers and techniques that actually work in the shop.