WoodCentral Forums

Est. 1998 — 27 years of woodworking knowledge

Crosscutting with a slider's rip fence

Posts

Crosscutting with a slider's rip fence

#1

Crosscutting with a slider's rip fence

Generally, one thinks of a rip fence for ripping ...
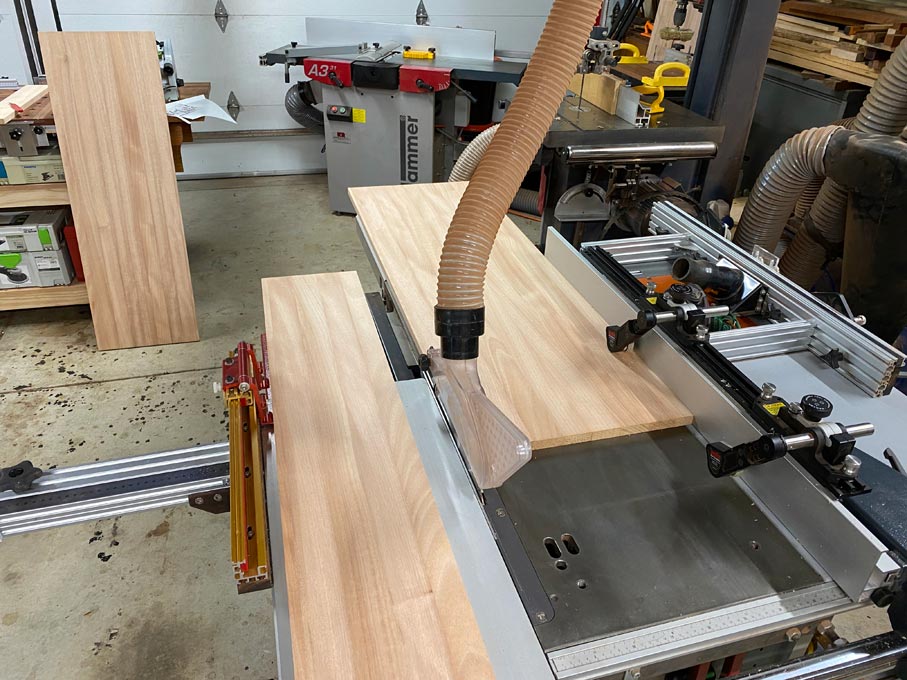


I am in the process of building a pair of nightstands. These feature waterfall sides, which requires that the panels be sawn sequentially.

On a standard table saw this would involve running the panel against the rip fence, which is fine for wider panels ... but what happens when these get really narrow, such as 10mm wide? That's getting tricky, yes?

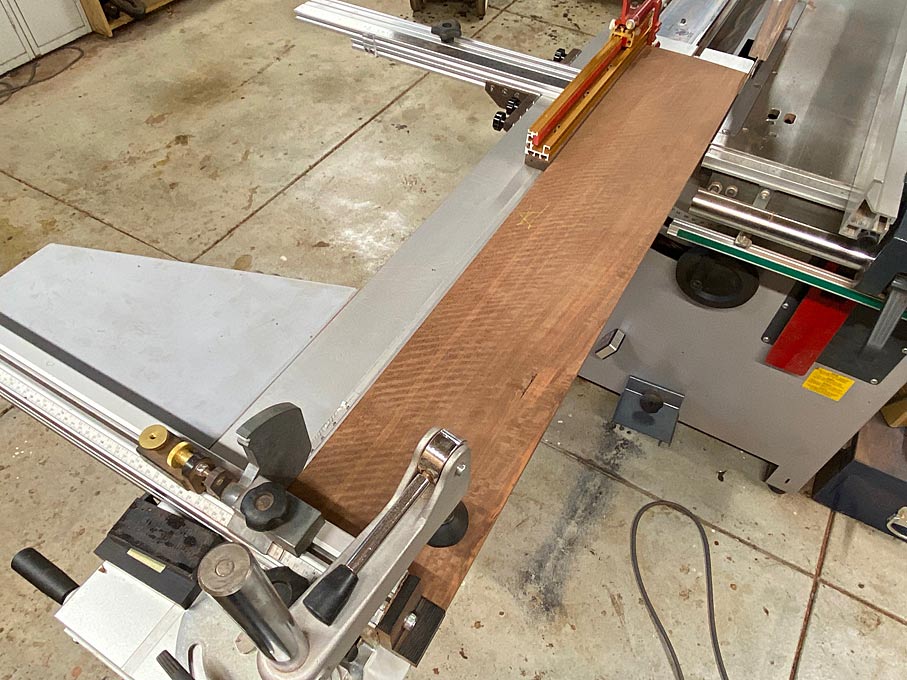
On the slider, the rip fence gets used as a depth stop. Firstly, here is the panel to be sawn up ...
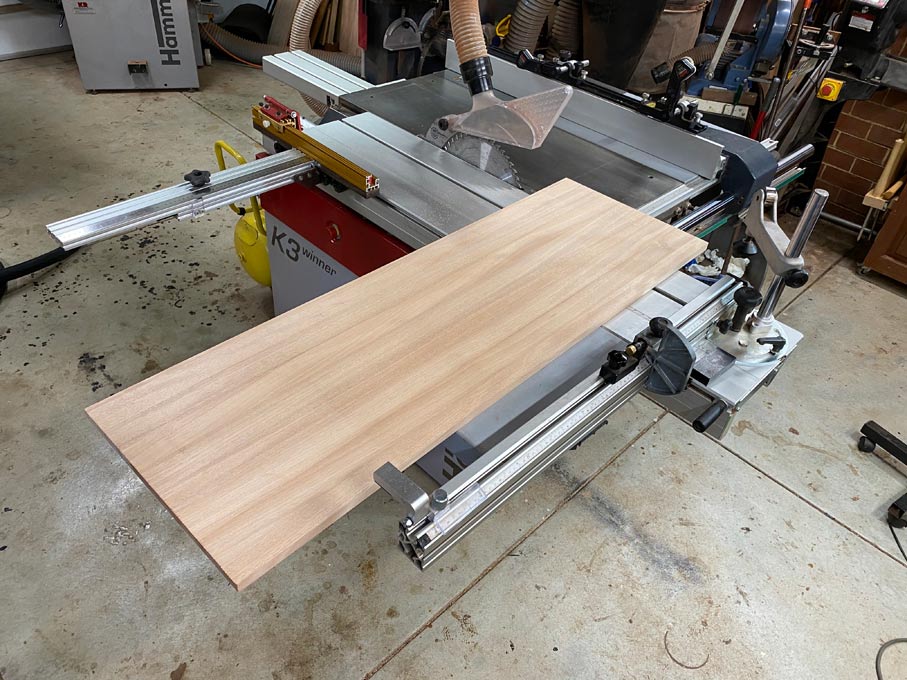
The first section to cut off is 140mm wide. This will form one side. 

Step 1 - set the rip fence at 140mm and run the panel against the fence ...

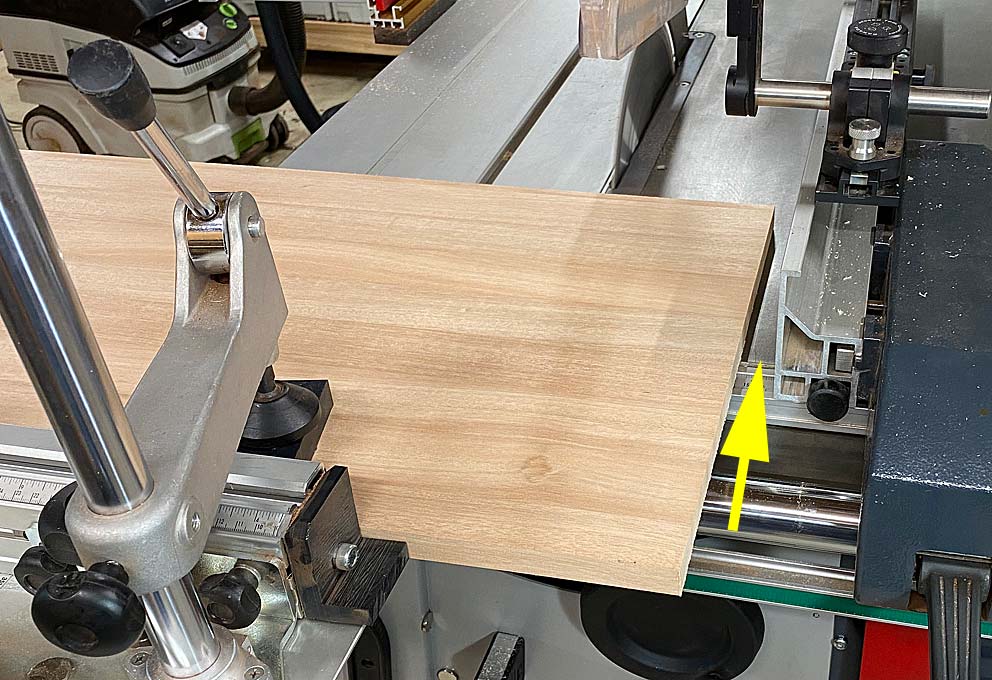
Step 2 - Clamp the panel down and move the fence away (to remove the danger of binding and kickback). Note that this sets the panel to be sawn on the rip fence side of the blade ...
That is too easy. 
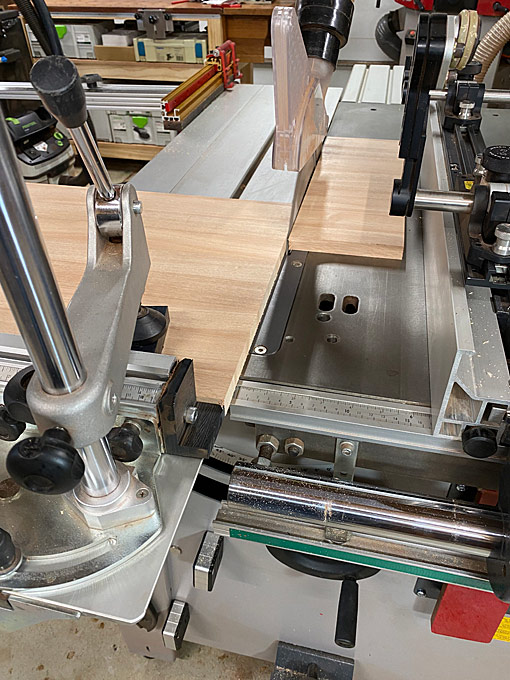


Let's do something tricky ... saw a 10mm section. One side on each of the nightstands will have a tiny drawer (in addition to the single drawer facing towards the front). This 10mm section will form one side of the drawer opening.

We set the rip fence 10mm away from the blade. It is so close now that the blade guard needs to be removed ..
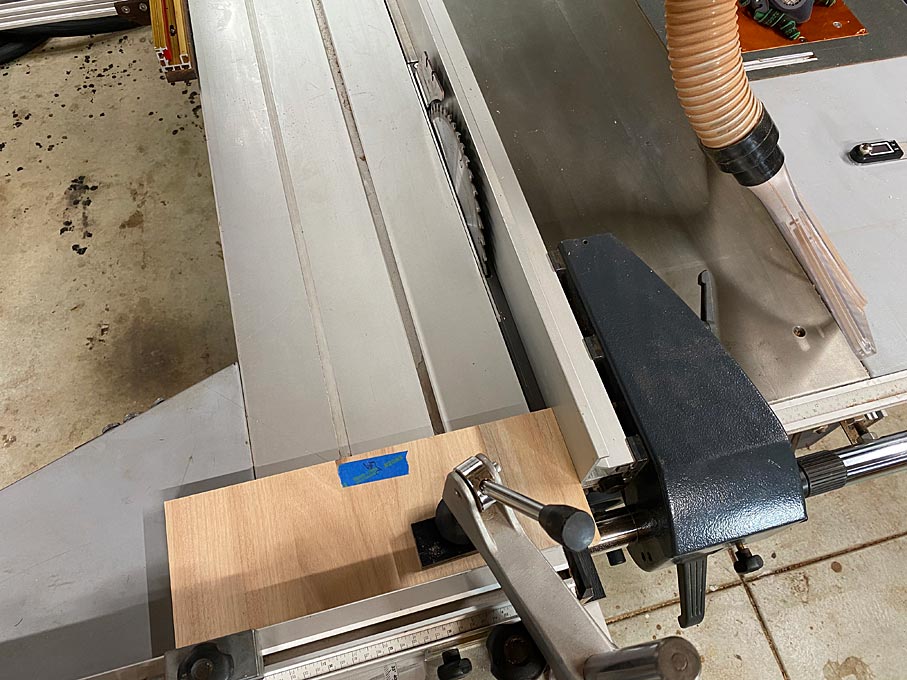
The slider rip fence has a micro adjust and a Wixey DRO for dialling in the dimension exactly. (You may be able to read the DRO).
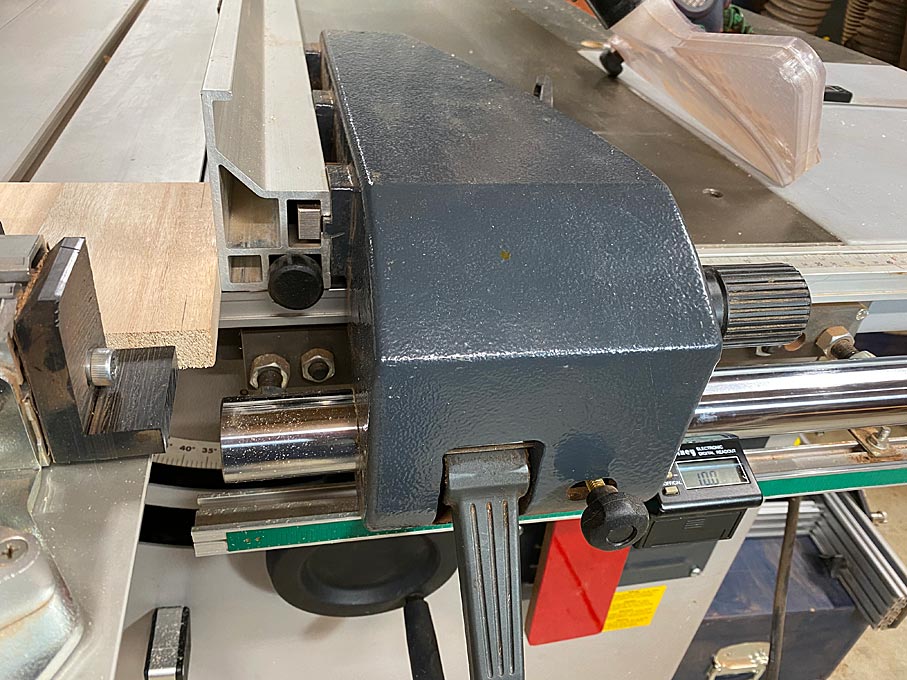


The panel is locked down, the fence moved back, and the blade guard replaced on the blade. The slider wagon is run past the blade ...
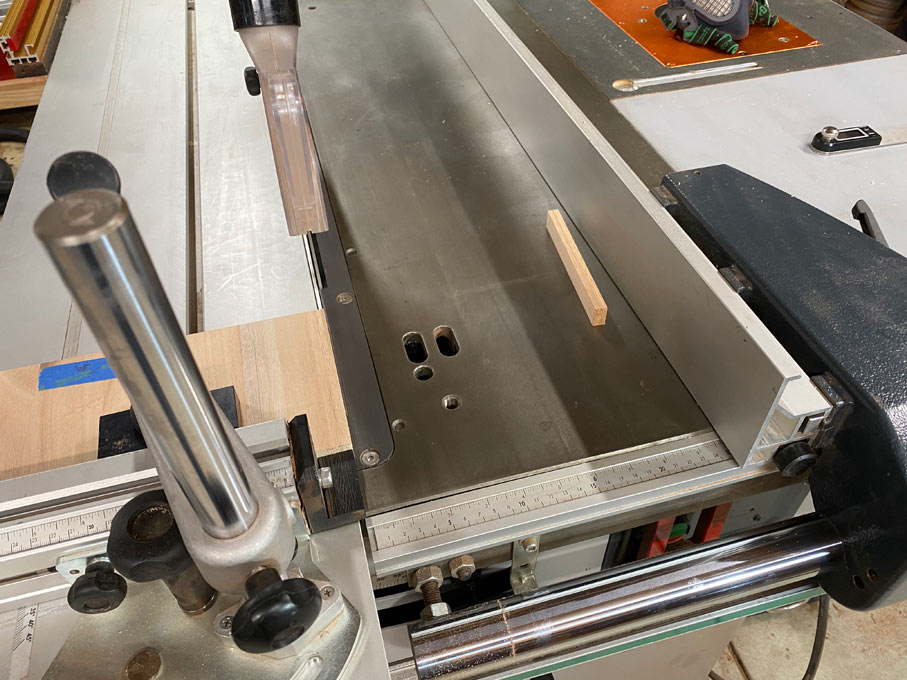
How easy is this to do this on a table saw without removing your fingers!


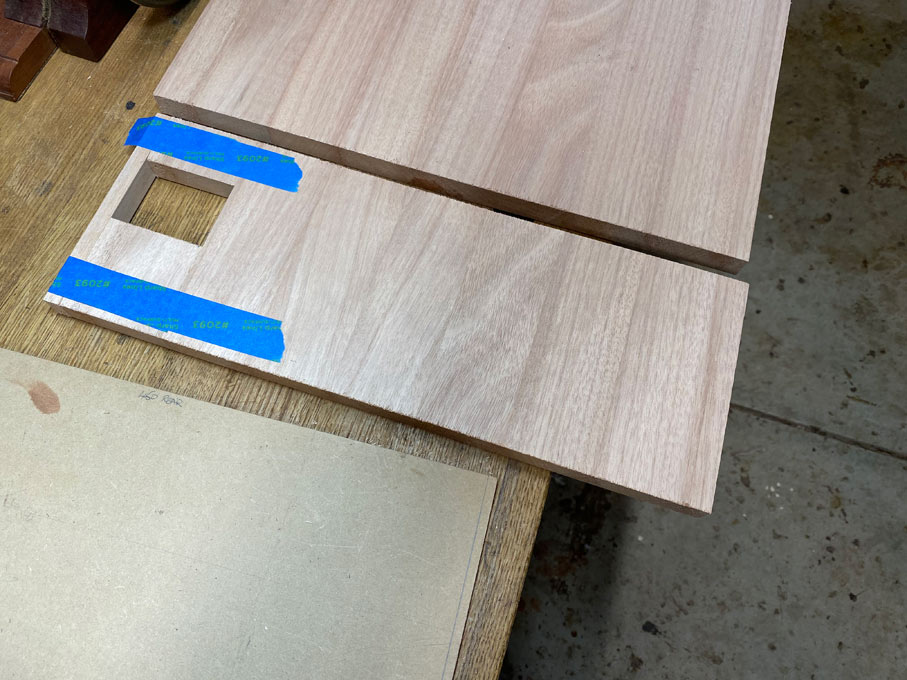
Here is one of the two panels ready for dovetailing ...
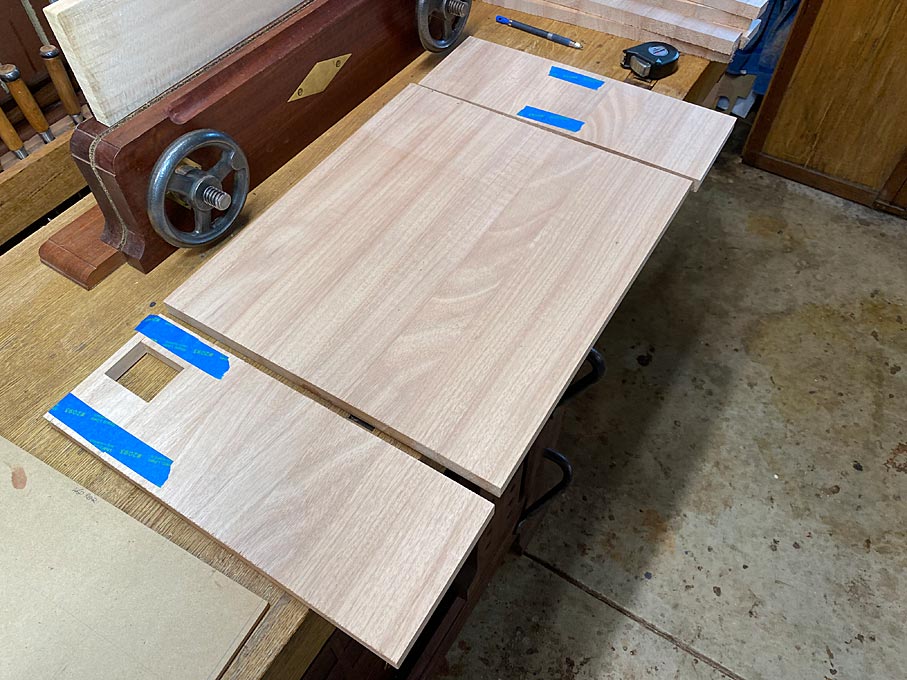


A close up of the inset drawer ...


Regards from Perth

Derek


Re: Crosscutting with a slider's rip fence

#2

Re: Crosscutting with a slider's rip fence

The sliding of the rip fence back and forth, and moving at away to the right after setting up the cut seems a bit long winded to me, Derek. To do exactly the same job I, right at the start, pull the rip fence back so that its front end is some distance short of the blade, usually ±10mm. After that, I set the required cut length/distance using the rip fence scale and cross cut the panel with the end of panel butted up against the fence. With the front end of the fence pulled back from the downward cutting teeth of the blade all the dimensioned parts fall free of the blade after they're cut. Slainte.


Re: Crosscutting with a slider's rip fence

#3

Re: Crosscutting with a slider's rip fence

Hi Derek,

With an extruded fence such as yours the fence can be repositioned to avoid trapping the cut piece between the blade and the fence. The nuts in the slots clamp the fence in whatever position you want it.

Another way would be to make a short L-fence that clamps to your fence.


Re: Crosscutting with a slider's rip fence

#4

Re: Crosscutting with a slider's rip fence

Richard and Steve …

Agreed. I would use a short fence if making repetitive cuts. These cuts were not repetitive but sequential and in different widths. As a result, each cut had to be set up independently. Nevertheless, a short fence would not need to be pulled away each time, and would have been one less action. 

An alternative would be to make a MDF template to set the dimensions exactly for each piece, and move the fence accordingly. Since I had just two nightstands, the number of initial cuts for each was just three. Not worth the effort. It was possible to obtain the accuracy from the micro adjust/DRO. In any event, I could not see any other way to do cuts for the tiny drawer opening. 

Regards from Perth

Derek


Re: Crosscutting with a slider's rip fence

#5

Re: Crosscutting with a slider's rip fence

When the 10mm piece is free at the end of the cut it looks as if it would have the risk of coming back in contact with the downward rotating teeth and getting launched. There looks to be a 5-6 mm gap from the teeth to the throat plate where it could pivot if it is moved into the blade by vibration. What holds the piece when it is free at the end of the cut while the saw winds down? Seems like a cross cut sled would be safer for narrow pieces as the cut off part can be held down with a block while it is moved backward to a point where it can be removed safely. Nice setup though.


Re: Crosscutting with a slider's rip fence

#6

Re: Crosscutting with a slider's rip fence

When the 10mm piece is free at the end of the cut it looks as if it would have the risk of coming back in contact with the downward rotating teeth and getting launched. There looks to be a 5-6 mm gap from the teeth to the throat plate where it could pivot if it is moved into the blade by vibration. What holds the piece when it is free at the end of the cut while the saw winds down? Seems like a cross cut sled would be safer for narrow pieces as the cut off part can be held down with a block while it is moved backward to a point where it can be removed safely. Nice setup though.


Hi Virgil

Kickback will never occur on this saw, especially in this situation.

Kickback occurs when the workpiece comes into contact with the rear of the blade, and then is lifted by the blade's rotation and hurled in the direction the blade turns. A riving knife generally prevents the workpiece coming into contact with the rear of the blade. Further, a blade guard would also block anything coming over the top of the blade (And I made sure my blade guard was replaced after setting up the saw cut).

The way these saw cuts are set up is that there is also little chance for the workpiece (here, the 10mm section) to be pushed by the fence into the rear of the blade - there is no fence for this to happen. As I mentioned earlier, my first preference is a short fence, where I would not need to do anything further as the workpiece would run off the end into a free zone. Without the short fence, I moved the fence away. It was no longer needed. It did its job, which was simply to act as a depth stop. The cut piece was not in danger of touching the rip fence.

One of the points I was seeking to emphasise is that the Slider's wagon not only crosscuts but also rips. Below is an example of ripping on the wagon utilising a parallel guide ...


The rip fence is useful - just as on a traditional table saw - but the slider is able to work beyond this, and the rip fence changes its role and becomes the servant to the crosscut fence and wagon. This is the opposite of a traditional table saw, where the rip fence dominates, and the mitre fence is tiny, almost an after thought (hence the crosscut sled).


Regards from Perth

Derek


Re: Crosscutting with a slider's rip fence

#7

Re: Crosscutting with a slider's rip fence

Hi Derek. I was not referring to kickback from the rear of the blade. The "launch" I referred to is the cutoff piece contacting the downward teeth and being forced into the gap between the throatplate and the blade. This would cause the piece to be pivoted violently by the the downward teeth and thus being launched. Unless I don't understand your saws operation there is a time when the cut off piece is "line to line" with the edge of the teeth of blade ever so slightly past the teeth until it is either moved or the saw blade stops rotation. This would only happen with narrow pieces around 2x the width of the gap of the throat plate.


Re: Crosscutting with a slider's rip fence

#8

Re: Crosscutting with a slider's rip fence

Hi Derek. I was not referring to kickback from the rear of the blade. The "launch" I referred to is the cutoff piece contacting the downward teeth and being forced into the gap between the throatplate and the blade


Hi Virgil

The answer is that there is no significant gap between throatplate and blade for this to occur. 

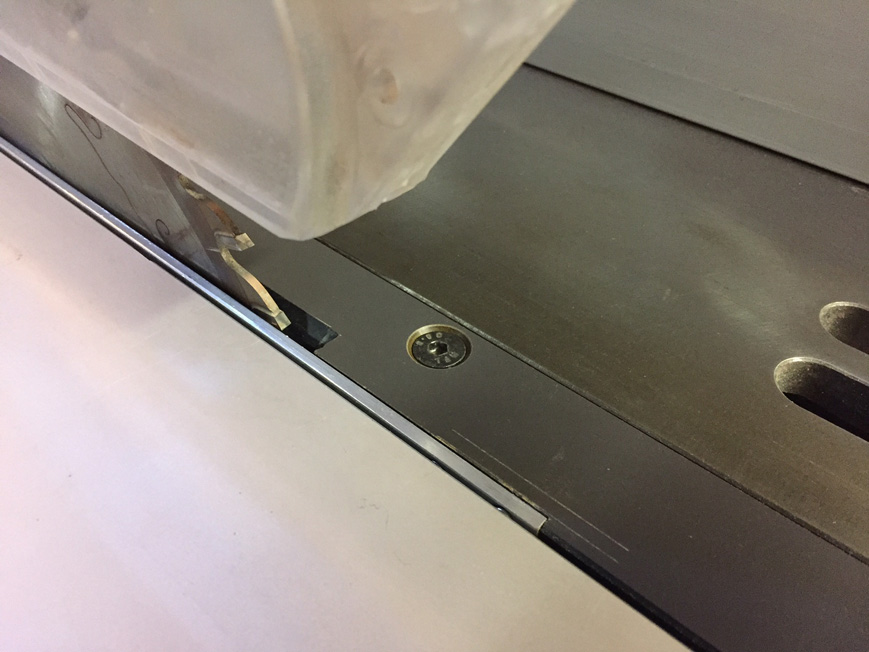
I have a couple of throatplates. The one used has a chamfer for angling the blade, but is otherwise tight to the blade …


Am I misunderstanding what you are saying? The long and short is that there has never been a problems sawing in this manner.


Regards from Perth

Derek


Re: Crosscutting with a slider's rip fence

#9

Re: Crosscutting with a slider's rip fence

We are on the same page. Thank you. What I was trying to point out (not very well) is that if there is a larger gap present this could be an issue at the end of the cut. Not every saw has a precision fit throatplate.  The result varies from slight damage to the work piece to scrapping the workpiece. Maybe not the correct post to try to point this out. 


Re: Crosscutting with a slider's rip fence

#10

Re: Crosscutting with a slider's rip fence

Kickback occurs when the workpiece comes into contact with the rear of the blade, and then is lifted by the blade's rotation and hurled in the direction the blade turns. A riving knife generally prevents the workpiece coming into contact with the rear of the blade. Further, a blade guard would also block anything coming over the top of the blade (And I made sure my blade guard was replaced after setting up the saw cut).

Generally speaking, Derek, it's unlikely you'll get anything more than very rare kickbacks with the set-up you described and use. Virgil, however, does have a point regarding those small bits that end up lying near the sawblade, although not for the specific reason he described, i.e., those small bits getting trapped between the sawblade and the throat plate in those saws with large gaps in that area.

What I have had happen, rarely I admit, and also witnessed with others using sliding table saws with a very small gap between sawblade and tables is small cut parts being thrown back towards the operator. This occurred even though the riving knife and crown guard were installed, and the small cut parts were not trapped against the blade by the rip fence. All that has to happen for this to occur is a small amount of vibration in the saw's running causing the cut part to drift towards the sawblade and eventually making contact, usually primarily with the upward moving rear teeth. Alternatively, a further small cut part may push an earlier cut part into the sawblade leading to a piece being thrown towards the operator.

I describe real occurrences above because such incidents do happen, even if only rarely. So, my advice is to just be aware of the possibility, have push sticks to hand to push those small bits well clear of the blade after the cut, and maybe make sure you've got your safety glasses on for all sawing operations, if you don't already wear such glasses as I do. I need varifocal prescription glasses anyway so as soon as I start firing up woodworking machines and power tools, my prescription safety glasses replace my regular ones, which always seem to end up tucked into the collar of my tee shirt, ha, ha. Slainte.


Re: Crosscutting with a slider's rip fence

#11

Peter Martin

Somewhat related...

I found this helpful for covering basic TS safety for newbies (like myself)...


Re: Crosscutting with a slider's rip fence

#12

Re: Somewhat related...

I found this helpful for covering basic TS safety for newbies (like myself)...

If you are the same Peter that I believe is UK based and fixes the background workings of this forum my recommendation is to ignore, better still, completely forget, everything you saw in that video. What was illustrated are the table saw work habits or methods of North American woodworkers. Those work methods have no application at all in the UK, and to be honest almost everything that was illustrated made me wince and gave me the heebie-jeebies. Slainte.


Re: Crosscutting with a slider's rip fence

#13

Peter Martin

Re: Somewhat related...

Interesting and worthy of elaboration IMO. I am certainly not a woodworker, althought I have a portable table saw I use on occasion, and my only training is zip aside from common sense. The tips in the video seemed logical to me.

What is done differently on the other side of the pond from here?  (I'm the same Peter and located in the US.)


Re: Crosscutting with a slider's rip fence

#14

Re: Somewhat related...

Peter, my error regarding your location. I'm not sure now how I came to have the impression you are UK based. The primary keys to understanding the difference between table saw usage in North America and the UK are as follows:

1. North Americans routinely remove safety features from their saws, particularly poorly designed and made ones, which was typical on traditional saws in the US as I found when I lived and worked there. I took an instant dislike to the first Delta cabinet saw I was asked to use. My dislike - no, loathing remained in place for every other brand of cabinet saw aimed at the North American user I came across whilst living there. Specifically, the safety features I'm talking about are the riving knife/splitter and crown/blade guard, which are generally well made and very effective on saws sold in the European market, and elsewhere. Those bits of kit remain in place in UK usage.

2. North Americans generally have a full length rip fence fitted to their saws, which cannot be adjusted. They don't use the sort of fence that can be quickly and simply adjusted backwards and forwards to best suit the type of cut being undertaken as is the case in the UK, and of the type illustrated by Derek Cohen earlier in this thread.

Because of 1 and 2 above, i.e., the lack of guards and the permanently installed long rip fence, North American users tend to automatically put themselves into dangerous situations when undertaking wood cutting operations, whether ripping, cross cutting, or mitre/bevel cuts. In addition they undertake operations on the saw that aren't undertaken in the UK, such as buried sawblade cutting (grooving, tenoning, for e.g.,) running dado blades and moulding heads; alternative methods are available for such operations, e.g., spindle moulders and routers to which users could turn to for such processes.

Other factors that perhaps historically encouraged such use include poorly designed safety features, such as too thin and flimsy splitters that didn't tilt with the saw blade meaning bevel cuts couldn't be undertaken without removing the splitter, and once the splitter is removed there was a good chance it would never be replaced. Poorly designed and ineffective crown or blade guards were surely another 'safety device' that users soon became so irritated with that they removed it or them. All those techniques and safety devices illustrated or demonstrated in the video you linked to address problems caused by the aforementioned tendency to use table saws with unguarded blades plus the long rip fence.

Finally, just for comparison here's a link to the HSE rip saw recommended usage page. There are additional links at that page you could follow to get a broader picture of saw usage for comparison with what's familiar to North American users. Slainte.


👍 This page answered my questions

Your vote helps other woodworkers quickly find the answers and techniques that actually work in the shop.