WoodCentral Forums

Est. 1998 — 27 years of woodworking knowledge

Drawer parts before dovetailing the drawers *LINK*

Posts

Drawer parts before dovetailing the drawers *LINK*

#1

Drawer parts before dovetailing the drawers *LINK*

Derek Cohen (in Perth, Australia)

This chapter follows on from "Before the Drawers", in which I ended stating, "Now we are one step away from making drawers". And now this chapter is that penultimate step ...

I need to explain some of the (as I feel) pedantic details I have been outlining. Firstly, I write this for those who are starting out and those who are seeking ways to increase their accuracy. The steps may not be new to some, but we all like to be reassured that others also find them necessary.

Secondly, I am going to introduce a fixture I built that increases not only accuracy, but speeds up a section of the work. This is the first time I have had a chance to try it in a furniture build.

So what do we need to do today? Well, we need to cut the drawer parts (minus the drawer bottoms) to build the drawers :)

I spent time selecting the wood for the drawer sides and drawer front-and-back. The sides were jointed and thicknessed by machine, and then stickered for a few days ...
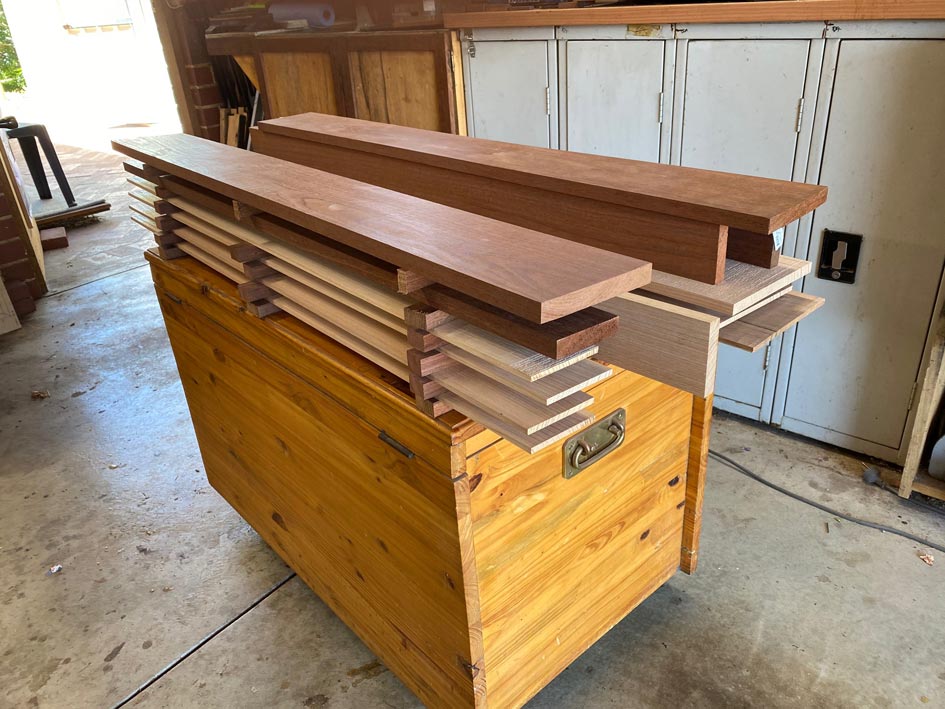

The drawer sides are to be 7mm thick, which is more typical of the drawers I build for furniture than a tool cabinet, however the drawers will each house a tray - some sliding and some cantilevered - which effectively doubles the thickness. My aim is to be sturdy but also save space (since the tool cabinet is on the small side, as it must fit under the work bench).

The drawer front is 18mm. The drawer back is 12mm.

For reference, mentioned at the start of the build, the dimensions are:

Dimensions: 660mm x 400mm x 400mm (26" x 15 3/4" x 15 3/4").

Small drawers: 205mm x 70mm (8" x 2 3/4")

Large drawers: 305mm x 95" (12" x 3 3/4")


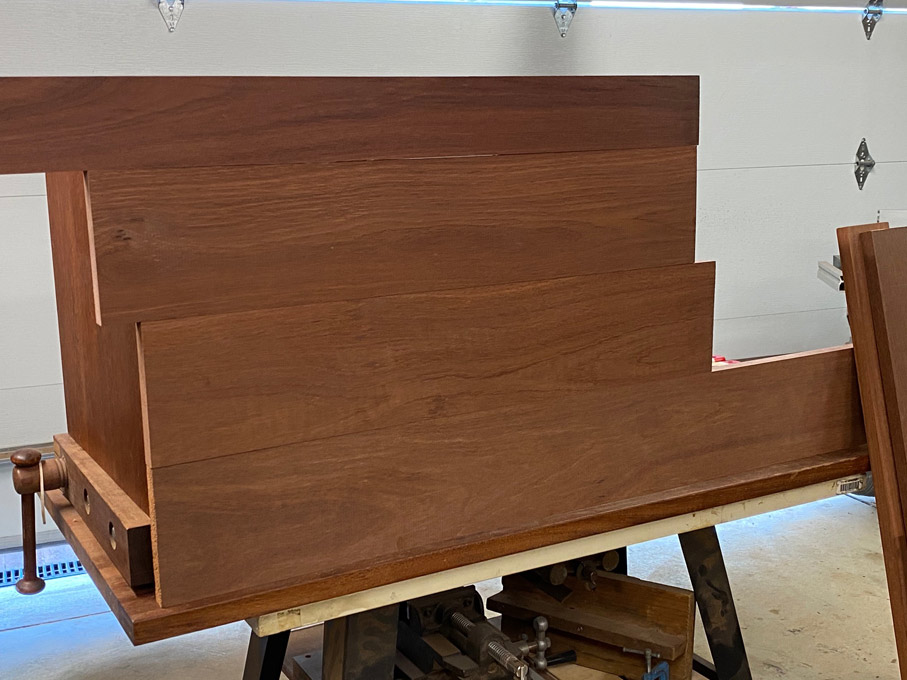
Time was taken to select the wood for the drawer fronts.

The issue here is that I was not after figure, but constancy of grain and colour (although a little tinting could be done with a latter). Lots of combinations tried ...

Now to the fixture. Actually, there are two fixtures.

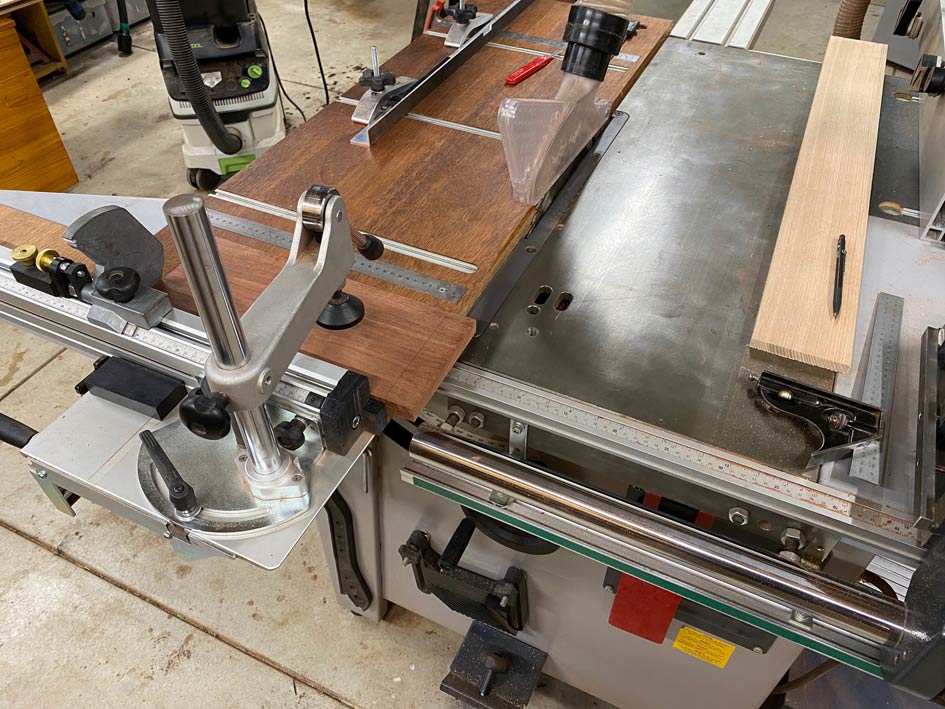
I recently posted a design for a Parallel Guide for a slider table saw (mine is a Hammer K3). This article is here: http://www.inthewoodshop.com/Powered%20Tools%20and%20Machinery/ParallelGuideForK3Slider.html


The other design I posted was for a Micro Adjust for the crosscut fence: http://www.inthewoodshop.com/Powered%20Tools%20and%20Machinery/CrosscutFenceMicroAdjust.html


These new addictions made sizing the drawer fronts and backs much easier, and quicker.

Generally, I would rip a board to rough size for the drawer front (and back, since they must be an exact copy of each other), and then fine tune it with a shooting board and hand planes. Well, these tools continue to be used, but I can get pretty close to final dimensions on the slider alone. The parallel guide replaces a rip fence, and it is both safer to use as well as leaving a cleaner finish than off a table saw rip fence.

Here is the crosscut fence cutting the width of a drawer front ...

With the use of the Micro Adjuster, it is possible to sneak up on the width and "shoot" it with the table saw, to such fine tolerances only previously capable on a shooting board ...
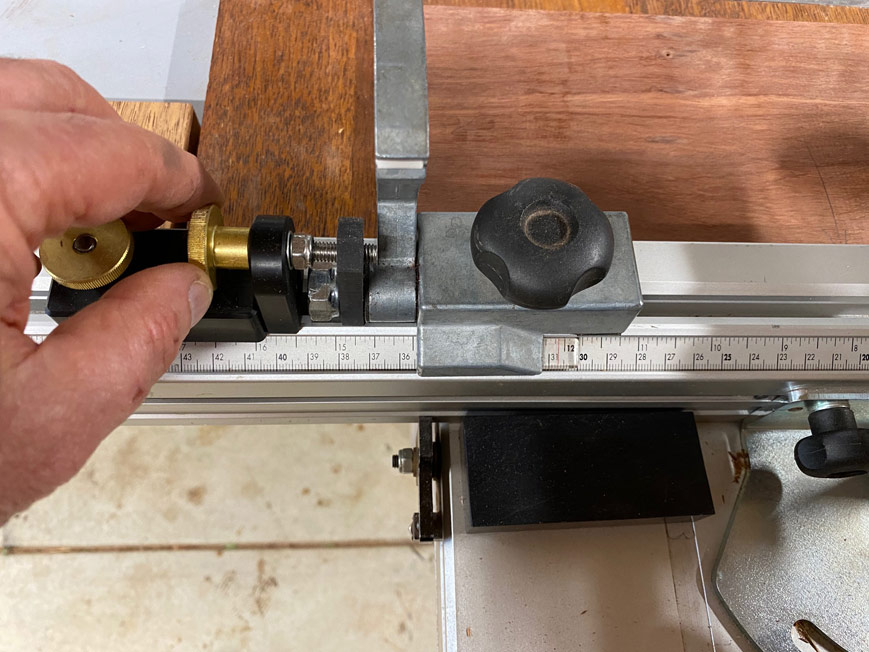

Minute adjustments can be made to the cut, with the aim of a tight fit side-to-side ...

Once the drawer front is done, it is a simple matter to cut the drawer back using the same setting.
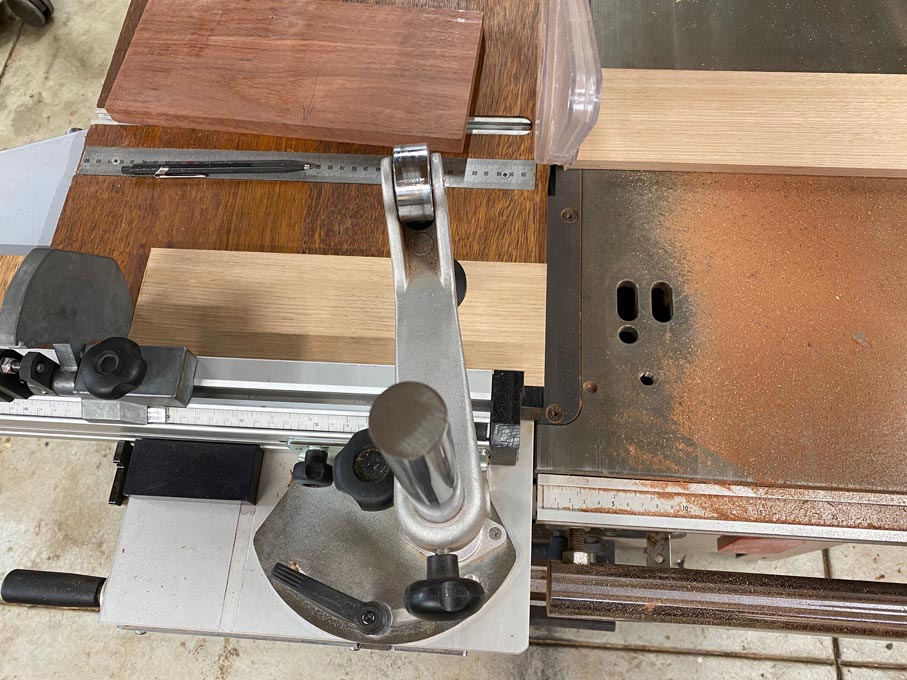

Now is the time to rip the height if the drawers fronts and backs (although the drawer backs will receive further shaping at the time of drawer making). This is a test cut. It needs to be repeated for each line of drawers, and checked for each drawer ..
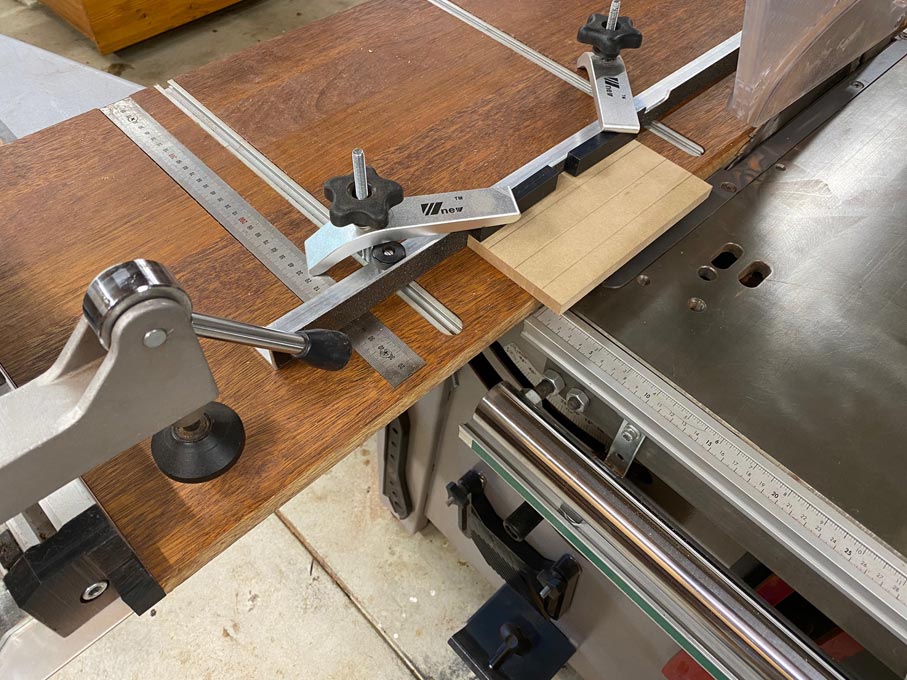

As mentioned earlier, the aim is a tight fit throughout ...
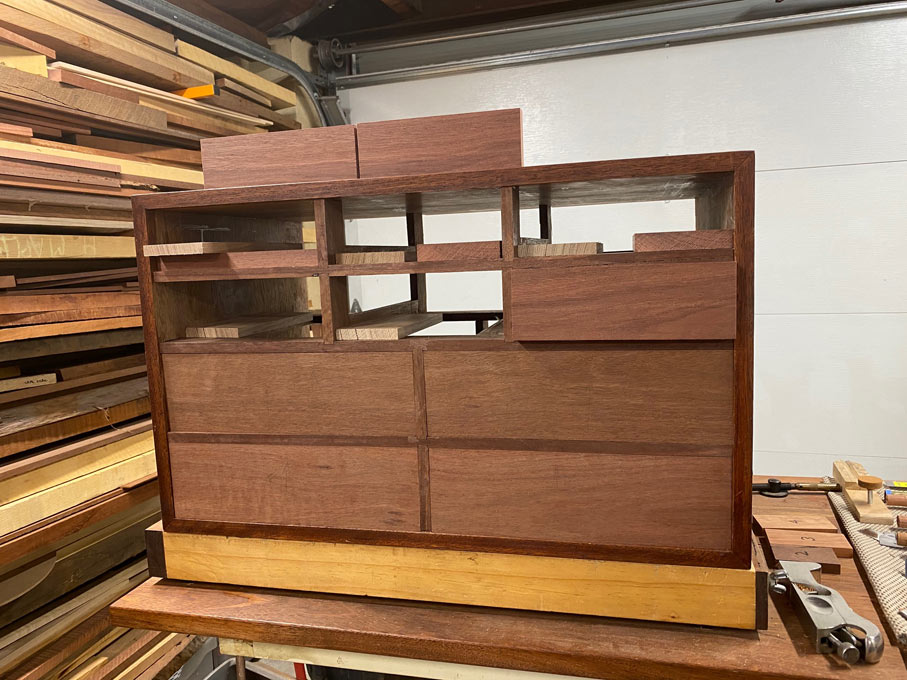

Once all are done, comes the time to tune each. The main tool use for the upper edge is a shooting board ...
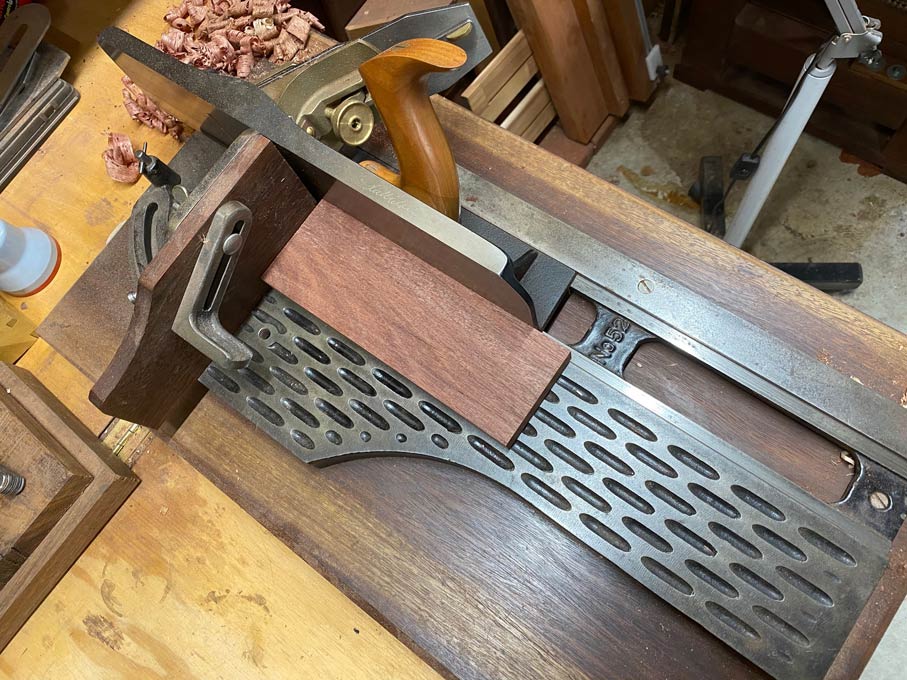

Ensure one side fits smoothly ...
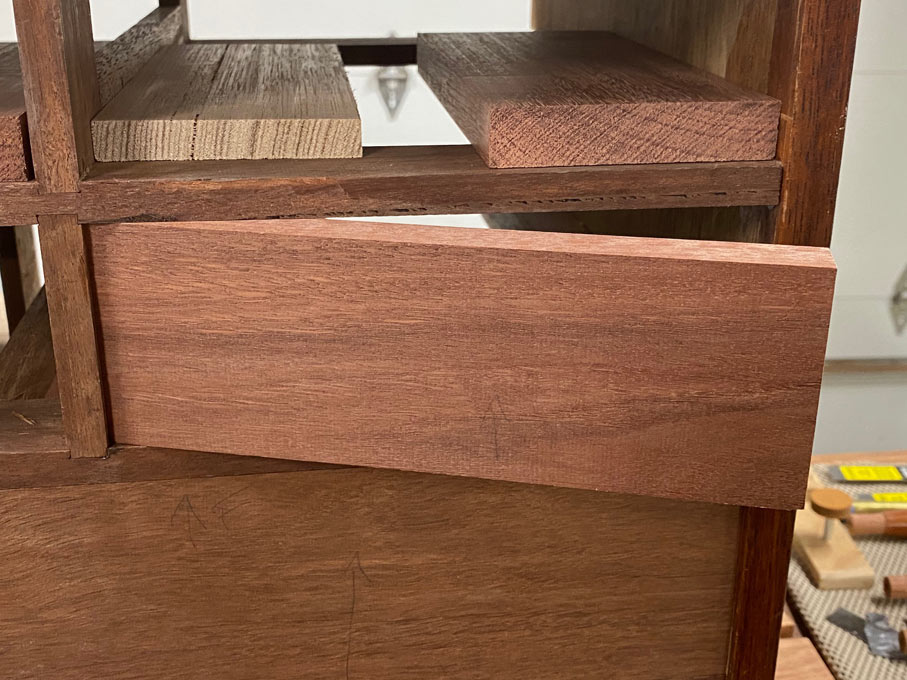

... and the other ...


The ends need some tuning as well. This is to remove a smidgeon here-and-there, to ease a section where the sides may be touching or even jamming. It may require a shaving, or just dust. The tool of choice here is a block plane.
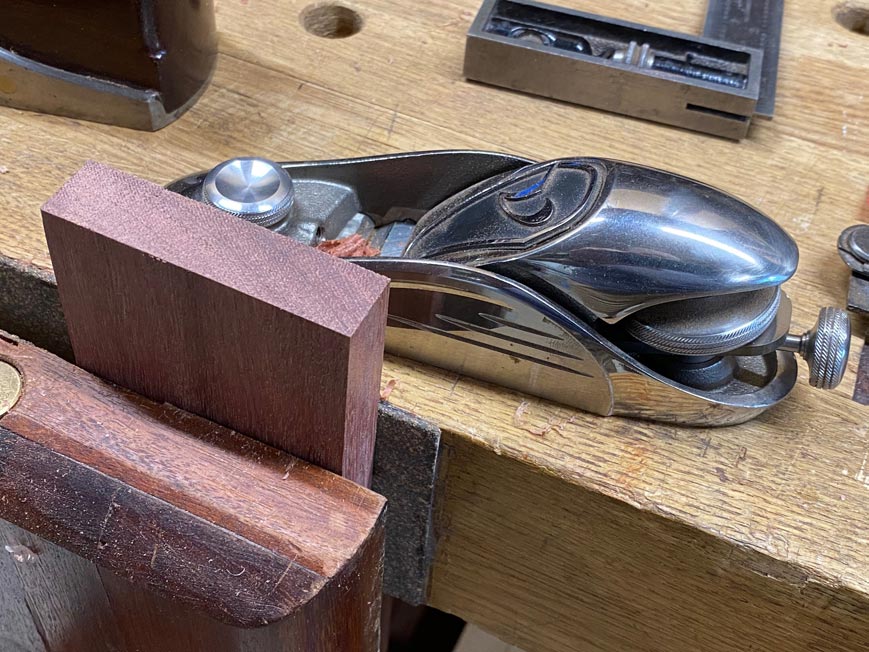

My aim here is a smooth fit - not loose but not tight: at the end, after the dovetailing is done and the sides are glued together, I want the drawer to dry in the drawer case. Therefore, it needs to be able to fit. I expect to do a little tuning still, but the aim now is to prepare for this fit.

The drawer back needs to be tuned up identically to the drawer front - the smidgeon "here-and-there" included. So, clamp the parts together ...
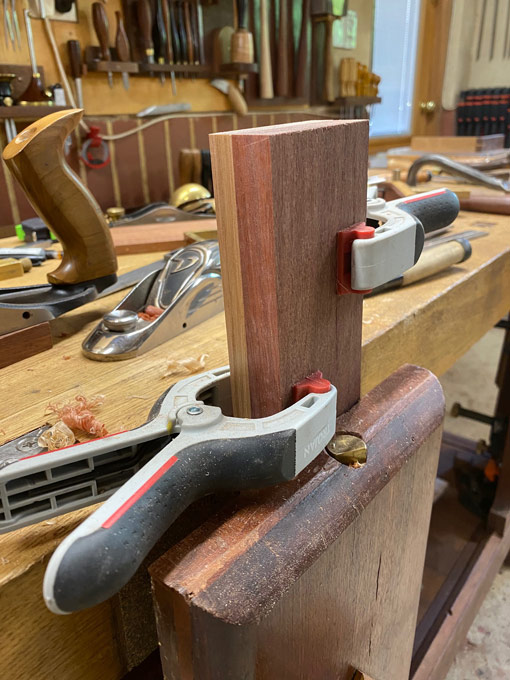

I prefer a sharp, wide chisel to pare away the excess waste from the drawer back ...
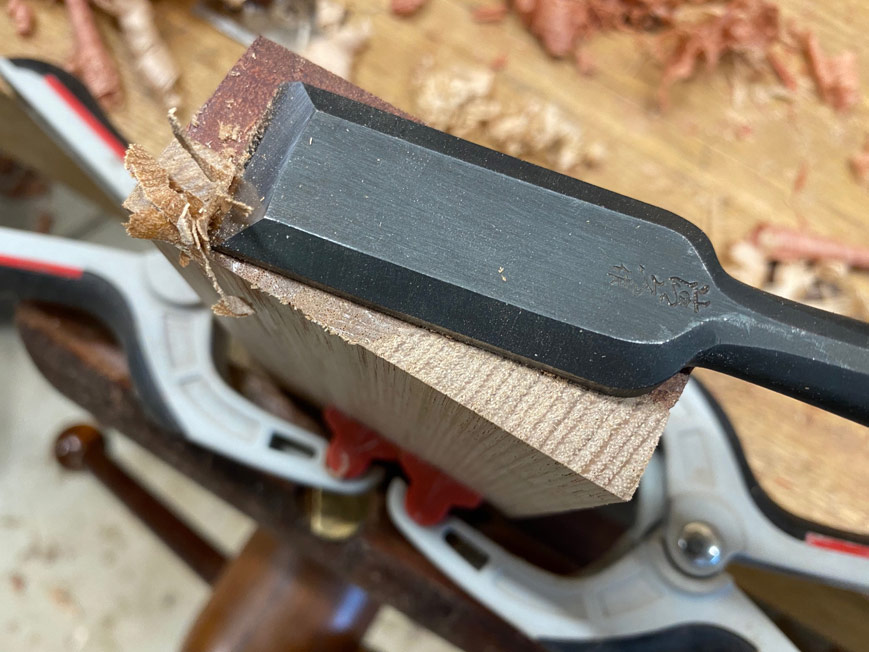

This leaves the fronts and backs ready, so ...
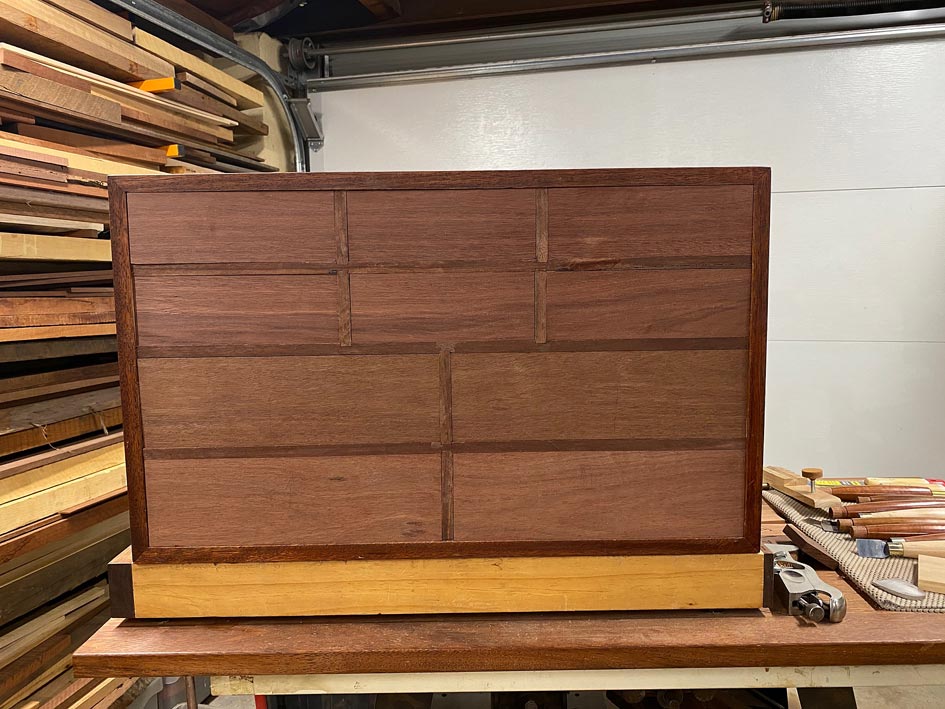

The last task is to saw the drawer sides. This is made a quick job by the parallel guide, and using the drawer fronts as a template.

Once side of a drawer front will dimension the height of that drawer side ...
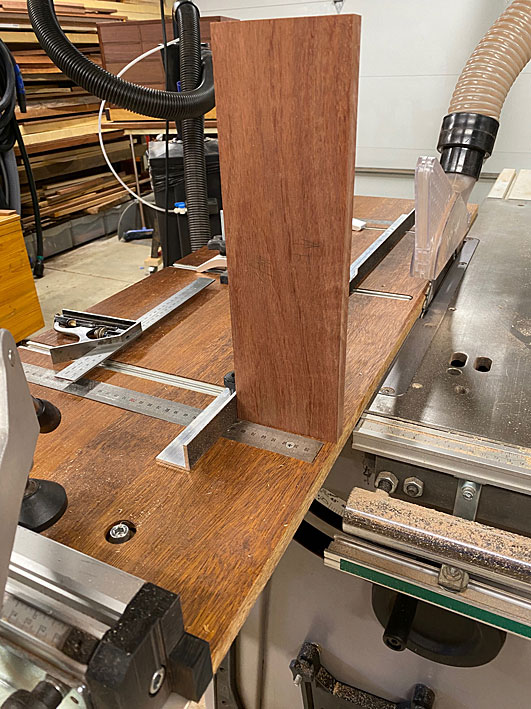

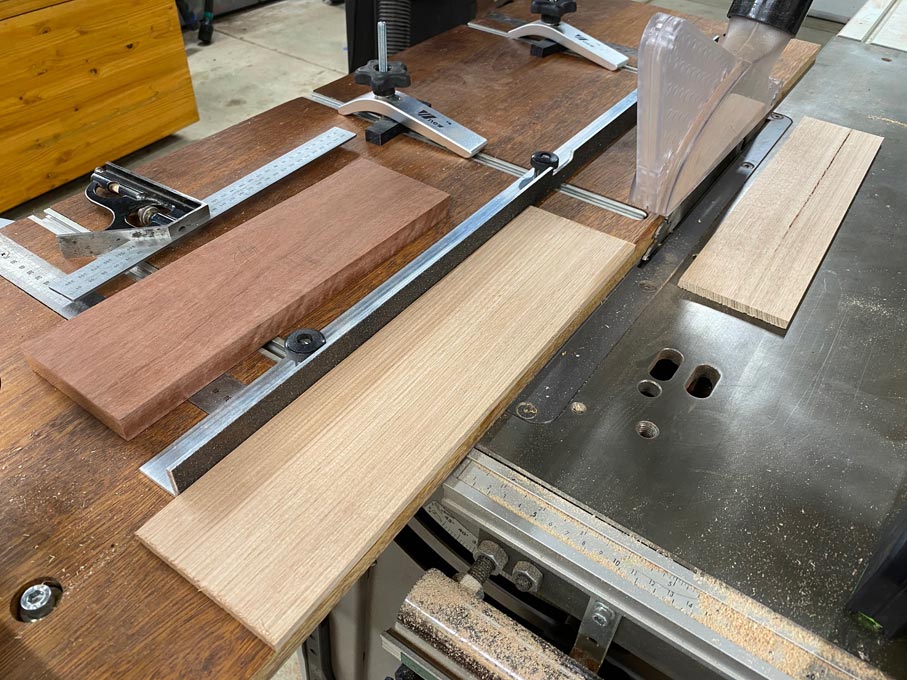
Rip it ...

Test the fit in the drawer case. Any tight spots can be removed with a shooting board or block plane. This is what we are after ...
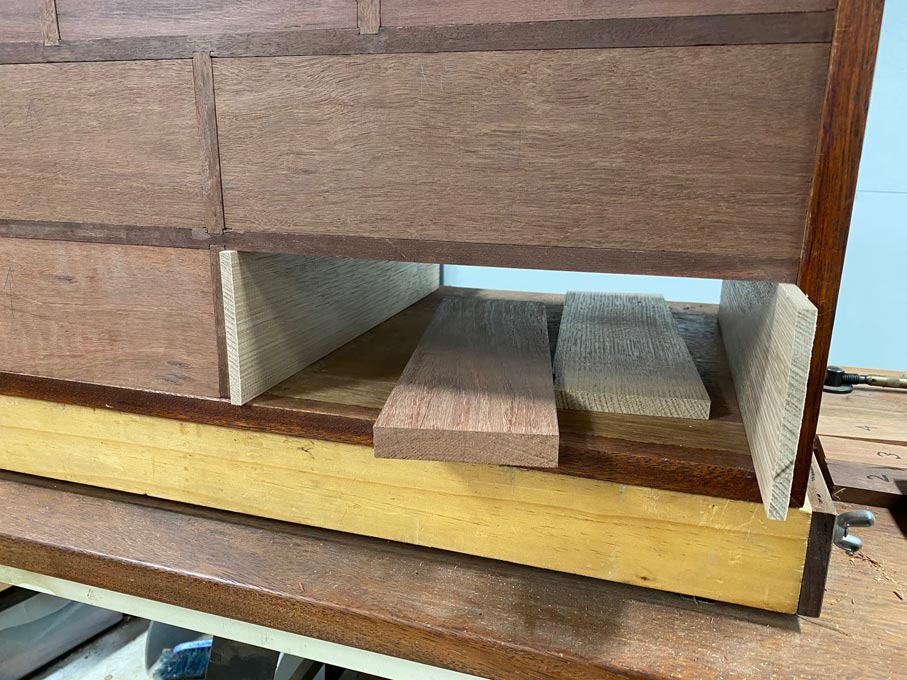

... and eventually ...
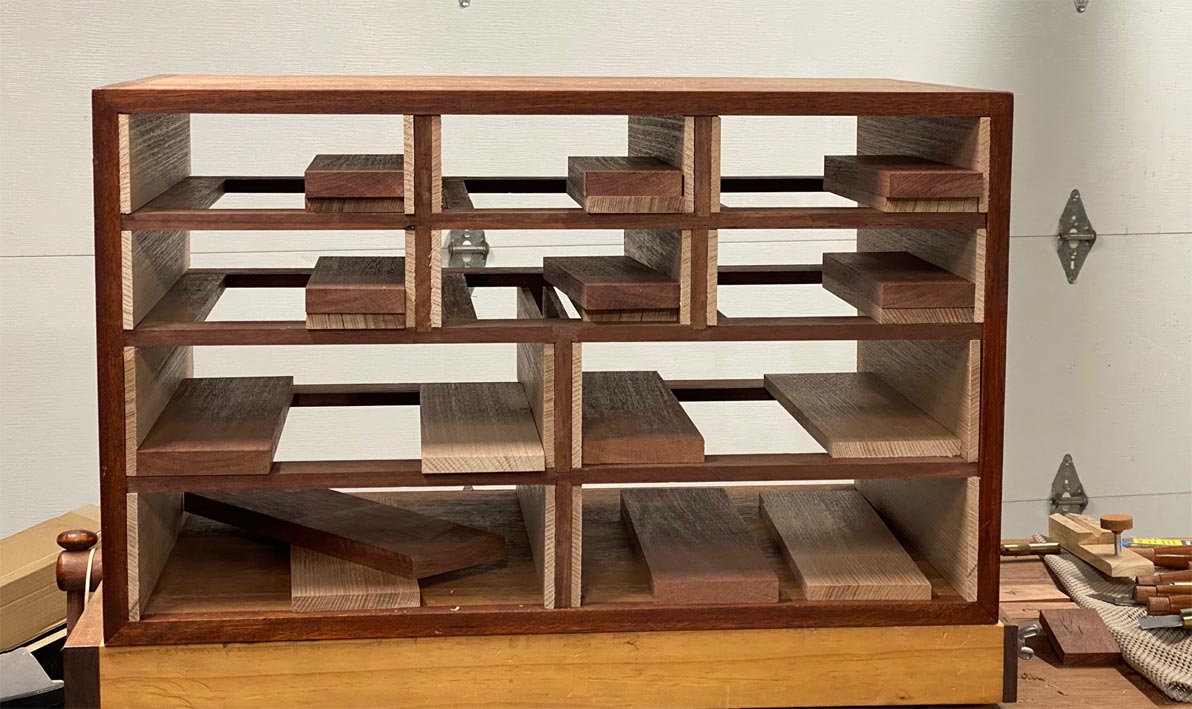

Now we are ready to start dovetailing. :)

Regards from Perth

Derek


Before the Drawers

Re: Drawer parts before dovetailing the drawers *LINK*

#2

question and comment

Bill Tindall, E.Tn.

Why are you using a shooting board to plane an edge? Don't we plane edges by putting them in the vise and planing?

I don't prefer having thin drawer parts in storage awaiting assembly. They often don't remain flat. I rough cuts drawer parts to know that I have what is necessary. Then I flatten, plane size and assemble one at a time

Re: Drawer parts before dovetailing the drawers *LINK*

#3

Re: question and comment

Derek Cohen (in Perth, Australia)

Bill, all good questions. :)

Why are you using a shooting board to plane an edge? Don't we plane edges by putting them in the vise and planing?

Yes, you can plane them in a vise. However, the shooting board offers much better control for thin boards. For drawer sides around 1/4" thick, shooting ensures that the result is perfectly square. Having said this, I do also use a hand plane in a vise. This is more of a case when a section needs to be trimmed, rather than the full side.

I don't prefer having thin drawer parts in storage awaiting assembly. They often don't remain flat. I rough cuts drawer parts to know that I have what is necessary. Then I flatten, plane size and assemble one at a time

I use quarter sawn boards for drawer sides. Very stable.

Having cut everything first (but the drawer bottoms, for the reason you mention), speed comes from the momentum built out of repeating the same task.

Regards from Perth

Derek

Re: Drawer parts before dovetailing the drawers *LINK*

#4

Re: question and comment

Bill Tindall, E.Tn.

Having cut everything first (but the drawer bottoms, for the reason you mention), speed comes from the momentum built out of repeating the same task. Undeniable

Some psychology student could get a PhD studying why the one part of drawer making I don't strive to take labor out of is the one you strive to make more efficient. We need to find something we agree on. :)

Re: Drawer parts before dovetailing the drawers *LINK*

#5

Re: question and comment

Derek Cohen (in Perth, Australia)

Bill, where would the fun be if we agreed on everything?! :)

Here is another: You mentioned that you gang cut the tail board. This makes sense to me if the primary aim is to save time. I have done the same in the past. I know that this is an important factor for you, especially as you have a greater output than I (my turn out is just 3-4 furniture pieces each year). You appear to have many grandchildren! I am still working on this.

My take on this is that I enjoy the building and ultimate speed is less important than completing a task to the highest standard I can. Unfortunately, I am a klutz, so reaching this goal is hit-or-miss ...

I suspect that I speak for others here when I say that there is much pleasure in the process, and part of the process is a focus on the tools used, their ergonomics, aesthetics, and technique. For example, the shape, comfort and control of a chisel handle is more important to me that the ultimate edge holding of the steel.

We will also differ on what we consider an important shortcut to be, that is, decide where it can be made. No doubt we have to factor in that we use different woods, and this is influenced by knowing and respecting our material.

It is wonderful for the forum that we approach these area differently. So much more to discuss ... so where is the discussion? Come on folks! Questions, comments, agreement, disagreement, different methods and techniques ... all good.

Regards from Perth

Derek

Re: Drawer parts before dovetailing the drawers *LINK*

#6

Re: question and comment

Martin S.

I find that I learn quite a bit from both of you.

Sometimes different techniques are presented, but that is ok.

The goal is the finished product, how I get there is the enjoyment.

I enjoy reading posts from both of you, and I thank you for your input.

Re: Drawer parts before dovetailing the drawers *LINK*

#7

Disclaimer for those following

Bill Tindall, E.Tn.

My take on this is that I enjoy the building and ultimate speed is less important than completing a task to the highest standard I can.

I don't build to Derek's standards. My quality standard is about what a shop making stuff for ordinary folks in 1850 might be. Most of what I do I learned to do in the Mack Headley shop. They have to build stuff their customers can afford. My customers are family and they have needs sufficient to keep me as busy making stuff as I want to be. I build to work well and last but if it don't show I don't take pains to make it perfect. I often, but not always, look for ways to save time.

Often you may find what I do less "fiddly" than what Derek does, and the result less perfect. I do wind up with a drawer that works as well though.

I am influenced by my wife's family experience. Her father and grandfather bought their wood furniture from a small shop in Utica, NY. This shop turned out custom furniture that middle class people could afford to buy. That isn't the case any more. Gallery Grade furniture is made to such a high standard, and labor cost, that only the rich can afford it.

Re: Drawer parts before dovetailing the drawers *LINK*

#8

Re: Disclaimer for those following

Curt Putnam

Yes, the world cannot afford gallery grade anything. Bill Gates built Windows to a "good enough" standard - 'nuff said. With that said I do believe there is a place for solid, functional but less than gallery grade. I also believe that absent 7 figure incomes, people will need to make their won if they want gallery grade.

Many of us will never get to be that good, but reading the discussions between you and Derek helps me immensely. Especially important is the thought processes behind why did or did not do something as opposed to alternatives - these can help more than the how-to. I suspect my thoughts are true for many.

Keep at it guys!

Re: Drawer parts before dovetailing the drawers *LINK*

#9

Your "thoughts are true for many" indeed


👍 This page answered my questions

Your vote helps other woodworkers quickly find the answers and techniques that actually work in the shop.