WoodCentral Forums

Est. 1998 — 27 years of woodworking knowledge

Repairing a sideboard

Posts

Repairing a sideboard

#1

Repairing a sideboard

Svante Nilsson

I mowed my furniture to Portugal, which has very humid winters. Surprisingly all except one of my 20+ furnitures survived, with just minor adjustments of the drawer widths.

On a sideboard thou, the expanding drawers splitted a spline joint. Any suggestions on how to repair it?


Re: Repairing a sideboard

#2

Re: Repairing a sideboard

Dave Bair

Pocket screw.

Re: Repairing a sideboard

#3

Re: Repairing a sideboard

Dick Coers

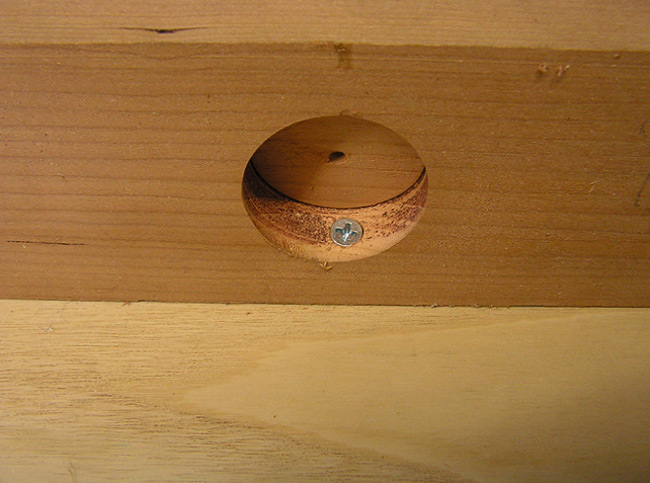
What's that plug in the front of the vertical piece? I'd probably apply epoxy with a palette knife and clamp.

Re: Repairing a sideboard

#4

bigger picture

Bill Tindall, E.Tn.

Can you post a picture showing a more of what the font of this furniture looks like? Before suggesting a repair I would like to see how the broken part fits into the whole of the sideboard.

There is something that looks like a plug in the front (the round part that shows on the edge). Is it a plug? What is it plugging?

Re: Repairing a sideboard

#5

Re: bigger picture

Bill Tindall, E.Tn.

Does that plug hide a screw that joined the top to the vertical piece?

Re: Repairing a sideboard

#6

Re: bigger picture

Svante Nilsson

The joint is a 6mm (1/4") by 20 (3/4) spline. No screws. The plug has a magnet inside to lock the door.

Should I force with clamps to open the joint completely or just glue the part that has opened?


Re: Repairing a sideboard

#7

That was helpful

Bill Tindall, E.Tn.

I like this piece of furniture. Ash?

The design is flawed. I suspect a bounce during moving caused the weight of the drawers to exert a downward force on the vertical piece. This downward force broke the joint at the top. Any heavy weight in the drawers or bounce/jar/impact (trying to get an English word here that you can translate accurately) on the drawer side would break the joint.

There are two problems to solve.

1. How to get the joint back together: I would not recommend breaking it further. Try clamping it tight by placing a clamp between top and bottom of cabinet. If the joint closes up tight.......add glue and clamp tight until the glue cures. A high quality epoxy may be the best choice. If it will not clamp tight, determine what is holding it apart (probably broken wood fibers) and try to remove them.

2 Strengthening the joint. A corner block on the left side of the joint will reinforce the joint. The problem will be to get glue to stick to the finished surface. It probably will not stick. Scrape finish off? Add small nails, or screws to secure glue block? Use something besides glue block to reinforce this joint?

Re: Repairing a sideboard

#8

Re: bigger picture *LINK*

Sgian Dubh

As David suggested you could use a pocket screw, something like as shown below, or similar - there are a pocket screw guides, screws and drivers available as an alternative, e.g. https://www.axminstertools.com/ujk-technology-mini-pocket-hole-jig-kit-101603 Form the pocket first in the side of the divider where the drawer runners are located. The resulting repair will eventually be hidden by the drawer.

Then, as Bill suggested, clamp across from the cabinet top to the bottom panel centring the clamp on the front edge of the divider to close the gap. Insert a screw to hold the housing joint tight. Remove the clamp to check the pocket hole and screw can actually close the joint effectively. If not, add one or two more pocket holes and dry clamp again, adding more screws.

When you find you can hold the joint tight with just screws in the pocket holes, go through the whole exercise again, but this time add an adhesive, where my choice would be an epoxy resin. Prior to adding an adhesive, you may find you can clean off some of the existing glue, and if possible to do so without opening the joint further, I'd do so.

It might also be a good idea to put pocket screws front and back because the joint may have been weakened along its whole length. Slainte.


Pocket hole jig kit

Re: Repairing a sideboard

#9

Pocket screwing

Bill Tindall, E.Tn.

This information is of course all theoretical for I would NEVER have gained it from experience. I have heard tell of it having happened to others ;)

When adding a screw that could poke out the show top of a case, like for example if the screw was strong enough to pull into a counter sink beyond the planned point of stopping.....

So,.....when screwing in such a screw put some finger about where the screw would poke through if it was to poke through. I am told ;) you can feel it before it pokes through and safely stop.

Re: Repairing a sideboard

#10

I do that too..

John in NM

Never had one poke through though, or even get close, so its theoretical for me too :D

As hot as drill bits seem to get, I figure I might just feel it getting close before it daylights. Ever the optimist :D

Re: Repairing a sideboard

#12

Nothing to add but a compliment

John in NM

From what I can see in the bigger picture Bill requested, I like the piece.

From the details of the door I have a hunch you got the balance of minimalism and interesting just right without overdoing it to add interest - that is a tricky balance to strike.

I'd encourage you to start a member gallery and show us more!

Re: Repairing a sideboard

#13

Re: Another Technique Using Similar Sensory…

William Duffield

I use a similar trick when drilling through holes with a Forstner bit, to prevent blowout on the back side, using fingertip sensory input. When I feel the central tip of the Forstner bit starting to poke through, I stop, flip the piece over, recenter the bit on the small center hole, and finish drilling from the back side. This leaves a clean hole on both surfaces, doesn't require clamping a backer block to the work, and doesn't risk putting holes in the drill press table. Usually, I also get a round wooden fender washer to toss into the appropriate spare parts drawer.

Re: Repairing a sideboard

#14

Re: Nothing to add but a compliment 

Svante Nilsson

Hi,

Thanks - I will try with epoxy and heavy clamping.

The joint probably collapsed when the drawers expanded when the humidity rose from 50 to 90%.

Below is a photo of how the sideboard looked as new. Now several years later the colours of the ash is much paler. That seems to happen to many (but not all) of my ash furniture.


Re: Repairing a sideboard

#15

A handsome piece of furniture

Bill Tindall, E.Tn.

Ash heartwood always bleaches. The pretty red in my ash pieces is gone after 20 years and the white sapwood in now tan. Now the ash is gone, made extinct by an Asian bug. Thousands of bdft of ash died in our timber lands.

That stack of drawers puts a large tension load on the joint that failed.

I would like to see a close up of your pulls. The black on ash looks attractive.

👍 This page answered my questions

Your vote helps other woodworkers quickly find the answers and techniques that actually work in the shop.