WoodCentral Forums

Est. 1998 — 27 years of woodworking knowledge

Underbench cabinet: 1. the case

Posts

Underbench cabinet: 1. the case

#1

Underbench cabinet: 1. the case

Derek Cohen (in Perth, Australia)

I have been uncertain whether there is interest on the forum for builds. We do tend to get carried away with the technical side of tools and somehow their use seems overlooked.

I find it interesting that when I post on this forum, part of my aim is to encourage power tool users to explore hand tools. Then, on the hand tool forum, I feel that want to encourage those there to make proper use of power and machines. Everything has its place. This is a blended build, although predominantly hand tool-orientated ... which is my preference.

This build is also on my website: http://www.inthewoodshop.com/Furniture/index.html

I decided to add a cabinet to my work bench. There are just too many tools on the wall, and many would be better off stored in drawers where I can reach for them when needed. Hopefully, this build will reveal some interesting design features for some of you.

Please feel free to post your underbench cabinets here. I do not recall a thread on this topic.
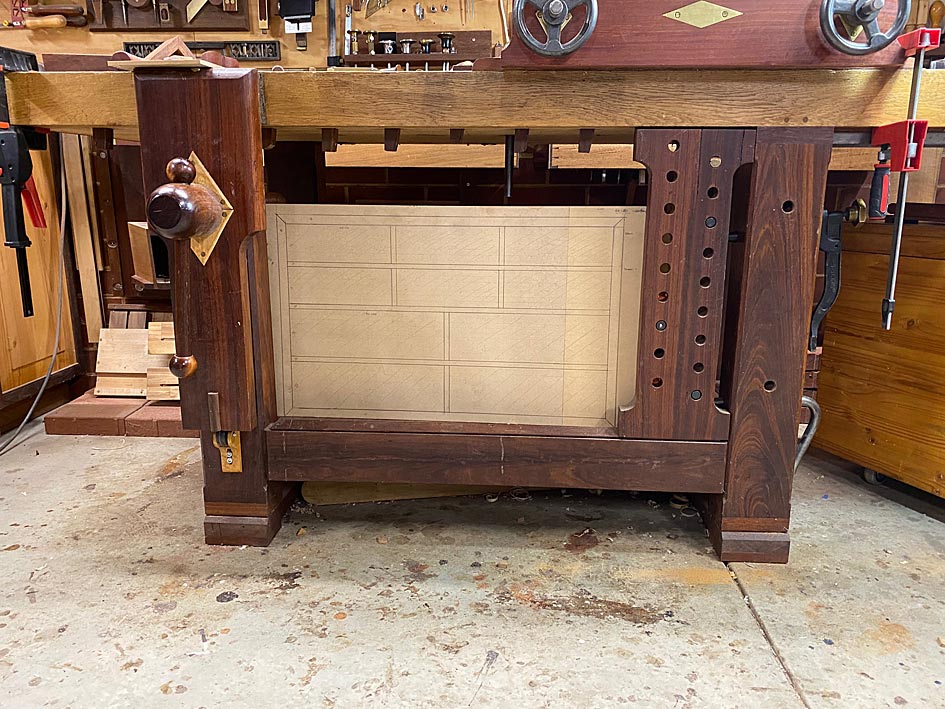

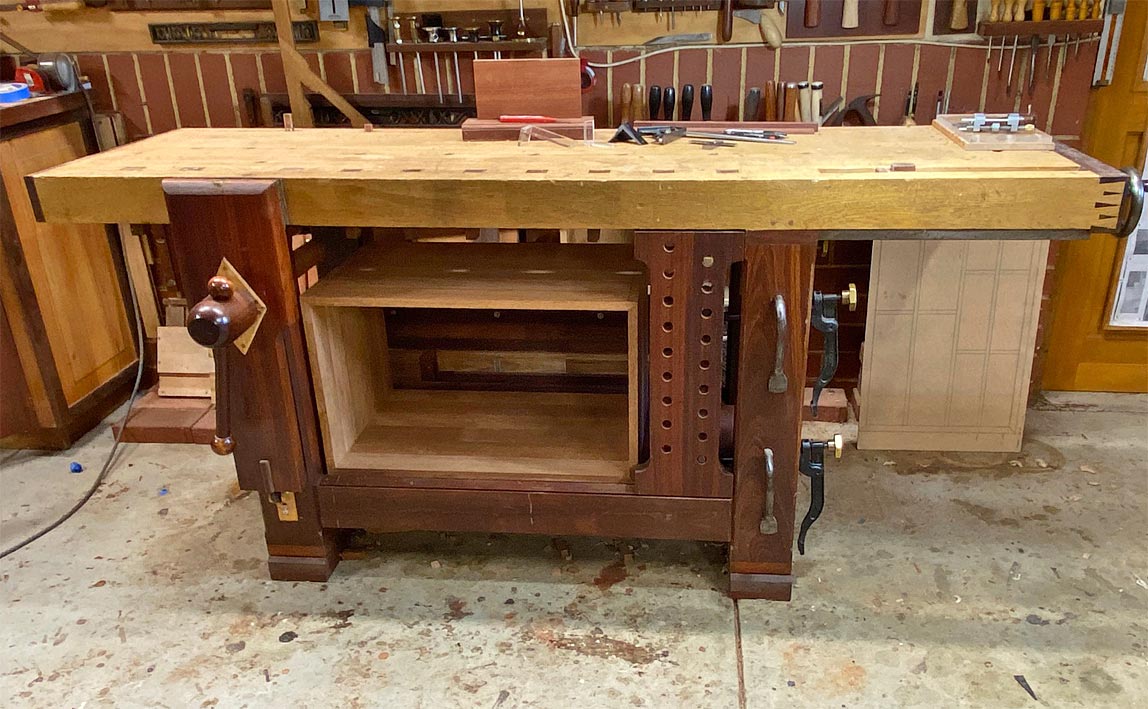
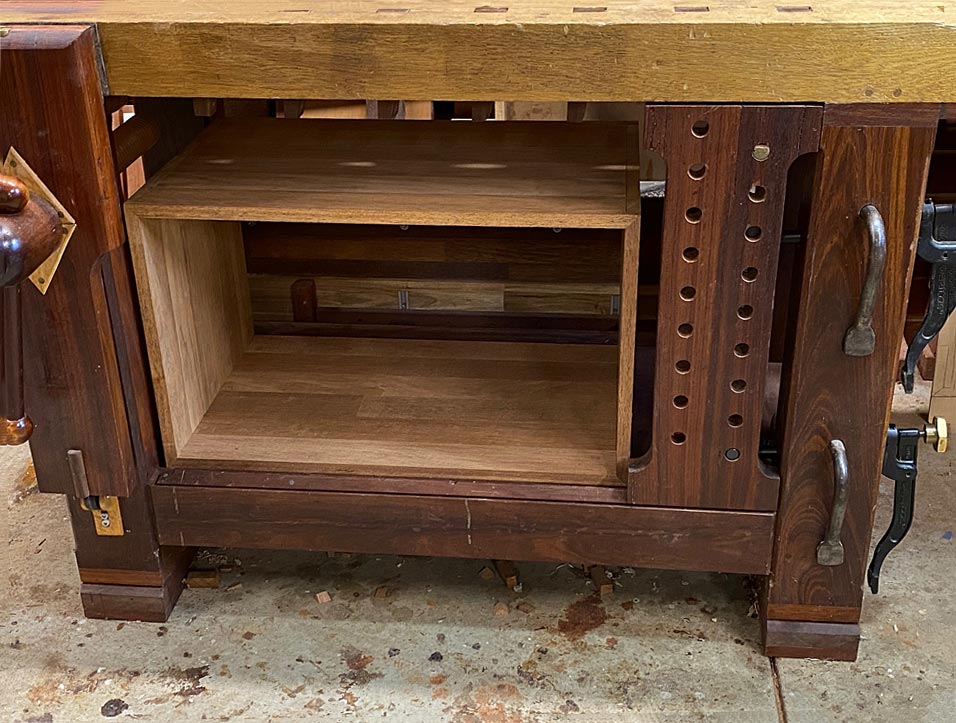
The cabinet will span as wide and high as it can go without being impeded by either hold downs or the sliding deadman.

The cabinet is deep - too deep for drawers. The plan is that the drawers will not be full length deep internally, but have full length sides through to the rear to create a full extension when siding out. Internally, it has been my plan to use siding trays within the drawers ... fewer drawers externally, but more drawer space internally.

This tool cabinet is inspired by the North Bennet Street School version (a well-known woodworking school in Boston). The tool cabinet is one of their training pieces. One became an article by Tommy MacDonald in PW magazine.

Tommy's tool cabinet ..


Mine will be a little larger, more drawers, and a more complex construction involving mitred through dovetails ...
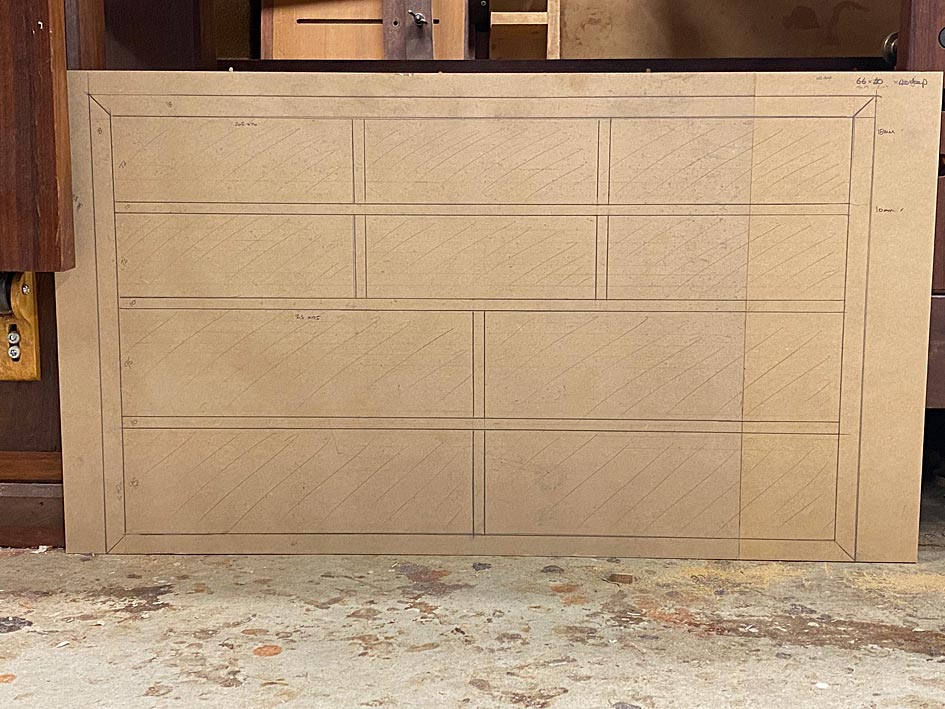

Dimensions: 660mm x 400mm x 400mm (26" x 15 3/4" x 15 3/4").

Small drawers: 205mm x 70mm (8" x 2 3/4")

Large drawers: 305mm x 95" (12" x 3 3/4")

Merbau is definitely going to add some weight to the bench! The case being dovetailed.
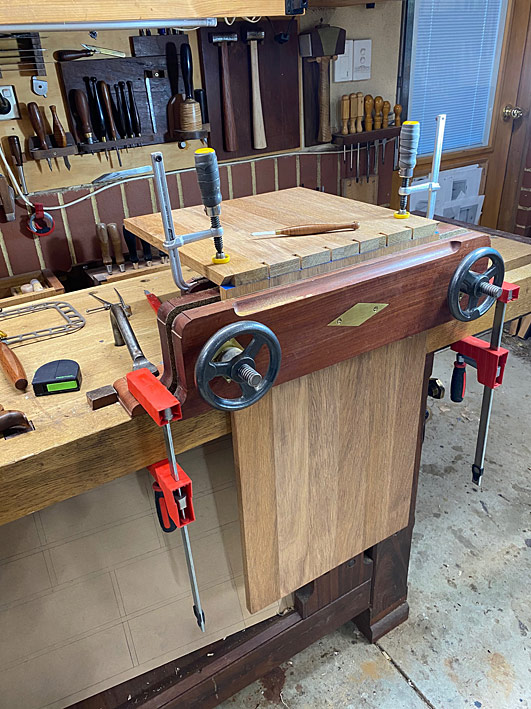

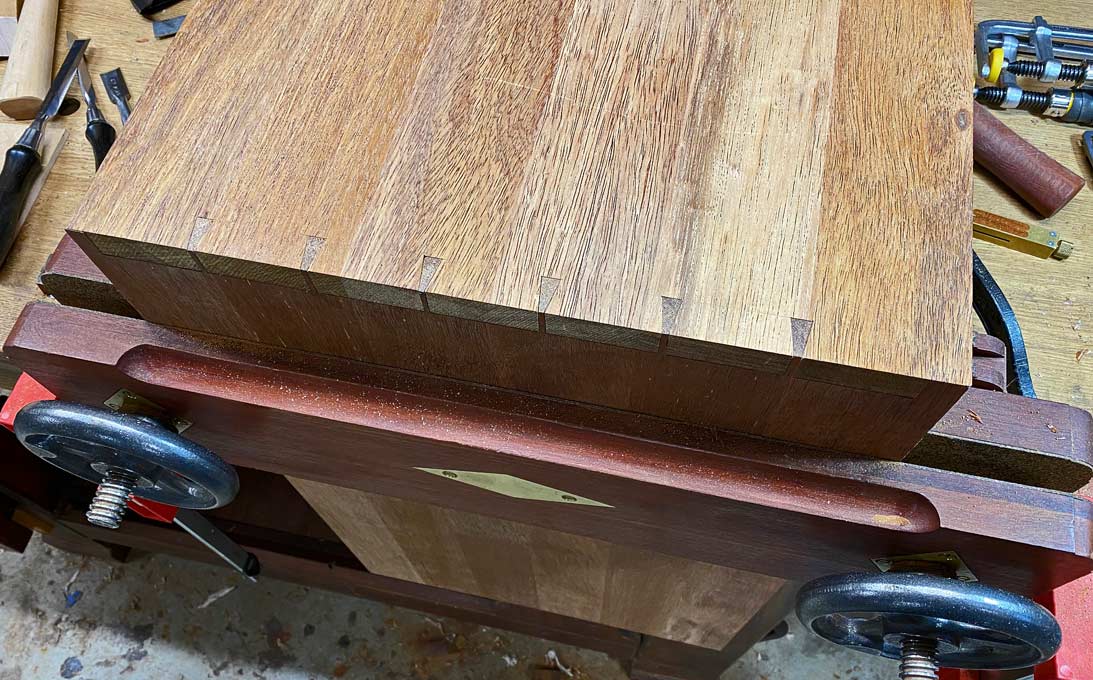
Well, this is about the fourth mitred through dovetail case I've built in about 18 months. I must be getting the hang of it now, since this was straight off the saw. No tweaking needed. Merbau is hard and has no give at all ...
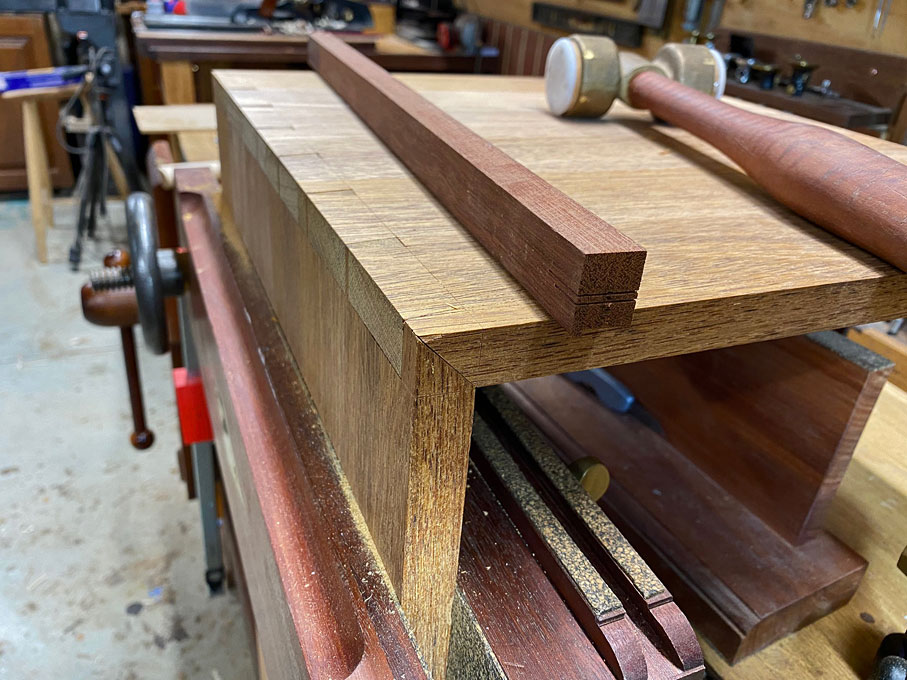
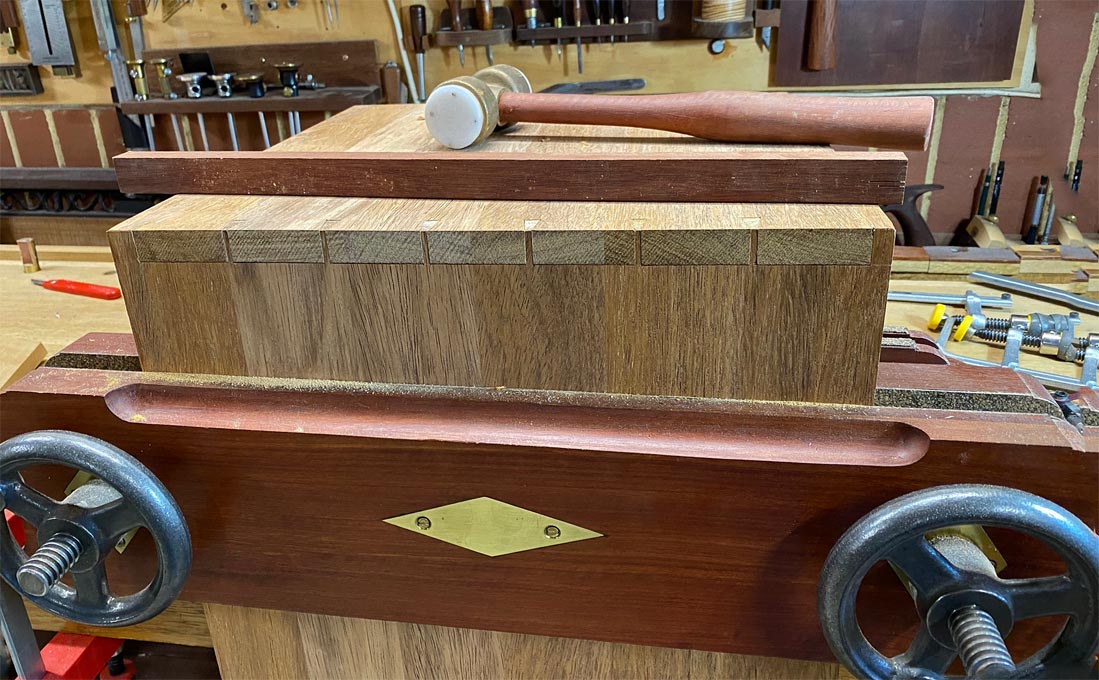

The Merbau comes as a panel from Bunnings, a local hardware store. This is shop furniture and I make no excuses for taking a shortcut. The 18mm thick panels are flat and ready to go. Literally all I have done is cut them to size.
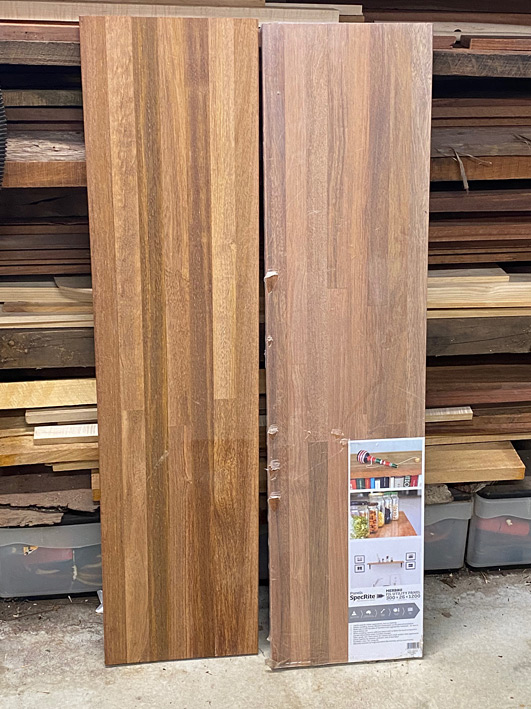

The penalty is that the wood is bloody hard!

The drawer fronts will be Jarrah. I intend staining the Merbau case to match the drawer fronts.

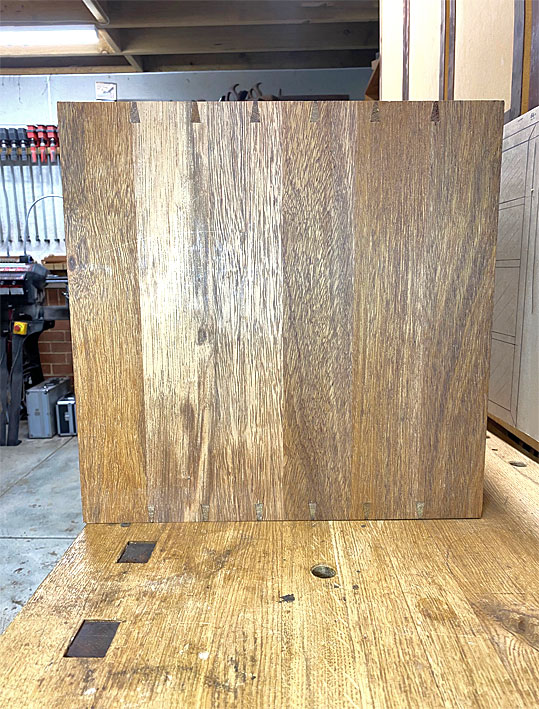
Just to prove to myself that it was no fluke, it happened again ...
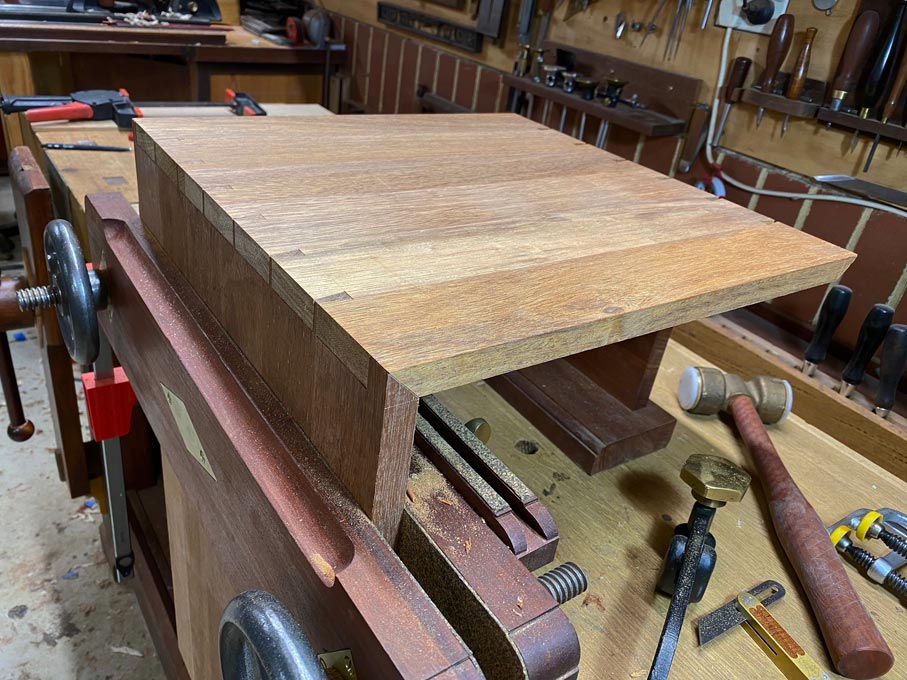


I continued on until all four sides were dovetailed. Through dovetails with mitres at each corner. And every one went together off the saw ... well, almost - one mitre required a smidgeon of a mm pared away to close tightly. All tight and square. I am quite chuffed.
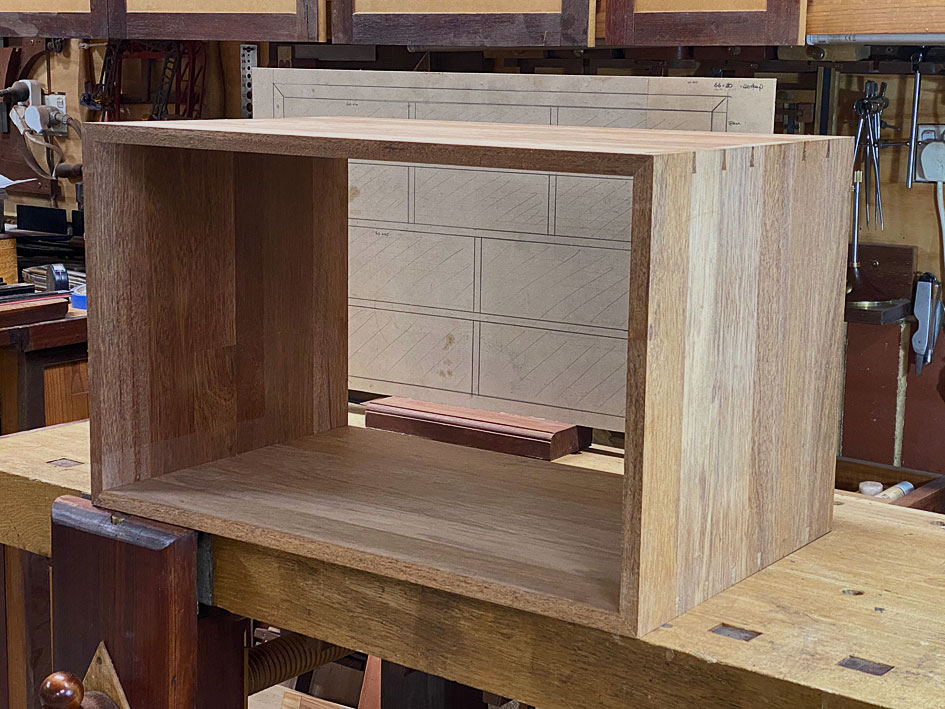

The difficult part is to get the mitres to close along with the sockets ...
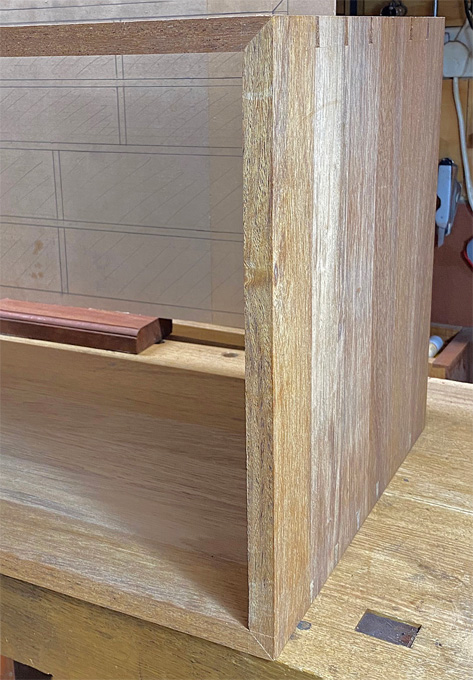


Inside the bench ...


Regards from Perth

Derek

Re: Underbench cabinet: 1. the case

#2

Re: Underbench cabinet: 1. the case

Cameron

Awesome, I've had my cherry panels glued up and leaning against a wall for a few months waiting to do this same build for my bench that I made in the spring. I don't have the skills for the mitered dovetails but I was debating if I should make my 1st attempt at hand cutting the dovetails or break out the Leigh jig... Thanks for posting

Re: Underbench cabinet: 1. the case

#3

Re: Underbench cabinet: 1. the case

Derek Cohen (in Perth, Australia)

Cameron, you must give the hand dovetailing a go. If you do not, every time you look at the cabinet, you will be reminded that you chickened out. If you do try, and even if the dovetails are far from perfect, you will be reminded that you gave it a go.

Regards from Perth

Derek

Re: Underbench cabinet: 1. the case

#4

Re: Underbench cabinet: 1. the case

Brian gunsmith From colorado

Derek, I like seeing builds. Particularly those that show things that I might be building in the near future or have already built. It gives me a view of what a leader/peer did and how he did it. Basically, I learn from watching. I am self taught with books,pix and videos. Keep up the good work.

Re: Underbench cabinet: 1. the case

#5

Re: Underbench cabinet: 1. the case

Oskar

Hi Derek,

thanks for posting a lot on this build. I´m following along and looking forward to the sliding traz part. I´m about to make something similar for my bench, and I´m curious about your design choices (as I´m now laying out the drawer sizes). As this concerns the thoughts before even starting to build I thought I ask here at the first part of all threads.

I´m sorry if these questions already got answered in later threads and posts. Please redirect me if so.

How did you choose these two drawer depths? What tools and parts will live in these drawers? I tend towards mostly shallow drawers, as most tools take little vertical space and I want to avoid stacking.

Will all drawers have sliding trays, or just the larger ones? Why did you choose deeper drawers with trays instead of two shallow drawers (where one can use the full depth in both)?

Best regards,

Oskar

Re: Underbench cabinet: 1. the case

#6

Re: Underbench cabinet: 1. the case

Derek Cohen (in Perth, Australia)

Hi Oskar

This is just a quick answer as I am working on the next sequence (drawer bottoms and slips) ... having only just returned to the shop after a couple of weeks, one of which was in Sydney visiting family.

The first consideration was the maximum size of the case, itself. This needed to fit the available space under the bench. Then I simply divided up the rows into what looked aesthetic, rather than working on specific dimensions, per se.

Once this was done, I looked at what I had, and then estimated whether what I wanted to go into the drawers would have sufficient space to fit. All looked good in that regard. The fun begins when the measuring and fitting takes place. Nothing is certain, and creativity is likely to be the order of the day! :O

Regains from Perth

Derek

Re: Underbench cabinet: 1. the case

#7

Re: Underbench cabinet: 1. the case

Oskar

Hi Derek,

thank you, looking forward to see the next part and hope to learn more about your design choices and in the end see how the drawers are used.

Exactly, this is how I started as well and will end up about where your are, at 30 by 15 by 15 inches, give or take. After that its different - I already have 4 assorted drawers I want to build into the cabinet. These are drawers I inherited or found and are used for drill bits and files etc. but they have no cabinet and are just kept on shelves.

Now I´m playing sort of a tetris game, filling out the cabinet with drawers yet to be made in a sensible and aestestic (and fun) way around these drawers. The result will be more improvised than strict geometric and with unmatched parts, but I like that for shop furniture. Making too many small drawers it will be a lot of work and I will loose a lot of space to drawer blades and dividers, but on the other hand, I rather want many shallow drawers than just a few deep ones. Balancing game. Could be that I put a tray into one of the larger drawers just for the fun of it and to get more place for smaller stuff.

Oskar

👍 This page answered my questions

Your vote helps other woodworkers quickly find the answers and techniques that actually work in the shop.