when redoing my table saw the fence guides need replacing. I purchased a piece of the UHMW from Woodcraft for this purpose but how do you glue it on. I tried double stick tape and it worked for about 3 weeks. I just did a test on some scrap with Barge Cement, Contact cement, and 2 types of epoxy. Epoxy didn't work at all. Barge cement looks and smells like contact cement but didn't hold very well. The contact cement was better but I hope there is something stronger. No instructions came with it to tell me what is suggested.
I did find this link and looked up the 3M 4693. Wow, cost more than the sheet of UHMW cost.
To work an adhesive needs to wet the surface of the substrate. What do you know that will wet and spread on poly(ethylene)...damn little. To get adhesive to wet, the surface can be modified by various means.
I thought about putting large scratches in the surface for a mechanical bond. Possibly use a carbide bit rotary cutter running slow. May do a test on that in a few minutes when I head out to the shop.
I've heard of using a flame but have never tried it.
From U.S Plastics; Oxidize the surface of the plastic with an open flame, such as a hand-held torch, using just a couple of very quick passes. Do not allow the material to blister.
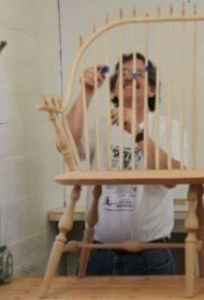
I used to watch a TV show featuring a young woman craftsman. It's been years and I can't remember the name of the show or her name either.
She built some chairs with seats and back rests made of UHMW Poly and basically glued pockets in the corners and hung it on the metal frame. The point is, there is something out there that will do the job.
Also, there are a hundred different kinds of double stick tape and some of them are fantastic. Might call or email 3M's tech department. As Dick pointed out they are time sensitive. Clamping them for five minutes would be good and ten might be better. I had some that was very thin and used it to glue cabinet trim in place. If you could clamp it and get a really tight joint it was as strong as the wood.
That's thick enough for flathead screws. Use 100 degree heads that are designed for thin materials. Downside is that you will need a 100 degree countersink.
I used to work for a company that manufactures flexible packaging - chips, cookie bags, candy wrappers, lids for various things.
We didn't necessarily do UHMW HDPE - but we did everything else.
Surface oxidation by either flame treatment or sparking was one step in the procedure. The typical adhesives were acrylics or epoxies - when we used adhesives. For HDPE, one of the typical things to do was to extrusion laminate layers together - obviously something you aren't going to do.
After looking back over some of the literature that I kept - there is an Ethylene Vinyl Acetate adhesive that bonds well - it is a "hot melt" - so it should work. Other adhesives that may work are epoxies (after flame treatment) or reactive polyurethane adhesives (also after surface treatment).
There isn't much that truely sticks to UHMW, which what the material was designed to do. Mechanically fastening it is your best bet, but you do need to allow for temperature changes, as it grows/shrinks much more than steel/aluminum. Securing it without this movement allowance will cause it to buckle between fasteners, even with a 20 degree change in the weather.
There is UHMW tape available, buy it's not cheap.
How bout a good table surface lube/sealant instead?
Be sure you are out of doors, and with your back to the wind. You flame it til the surface looses gloss. That is an indication that an oxide has formed. I have not personally done this with UHMW. It does work with PVC pipe. Which means little.
I know they sell UHMW which is PSA backed for easy application in marine environments. The threads I once read on gluing UHMW were in river fly fishing drift boat building or maintaining threads.
My information is over 12 years old so maybe there is something new that may work, BUT I was an Engineer at a fairly large factory that used a lot of UHMW.
We had several large printed circuit cleaning systems that were built with UHMW panels. These were purchased from fairly large builders. None of these machines had any panels that were glued.
We also fabricated some items from the material and I (or any of the other Engineers) could find any adhesive that bonded the material with any success!
As has been posted some of the attributes of the material is that it has a coefficient of friction lower than Teflon and is chemically inert.
There is (was) a UHMW "tape" that I used for some chutes that had an adhesive on one side. It worked fairly well, but wasn't in a stress situation.
Personally I would opt for mechanical attachment - using flat head screws. By the way it does behave a little odd when machining, if you drill using a .250" bit the hole will a little undersized after drilling, usually .003 ~ .005". Then you cannot take out a small amount! The next size bit will not "Bite" so you have to go up a size or two!
Years ago I was in the local WoodCraft store looking over their machinery. They had a table saw (I believe it was the Steel City brand) that had an innovative design on its rip fence. Instead of having the little shoe under the rip fence like what is being described in this thread, they had a foot that appeared to be one of the long threaded furniture levelers that had the plastic glide material in it . This was bolted to the bottom of the rip fence ( had to drill a couple of holes) so that it lined up with the angle iron rail on the back of the saw. What I liked about was, it is adjustable. You could control how much of a gap you had between the fence and the top of the saw. With my saw, as purchased, if you were cutting laminate, it would slide under the fence. Needless to say when my shoe came off, It was replaced with one of the furniture leveler/glides from WoodCraft. It works great, if it wears out I will go back to WoodCraft to get another one. To me this was a KISS fix.
Mostly because I have it and if it fails I can always try something else. I tried a flame on the material and it didn't really seem to do anything. Maybe microscopically but you sure can't see or fee a difference. The UHMW is fairly soft so I used a scratch awl to scratch a bunch of line. This sheet is about 28" x 3" so a lot of glue surface. I spread rapid set West System epoxy on and then clamped it for a couple of hours. I'll it sit overnight before I do any testing to see if it holds.
In my earlier post I spoke of the need to chemically modify the surface. Only the outer layer of hydrocabon molecules need to be turned into something that the adhesive will wet. If flaming resulted in the surface feeling different there was way too much flaming.
While I have not faced bonding something to poly(ethylene) if I did I would wave a flame over the surface. Then I would add a drop of water to the surface. If the water spreads instead of beads up the new surface will wet with any adhesive. The water test could be extreme. If the water beaded up I would try acetone. If acetone spread and water didn't I still think a contact cement would bond. Unsure? add a bit of adhesive and see if it sticks.
Don't know if it works in this application, but it is cheap and most people have it. See if you can get the surface to wet, as per Bill, then hit it with the super glue.
I work in the plastic injection industry and back in the days before 3d printing we machined models. We used 3M 410M Double-Sided Masking Tape which is .005 inch thick to hold material to the CNC mills's table so we could machine all the way around the material.
The trick of getting a permanent bond with double face tape is to put one layer on the material and one layer on the sub-straight (table, fence, etc.) and press it down with j-roller. Then remove the backing of the tape and put the sticky faces of the tape together. It is better if you can clamp them together for 30 seconds but we generally hit the piece with a dead blow hammer to seat it to the table. We could take cuts with a 1 inch diameter 1/2 inch deep with no adverse effect. One of our machines has a sacrificial table attached this way and it has been on there for 20 plus years.
And another thing that should be mentioned is that it expands and contracts much different from most things your trying to bond it down to. When this is expected, the last thing you want to do is clamp it down. Instead you want a really thick flexible adhesive like silicone or some of the boat sealer / adhesives.
Back when I was in the sailing club, we bought a Main Lobster boat for our committee boat, then fitted it out with all the things that made it good for starting and finishing races. One of those things was a toe-rail. Instead of using teak or another wood, someone came up with a black plastic, maybe UHMW, or Nylatron. It hadn't been on there long before it had broken itself into short segments with a fairly wide gap between screws. I'm guessing it tried to shrink on a cold night. This is why a hard rigid epoxy will fail.
Back then, Whenever I wanted to stick something like aluminum to a fiberglass hull, the best adhesive / sealant that I ever used was 3M 5200, which was very slow setting, but now they have 5200FC Fast Cure. It is very sticky stuff. You might call West Marine or Jamestown and ask for their tech help if they know whether it will bond to UHMW, because they would probably know.
Back to John's comment about scratching it up to give it some tooth or texture, I like to use a Mill bastard file tilted up at about 45º and raked down a bonding surface, whether it be wood, plastic or metal.
The cheap version of that is to use dollar store masking tape, and super glue. Given that masking tape seems temporary at best, I was not expecting much the first time I tried it. I barely got the parts apart, and it was not because super glue had bonded the wood directly. That masking tape is amazing. I was using my planer to process sides for guitars, and the idea was to stick two parts together and flip them end for end. That way one can get the parts to a much thinned dimension than the planer will handle natively. One is then supposed to be able to separate the parts...