Deconstructing Line and Berry Decoration
Bill Tindall, E.Tn.
Deconstructing Line and Berry Decoration
Line and Berry is the decoration found on Chester County furniture from the early 1700’s. It is described in detail in a PhD thesis by Lee Ellen Griffith. It consists of geometric patterns like that shown on this spice box door. The patterns were largely scratched into the wood with a compass with a cutter on one end and a point on the other.
In making similar furniture the problem is how to reproduce these patterns. The pattern on spice box door is familiar to anyone with a compass who was bored at the progress of geometry class. Its origin is inscribing a hexagon in a circle.
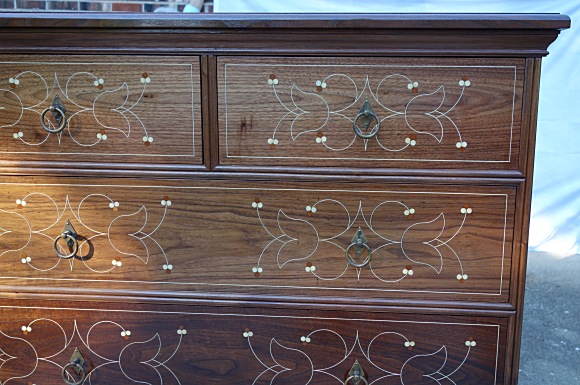
It is less obvious how the pattern on this drawer is created and scaled to the drawer height. I decoded this pattern fortuitously while trying to draw it on a drawing board. The arcs are all of radius R or 2R. The centers of all the arcs lie on an R x R grid. Reproducing the pattern on any size drawer is a simple matter of setting R to some fraction of the drawer height that will result in the pattern attractively filling the space.
When I proposed in a letter to Popular Woodworking that this common Chester County pattern was created this way the claim was met with skepticism by one expert on this furniture. Undeterred, this discovery perked my curiosity about other Line and Berry patterns.
I was granted permission to study these patterns on furniture in the Chester County museum. I found that many of the patterns could be laid out with just a ruler and compass or divider as was the case with the drawer illustrated in the picture. To word another way, the geometric looking patterns were laid out with geometric proportions, not by freehand. (there are of course free hand patterns for inlay)
I also discovered that when examined closely, many of the inlaid lines varied in thickness. I failed to get any interest in looking into how the conventional explanations for how these patterns were scratched and inlaid would lead to lines of varying thickness along their length.
I want to decorate the top drawer of this bedside dresser with a pattern I found illustrated in the Griffith thesis, page 23.
I faced the problem of figuring out how it was created. Given my previous experience I was certain it was created by simple combinations of compass arcs centered according to some underlying geometric principal. The arcs are clearly all of the same radii. Connecting their centers revealed how the pattern was made to develop across the surface. Now came the problem of how to scale it to my drawer space.
There are three independent variables- the desired pattern height, width and the fact that it is symmetrical. The graceful development of the pattern was at first not apparent. Not only the size of the resulting pattern but its ascetics is dictated by not one dependent variable like the drawer pattern, but 3 variables- arc radius, bottom angle the bottom arcs are centered on and the top angle these arcs are centered on.
I could not determine a predictive relationship between the dependent variables that enabled me to predict the final height and width of the pattern.
In the beginning I imagined this pattern between two pulls. But as I worked on scaling it I realized it accommodated a single knob nestled in the center. Now I had to rescale it again by trial and error of the three variables so that it would stretch across the drawer front. Many sheets of drawing paper later......
Before scratching on an actual drawer front I needed to see what this paper pattern would look like in reality. Also I wanted to determine if it would look good on cherry. I have never seen line and berry done on cherry. And finally, I needed to determine what size berry looked right.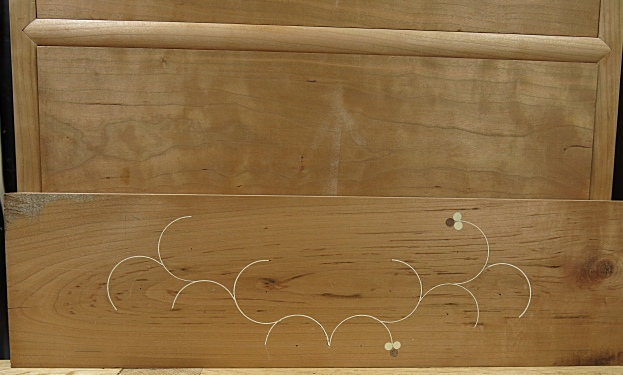
Shown in picture 5 is the test pattern hastily scratched on a cherry test piece. The first thing I learned was that I was out of practice scratching- ragged cuts, points that slipped out.....But, a test pattern emerged and I find it OK for the need. Oh, I never explained the need. I promised granddaughters I would have something special on their dressers.


