WoodCentral Forums

Est. 1998 — 27 years of woodworking knowledge

A coffee table for my nephew - #2

Posts

A coffee table for my nephew - #2

#1

A coffee table for my nephew - #2

Derek Cohen (in Perth, Australia)

The immediate challenge is to create the curved ends. The plan is to make dovetailed corners, round them on the outside and add a filler/filet to the inside corner, which will be hollowed to compliment the outer radius.

Complicating this is the need to mitre the insides of the dovetailed ends, since this will permit the shape to flow better than butt ends. Interesting ... as I have never made mitred dovetails to date. This is going to be a steep but quick learning curve!

I spent some time researching mitred dovetails. There is not much around. The only book I could find with directions was Ian Kirby's "The Complete Dovetail". I like Ian's work, but the writing here were not his best. There is a short video by Chris Schwarz (Google for it), which was helpful. There was also an article on the UKWorkshop forum (by Custard), which is a Pins-first method (I tend to saw Tails-first). There were one or two other articles to be found, of less assistance to someone like yours truly, who becomes easily spatially challenged. In the end I worked it out but, reflecting on the method that evolved, it does not look like those who came before. Perhaps it is a different way of doing it? I really do not know. Let me have your thoughts here. Anyway, I plan to show it for the education of those who want to learn a method.

Beginning with a tail board that has been marked and sawn (to speed up the description). Note that there is no shoulder here (which is common on butt ended dovetails). The wood is Merbau, which is hard, hard, hard. 20mm thick, as per the panels on the table ...
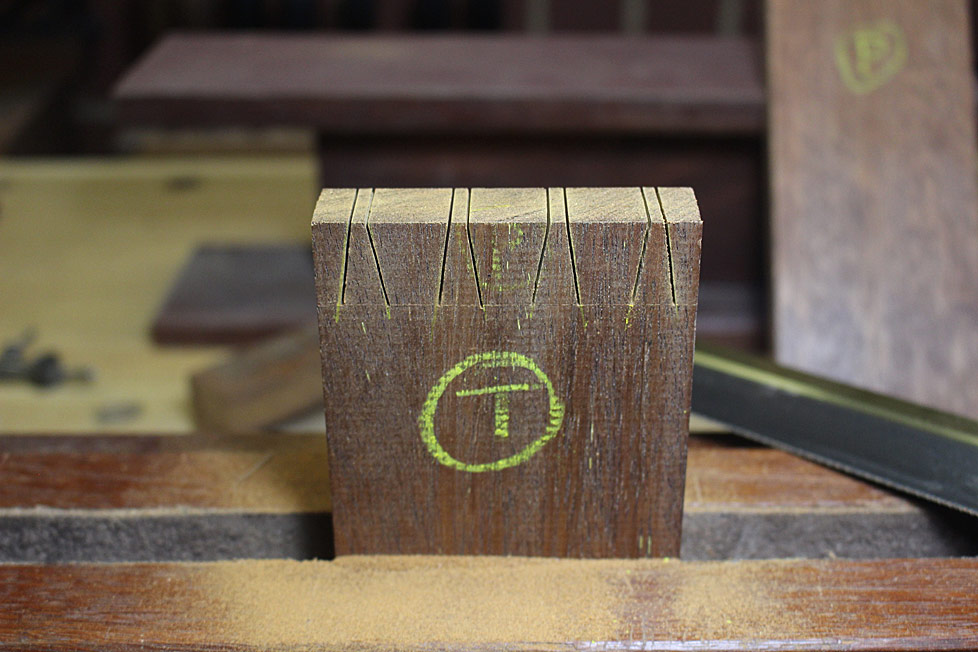

The aim is to saw all the tails. Forget about the mitre for now (... this is a departure from the methods I observed).

To make the removal of waste easiest, undercut the baselines (shallow cuts to avoid losing vertical) ...
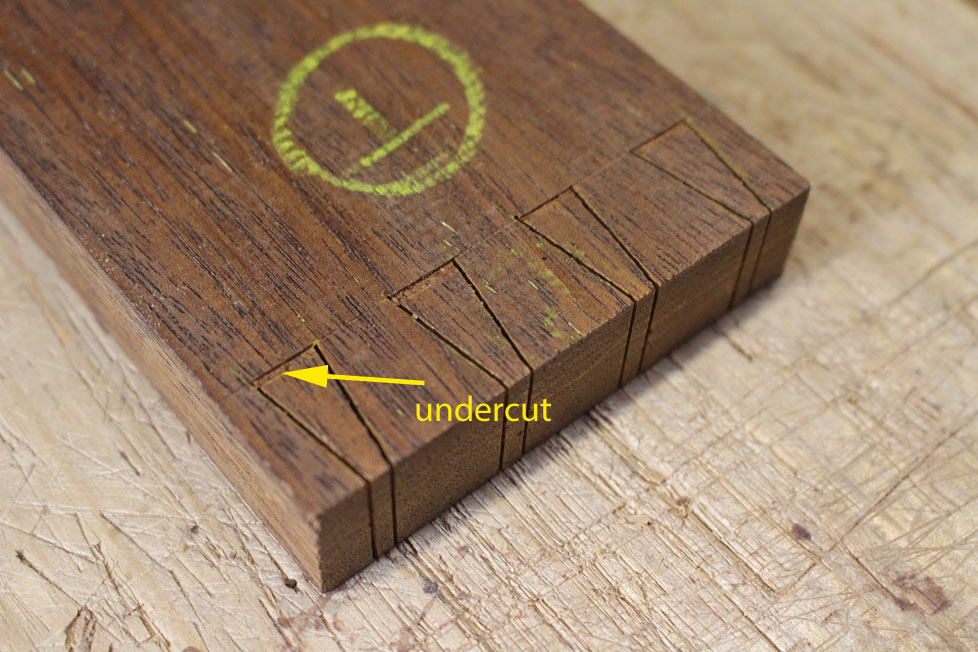

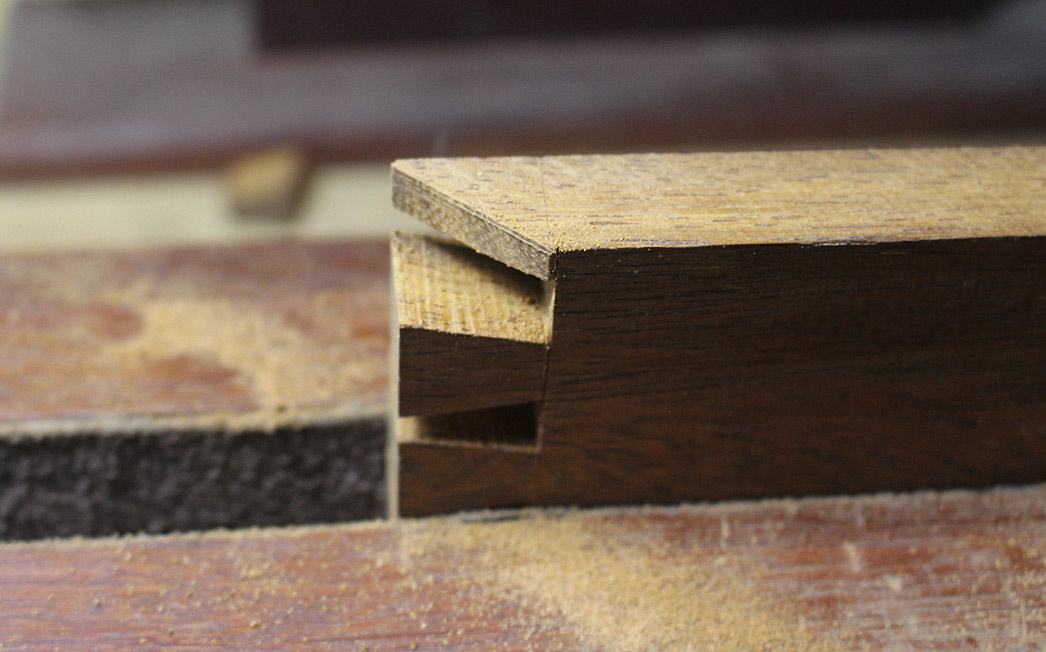
Now fretsaw away the waste. Get as close to the baseline as you dare! My cuts are about 1mm ...
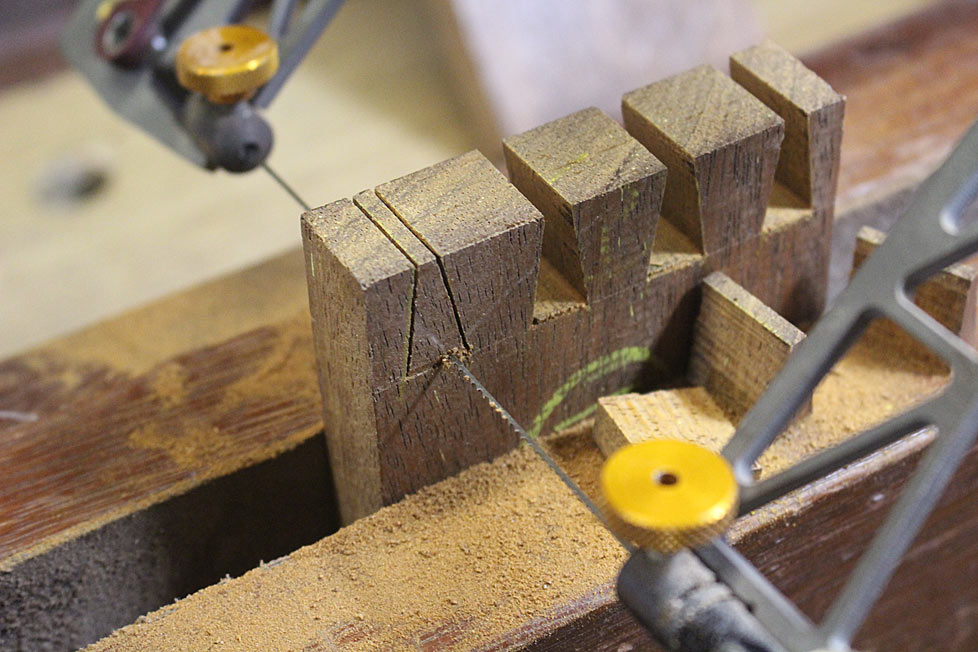

This enables the minimum of waste removal. You can place the chisel immediately against the chisel wall and pare/chop down halfway ...
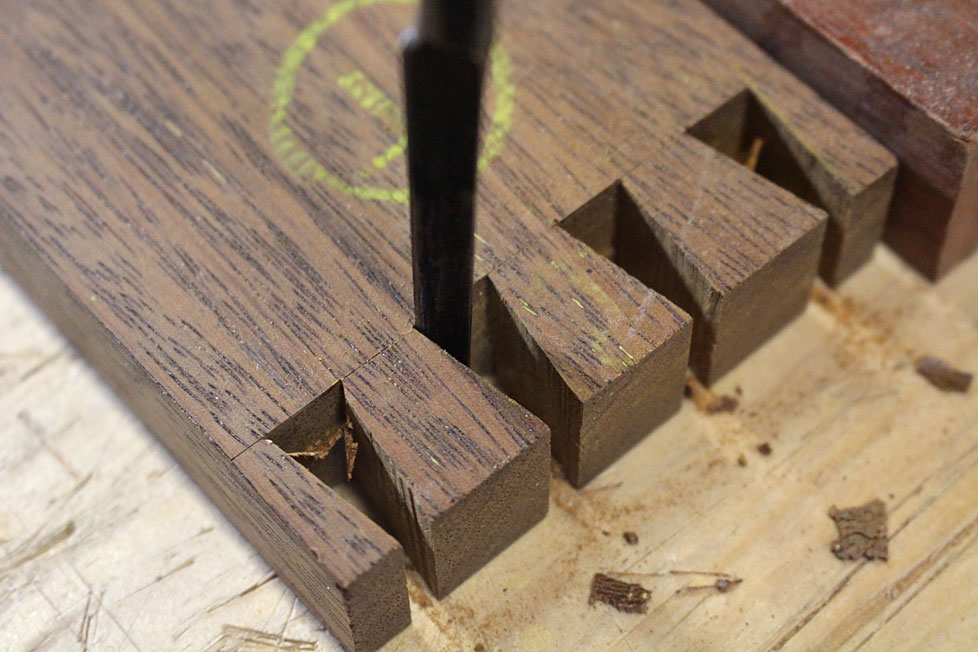

With the waste removed, mark the mitre cuts at the sides - but do not cut them yet (this is another departure) ...
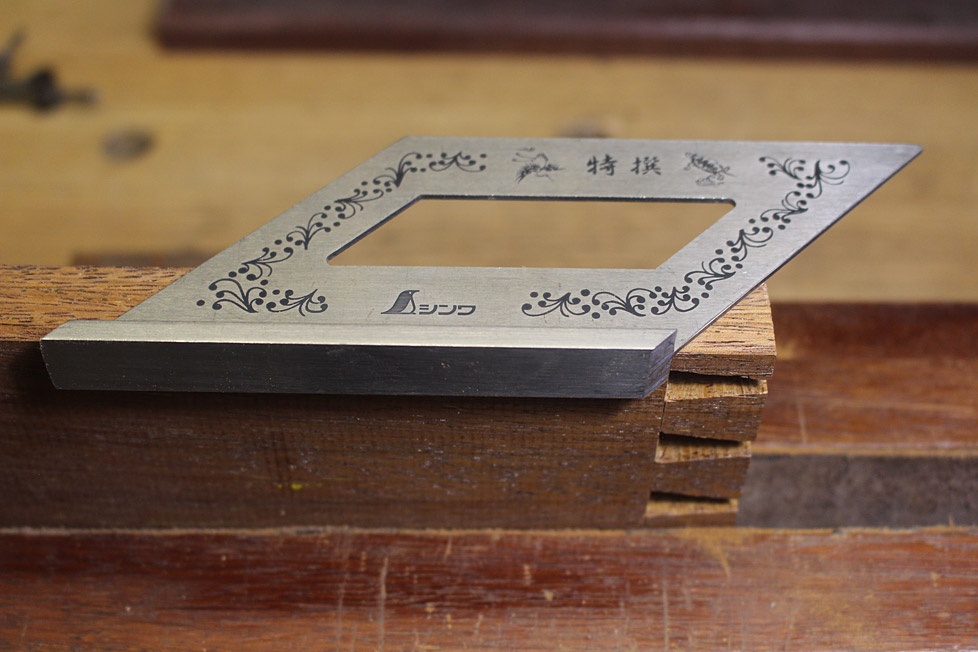
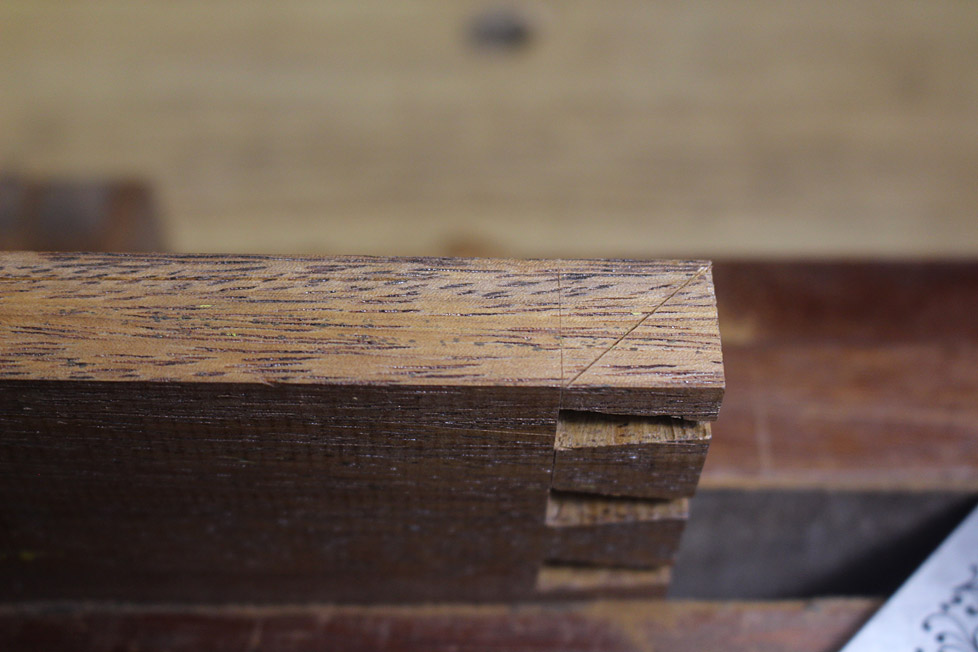

Time now to transfer the marks to the pin board.

First, here is an alternative to the "#140 trick" (the #140 trick involves creating a shallow rebate to securely connect the tail board to the pin board when transferring marks. This was popularised by Rob Cosman and Chris Schwarz, amongst others). My alternative is three layers of blue tape, which is peeled away afterwards.

Lay three layers of blue tape over the baseline. No need to be careful ...
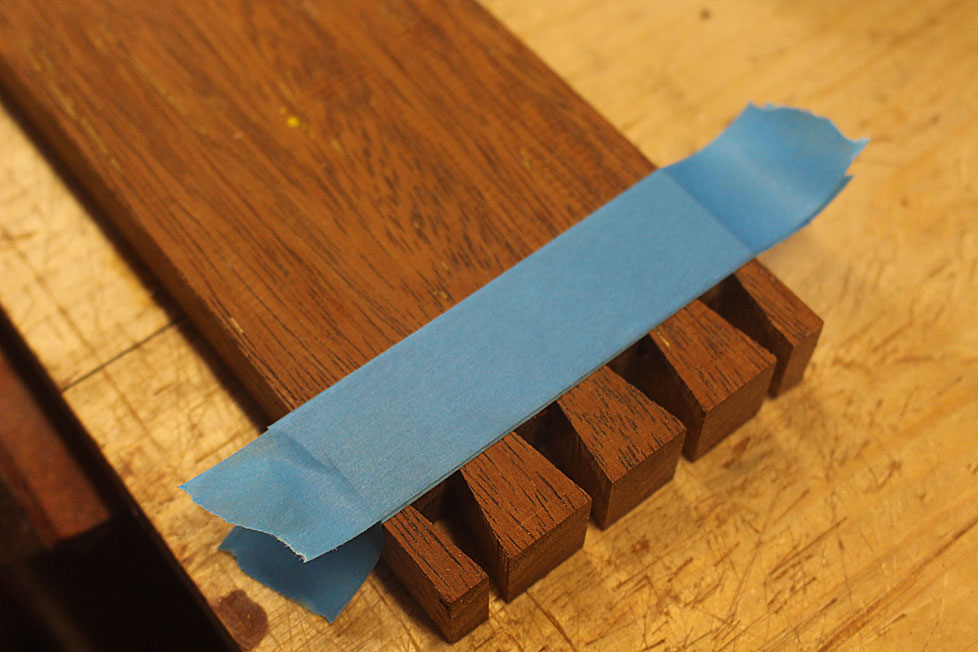

Now use the cutting gauge (which marked the tails) to slice away the tape, leaving an edge butting against the baseline ...
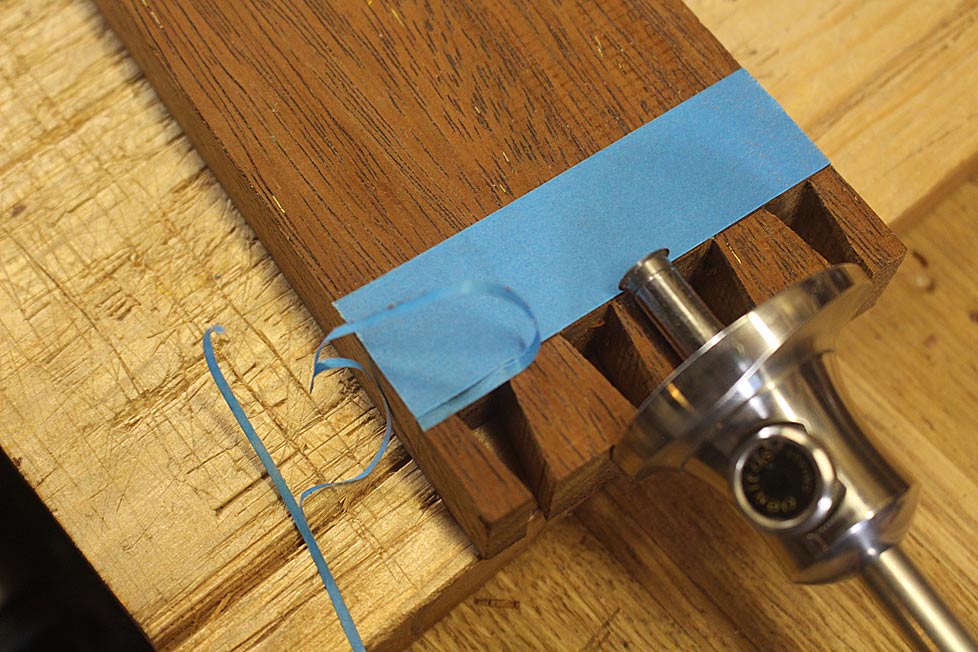

This is the fence. Here it is seen with the pin board, which has a layer of blue tape on the end ...
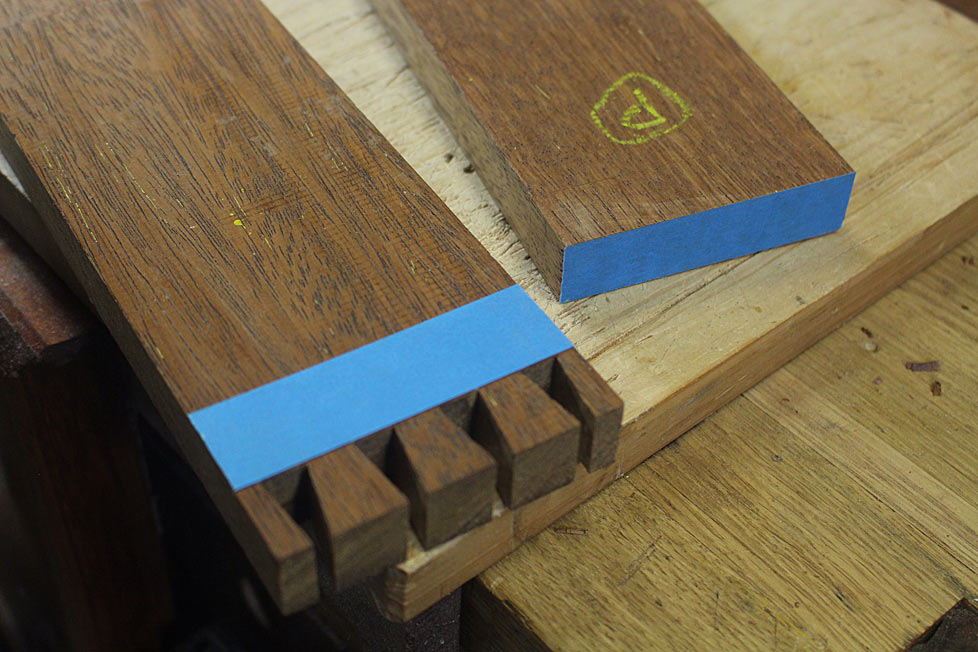

The "fence" makes it easy to align the boards, while the blue tape on the pin board also acts as a non-slip ..
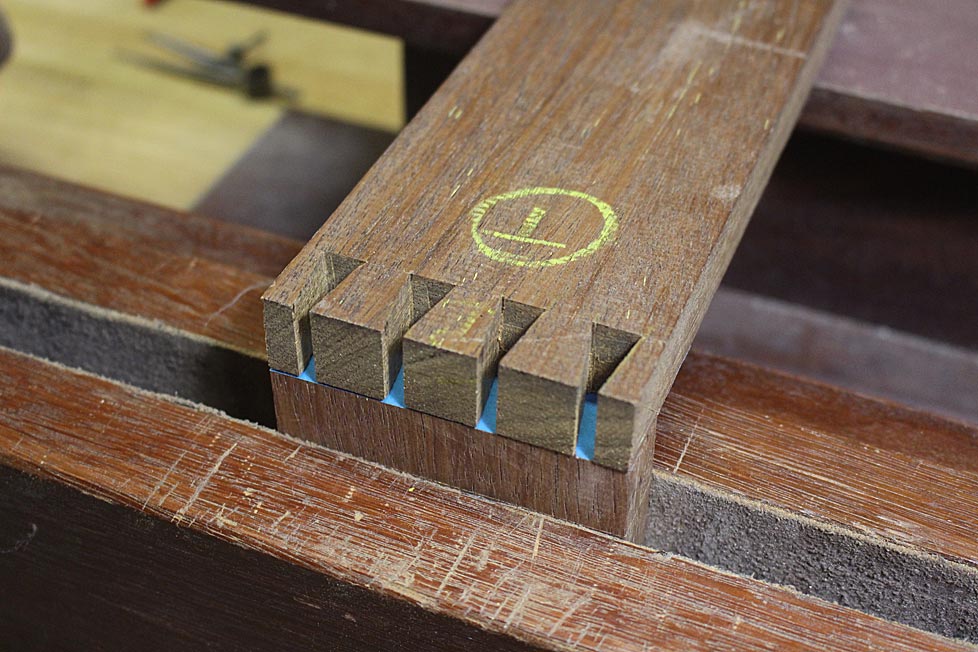

When you trace the sockets (with a knife), the outlines look like this (great for old eyes!) ...
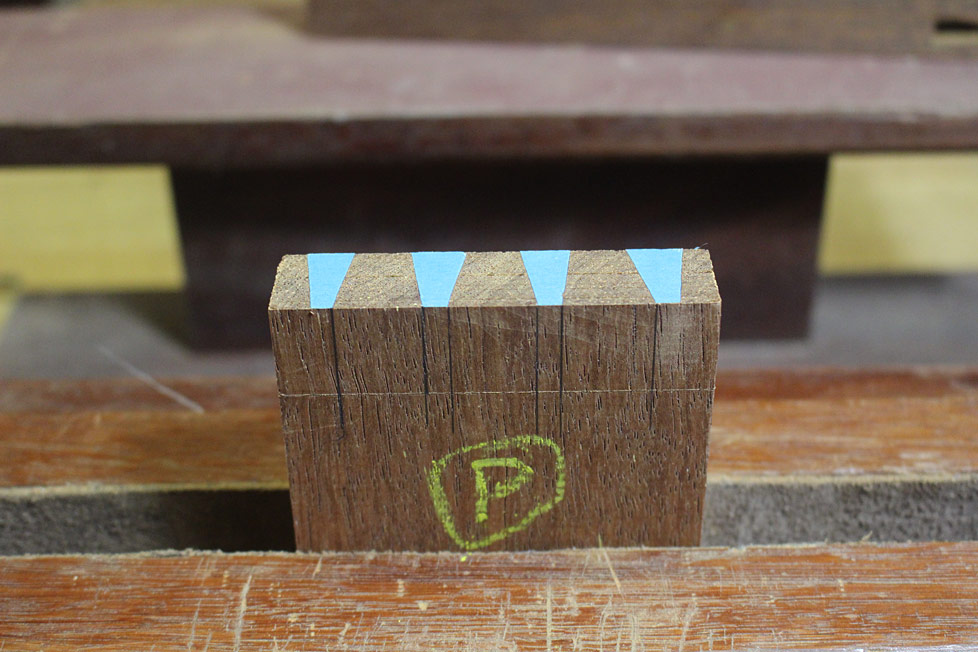

Drop all the vertical lines, with the exception of the line on the outside at each side ...


Remove the waste in the same way as done on the tail board (undercut the baseline, fretsaw and chisel) ...
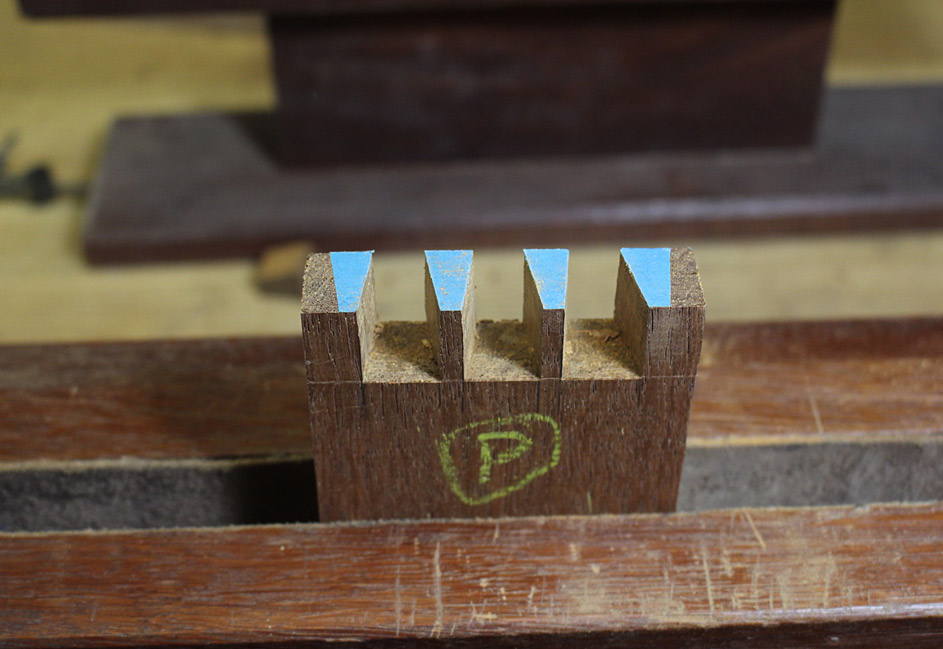

Mark out the mitre lines ...
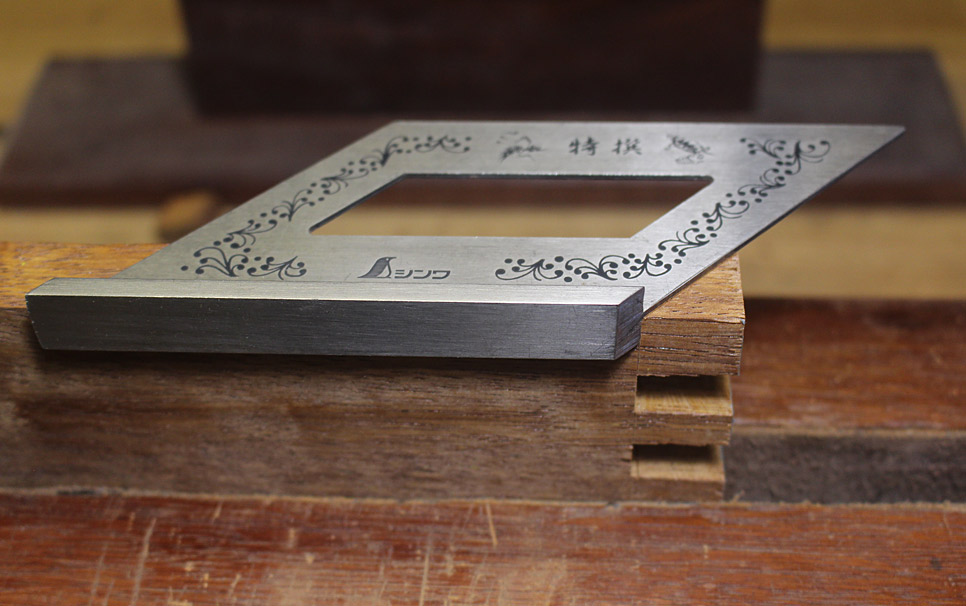

... and drop the verticals on the reverse side...
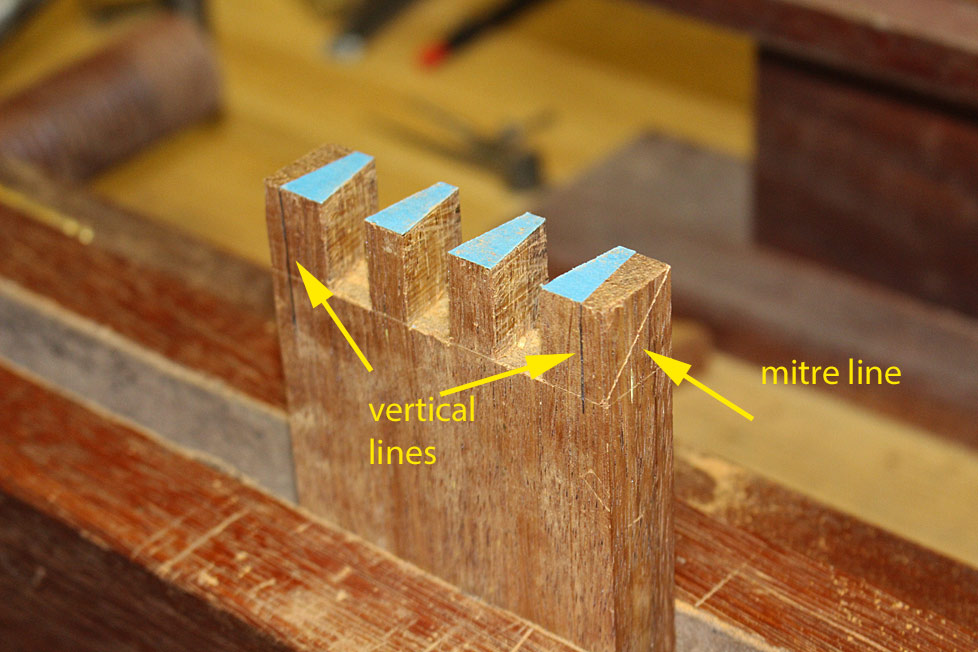

Now saw the mitre cuts and remove the waste ...
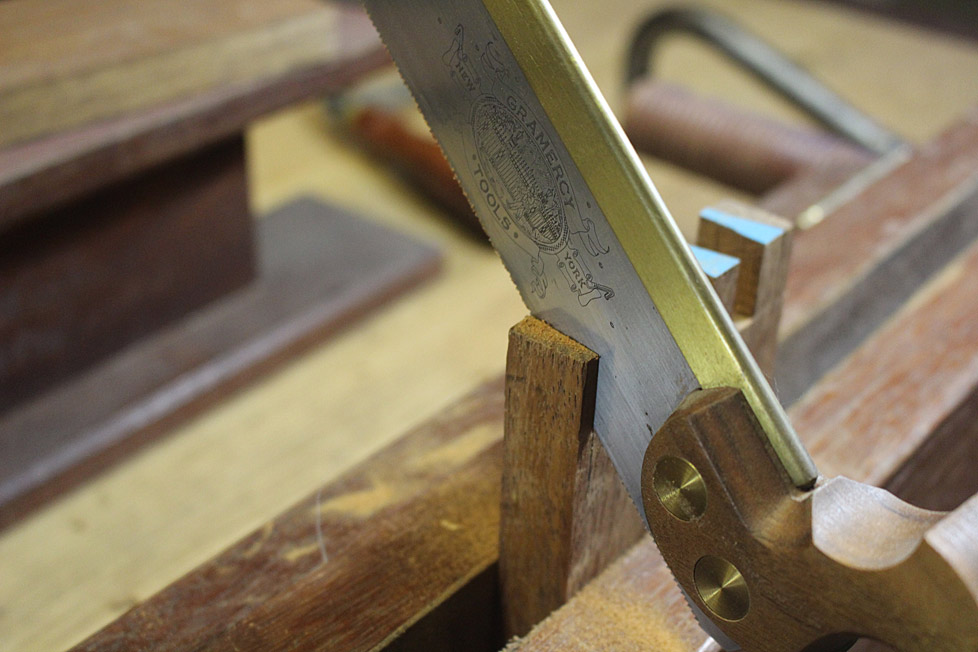


Do this on the tail board as well - the reason it was left until now was that it would be difficult to transfer the outside tail if the mitre was sawn.

Stay about 1mm from the mitre line. Do not saw to the line. This will be more accurately shaped with a chisel.

For chiseling, use a mitre guide. This is just a 45 degree saw cut. I made a double-ended guide - to use on opposing sides ..

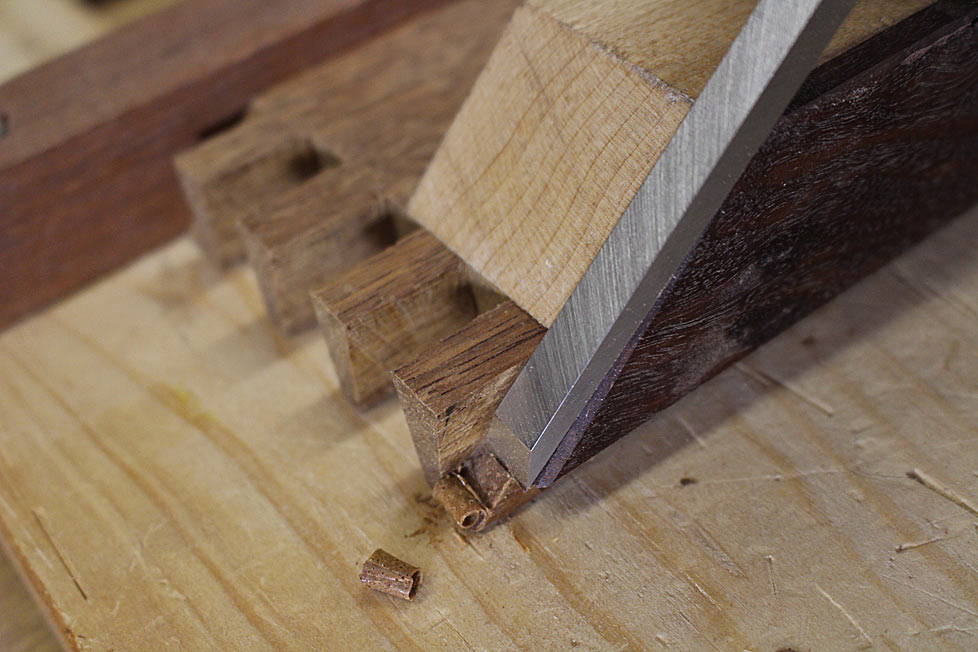

Take it slowly, a smidgeon at a time.
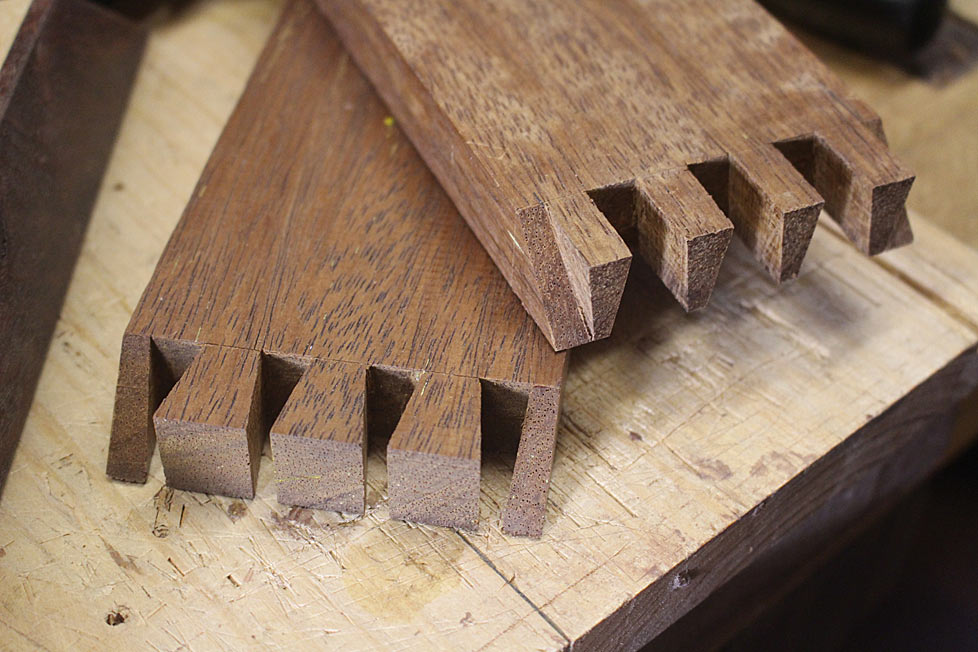

Finally ... the moment of truth arrives ... will she .. won't she ??
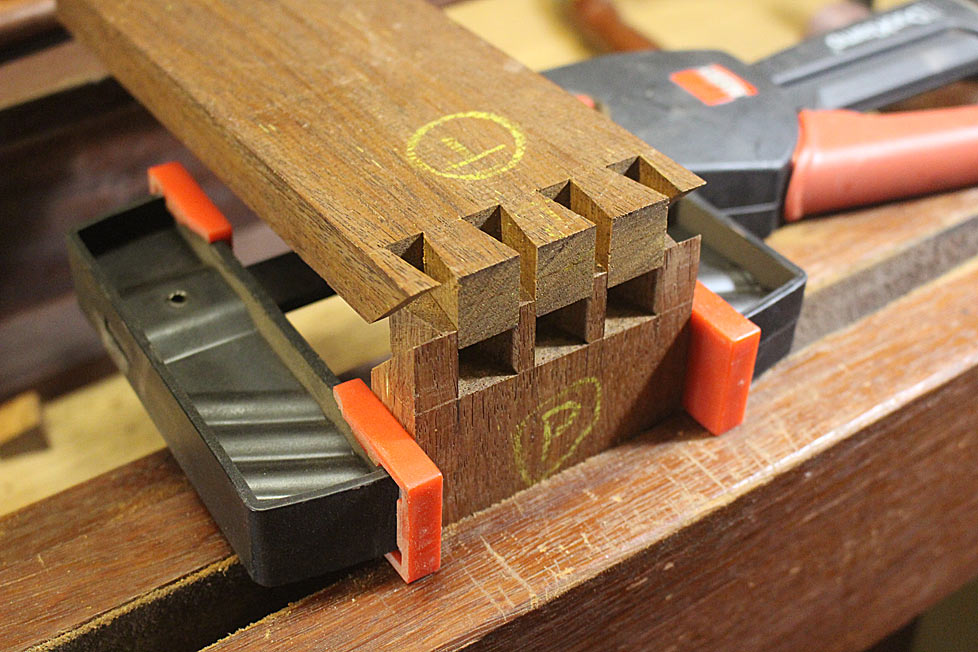

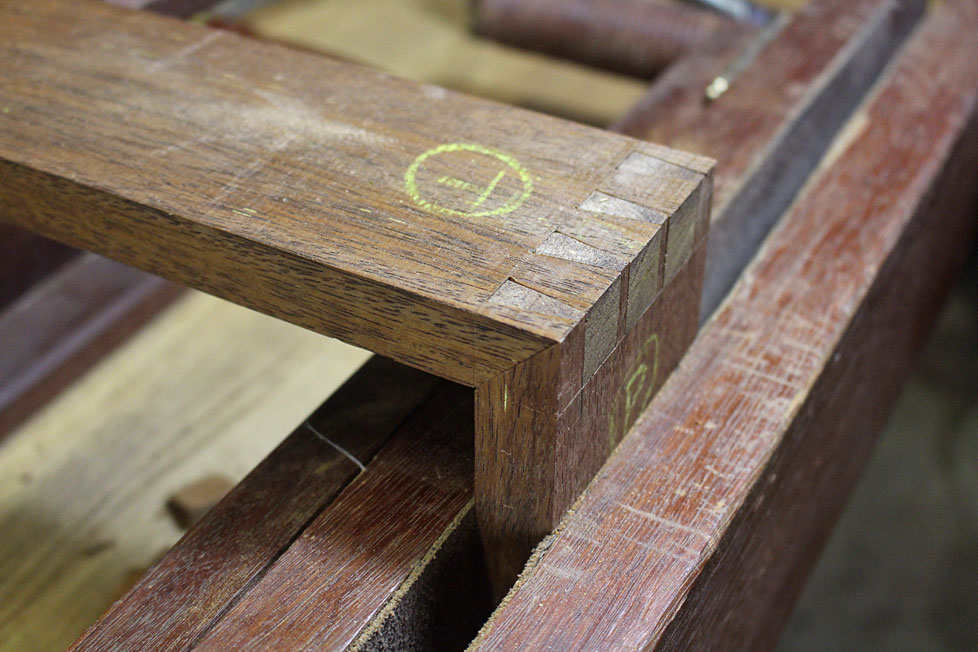
Looking promising as the top is pressed together with finger pressure. Then I wack it - the wood is uncompromising. The clamp is to prevent any cracking in such circumstances.
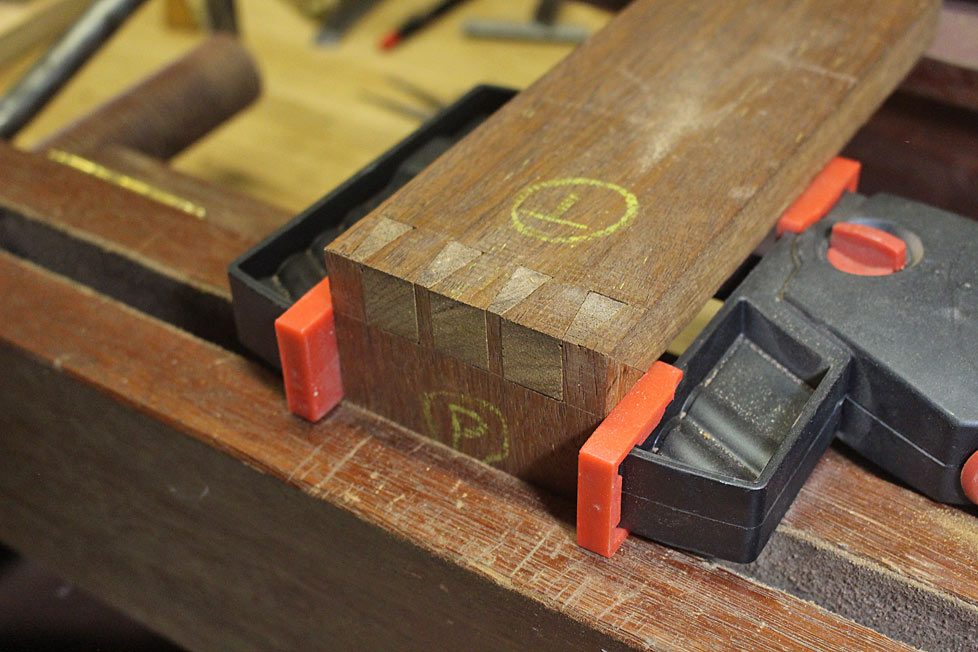

Not too shabby.

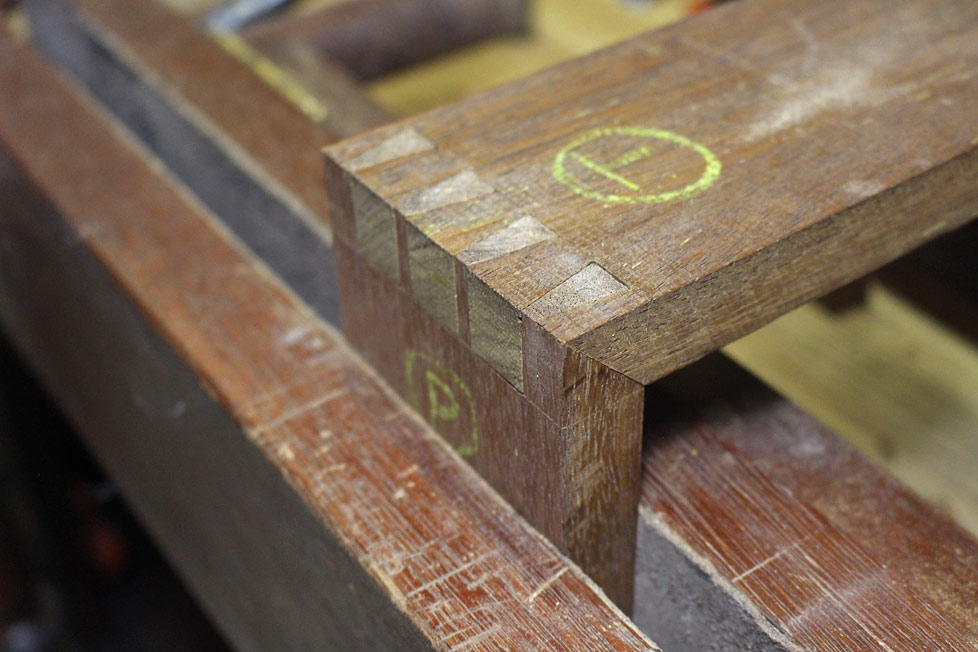
Mitres are tight ...


Now about the rounded edge ... here is the secret weapon:
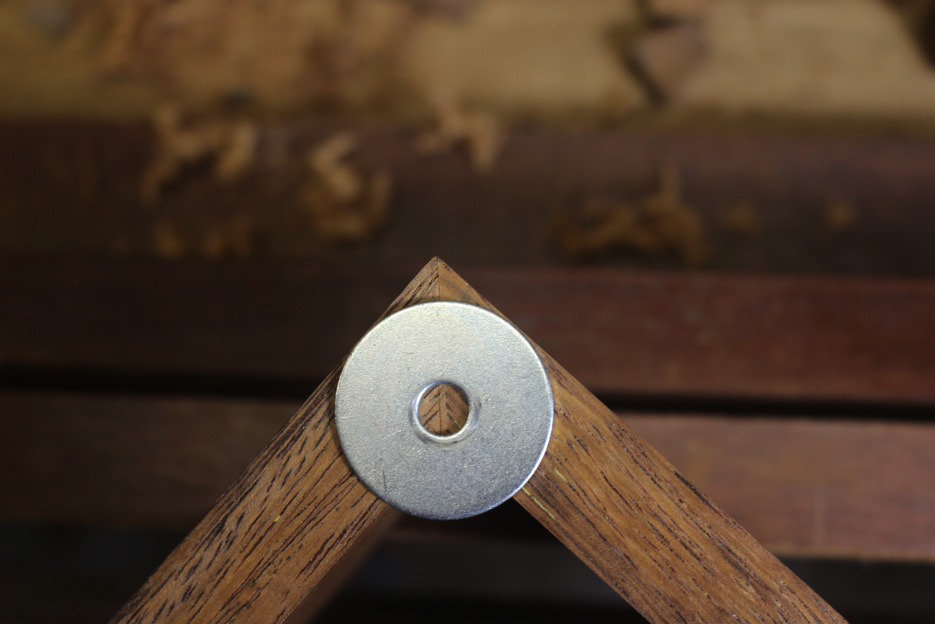

After marking out, the waste is removed with a block plane, and then sanded smooth. Just lacking the inner filet ...
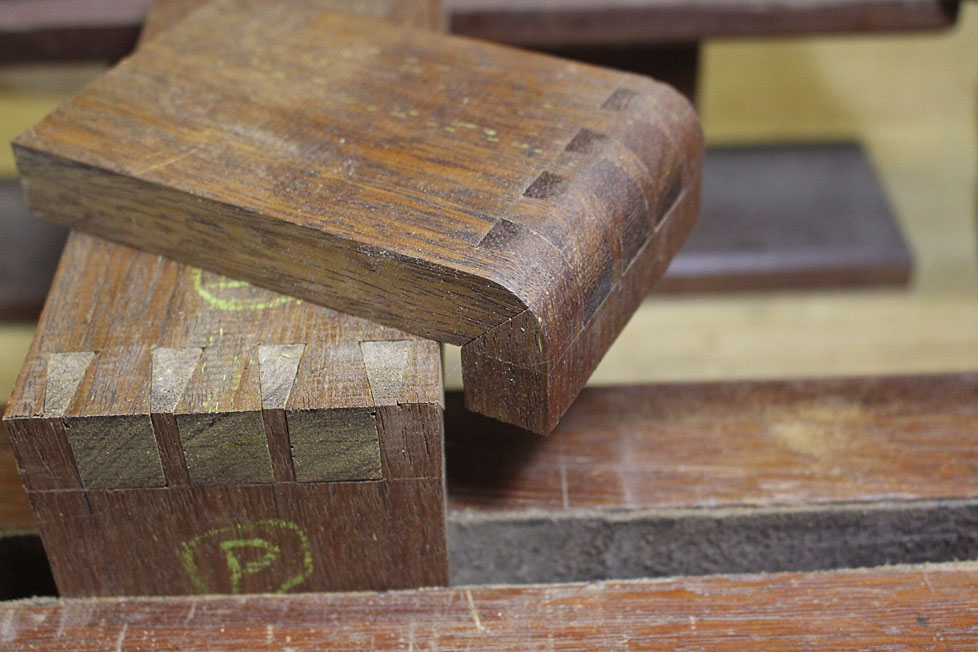
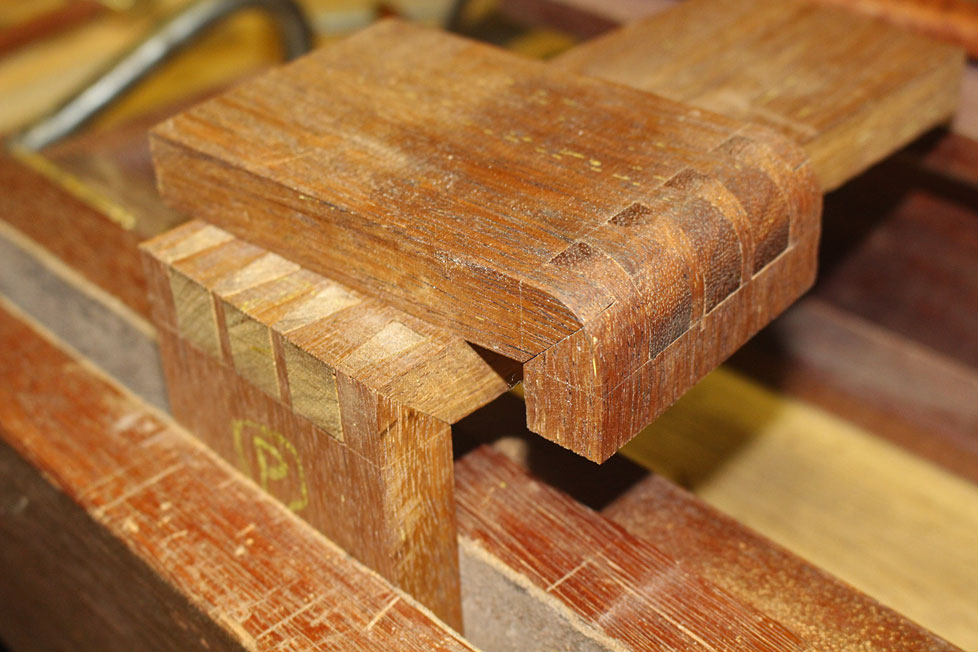

Enough practice. Now for the real thing. A bit more of a challenge as the panels are 500mm wide.

Regards from Perth

Derek

Re: A coffee table for my nephew - #2

#2

Re: A coffee table for my nephew - #2

Hank Knight

Very nice, Derek. That's a great solution to the rounded edge conundrum you posted about a while back. I'll be interested to see the filet process. Nice job on the mitered dovetails. Like the chisel/miter guide approach. In the past I've just relied on the saw cut with marginal success. Looks like I need to make another miter guide. Thanks for posting the process.

Hank

Re: A coffee table for my nephew - #2

#3

Re: Excellent Tutorial!

William Duffield

Thank you for the very clearly documented explanation of a well thought out and improved process. I'm saving it and copying it to my shop laptop so it will be a very useful reference the next time I need to execute mitered dovetails.

Re: A coffee table for my nephew - #2

#4

ebd

Re: A coffee table for my nephew - #2

ebd

Very slick. Wish I had the patience. Just doing the small piece in the excellent tutorial would drive me crazy. Don't think I could work to that kind of precision with hand tools either. Very masterful.

Re: A coffee table for my nephew - #2

#5

This submission  needs to go to the Articles

Bill Tindall, E.Tn.

However, it needs to go with the supporting pictures in the Articles File.

Re: A coffee table for my nephew - #2

#6

Question

Bill Tindall, E.Tn.

what saw and tooth are you using on this vary hard wood?

Re: A coffee table for my nephew - #2

#7

Re: Question

Derek Cohen (in Perth, Australia)

Bill, I used a 19 tpi Gramercy dovetail saw. It worked pretty well (I particularly like the light touch that the Gramercy creates), but I think that a more aggressive 15 tpi saw, such as the LN, would be better in this hard wood.

The waste was removed with a Knew Concepts fretsaw. The "secret" to controlled sawing here is, again, a light touch. Let the saw do the work, and the kerf will stay on track.

Regards from Perth

Derek

Re: A coffee table for my nephew - #2

#8

Re: A coffee table for my nephew - #2

Sgian Dubh

"The aim is to saw all the tails. Forget about the mitre for now (... this is a departure from the methods I observed).

I disagree, Derek. Leaving the mitring until after you've executed the dovetails is the normal order of work, or at least that's the case in the way I was shown and still do to this day. As I think you point out elsewhere in your text, if you do the mitre as you cut the tails, how can you accurately transfer the position of the sawn rake of the last tail to the pin board?

Your execution does show one difference to the most common layout though. The cut nearest to the two outside edges of both the tail and pin board are raked. In most examples, this last cut is parallel with the outside edge of the wood. In theory (and in practice for many workers) this would allow you to set out the position of the outside mitred part of both parts of the dovetailed joint using a marking gauge, and then cutting to the left or right side of this line as required so that the joint assembles. In my method, I gauge this line on the tail piece, which I cut first, then use this to transfer the mark to the pin piece. Essentially this is what you've done, except that your line is raked. Slainte.

Re: A coffee table for my nephew - #2

#9

Re: A coffee table for my nephew - #2

Derek Cohen (in Perth, Australia)

Thanks for the information, Richard. It did not make sense to me either that the mitre was sawn before transfering marks. Yet that is what I found written or demonstrated. Since I wrote that post, my attention has been drawn to the writings of Charles Hayward. It appears that he described the same method as I chose. It does not surprise me that I was reinventing the wheel.

With regard the straight vs raked dovetail, I have not come across this. Hayward does show a straight side in a drawing, however the purpose of doing so was to hide a rebate. Any references?

Regards from Perth

Derek

Re: A coffee table for my nephew - #2

#10

Re: A coffee table for my nephew - #2

Sgian Dubh

"Any references?

Mitre box corner dovetails, Ernest Joyce, (1980) The Technique of Furniture Making, Third Edition, p 199. Slainte.

Re: A coffee table for my nephew - #2

#11

Re: A coffee table for my nephew - #2

Derek Cohen (in Perth, Australia)

Hi Richard

Thanks for the link. I had Joyce's book in front of me all the time, and did not think to open it! I have the 4th edition. It is evident that Joyce is not referring to the use of mitres with a carcase, but to a box or tray where the dovetail hides a rebate. "The half pin is therefore laid out below the rebate, and the shoulder of the pin piece is brought forward to close the gap".

Regards from Perth

Derek

Re: A coffee table for my nephew - #2

#12

Re: A coffee table for my nephew - #2

Sgian Dubh

I think you mean where the mitre hides a rebate in a box, rather than the dovetail?

But, on a pedantic point, a box and a carcase are essentially the same thing where one could merely be arguing about the scale, e.g., is a box, by definition, small, and a carcase large?

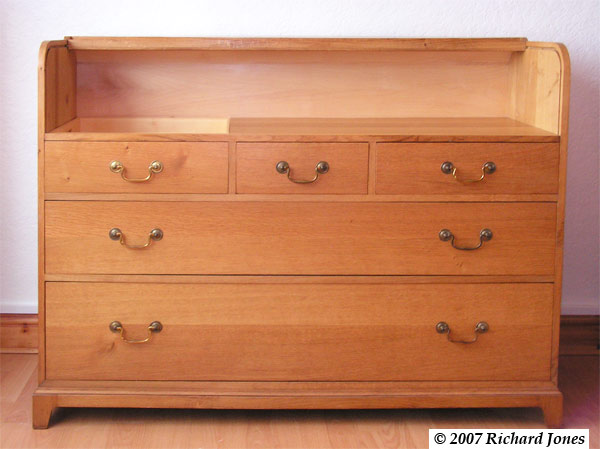
The box/carcase(?) below has dovetails at all the corners, with the lap dovetails at the bottom mitred at the front. The mitre doesn't disguise a rebate or groove, although I've used the technique many times in small jewellery type and similar boxes to hide the groove of a lid or the rebate for the box's base, etc. Slainte.


👍 This page answered my questions

Your vote helps other woodworkers quickly find the answers and techniques that actually work in the shop.