WoodCentral Forums

Est. 1998 — 27 years of woodworking knowledge

Apothecary chest - through dovetails on a drawer

Posts

Apothecary chest - through dovetails on a drawer

#1

Apothecary chest - through dovetails on a drawer

Derek Cohen (in Perth, Australia)

This is a long post, and so feel free to skim through it. Who needs another dovetailing documentary?

This one is specific to the back of a drawer, and so is different from the through dovetails which one might use on boxes. Also, I have a few techniques to share, ones that I do not see mentioned much, if at all.

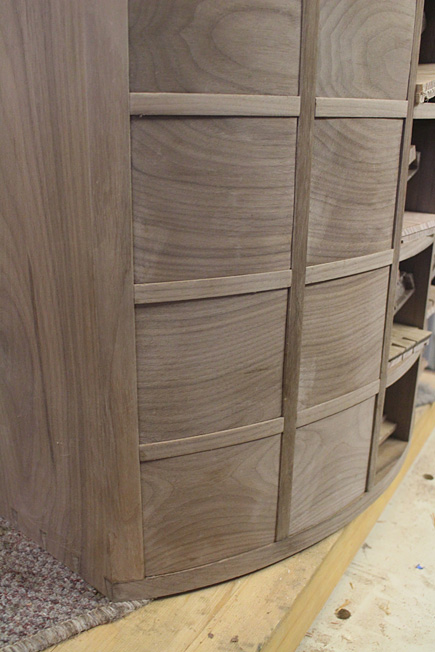
The drawer is one in the Apothecary chest. What has been shown before was the dovetailing hijinks needed for the curved fronts. This affects the drawer sides as well, since they are not equal in length. In fact, the length for the sides need to be measured individually.

Here is a drawer front with sides ...
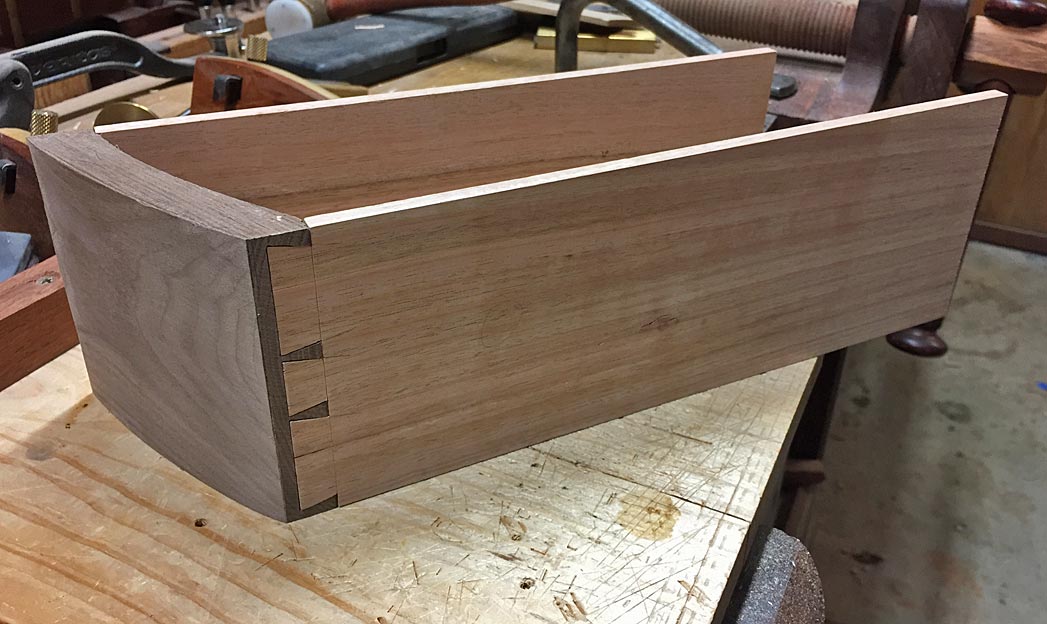

It is fitted in the recess and positioned carefully (top right hand drawer) ...
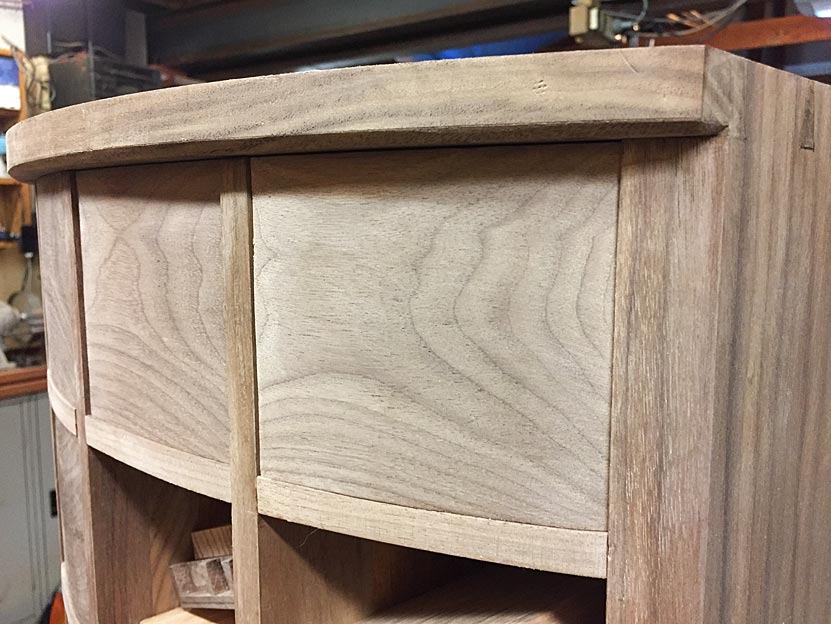

At the rear of the chest, the drawer sides are clamped to avoid any movement ...
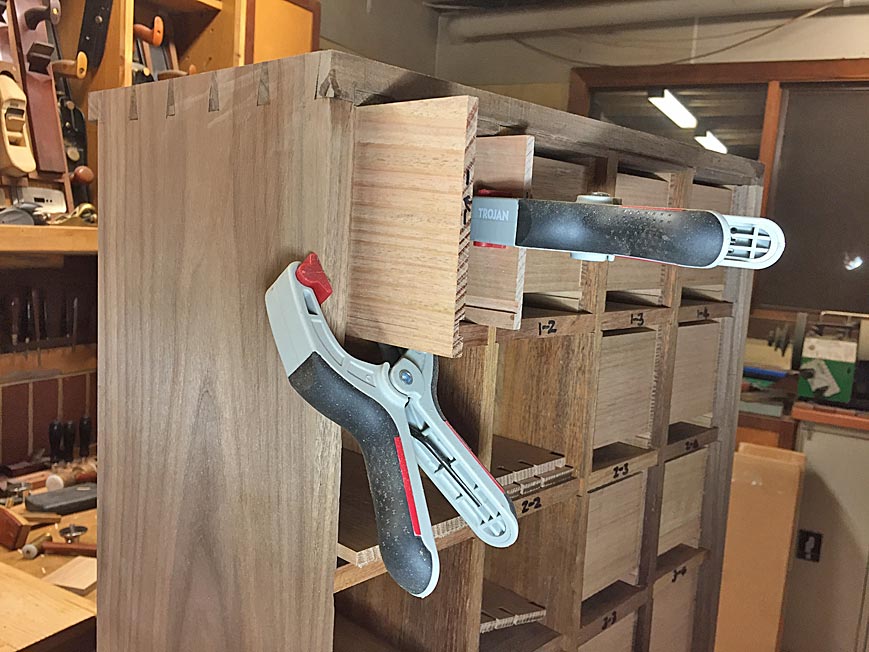

Now the drawer side length can be marked. The final length is 10mm in from the back of the recess.

We are ready to begin joining the rear of the drawer. A drawer back has been added to the parts ...
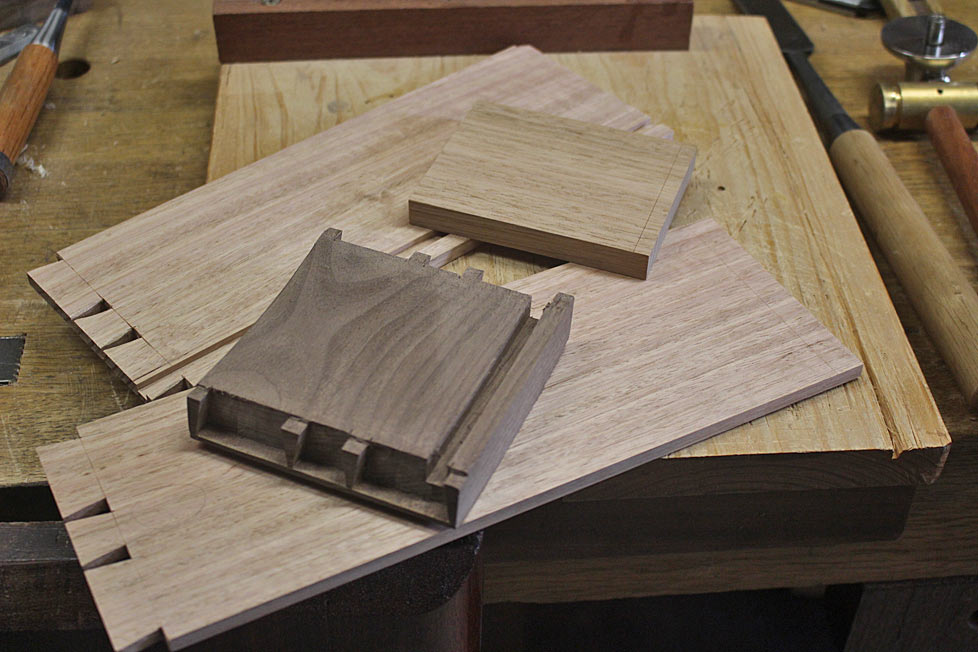

"Drop" (the gauge) for the width of the drawer back and transfer it to the ends of the drawer sides ...
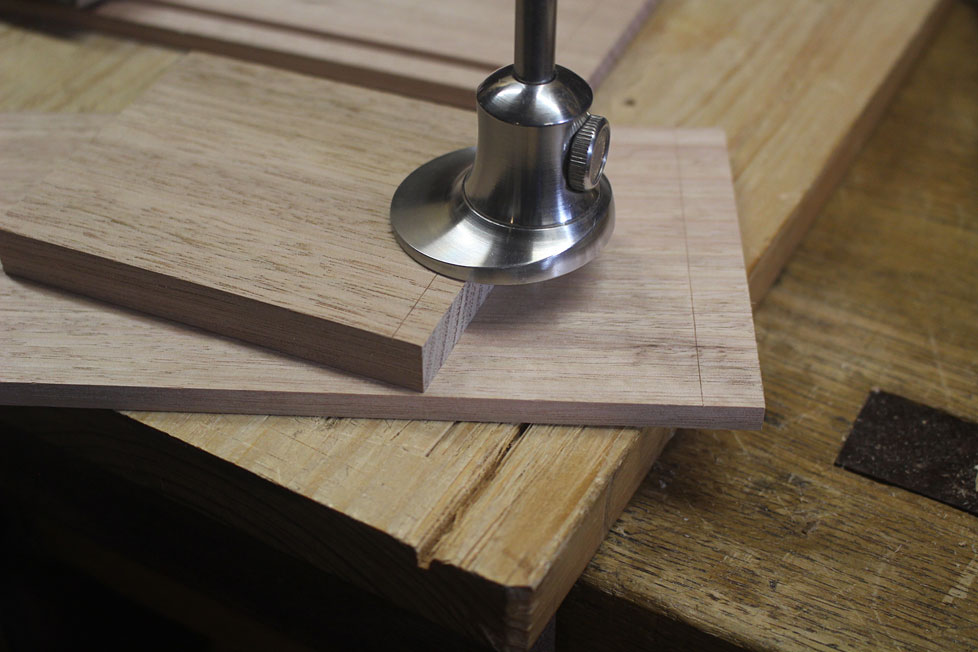

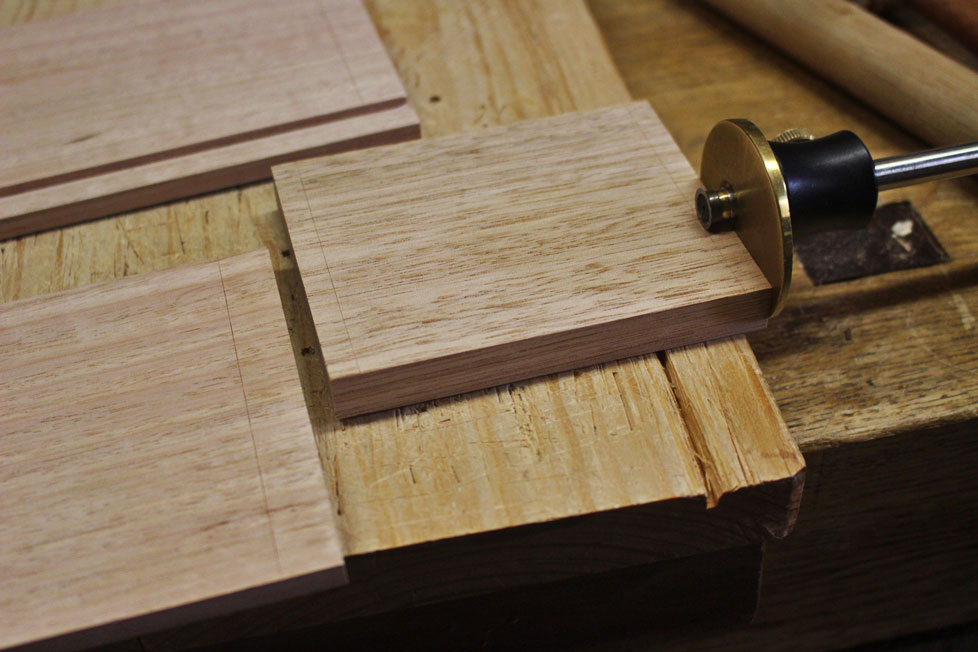
Now do the same for the drawer sides and transfer this to the drawer back ...

With 24 drawers, it was quicker and easier to make up a template for positioning the tails ...
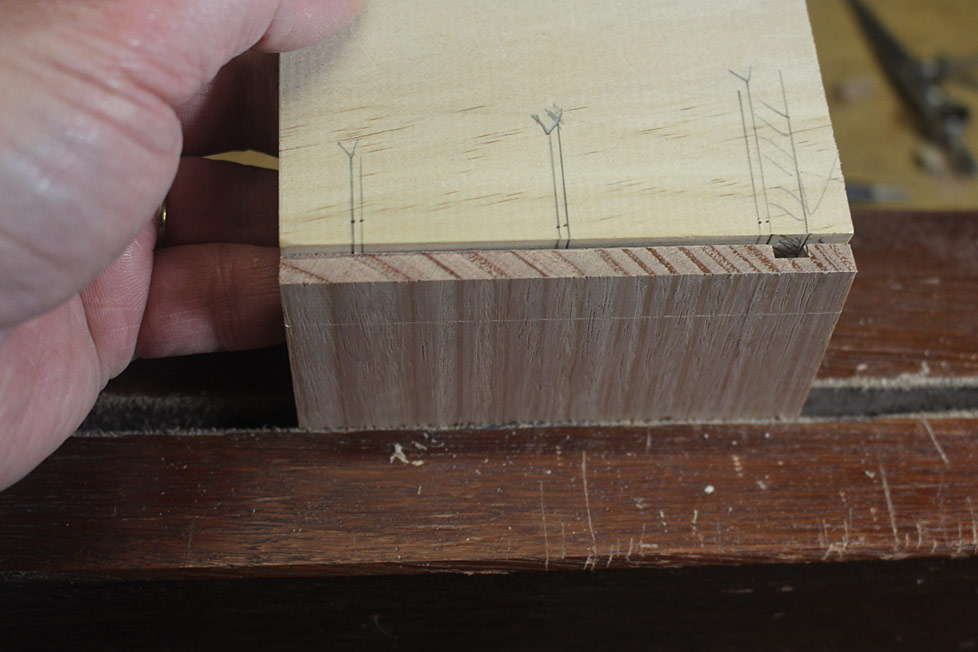

Note that the tail alongside the groove (for the drawer bottom) is not a triangle, but one side is vertical (flanking the groove) ...
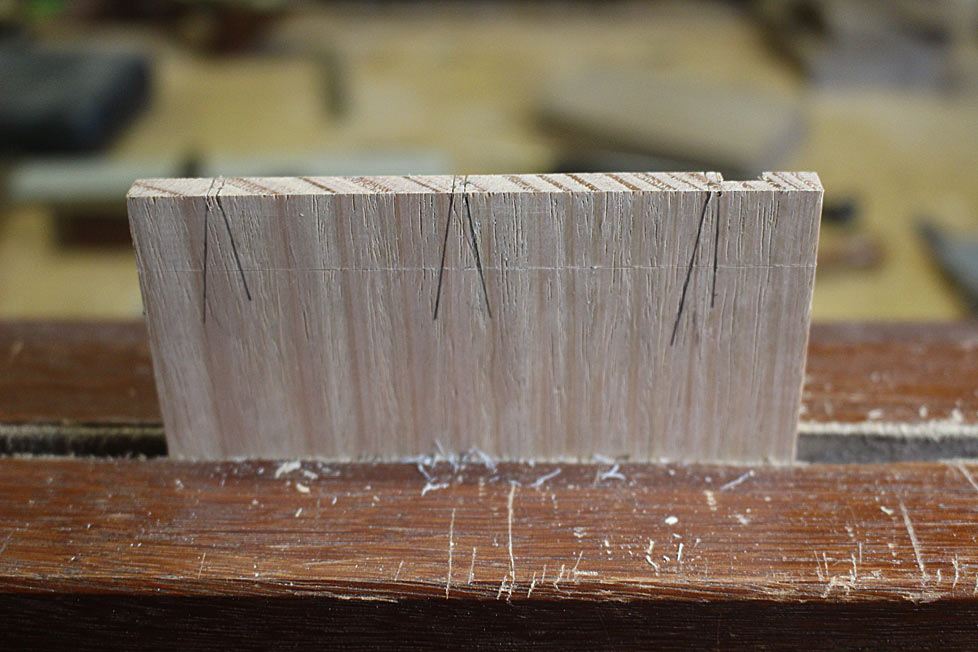

Saw both drawer sides ...
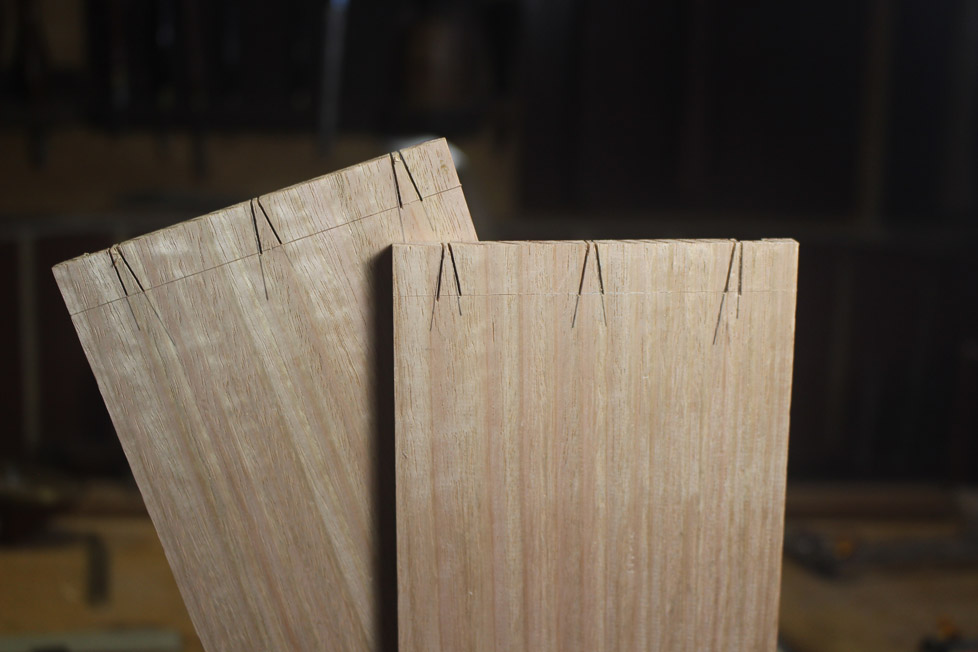

Time to remove the waste from the tails. First, create a chisel wall for all the tails ...
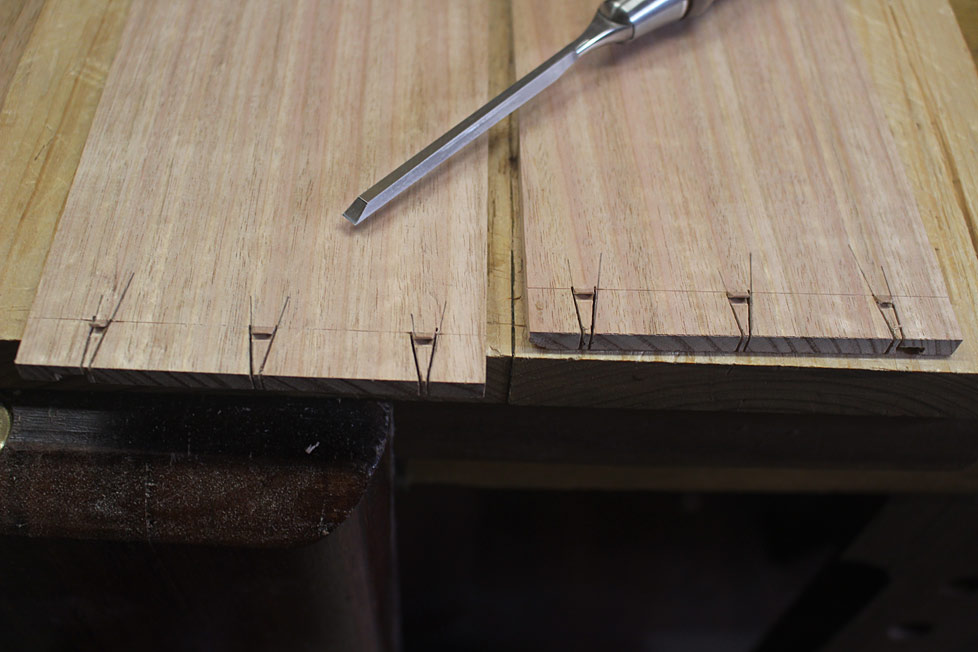

Fretsaw the waste to 1-2mm from the line ...
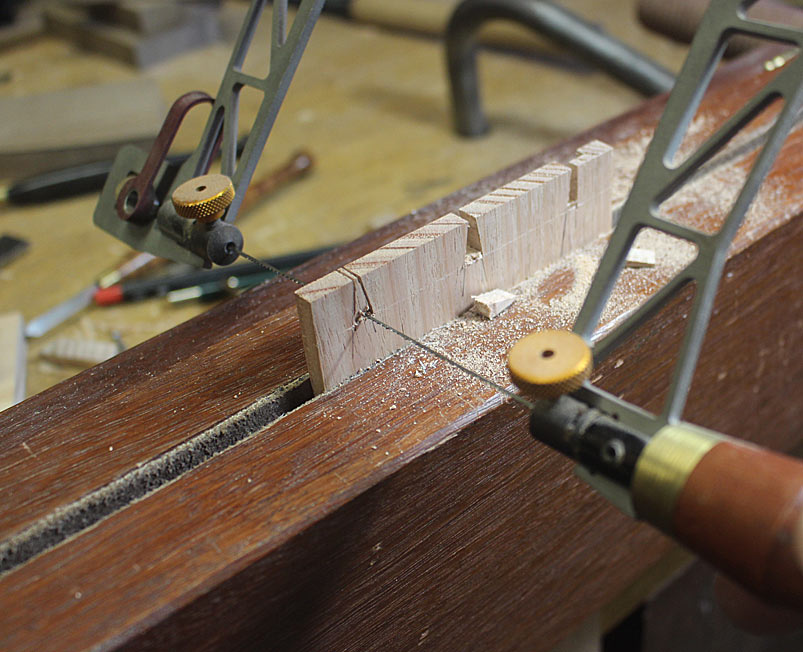

Remove the waste in thin layers for the cleanest finish. Note that the Tasmanian Oak is too thin (6.5m) to confidently pare half way by hand (better to use a hammer for precision). By taking very fine layers it is possible to push through the board without spelching the other side ...
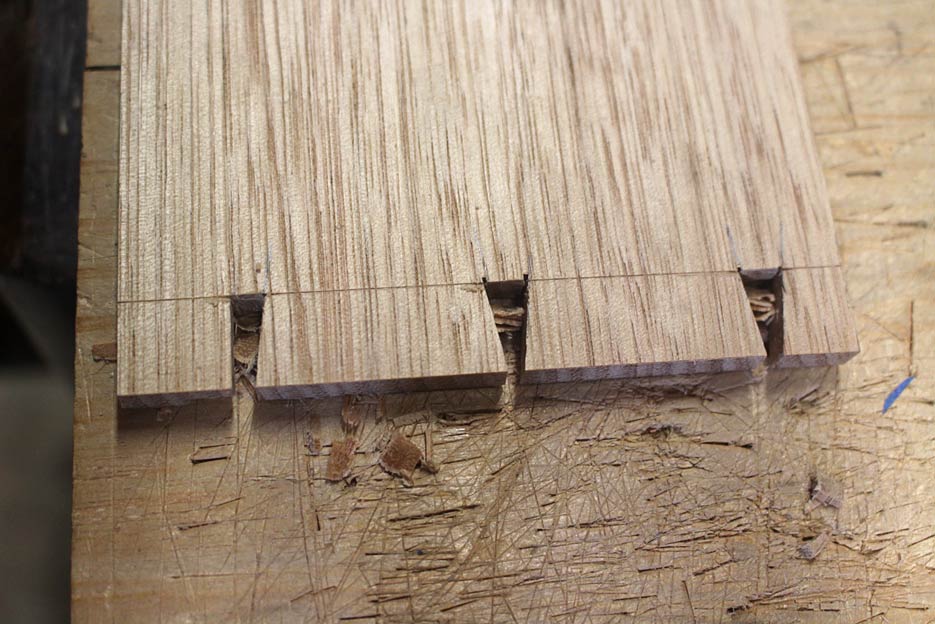

Blue tape on everything!! The drawer sides have blue tape ala the #140 trick (I wrote this up recently on my website). There are 4 layers. The drawer back has tape to aid in transferring marks (don't knock it if your eyesight is better than mine).
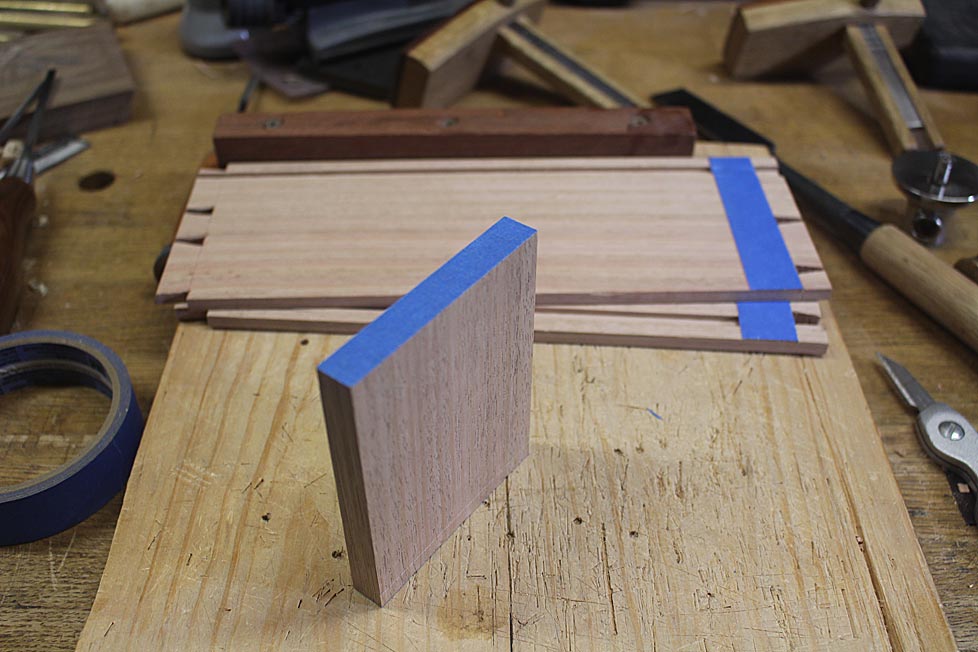

Transfer the tails to the pin board ...
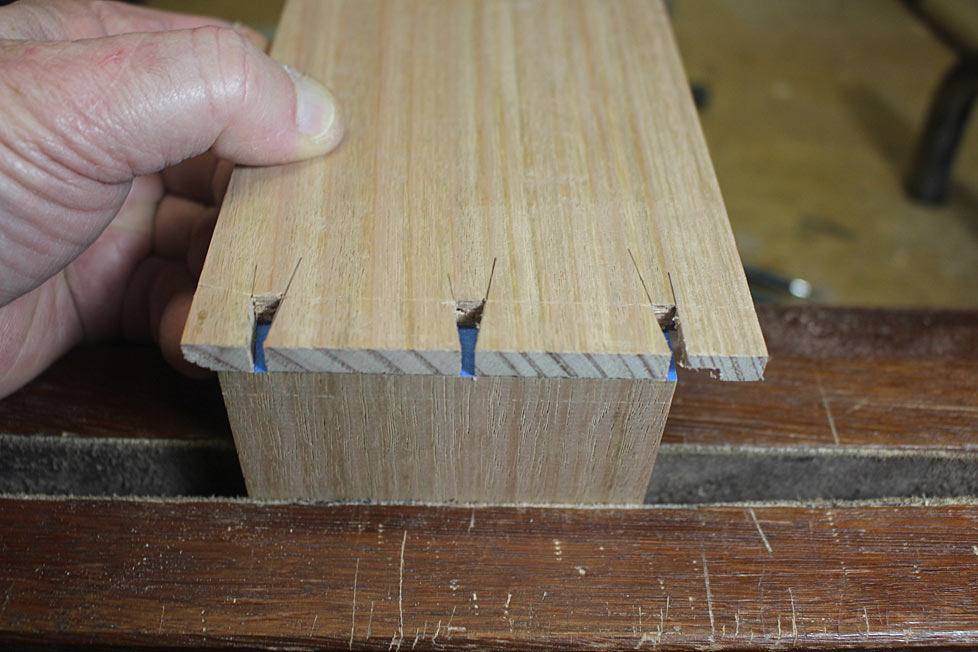

The great thing about the blue tape method is that you only need one knife stroke to cut through. No sawing away to make an impression in the end grain. Saw against the tape. Go for it!
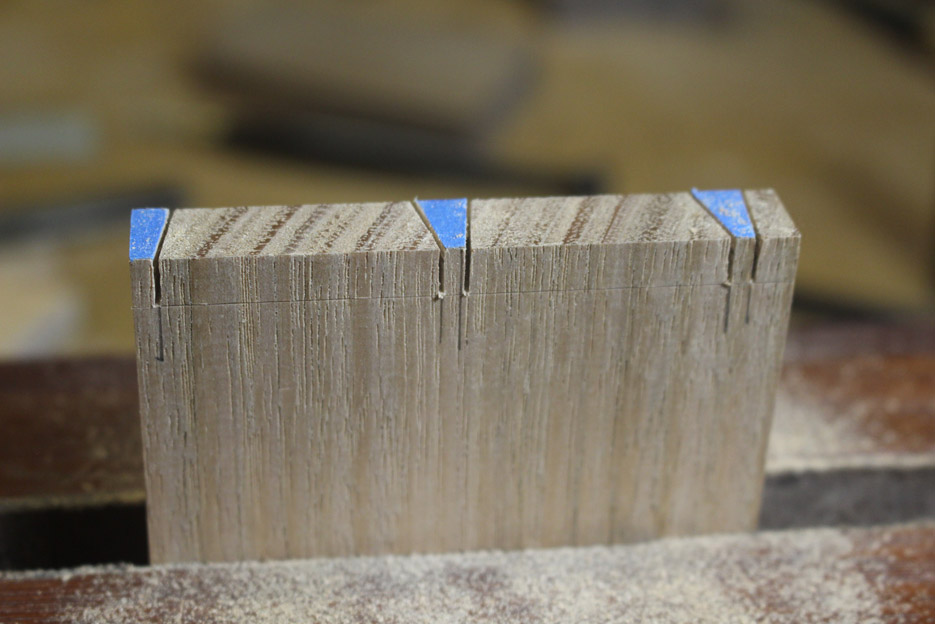

Now remove the waste with a fretsaw. Again, aim for about 1mm above the line. For control, hold the saw handle very gently, and saw as lightly as you can - do not force the cut. Let the saw do the work. You will be rewarded with a straight line ...
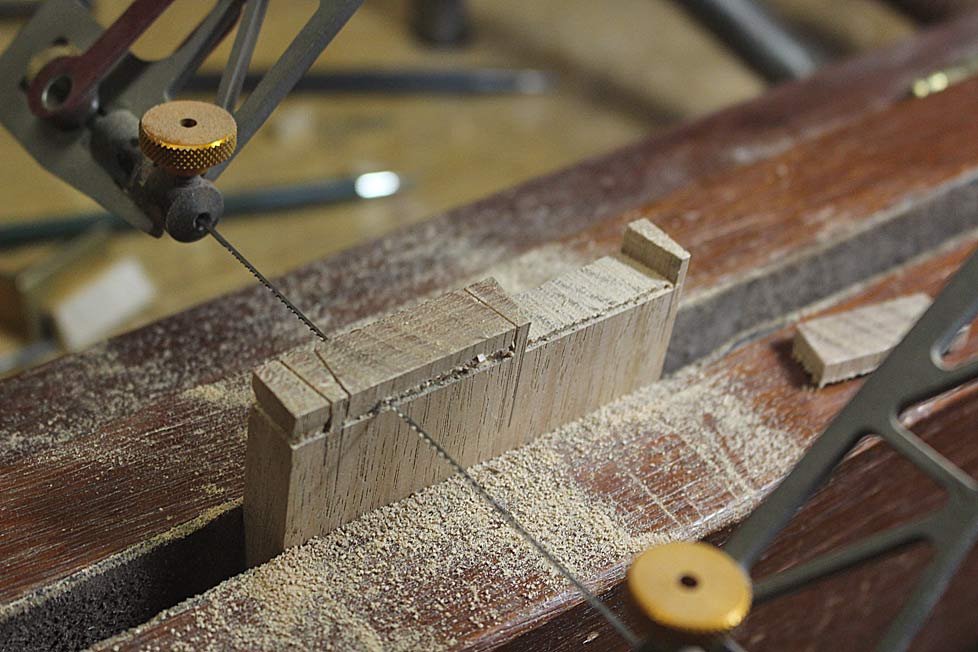

I saw away the ends about 1mm above the line ...
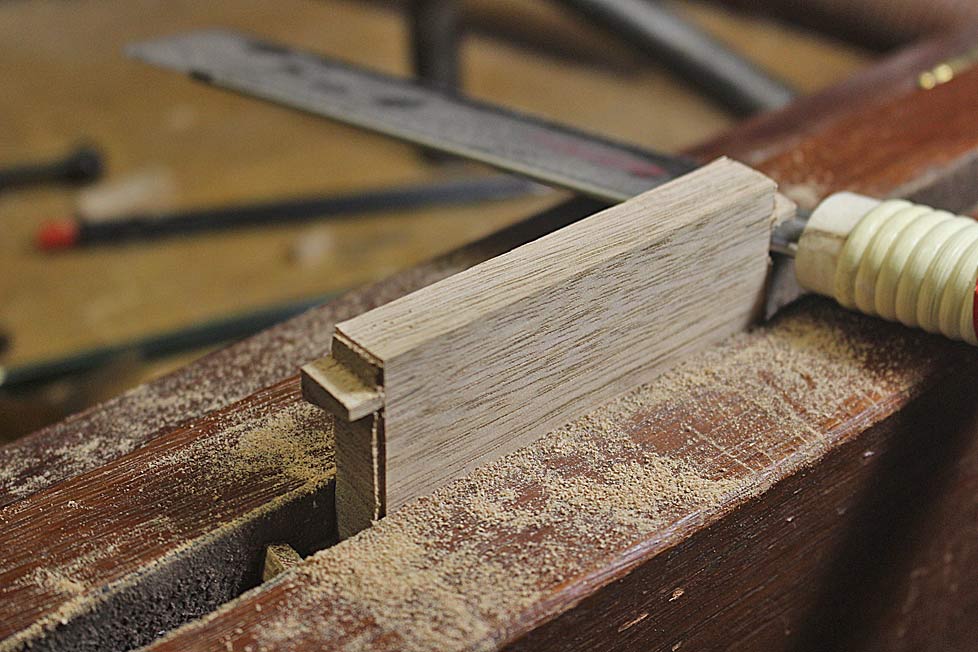

In years past, I used to saw to the line. I now see more value in paring to the line. What you will notice is the chisel wall around the section. I am reminded of David Charlesworth's method of removing end waste. He calls his process "tenting". In this he pares upward, reducing the waste all the time. In my method, this is unnecessary since the chisel wall protects the sides and you can see when you are getting close to level ...
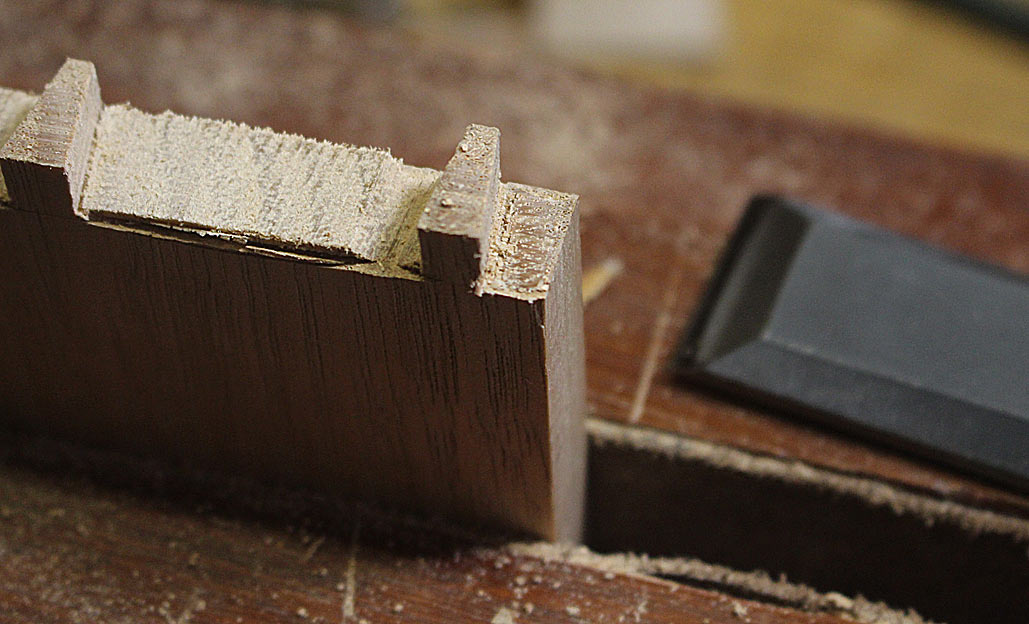

Of all the aspects in through dovetailing, I think that removing the waste between the pins is the hardest. This is again where I was reminded of David's tenting method (but which he does not use in this section, only at the ends).

Again the chisel wall aides in enabling the chisel to register against the line without any danger of going over it. The chisel here is PM HSS, and very tough (and sharp!). The blade is driven at an angle away from the sides ...
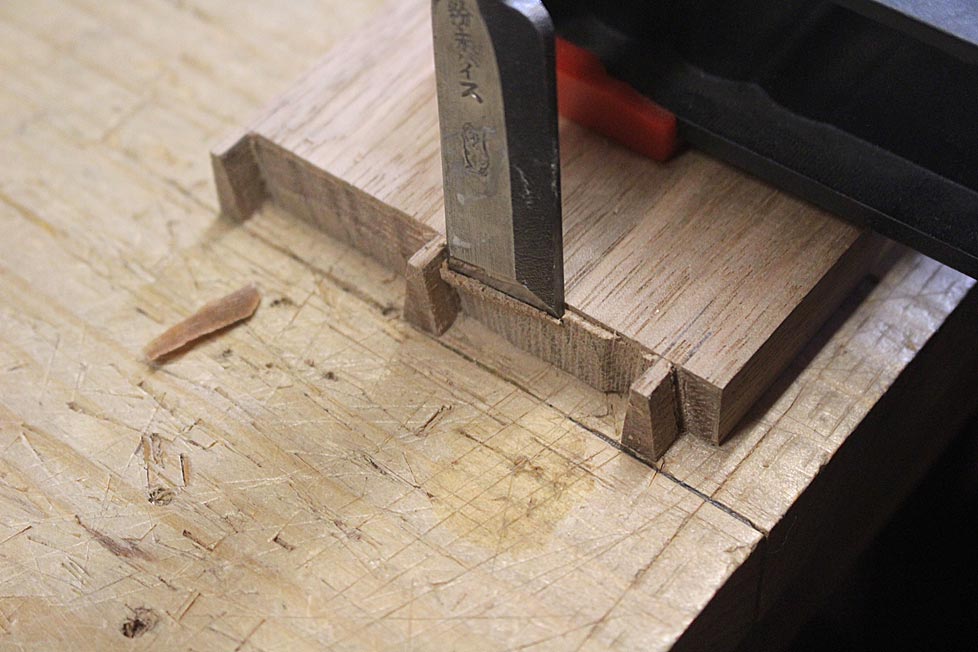

Turning the board over, and repeating the manoeuvre, the result is a tent ...
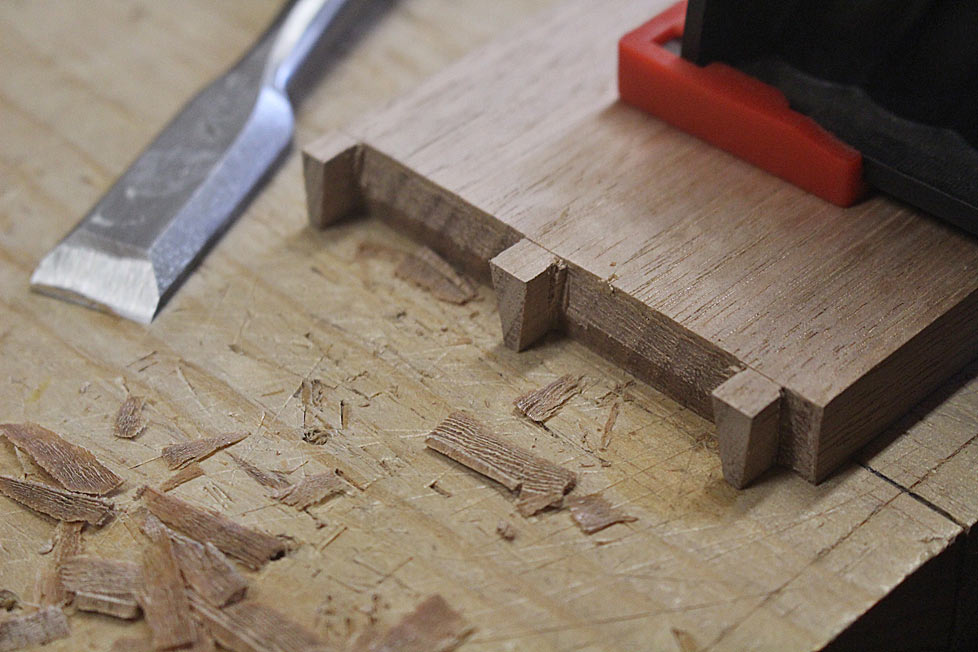

I have two methods for removing the remaining waste. The first is to pare the tent, slowly reducing the angle. Since you are paring upwards, there is now danger to spelching the opposite side of the board ...
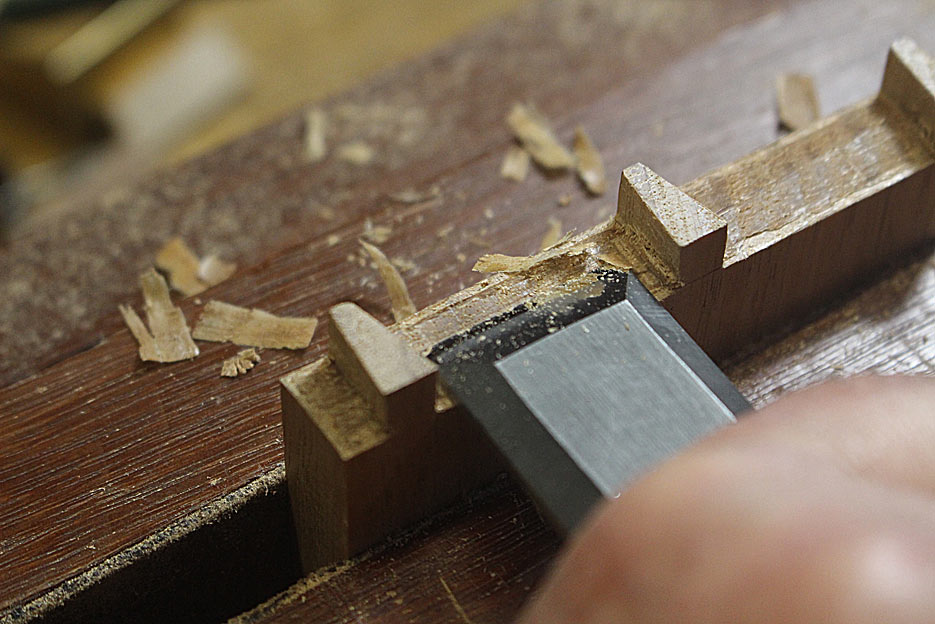

The second is a side-to-side sweep, which slices away the waste ...
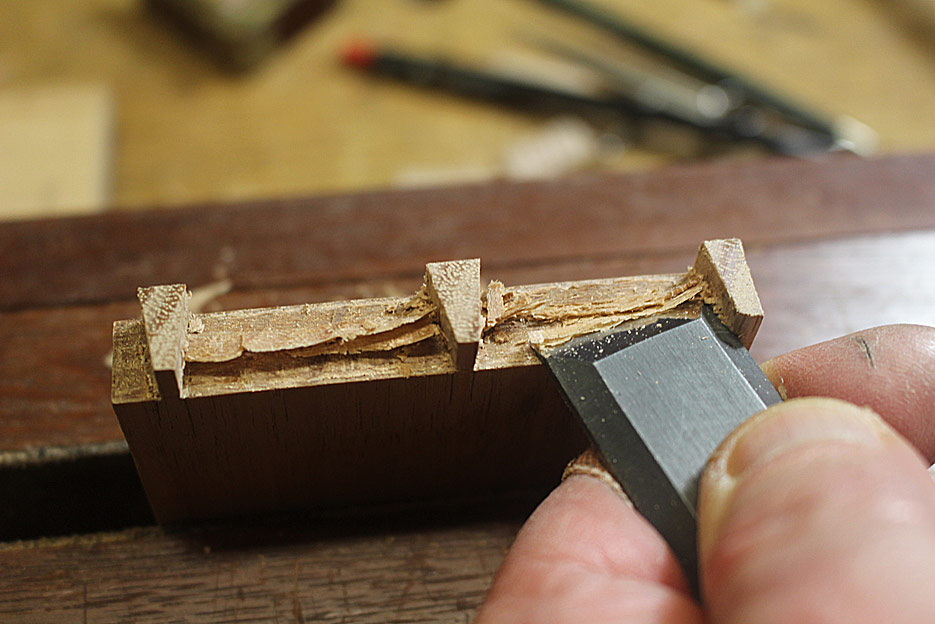


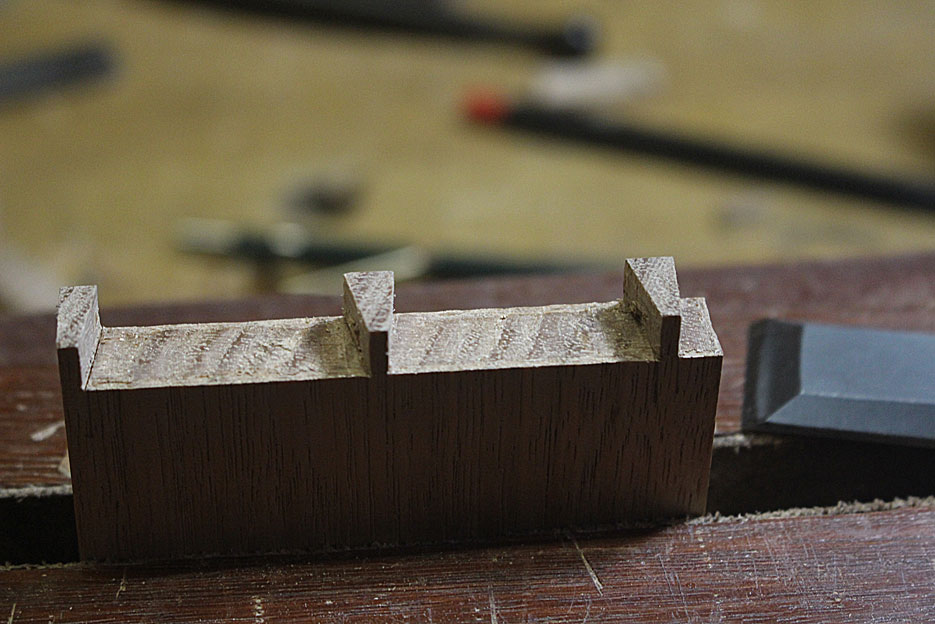
Finished ...

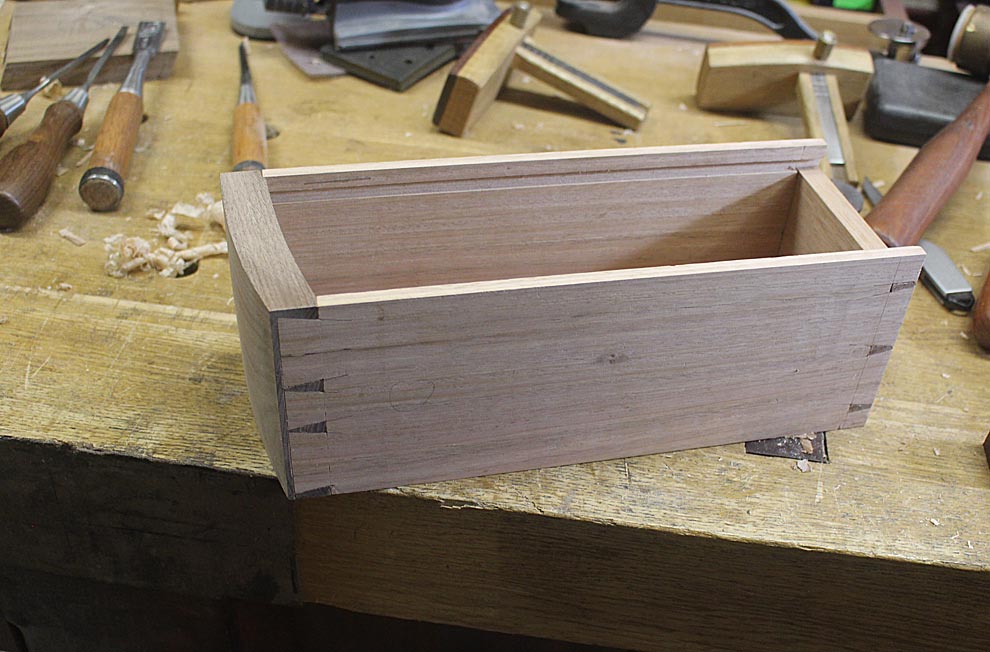
The parts are now assembled. From the top ....
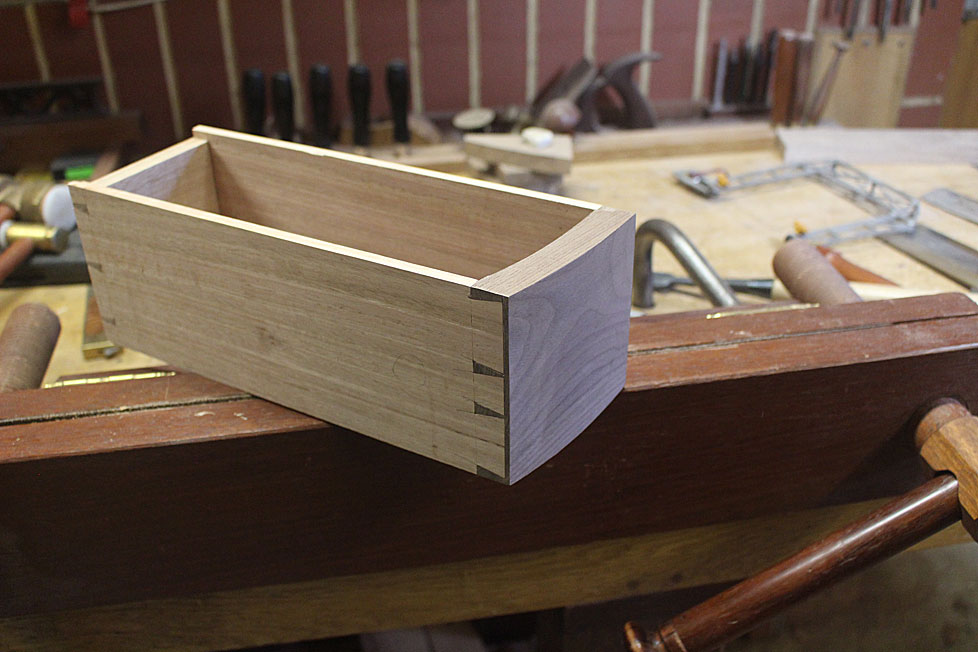

... and the bottom ...

Fitting the drawer ...
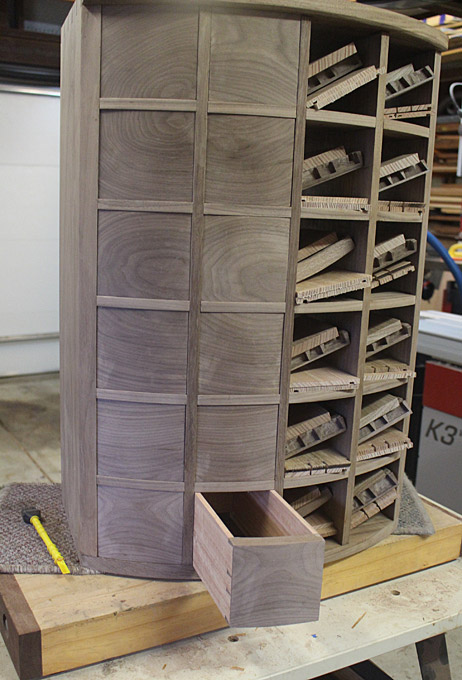


My plan is to set the drawers back a mm or two ...

Any thoughts about this?

Regards from Perth

Derek

Re: Apothecary chest - through dovetails on a drawer

#2

comments

Bill Tindall, E.Tn.

1. Template for marking- a fine idea. better to get it right on paper than trial and error on the end of the drawer side with a multitude of confusing marks. If I have not done a drawer in a while I lay it out on paper and then transfer, even for one drawer.

2. Pictures 20,21. I am bewildered by this unnecessary step and do not encourage anyone else to employ it. Why are you leaving anything to pare after chisel chopping from the base line? Straight cuts or even slight undercuts and done. I only pare as you have shown if I screw up the chisel chop and don't get it level or slightly undercut(preferred).

3. Is that drawer side wood as miserable to work as it looks to be? I don't like making dovetails in wood with hard and soft growth rings. Our widely used(in southern reproduction furniture) southern pine falls in this category. Maple would have been a better looking and maybe easier to work choice.

Re: Apothecary chest - through dovetails on a drawer

#3

PS

Bill Tindall, E.Tn.

The set back looks attractive to my eye.

Re: Apothecary chest - through dovetails on a drawer

#4

Re: comments

Derek Cohen (in Perth, Australia)

3. Is that drawer side wood as miserable to work as it looks to be? I don't like making dovetails in wood with hard and soft growth rings. Our widely used(in southern reproduction furniture) southern pine falls in this category. Maple would have been a better looking and maybe easier to work choice.

Bill, the wood is horrible to work as the pictures suggest. It is what I have. The advantage is that it is stable, being quarter sawn. Maple is not easy to access in Oz. It has to be imported from the US.

Regards from Perth

Derek

Re: Apothecary chest - through dovetails on a drawer

#5

Re: comments

Brian Holcombe

Bill, I agree with you to an extent but I also believe that considerable bearing surface is an improvement in any joint.

Re: Apothecary chest - through dovetails on a drawer

#6

Metric for dovetail base  line

Bill Tindall, E.Tn.


The picture is a half blind and we are talking about a through dovetail, but this picture will illustrate my comments on the undercut. After sawing or chopping away most of the waste I chop to the dovetail baseline, half way through on each side, with the goal of a slight undercut. Before assembly I slide the square along the baseline wall. What I want to see is a burnish from the square sliding at the front edge and no burnish deeper. This situation ensures the joint will come together where it shows with no sticky outy part to prevent this desirable situation.

The additional benefit of the undercut, beyond insurance, is there is a place for excess glue to collect. I very rarely get any internal squeeze-out.

Examining the mechanics of the dovetail, this under cut does not weaken this already hugely over engineered joint any significant amount.

Re: Apothecary chest - through dovetails on a drawer

#7

Location of bottom back dovetail, PIC 7

Bill Tindall, E.Tn.

Reference PIC 7

I used to make this bottom pin a half pin (flat on bottom side) as you have shown. This surface defines the bottom of the drawer back, which must be as high as the groove in the drawer side or the drawer bottom won't slide in. Then I realized that this pin does not have to be perfectly located relative to the groove. Raising it to a full pin provides a degree of freedom for adjusting the bottom edge of the drawer back relative to the groove in the drawer side.

Indeed, when I checked with my go-to book on Period Correct drawers (Greene, American Furniture) I see a full pin for this location.

Re: Apothecary chest - through dovetails on a drawer

#8

Re: Metric for dovetail base  line

Brian Holcombe

We’re now talking about two separate scenarios. The joint you’re commenting on originally is a small triple pin joint with large space between pins. It’s being compared to half blinds with many more pins.

Derek may cut differently for that, I certainly would as I normally undercut slightly as you show, for the same reasons .

Re: Apothecary chest - through dovetails on a drawer

#9

Re: Metric for dovetail base  line

Bill Tindall, E.Tn.

doesn't differ. I target a slightly under cut baseline of through and half blind dovetails, both pin board and tail boards. I just didn't have a PIC of a full pin board to illustrate the check with a square. The intersection to ensure comes together on the drawer inside is the same in either case, in principal.

Engineering- the back of a drawer has no active forces on it in use. I use fewer and coarser pins back there, as would be seen in Period Furniture.

Re: Apothecary chest - through dovetails on a drawer

#10

Re: Metric for dovetail base  line

Derek Cohen (in Perth, Australia)

Bill, I very slightly undercut (i.e. create a hollow) at the base on the through dovetails to ensure good mating. I also use less dovetails at the rear. They are not show dovetails. It is more important that the inside of the drawer at the rear is a clean fit.

I would not compare the base of a through dovetail with that of a half blind. They are different in design and require different techniques to make. If anything, I would argue that a cleanly formed through dovetail is harder than a half blind dovetail, and I've made a lot of the latter ... some interesting ones as well :)

Regards from Perth

Derek

Re: Apothecary chest - through dovetails on a drawer

#11

Re: Metric for dovetail base  line

Brian Holcombe

I don’t undercut through dovetails, there is a practical disadvantage beyond reduced bearing surface.

Occasionally I’ll have to plane a corner more than expected, the undercut joint will show more glue line than the square edge joint. Even if it is undercut very very little.

Re: Apothecary chest - through dovetails on a drawer

#12

Re: Metric for dovetail base  line

Bill Tindall, E.Tn.

I don't mean to beat this horse to death, but why if you undercut or at least ensure not "over cut" the base line, why don't you just directly chop it that way instead of what is an unnecessary and time consuming "tent" approach? I might imagine an insecure novice sneaking up on this cut with a "tent" but not someone of your skills. Especially with the abundance of backs you had to do.......I would have been looking for every possible way to cut labor out of what was a laborious task.

Is there something about this piece that required native wood? The piddly cost of maple for these tiny drawers would be insignificant, if indeed you had none left from the kitchen. There was no need to worry about quarter sawed grain for these small drawers. In fact, in American antiques I don't see that drawer side grain orientation was often worried over.

Re: Apothecary chest - through dovetails on a drawer

#13

Re: Metric for dovetail base  line

Derek Cohen (in Perth, Australia)

I don't mean to beat this horse to death, but why if you undercut or at least ensure not "over cut" the base line, why don't you just directly chop it that way instead of what is an unnecessary and time consuming "tent" approach?

Why not chop directly, indeed? Bill, that is my usual way, however you know that I am always experimenting, and decided to do it via tenting and paring. The tenting is amazing quick. Two chops from each side. There is little to pare away.

Having said that, it is not as efficient as chopping directly. I think that I will revert for the remainder of the drawers (9 left to do).

Is there something about this piece that required native wood?

The quarter saw Tasmanian Oak has generally been good. I like to use it for drawer sides because it is quarter sawn. The problem is that "Tasmanian Oak" in Oz is similar to "White Oak" in the USA - there can be a number of species that make it up. This stuff began good but some of it has turned out to be brittle and interlocked. It is a similar density to white oak.

Regards from Perth

Derek

Re: Apothecary chest - through dovetails on a drawer

#14

Re: Metric for dovetail base  line

Brian Holcombe

Sounds like white oak, some of it is wonderful and some miserable.

Re: Apothecary chest - through dovetails on a drawer

#15

that I can understand and encourage

Bill Tindall, E.Tn.

"however you know that I am always experimenting,"

While woodworking has been around a while, and as a result the "best" way should have been discovered 200 years ago, tools and materials change and "notions" prevail. Unlike a professional shop in 1820, people doing woodwork today have a vast range of skill and experience. There isn't a best way in many cases. I find what is best for me changes as I gain experience. I shamelessly employ crutches and they get shed when they are no longer needed.

I have a tee shirt with the face of an inquisitive child and caption "Question Everything". I like it. (I would add, try everything)

As to the wood, quartered oak sides is an English tradition, though I don't know why. It never caught on over here in spite of our abundance of fine white oak. Maybe England lacked an abundance of poplar :)

Re: Apothecary chest - through dovetails on a drawer

#16

Choosing white oak

Bill Tindall, E.Tn.

Look for lumber with 10 or more growth rings per inch and typical white oak color (if dark it is likely Chestnut oak). A slow growth white oak will be nearly as light as walnut and soft enough to drive a nail in it.

Re: Apothecary chest - through dovetails on a drawer

#17

Re: Metric for dovetail base  line

Derek Cohen (in Perth, Australia)

Bill, I had a couple of hours in the workshop after work today, and compared two methods of clearing the waste from the pins.

While chopping vertically is ultimately quicker, the tenting and paring is pretty quick - certainly quick enough for anyone - but is also much safer and provides a better finish. For now I am happy to keep using it.

5 more drawers to finish dovetailing.

Regards from Perth

Derek

Re: Apothecary chest - through dovetails on a drawer

#18

Thank you

Brian Holcombe

Appreciate the insights, thank you, Bill!

Re: Apothecary chest - through dovetails on a drawer

#19

Re: Metric for dovetail base  line

Brian Holcombe

I built a 20” tall fence for my router table from birch ply. For big projects, after wasting out the material with a saw (chop saw or hand saw) I set a down shear mortise bit to the height of the knife line then waste out the majority of what remains with the router table. After which I chisel are areas near the pins.

Works beautifully and I’m left with perfectly square baselines which are especially important on casework and nice to have on drawers.

This approach can only be used for through cut dovetails but it’s handy when there is a giant pile of work.

Re: Apothecary chest - through dovetails on a drawer

#20

Re: Metric for dovetail base  line

Derek Cohen (in Perth, Australia)

Hi Brian

In the absence of a morticer to chop out most of the waste between the pins - which makes sense to me - the next best machine option is a router table. Would this would work (using the fence as a depth stop)? I used a trim router (hand held) for the waste on the half-blind tail board. However, there the router was cutting at a different orientation to the grain. In the router table there would climb cuts to contend with, and my concern is that the board/bit could shoot off into a pin. Any thoughts?

Regards from Perth

Derek

Re: Apothecary chest - through dovetails on a drawer

#21

Re: that I can understand and encourage

Sgian Dubh

"As to the wood, quartered oak sides is an English tradition, though I don't know why."

Bill, I'm speculating here, but I think my reasoning is at least plausible. Match quarter sawn European oak for drawer sides and backs with the once popular American mahogany, tangentially sawn, for drawer fronts and you have materials whose expansion and contraction factors are very closely matched. I'm not suggesting those woodworkers from the eighteenth and nineteenth century necessarily knew those factors, but perhaps they worked out the fairly close correlation through observation. I've no proof my theory holds water, it's just an idea.

Oak is however pretty hard and wear resistant, so maybe that too was a factor over here in the UK for it to be chosen for drawer sides, and slips if they were employed. Slainte.

Re: Apothecary chest - through dovetails on a drawer

#22

I question the theory

Bill Tindall, E.Tn.

At an earlier time English sides were some soft wood. At the time English sides were oak, in America they were yellow pine or poplar, with little regard to grain orientation and in spite of the abundance of white oak that could have been used. Given the equivalent success of each choice, I don't think engineering was a reason for the English choice. And in fact, hard oak sides are a disadvantage in wear. The runners wear and they are harder to repair that a worn softer wood drawer side. I have seen many English antiques where the oak side milled a substantial groove into the drawer blade.

I think the quartered can be explained by the fact that the billets for the sides could be quickly riven. For a time riven shingle stock was used for Philadelphia drawer sides.

I think eventually the quartered oak side became a fashion. But what got it started? The availability of riven oak billets? Did the English make shingles from oak?

Re: Apothecary chest - through dovetails on a drawer

#23

Re: Metric for dovetail base  line

Brian Holcombe

I set the height of the cutter to the baseline, rather than using the fence as a depth stop.

None of the work is climb cutting. A bit that doesn't chip out the edge grain is very helpful in addition of course to the knife line.

Not sure I want to further describe the process in a public format, it's not dangerous as far as I'm aware but certainly a process requiring great care, so we can take it to email if you're curious.

Re: Apothecary chest - through dovetails on a drawer

#24

Re: Metric for dovetail base  line

John in NM

I wouldn't use a mortiser, they tend to leave a messy end grain.

I do something similar with the router table on a part I make routinely - cut a 9/16" wide by 1 1/8" tall slot through about 1/4" thick material, orientation is the same as a drawer side dovetail. Works great, I would probably do the waste cuts on a dovetail with the bit set a little low (say 1/32") then follow with a finishing cut as Brian described. I don't see the point in wasting by a slow method just to follow up with the faster one.

The biggest risk with this kind of cut is that the bit will pull up and out of the collet during a heavy cut. Dull bits are terrible for this - I had one come all the way out and fly across the room once before I knew to watch for it! Probably less of a problem for a down shear bit, mine was a straight flute.

Re: Apothecary chest - through dovetails on a drawer

#25

Re: I question the theory

Sgian Dubh

Bill, I didn't claim my reasoning was infallible, as you noted. I too am aware that hard drawer sides can develop a groove in the runner, if the runner is soft compared to the drawer side, and slip, where one is included. Grooves worked into runners over time are not so pronounced if the drawer side and runner/kicker material are all made of oak, quite common in my experience in British furniture. And that's the case for me being British - I've never really worked much on antique American furniture, but I've restored or repaired a lot of British stuff. You're correct to say it's much easier to replace the bottom edge of a drawer box than it is to repair the runners, and sometimes the kickers.

Shingles from oak over here? Not common; I can't even say I've ever heard of it. Whilst there is a little of roof shingling around, usually from other species such as larch and chestnut, from what I've seen it's so rare as to be counted as near enough negligible. Slates, tiles, corrugated tin, asbestos (historically), concrete and fired clay, felted flat roofs are the norm, and that covers (pun intended) a wide range of building types, but shingles for roofs and sidings are exceedingly uncommon as far as my observations go, although I admit I've not been going out of my way to note such building techniques.

Incidentally, how are finding that darned book? Slainte.

👍 This page answered my questions

Your vote helps other woodworkers quickly find the answers and techniques that actually work in the shop.