WoodCentral Forums

Est. 1998 — 27 years of woodworking knowledge

Dovetailing on an angle

Posts

Dovetailing on an angle

#1

Dovetailing on an angle

Derek Cohen (in Perth, Australia)

I was in two minds whether to post this, but since the method is a practice, it would be great to get feedback, since the strategy I have come up with is complex. Can you do this another way?

Each row has 4 drawers, and these will be shaped to match the bow across the chest.
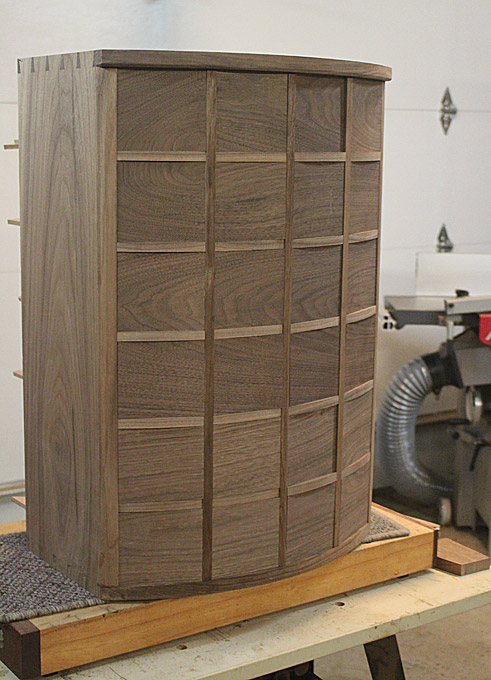

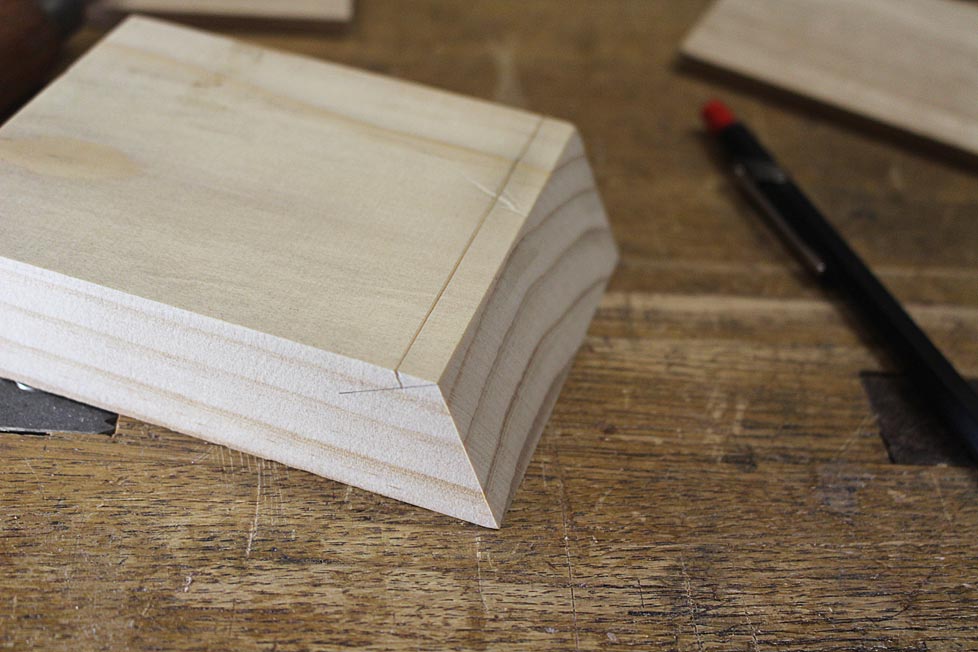
At the start, the drawer fronts are to be left straight. This maintains the reference sides. The ends of each drawer front have been bevelled to match fit the bow of each drawer blade.

This is a fitted (practice) drawer front (posted last time) ..
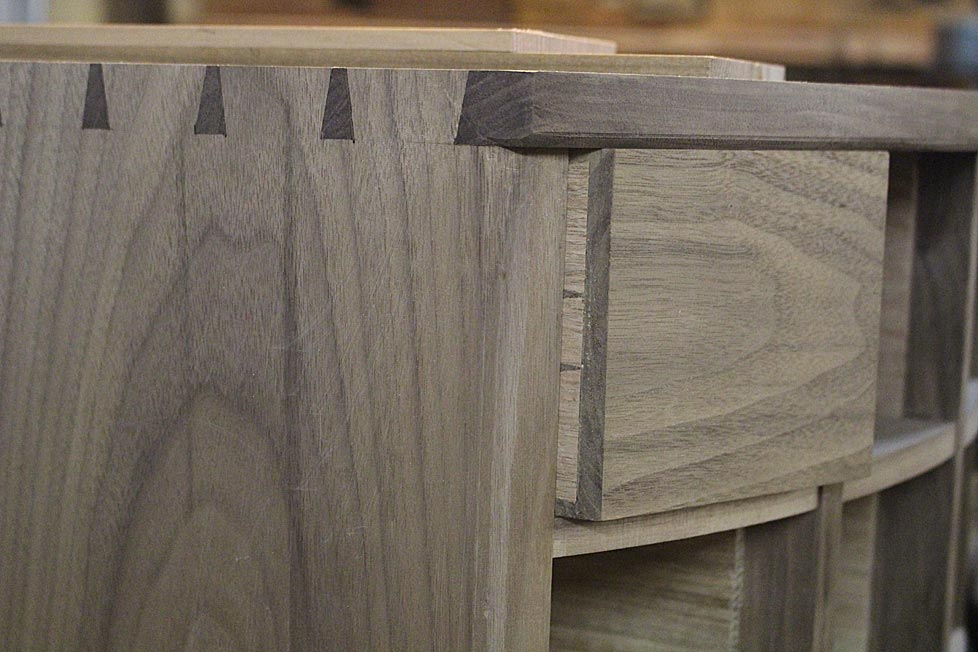

The drawer side has been dovetailed to the obtuse angled side (again, details in my previous post: http://www.inthewoodshop.com/Furniture/ApothecaryChestWeekend8.html) ...
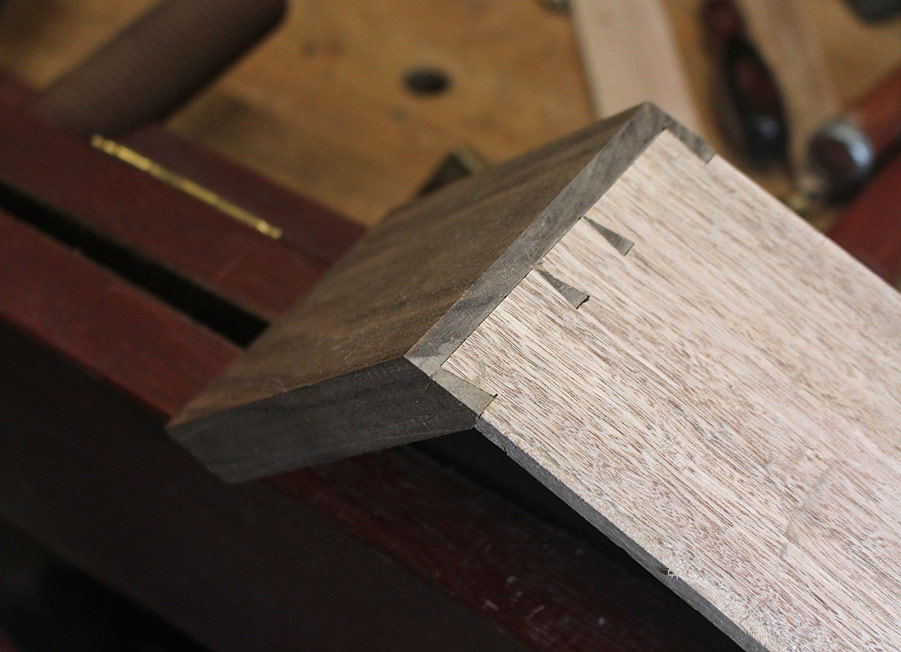

The need now is to dovetail the acute angle ...
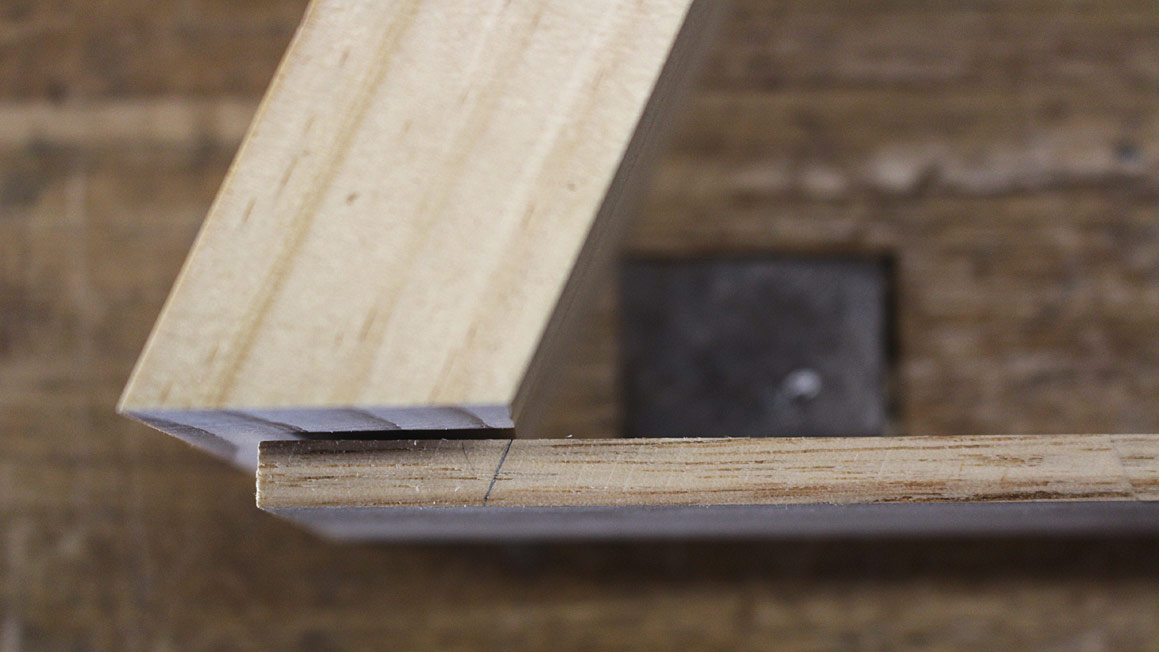

This is where it gets interesting. It you look at the lines drawn on the drawer side, if made coplanar with the drawer front, the dovetails will need to me cut at an angle. That is much too complicated, and likely to be a poor fit.

Then, if the baseline is cut square (as usual), the dovetail will end up in the centre of the side (and not extending up from edge of the board).

The only way I could come up with for a fit that simplified the tail board was to rebate the pin board, so ....
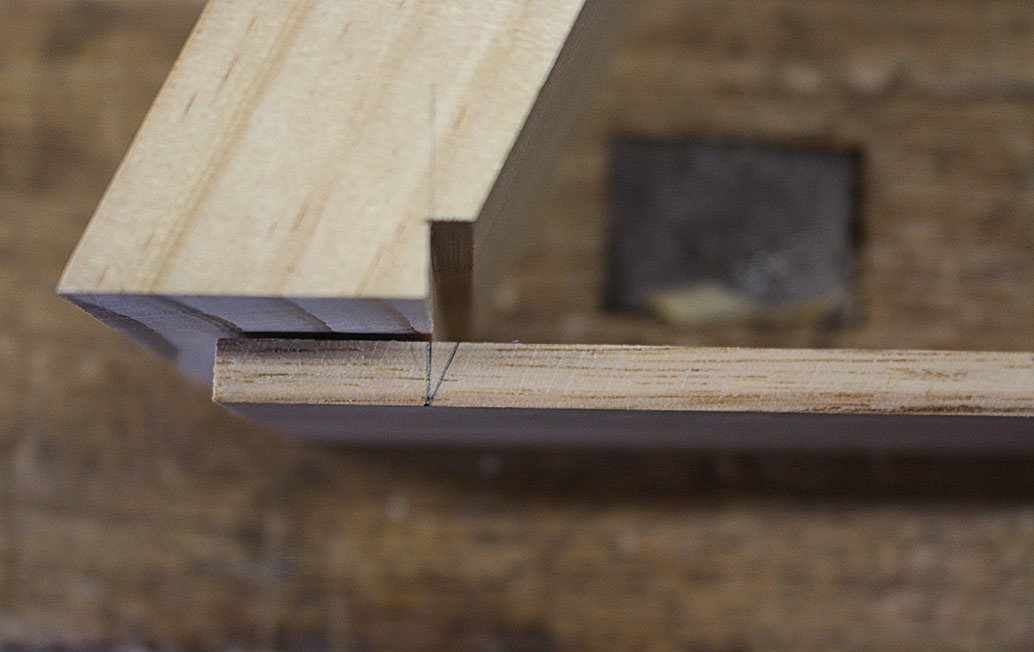

The rebate needs to be as deep as the drawer side (for a flush fit), and square to the side (so the baseline of the tail board fits flush).

The first step is to mark the baseline ...
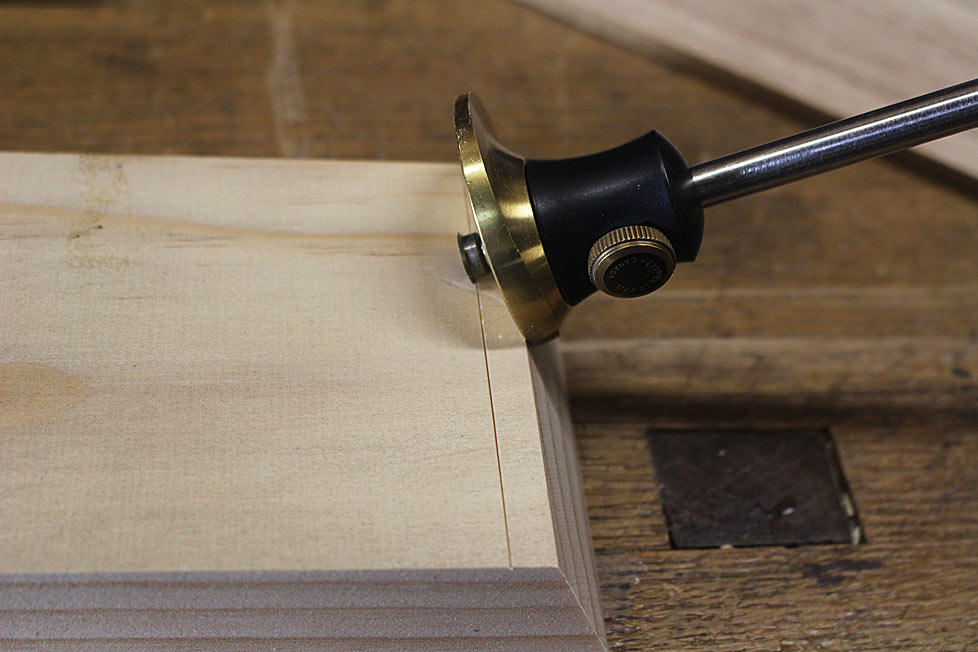


On the piece above, you can also see the rebate markings.

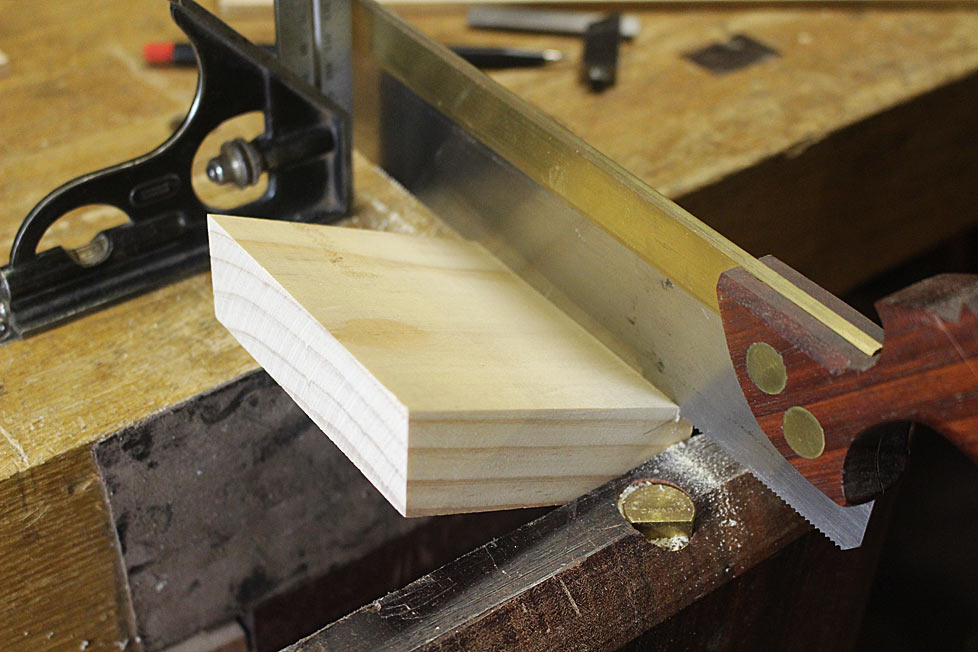
The rebate is now cut parallel to the side ...

Remove some of the waste with a chisel ...
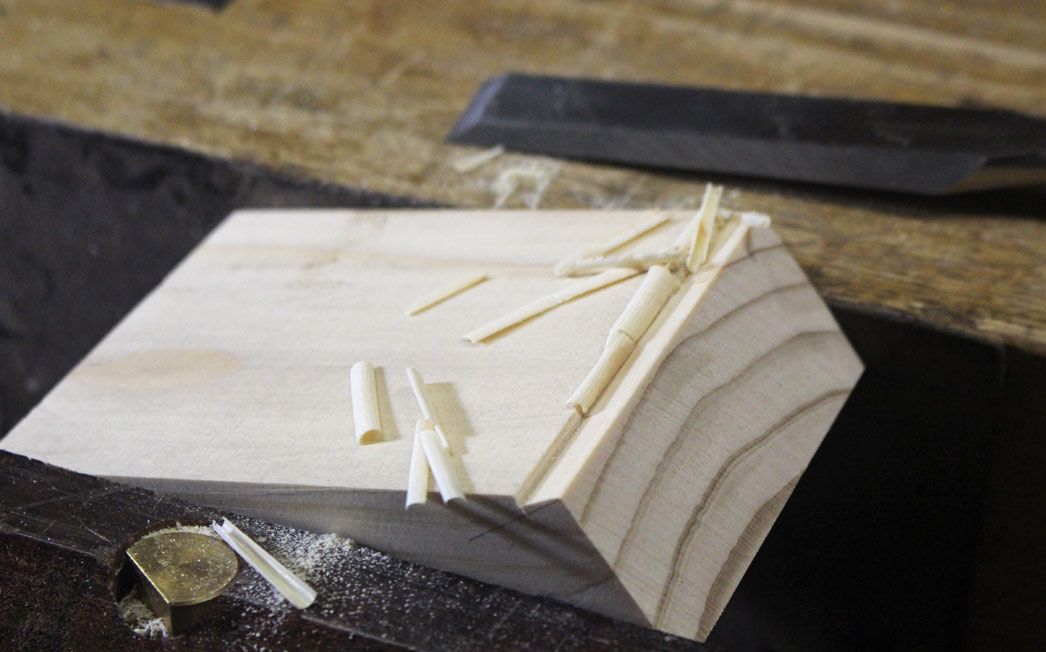

Now that rebate needed to be both straight and flat. It needs to be an equal depth along its length.

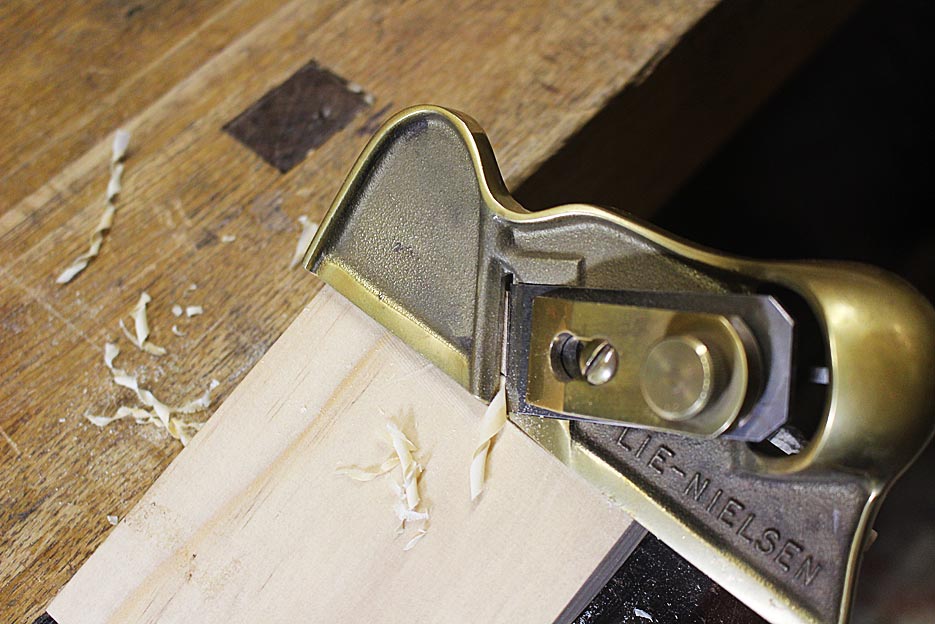
It could have been chiselled, but that is less efficient. A shoulder plane as this would not ensure a square shoulder without extra work to create an absolutely square edge for a tight fit. In the end I came up with this idea to plane it using a LN Edge Plane.

A spacer was attached to plane to the 1/4" depth ...
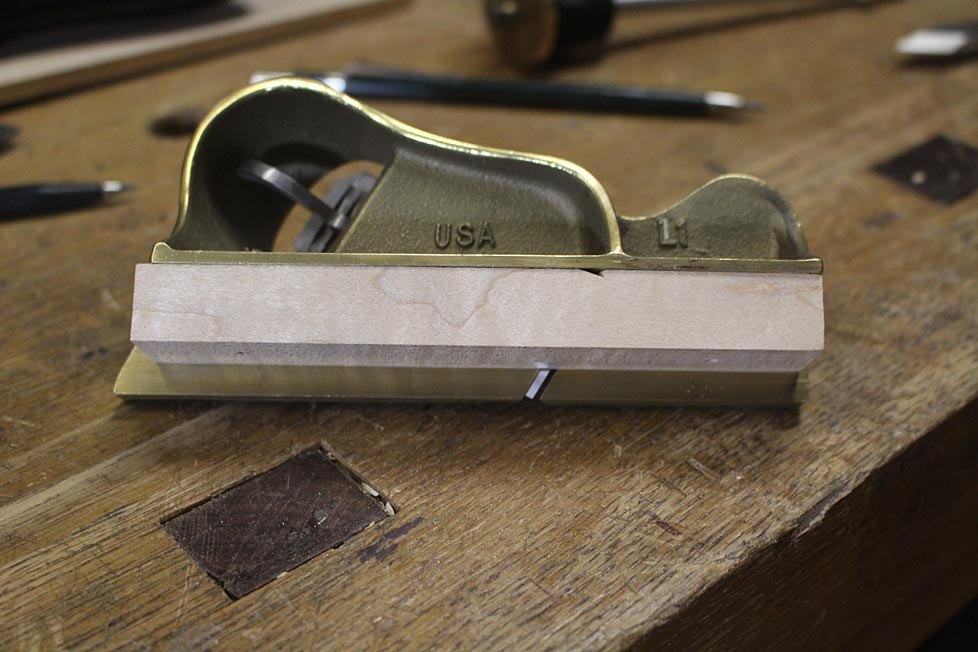


The finish was spot on ...
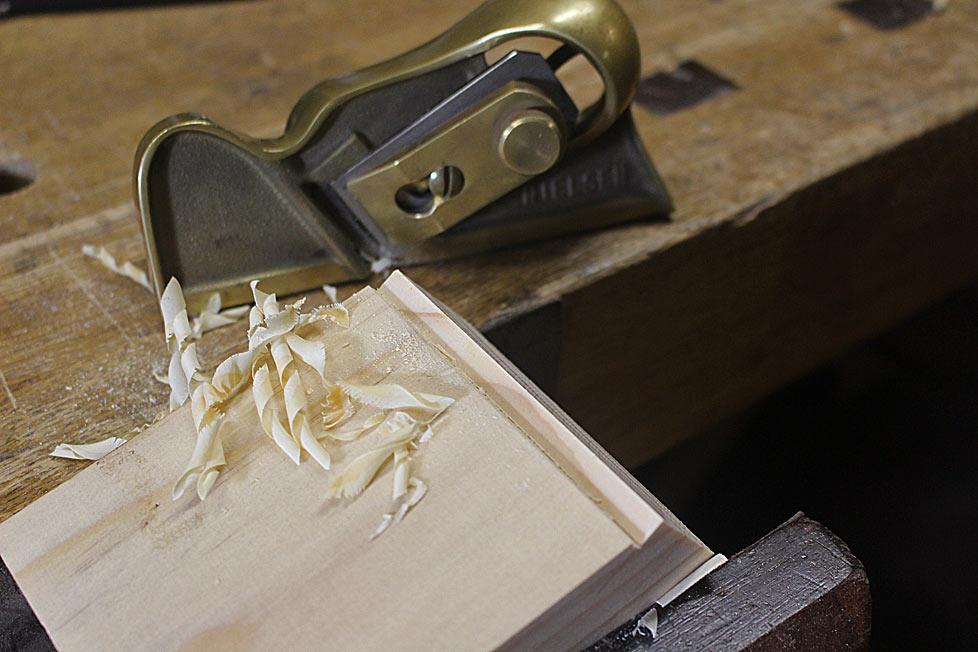

Transferring

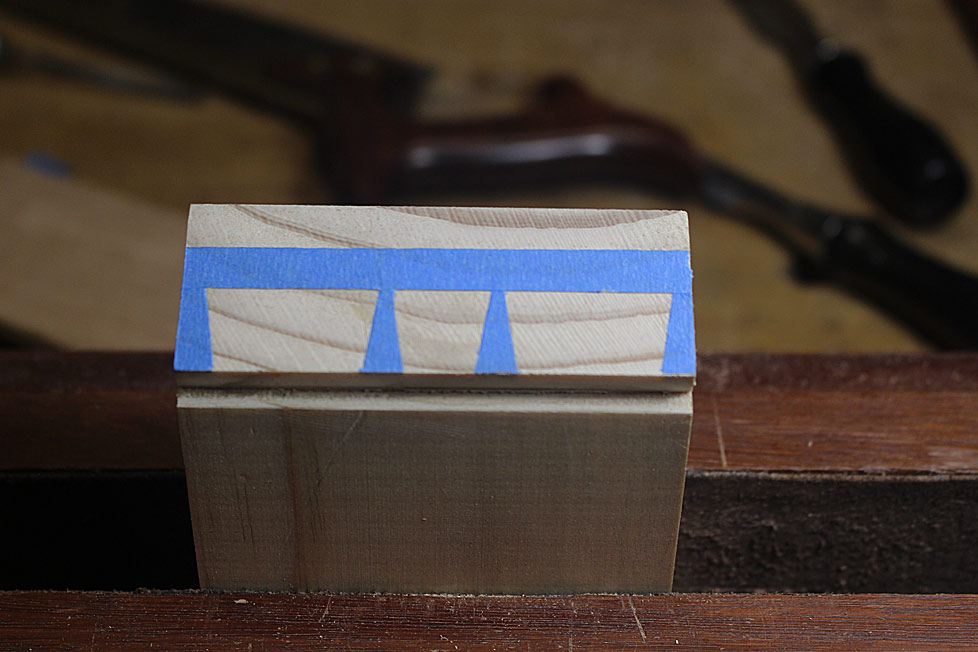
The rear of the tail board, with blue tape used to create a fence ...
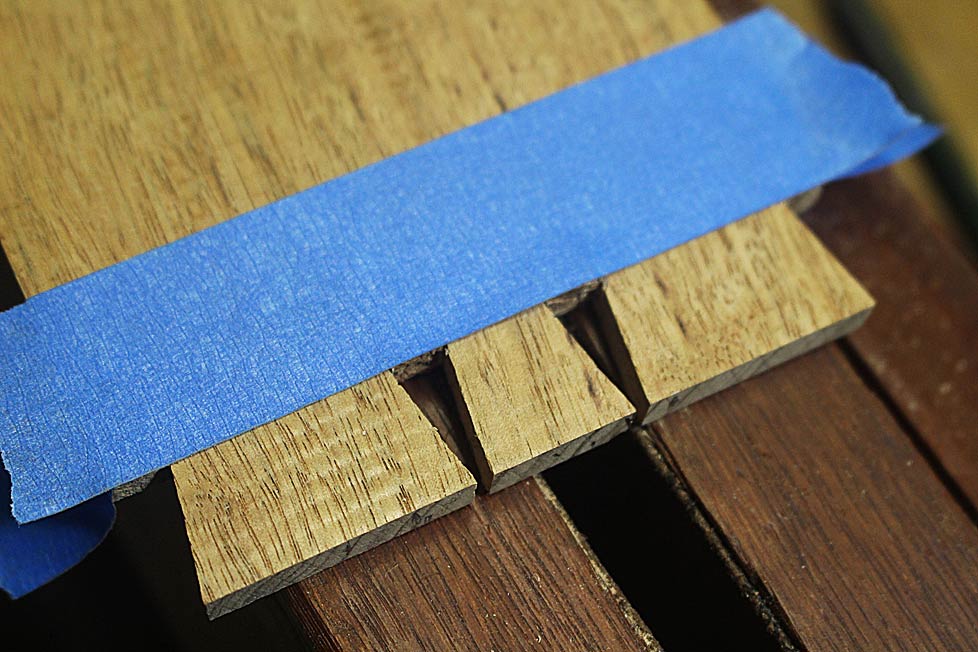

Tails on pins ...
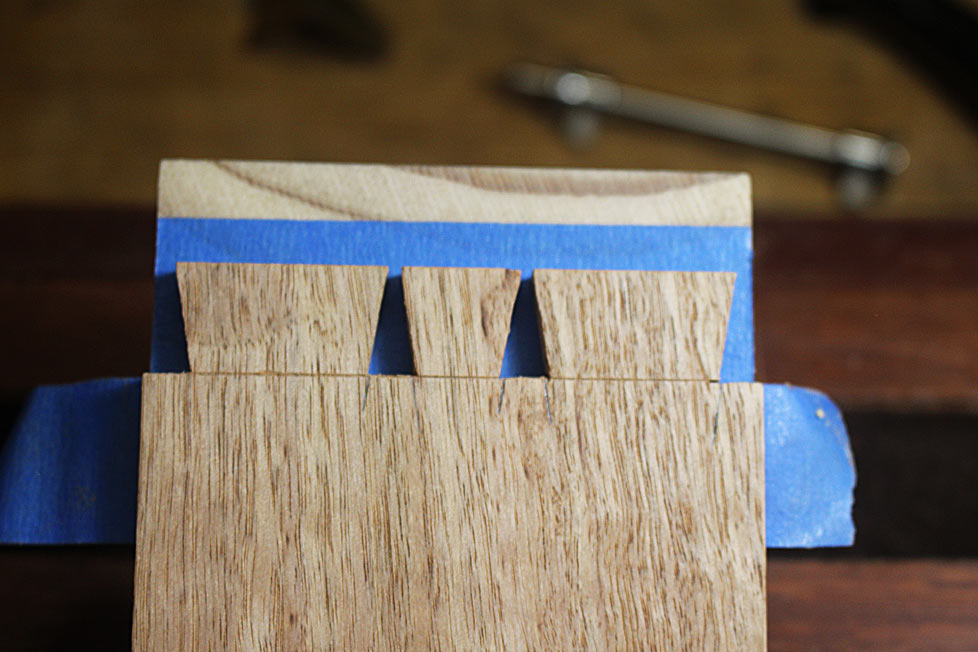


The socket shoulders are deepened to create a socket that undercuts the baseline ..
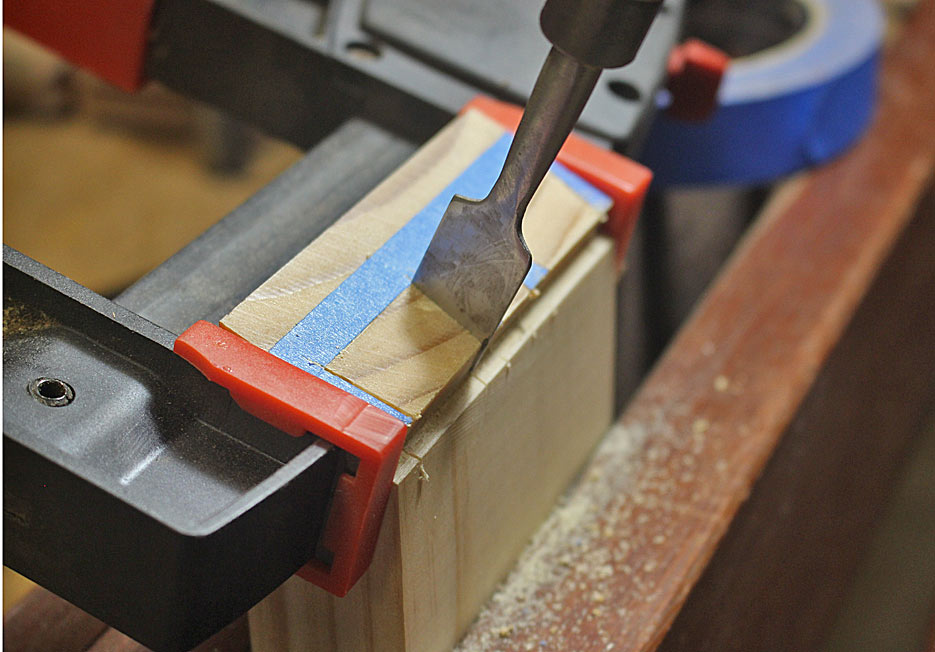

Because the angle was so difficult to chisel, a trimmer router was used to remove most of the waste ...
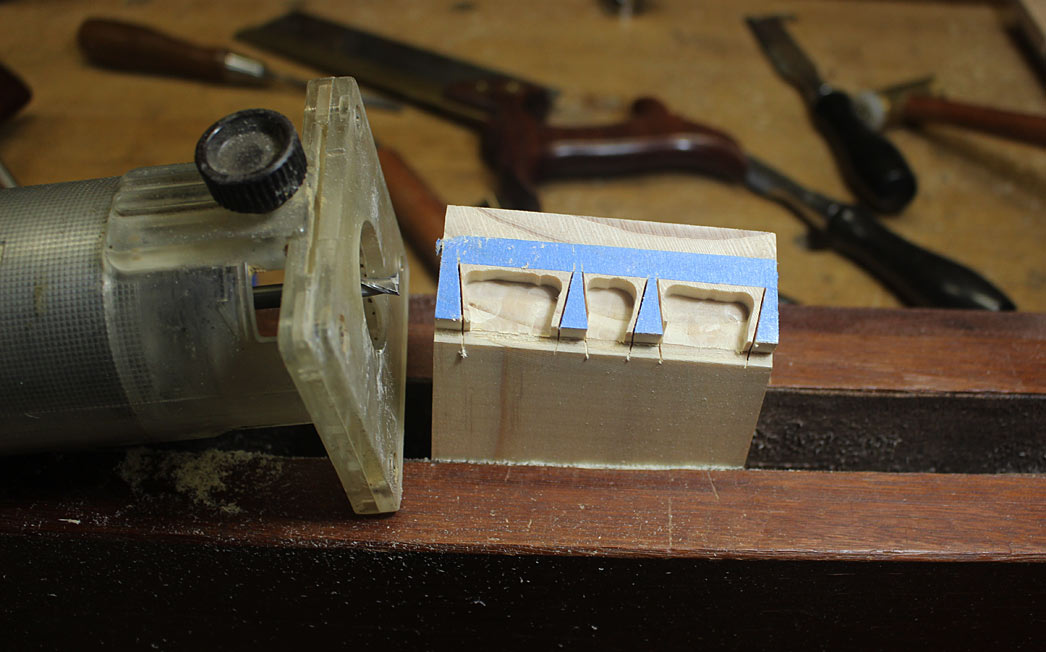

... before the remainder was removed ...
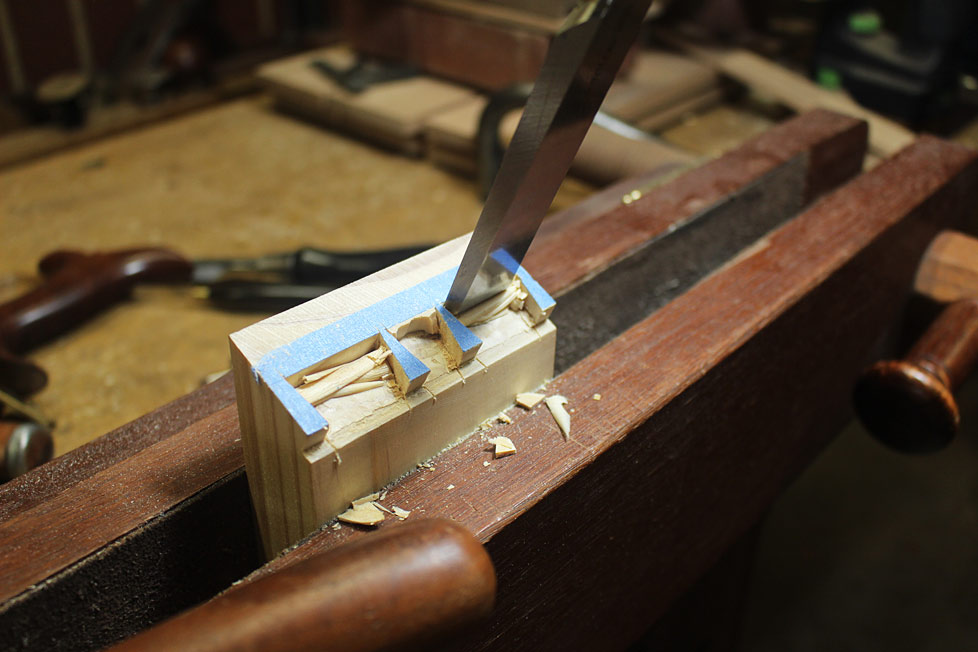

Coming together

The fit ...
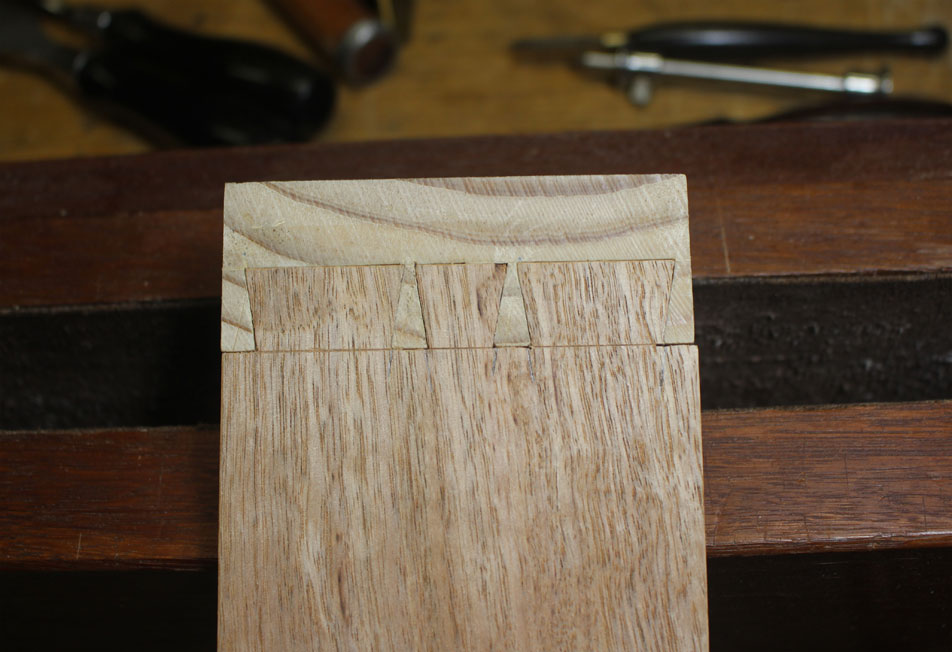

The angle ...
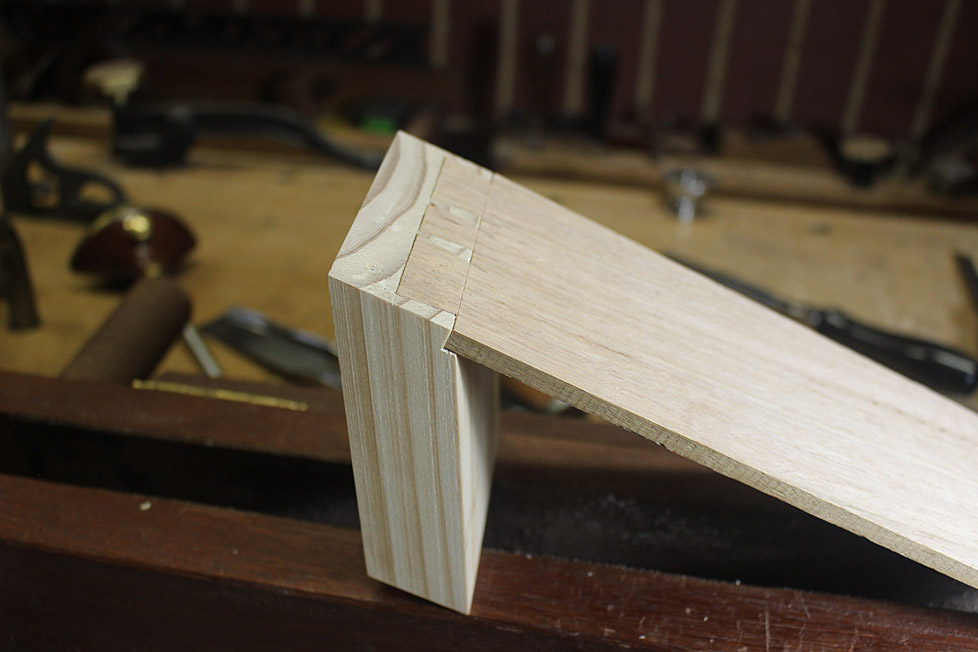

This is a rough idea of what it will look like once the drawer front is shaped ...
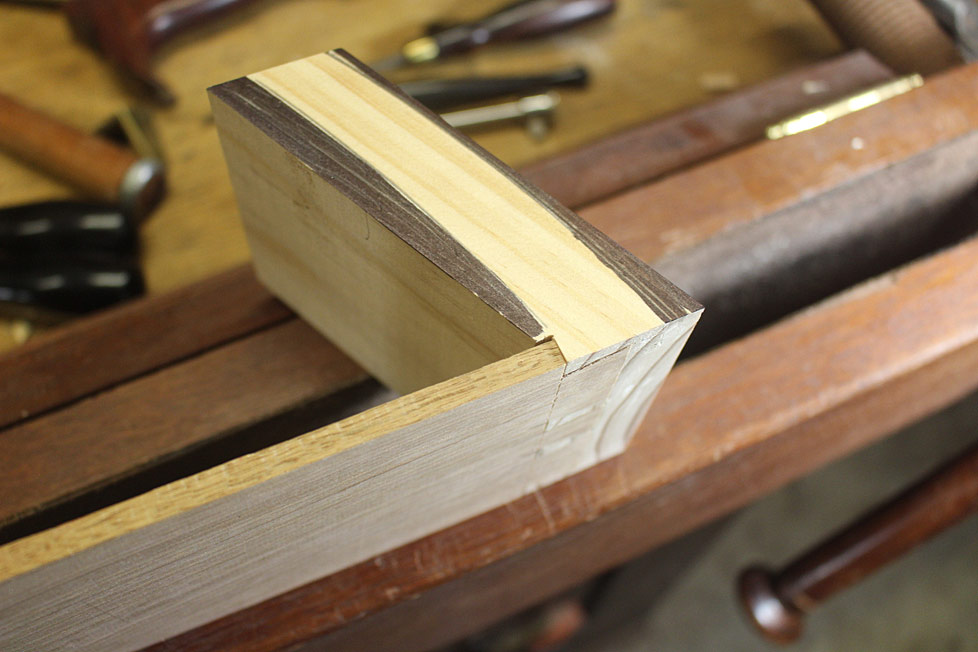

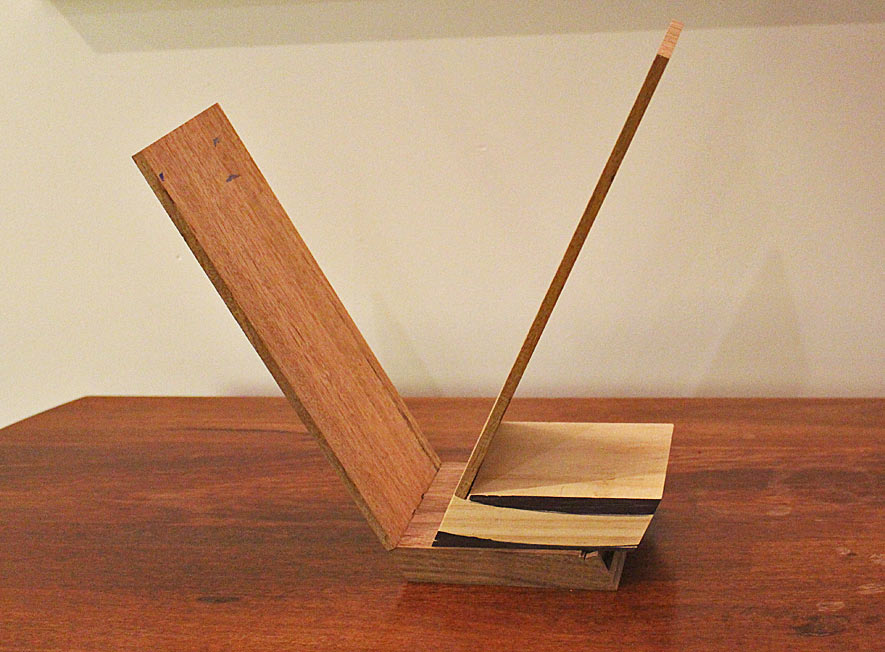
The two sides that must be made for all drawers ...

Regards from Perth

Derek
Re: Dovetailing on an angle

#2

For those watching.......

Bill Tindall, E.Tn.

An impressive solution to making a bow front drawer. A challenge for those that like a joinery challenge. But it should become apparent that an 18th century cabinet maker would have starved his family making bow fronts this way. They are about 1/3 greater labor even made the traditional (efficient) way.

For those needing a bow front to hold your socks, and plenty of other stuff to do, consider how bow fronts were traditionally done. Veneer some secondary wood thick enough to keep the drawer back orthogonal to the sides until the dovetails are cut. Or, here in the land of plenty when it comes to lumber, buy some 12/4 walnut. Note: Veneered, the drawer will look better because the arc will not be cutting across the grain.

Re: Dovetailing on an angle

#3

Re: For those watching.......

Derek Cohen (in Perth, Australia)

I don't think that was a standard way, Bill. If you look at the way a bombe was made, the fronts (and sides) were carved from solid chunks.

This is an example from David Boeff ...


Link: http://davidboefffurnituremaker.blogspot.com/2015/02/bombe-chest-drawers-are-difficult-fifth.html

I took a similar approach with the Lingerie Chest, that is, carving the fronts. However I used thin drawer sides, since those on the bombe get thick and ungainly, and used a similar method to the current one for the apothecary chest.

Regards from Perth

Derek

Regards from Perth

Derek

Re: Dovetailing on an angle

#4

not an equivalent example

Bill Tindall, E.Tn.

There is no part of a bow front that is orthogonal to the sides. Not the case with the piece you illustrated, nor the case with some serpentine fronts, depending on the details of the "wings".

Serpentine and Bombe fronts, when made in their most showy fashion, were sawn from a carefully selected thick piece of wood in order to emphasize the surface cutting across end grain where the pulls are located. At their "best" the serpentine front presents two big eyes, a presentation that I don't care for.

Because of the compound curve it might be impossible to veneer a bombe, so I don' t know why you offer it as an example of what was done for bow fronts.

By contrast, no doubt to make construction easier, bow fronts are commonly if not always, veneered in American Furniture. For a stunning example look up the "McIntyre chest on chest" original or Alf Sharp's reproduction, or Connecticut Valley Furniture page 395. An image search of bow fronts will reveal many obviously veneered. One can not say for those not obviously veneered from sequential veneer whether they were veneered or not. Or just ask Alf Sharp or Jeff Heady, who works in a 4th generation shop making Period Correct early American Furniture.

I am no authority on any of these details so I ask those that are when faced with the need. .

Re: Dovetailing on an angle

#5

Re: not an equivalent example

Derek Cohen (in Perth, Australia)

Well Bill, I wasn't trying to compare the bombe with a bow front directly, other than to use it as an illustration that not all curved drawer fronts are veneered.

As I mentioned previously, I recognise that a veneered front is probably the first choice for many. In my case, with 24 small drawers, it just seemed a lot more work.

Regards from Perth

Derek

Re: Dovetailing on an angle

#6

The topic is bow front drawers

Bill Tindall, E.Tn.

"not all curved drawer fronts are veneered. "

I never used the term "curved". I think most would agree that my comments were specific to bow fronts.

It doesn't matter if the bowed front is a single drawer, or two, or many. The common veneered approach is the same. Veneer the whole drawer front and cut it into as many pieces as there are drawers across. Trivial to do if the drawer back is left orthogonal to the ends until just before the drawer box is glued together, at which point the back is sawed to match the bow of the front.

I remember Jeff Headley warning me to not mess with the drawer back until all the joinery and fitting was complete. The multitude of reasons become apparent when building the drawer.

As I pointed out, my post is for the audience. It is up to them to decide what works best for them. I was my purpose to point out what was commonly done in the past for bow fronts that I had no problem repeating when I made them.

Re: Dovetailing on an angle

#7

not to be picky, but

Ian Neuhaus

that example is not really "curved"

sinusoidal perhaps, but the side to front attachments are square -- which supports Bill's contention that makers of old simplified construction to make joint cutting straight forward.

Re: Dovetailing on an angle

#8

Re: The topic is bow front drawers

Derek Cohen (in Perth, Australia)

I never used the term "curved". I think most would agree that my comments were specific to bow fronts.

You are correct, Bill. My mind is focussed on "curved" and off on a slight tangent. My apology.

It doesn't matter if the bowed front is a single drawer, or two, or many. The common veneered approach is the same. Veneer the whole drawer front and cut it into as many pieces as there are drawers across. Trivial to do if the drawer back is left orthogonal to the ends until just before the drawer box is glued together, at which point the back is sawed to match the bow of the front.

I understand that your comments are aimed at others (who may build something similar), and not at myself. My comments below are just to explain my reasoning for my method, and not to disagree with you.

I did not want to veneer the drawer front - I've done that with several bow front tables - as then there is the need to additionally veneer of the top of the drawer. This makes for more tasks. Plus there is the side to disguise as I want the drawers to end up looking like "traditional" drawers.

What could have been a better alternate approach would be to laminate curved sections, and cut them up to make the drawers. I discarded that for myself at the start because I did not have the equipment to do reliable laminations (in regard to springback).

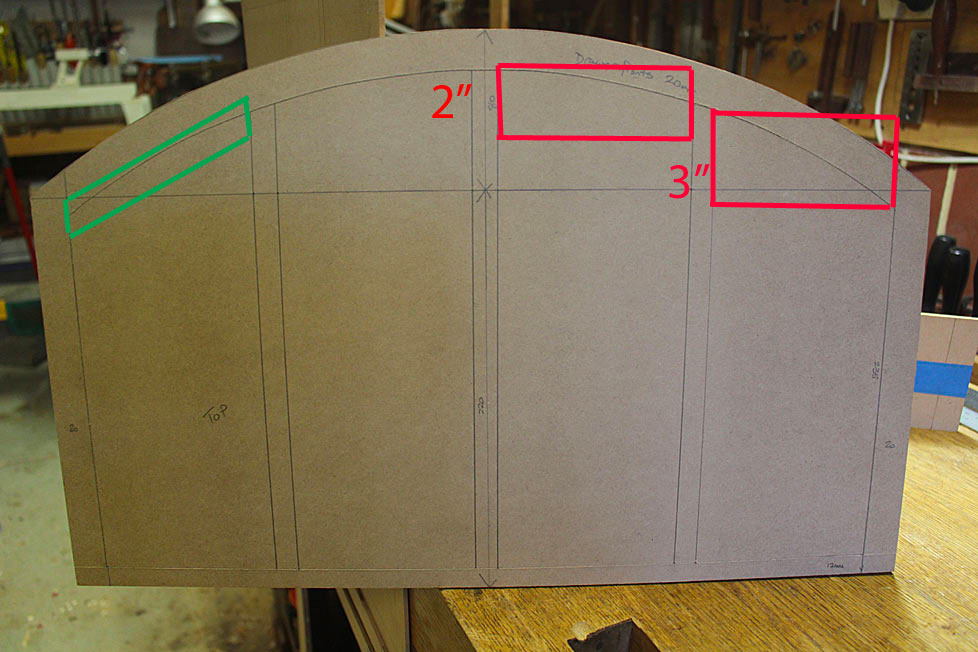
Someone suggested that I use thick sections of walnut, cut the dovetails, plant the sides, and then shape the drawer front. This, however, would require very thick sections - far thicker than anything I had, and a waste of much timber in the cutting. Here is a diagram ...


The side fronts would need boards approximately 3" thick, and the two inner fronts would need to be about 2" thick.

By orientating the boards and using my, admittedly, complex dovetailing method, I get away with drawer front blanks of 1" thickness. These will end up around 3/4" thick once shaped.

The other issue with using thick boards is the grain run out, which would be very noticeable. With the boards orientated as I have, the run out should be minimal.

I remember Jeff Headley warning me to not mess with the drawer back until all the joinery and fitting was complete. The multitude of reasons become apparent when building the drawer.

I agree. That is my strategy. I leave the backs until the sides have been dovetailed at the front. They are then to be cut to length, removed and dovetailed to the backs.

Regards from Perth

Derek

Re: Dovetailing on an angle

#10

Re: not to be picky, but

Sgian Dubh

"I am not sure what to call the "curve" the drawers have."

Arced perhaps(?), especially if each 'arc' could have formed a segment emanating from a circle's centre point prior to cutting each end of each drawer front to an angle to enable you to do the dovetailing. Slainte.

👍 This page answered my questions

Your vote helps other woodworkers quickly find the answers and techniques that actually work in the shop.