WoodCentral Forums

Est. 1998 — 27 years of woodworking knowledge

A drawer building lesson.

Posts

A drawer building lesson.

#1

A drawer building lesson.

Lee

I’ve slowly been chipping away at building the ‘essential tool chest’ from Fine woodworking.

Been putting the blind Dovetails off for a while. I finally mortised the locks and then finished the drawers with half blind dovetails at the front and through dovetails at the back. A lot of time invested in those little drawers and i was pretty happy with myself.

Then.........after milking the groove for the 3/8” rabbeted bottom I think I’ve messed it up?

I had trimmed the back of the box in line with the groove to allow the bottom to slide in from the back.

Now the Dovetail at the back of the box on the side, forget if this is the pin or tail, part of it is exposed. The bottom ort of the triangle. It looks wrong, unfinished and like a mistake.

Is this usual?

Lee

Re: A drawer building lesson.

#2

Re: A drawer building lesson.

Derek Cohen (in Perth, Australia)

Hi Lee

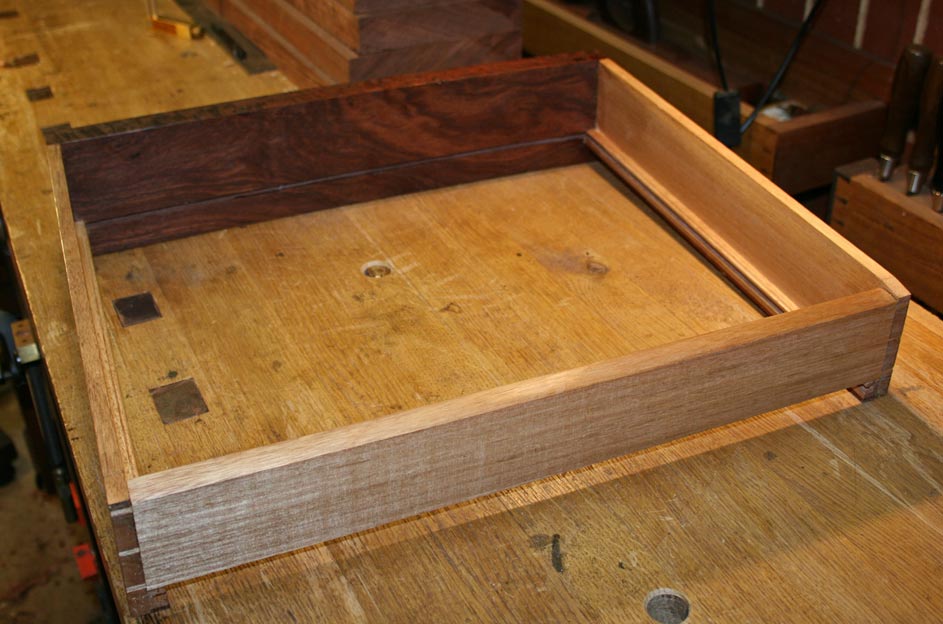
The rear dovetails should be laid out once you have determined where the drawer bottom will fit. In the photo below, the rear dovetails have been fitted. The drawer back is in the vise. To the left is where the drawer bottom will fit ..


Here is a view from inside the drawer, looking at the drawer back. The "gap" underneath is for the drawer bottom ...


Again, inside the drawer looking at the drawer back, but with the drawer bottom fitted (the drawer bottom rests in slips) ...


Here is the drawer from the back with the drawer bottom removed (you can see the slips on the side) ..


Regards from Perth

Derek

Re: A drawer building lesson.

#3

Jack Guzman from Maine

Re: A drawer building lesson.

Jack Guzman from Maine

I always lay out my dovetails after the drawer bottom grooves are done. I use a scrap of drawer bottom thickness to keep my drawer parts lined up for marking. I'm not sure what the back of your drawer looks like but consider that not many people will ever see the back of your drawer. Learn from it and leave it be.---Jack

Re: A drawer building lesson.

#4

Re: A drawer building lesson.

Bill Tindall, E.Tn.

I don't understand what you described.


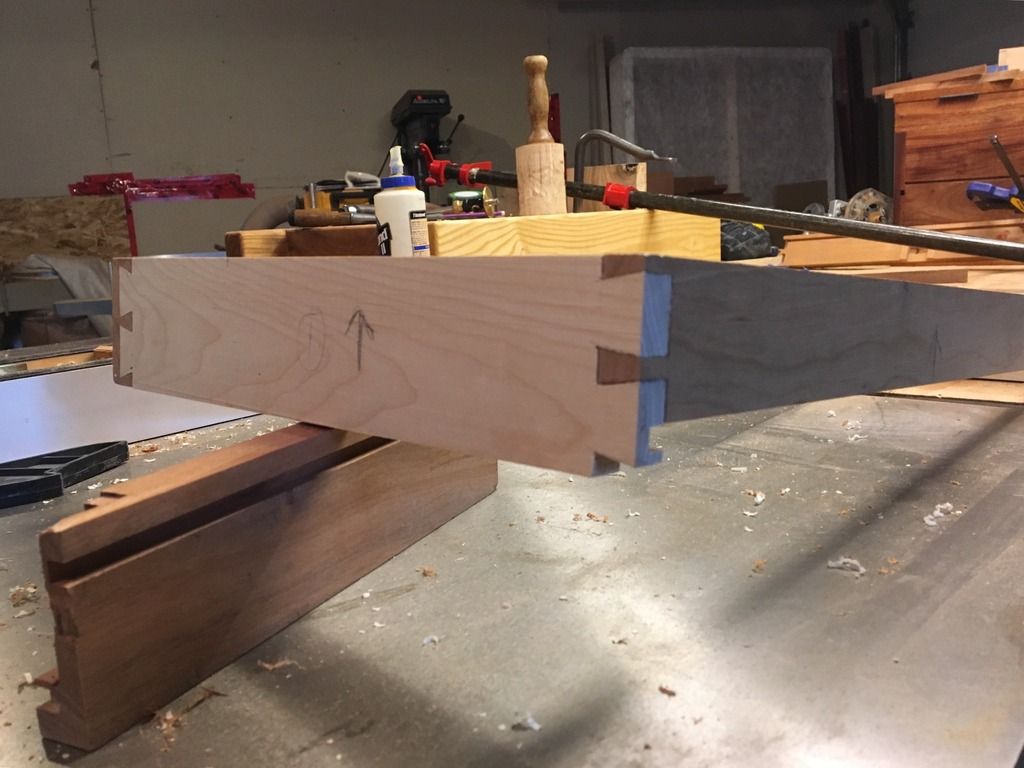
Anyway, shown in the PIC is a typical drawer back utilizing a drawer slip for the bottom groove.The back would be the same, slip or groove in the side.

Will the drawer stay together? If so, don't worry about this detail.

Until I get into the swing of things I usually lay out the first dovetail of a set on paper.

Re: A drawer building lesson.

#5

PS. clarification

Bill Tindall, E.Tn.

the top pin in the picture is in fact what is called a half pin. It is flat on top and angled on the bottom (drawer is upside down in PIC)

Re: A drawer building lesson.

#6

Re: A drawer building lesson.

Lee

Not sure if this link will work? First time I’ve tried this on WoodCentral.

The picture hopefully explains it better then I’ve tried.

The question is do I make new drawer sides and backs??

Re: A drawer building lesson.

#7

Re: A drawer building lesson.

Lee

Try again

Re: A drawer building lesson.

#8

Kneale Brownson

Picture fails....

Kneale Brownson

If you're using an image from elsewhere on the web, you need the URL placed in "optional image URL" spot at the bottom of the posting. You may need to add ".jpg" at the end of the URL.

If you create a posting with images, you can use the "preview" option below to determine that the images appear before you post.

Re: A drawer building lesson.

#10

do over, but for another reason

Bill Tindall, E.Tn.

For such a small drawer your side thickness and bottom thickness is way to thick. A bottom of 1/4 would be about right for this size drawer and a side of no more than 7/16". Also, your pins are large for a drawer this size. If you have a chisel small enough shrink the size. In the back the drawer side should end with a half tail , top and bottom. Mark waste before sawing. I have cut this half pin off a time or two by mistake, because in the front of the drawer it is cut off.

That said, I think it is great that you are making dovetails. Keep at it and it will come easier with experience.

Again, I often lay out the dovetail on paper to be sure I have not forgot something since the last time I made them.

Re: A drawer building lesson.

#12

Re: do over, but for another reason

Lee

Hey Bill, thanks for all the great advice, and pictures too. Sure appreciate it.

The sides are actually 1/2” but do look thicker in the pictures, and the fronts are 3/4”, which is what the plans called for. The bottoms are supposed to be 3/8” with a 1/4” rabbit for the groove.

I did consider 1/4” ply for the bottoms but I wanted to project to be completely solid wood.

I have so much time invested in the drawers. I may consider it a learning experience and stick with the sides? Although it may bug me?? I guess the mistake will only be visible if the drawer is fully extended? I had thought from time to time I would pull the draw out and leave it on my bench if I was wanting access to a few tools? But maybe I’ll show off my new chest and not let anyone pull the drawers fully out! Haha

Lee

Re: A drawer building lesson.

#13

suggestion

Bill Tindall, E.Tn.

That must be a smaller drawer than it looks. The parts look huge in the PIC.

Glue in a filler piece for the missing wood, plane it smooth and nobody will notice the difference.

It is for this kind of reason I keep every cut-off until a project is done. The trimings of this drawer end will glue on there with a perfect color and grain match. Just you and Woodcentral will know ;)

Re: A drawer building lesson.

#14

Re: suggestion

Lee

Another great idea! Haha

Thanks Bill..:)

Re: A drawer building lesson.

#15

PS

Bill Tindall, E.Tn.

The skill of a woodworker is measured by the perfection of their dovetail repairs, not by the originals. Sometimes I can hardly detect when the maker of a gallery piece sawed on the wrong side of the scribe line.

👍 This page answered my questions

Your vote helps other woodworkers quickly find the answers and techniques that actually work in the shop.