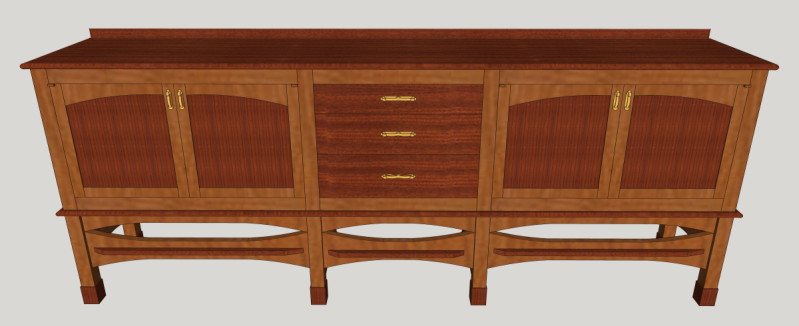
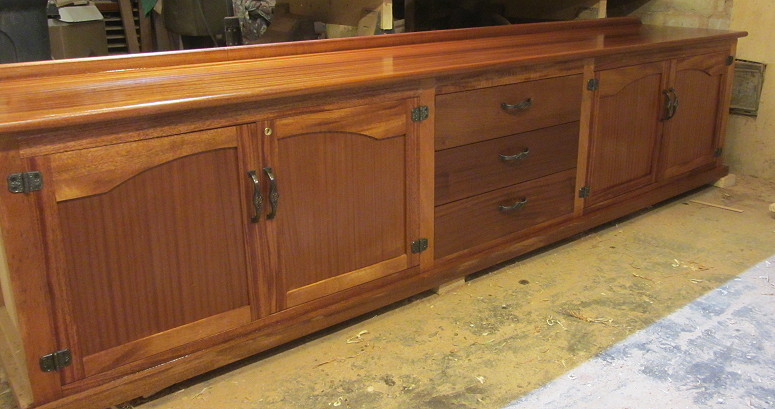
I started this piece quite a while ago. It gets attention for a couple weeks then I leap frog to one of two other projects-Not very logistically efficient but I am happy to have the pieces to work on. The design of this sideboard is based on a general Arts and Crafts look with maybe a hint of Greene and Greene. The woods are Sapele and Mahogany.
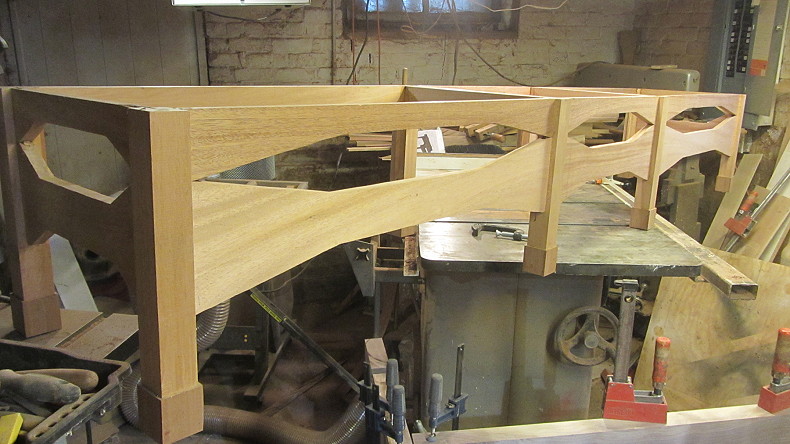
This is the base-I posted this pic a while back.
I have since added the horizontal accent strips. The base needs another round or two of sanding but is other wise completed and has at this point been moved out of the shop so I can finish up the main case..
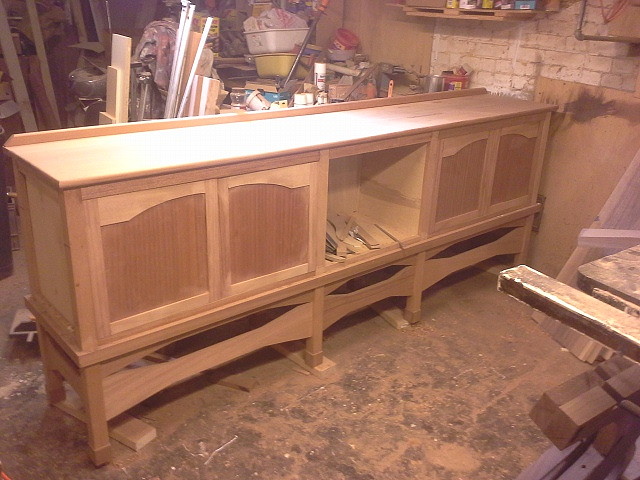
Here is another picture I probably posted a while back-You can see the general form now. Center drawers are not yet in this picture
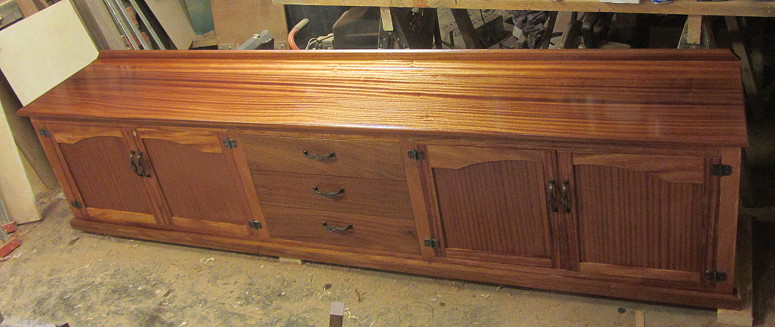
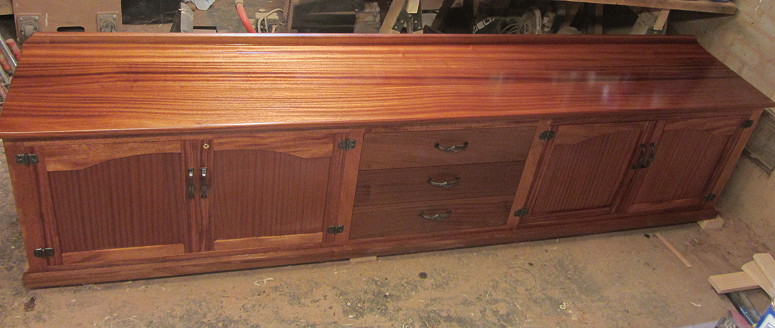
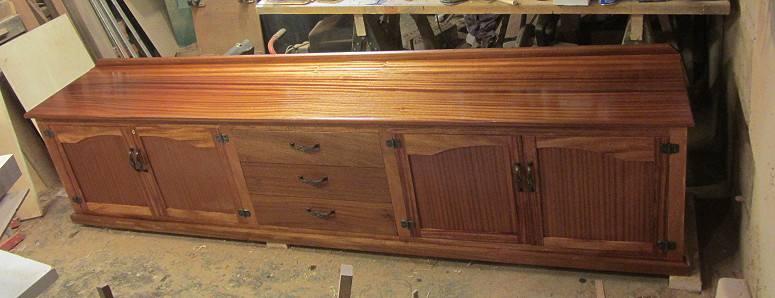
The main case of the side board is now nearing completion. Side case doors and middle section drawers are installed.
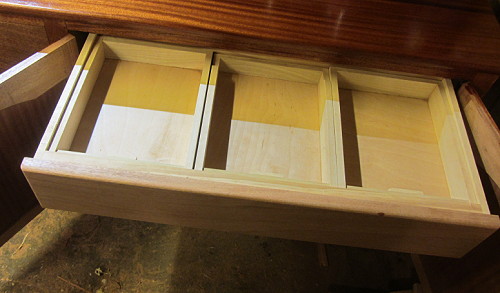
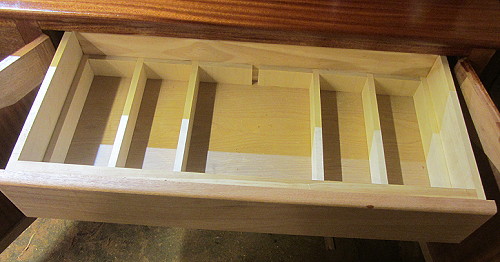
The far right case opens to a drawer that pulls out revealing removable silverware boxes.
Gorgeous finish and work. Have you considered adding a couple finger holes in the removable silverware boxes? When full they might be a bit heavy and awkward to remove.
Looking at the size I have a vision of NCIS's Gibbs building a boat in his basement. I hope you don't have a staircase that you need to navigate.
Good point Stuart! You cant see it in these pictures but I glued a small strip of wood on the inside of the pull-out drawers forming a "grab spot"....and yes there is a stairway out my basemet door through an opening the deck. I hope it fits!
2. I would not have been able to install hinges like that and wind up with the door positioned accurately in the opening. I rely on the fact that a butt hinge is captured by a mortise for self alignment if the mortise is right. How did you install the hinges?
3.Referring to the top section....How is the vertical framing fastened to the bottom of this section? And how is the top fastened on?
2. I would not have been able to install hinges like that and wind up with the door positioned accurately in the opening. I rely on the fact that a butt hinge is captured by a mortise for self alignment if the mortise is right. How did you install the hinges?
Well not too intelligently. The clients asked for and I installed a lock on the left cabinet bank doors. They have young children and will be storing adult beverages in that section. My original plan was some sort of mortised hinge for all the reasons you mentioned. As I look the piece over during fabrication I decided I wanted some hardware that matched the style a bit more than concealed hinge variety. After a number searches for Arts and Crafts Styled hinges I found and the clients liked the overlay hinges the I installed- While I like the look they add to the piece-they 1. Defeat the door lock as anyone with a Philips screwdriver can simply remove the door!. I am counting on the children not being wise enough to figure this out for a few years at least.....2. The actual hinges aren't perfectly parallel. I made the doors oversized- mounted the hinges to the face of the cabinet- then matched them up with each door and trimmed each door bit by bit till I had an acceptable fit.
3.Referring to the top section....How is the vertical framing fastened to the bottom of this section?
I should have taken more pictures during fabrication The framing is designed to be joined with mortice and loose tenon. This rendering hopefully illustrates the idea
The base as one contiguous piece of plywood (Not seen in a photos) that is screws to the top perimeter. The carcase sits flat on top of the plywood covered base. I cut and glued a Sapele "apron piece" that wraps around the entire bottom of the carcase. This apron is 1.5" high and is glued to the lowest .75 inches of the huge carcase. It also then extend .75 inches downward-covering the plywood on the base. Gravity and the "lip' created by the apron keeps the top and bottom fixed with out glue or screws and allows a bit less angst when moving the piece.
And how is the top fastened on?
It will be attached with screws from underneath. I made an apron that is glued and screwed to the inside section of the top. This apron has slots which will allow the screws/top to move in seasonal changes. I'll get some pics of this in a final write up...
Much like your earlier post showing that mammoth carcase glue up where indicated your technique is to glue everything all at once-but this requires a good amount of thoughtful preparation-- I tried to work out the details on this piece before "gluing" my self into a corner. We'll see if I succeeded when it's time to move this.
As I mentioned in my response to Bill's ?s I chose the hinges a ways into this fabrication process-again breaking Sgian's rule of designing from the hardware backwards .... There must be a corollary for choosing a finish....I assumed from the start that the top would have a protective finish -probably poly....The reat of the piece seemed to call for what Ellis always refers to as close to the wood finish- so I began this finishing with Tung Oil finish
- not pure tung oil... The nice gleam in these pictures is true to the setting but only because those photos are taken after an immediate application where I brushed the finish on and left it- no wiping after a few minutes- The application was light enough that it dries soon enough-24 hours or so. At that point the look is much more of a satin sheen. My plan at this point is to continue with this technique for several more coats. I will likely put a final couple coats of General Finishes Gloss Poly and buff back as seems necessary---stay tuned...
I have struggled with hinges on pieces. 0.010" off at the hinge translates to gaps elsewhere. It is hard to locate screws that accurately. The approach you describe is all I could imagine to get the good result you achieved.....but I was hoping you would reveal a miracle cure.
Thin the poly (at least 1:1) and you will get a close to the wood look as well as the protection. That same close to the wood look can be achieved with thinned conversion varnish too.
Ha! Yes I even lined up the holes of each hinge and use a center punch to create a divot with the hope the screw will be centered. This usually works for a 90+% accuracy but eventually some screw will wander in a section of wood where the grain is swirling or otherwise tempting the screw to run off track-even using a drill to make a pilot hole can wander -very frustrating. This was happening when I mounted the door handles. There are 4 handles meaning 8 holes to drill. When drilling the first of the 8 holes the drill wandered ever so slightly. I got luckier than I should have though and forced the "error" on the next 7-They complied!



 .... There must be a corollary for choosing a finish....I assumed from the start that the top would have a protective finish -probably poly....The reat of the piece seemed to call for what Ellis always refers to as close to the wood finish- so I began this finishing with Tung Oil finish