WoodCentral Forums

Est. 1998 — 27 years of woodworking knowledge

Rescuing good cuttings from a problem board

Posts

Rescuing good cuttings from a problem board

#1

Rescuing good cuttings from a problem board

Bill Tindall, E.Tn.

When we sold lumber customers would tell me how envious they were that I had our whole inventory to choose lumber from for my projects. What they didn’t realize was when we ordered a 1000bdft pack of lumber for resale it usually would contain some lumber with defects that made it difficult to resell. This was the lumber I usually used to make stuff. I became experienced rescuing useful cuttings from problem pieces.


I am building a chest of drawers for son-in-law. It will have early 1700’s frame and panel sides, the frame of which can be seen in the first picture off to the right side. I wanted a showy panel and found a potential source in the board shown in Picture 1. The board was long enough and wide enough and had a spectacular figure, possibly the best I have ever come across. That was the good news. It had been air dried, not thoroughly, then rough planned too much on one side to see what it looked like. I bought it in this condition from someone under some long forgotten circumstance.


This planing picked out divots from each curl as seen in PIC 2.


As it dried more it cupped badly as seen in PIC 3. The planing had left it much thinner than rough 4/4 stock. These are a lot of problems to overcome, but I was motivated by the figure. Because it would be a panel I could tolerate it at ¾” thickness, the edges of the panel will be beveled and two pieces glued together will be wider than the finished width I needed. These factors gave me hope.


First I took the fence and guard off my 8” jointer. I ran the board over the cutter head, convex side down and centered until I got a flat spot, PIC 4.


When the cut became wide enough to exceed the 8” cutter width I hand planed the ridges off the sides, PIC 5. When I got a flat on one side about 9” wide I moved on to the planer. I took light cuts with what had been the convex side (the side just flattened on the jointer) down. When the planer removed enough material to flatten the outside edges of the concave side I turned the board over and took light passes off the convex side. I kept flipping the board over, taking light passes until I had one side cleaned up and the other side nearly cleaned up, or in fact cleaned up. Light passes were essential for I did not what the rollers of my big machine to mash the cup flat as it passed through the machine, only to spring back out again. At this point the boards were ¾”and I quit.

Success. As it turned out I was able to match the planed pieces such that after edge gluing they will make attractive panels with the show side finish planed and the back side less so. Stay tuned to see the panels after glue up.


Re: Rescuing good cuttings from a problem board

#2

Re: Rescuing good cuttings from a problem board

Stuart Hough

Thanks, Bill, for the post. You have shown me another way to deal with my own problem boards. Did you have any trouble keeping the board centered on the area you wanted to cut? Any thoughts/suggestions/warnings would be appreciated!

Re: Rescuing good cuttings from a problem board

#3

thoughts and warnings

Bill Tindall, E.Tn.

no I did not have any problem keeping the board approximately centered for the first pass. After one pass the board tracked on the first flat spot created. One could create this 1st flat spot with a hand plane and that is what I would have done if I had thought about it then.

Warning....well only an idiot would run a jointer with the guard off :(

I did use push blocks to feed and kept my attention at high alert. The guard went back on as soon as I was done making a flat spot.

Re: Rescuing good cuttings from a problem board

#4

Question/suggestion.

Barry Irby

I have run a number of problem boards through the planer by fixing wedges and slivers to it with hot glue or double stick tape. I drop rips beside the TS until I get around to throwing them away. Find one that is the right thickness and taper and put it under the "tunnel"created by putting the concave side down. Run it trough the planer until the side is flat. Then turn it over and remove the filler strip and flatten it on the concave side.

If it teeters fill the opposite corners with slivers and flatten the other side. Works great.

Can you tell I still have not made friends with my hand planes?

Re: Rescuing good cuttings from a problem board

#5

Jointer

AZ in Colorado Springs

I've done that a few times for boards up to about 10" wide (using an 8" jointer). Just be really attentive to the task at hand, use push sticks, and, as you said, reinstall the guards promptly!

Re: Rescuing good cuttings from a problem board

#6

Re: thoughts and warnings

Stuart Hough

Thanks Bill! I completely understand the "idiot" warning...heard that a lot from my father while doing auto repairs (Dad: only an idiot doesn't look at the temperature gauge!; Me: I know I should have.) I do like the suggestion of hand-planing the flat first. I'm not rushing out to do this yet, but reading how you did it helps me to plan for things better. Thanks again!

Re: Rescuing good cuttings from a problem board

#7

Kneale Brownson

Solution

Kneale Brownson

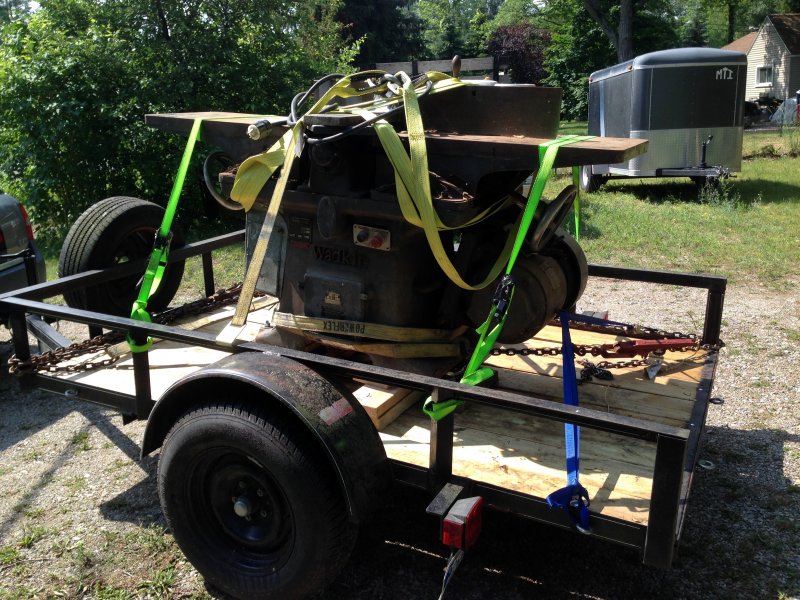
A 16-inch Wadkin


img

Re: Rescuing good cuttings from a problem board

#8

Missing

Mark Mandell - Gone Round In New Jersey

the V-6 power feeder!

:D

👍 This page answered my questions

Your vote helps other woodworkers quickly find the answers and techniques that actually work in the shop.