Home Articles Forums Gallery Marketplace Videos

WoodCentral Forums

Knowledge You Can Build On — Est. 1998

ADVERTISE HERE - FREE TRIAL

Messing around with a Brass piece...

Posts

Messing around with a Brass piece...

#1

Alan Young

Messing around with a Brass piece...

Alan Young

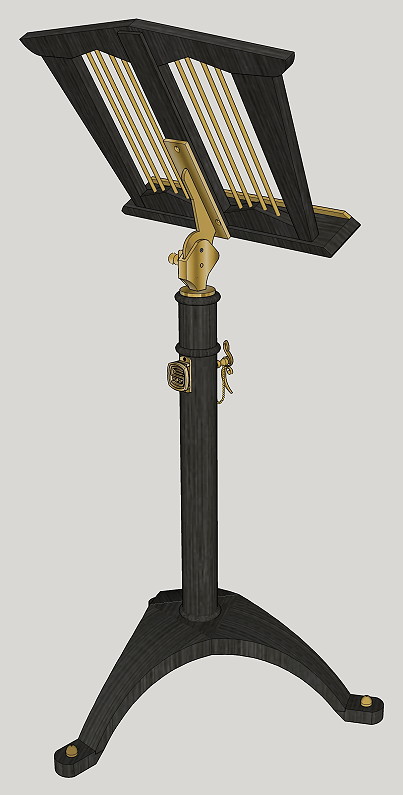
So I have been posting periodic progress pics of a couple of Music Stands I am making.. I am working on two of the Medallions that will have the Logo of the Commissioning Club---The medallions will mount on the main post opposite the height adjustment pin.

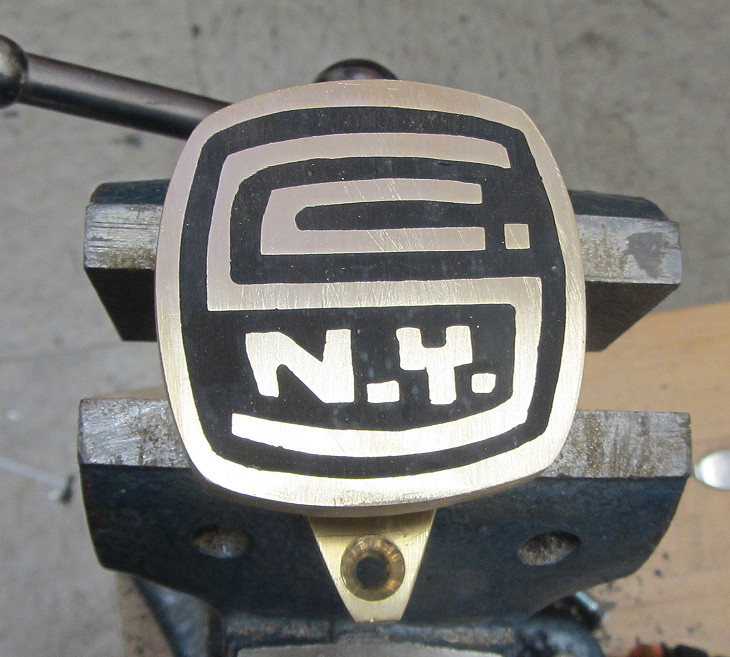
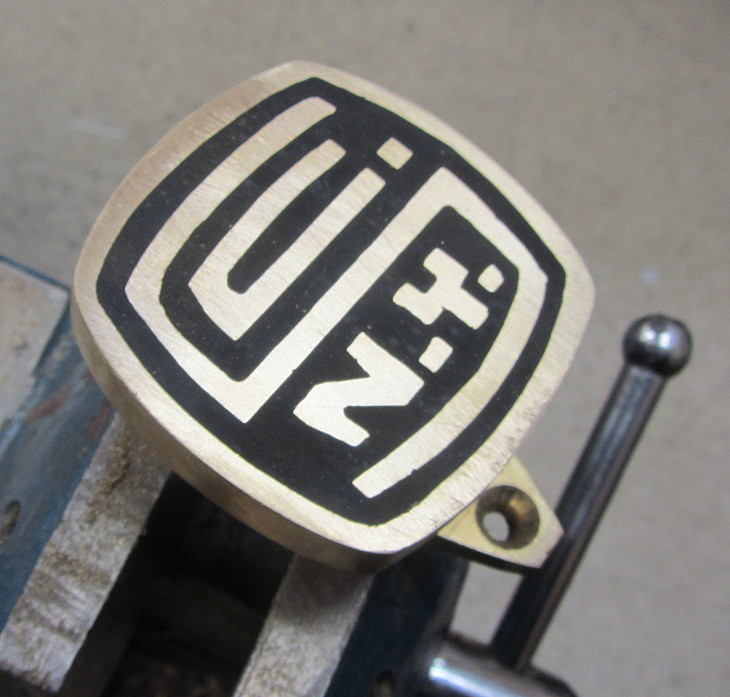
These are milled out of 360 Brass..Here is the first one with the logo milled into the brass in relief of aprox 1/8th inch. The milled background had some unevenness that I could not scrape/file clean enough to my satisfaction.


So I used some mica powder in a shellac solution--It evened things OK-but still not great.


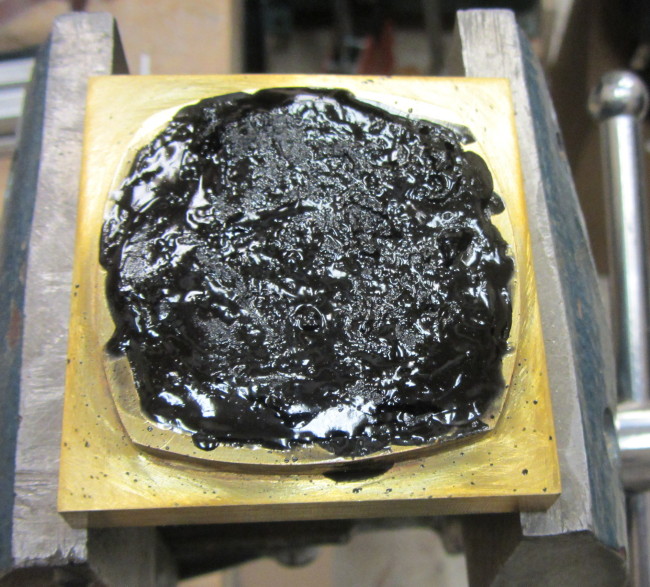
I started messing around with some of brass shavings from the milling/shaping process--


I think if I can sift through the shavings to get a consistant size particle that either large pieces or smaller pieces would make good "fill"... So my question is--if I go for using brass shavings for the back ground-what should I use as a binder??? Epoxy and shellac come to mind so far-I am thinking that I'd place the shavings in dry- as the twp pictures above show- then pour shellac or epoxy over the shavings. After the solution sets and drys I can sand the top smooth and the background should help "pop" the logo---So---- any comments or warnings on this idea???

-Alan

Re: Messing around with a Brass piece...

#2

Epoxy....

John in NM

Flood the area with epoxy and then sprinkle the brass shavings on top.

Next time, make yourself a pattern out of wood and have it sand cast - much less trouble than machining it.

Re: Messing around with a Brass piece...

#3

Ellis Walentine

Hmm

Ellis Walentine

Hi Alan,

Boy, you sure are a creative force. I have a few thoughts that may or may not resonate...

First, John had a good suggestion about casting the brass, but I think conventional sand casting would leave unacceptably rough edges, which means you'd want to find an atelier that can do investment casting for you. Even then, you'd have to sand and polish the visible faces. I think the cost and the aggravation of making the master might be daunting.

Second, to get a really clean milling job, consider creating a digital file of your design and have a machine shop cut it out with a CNC mill. I think this would be faster and cheaper than producing a casting.

Finally, I have some doubts about how your brass shavings approach is going to look, and I would really suggest making samples so you are sure you're getting the effect you want. Personally, I'd consider filling the negative areas with a thick putty made of lampblack in West System epoxy. It would add contrast and make the brass design really stand out, as well as creating a smooth face and eliminating the sharp edge transition to the brass. If you think the contrast would be too stark for the design of the music stand, consider a lighter value, in a hue that would complement the overall design.

Just thinking out loud. Nifty project. Very ambitious.

Ellis

Re: Messing around with a Brass piece...

#4

+1 with Ellis

Dick Coers

But I would also warm the epoxy in warm water so it will flow and self level. Also the fancy paints that Ed Davidson showed in the yo-yos on the turning side of the forum. No mixing for those, just really long set time.

Re: Messing around with a Brass piece...

#5

An alternative fill

Denny

If you have a hard time getting regular sized pieces for the background you might consider using small brass balls instead.

Re: Messing around with a Brass piece...

#6

Re: Messing around with a Brass piece...

Gary Smyth

You have a drawing made up of the logo which presumably has faired lines. While CNC is I think the more available option you might also consider DMLS (Direct Metal Laser Sintering) metal deposit 3D printing. If you look into it you will find that you can not only get the lettering exactly as you want (based on your drawing) but also the (stippled? or whatever) background can be done at the same time with the identical process.

I'm way out of my comfort zone with 3D deposit printing as I've only attended two lectures/demonstrations, and those are using plastic. But Boeing/GE are doing it with metal for their compressor blades and they are pretty particular with the consistency of those critical items. As I understand it the cost is with the drawings and less with the build time on a machine (but you have to find a machine). The size you want would not be beyond the capability of many machines. The layers can be blended so that all appears smooth with only minimal buffing to finished look. (Samples from the net below)Other images are "Direct Metal Laser Sintering images" from any browser.

Just thought I'd toss it out since you appear to be conversant with the software already.


Re: Messing around with a Brass piece...

#7

Alan Young

thanks for all the notes folks--

Alan Young

I did do some checking around when I began this project about CNC/Laser/3d printing options...I actually have a 3d printing file ready to go-If I decide I am not happy with my home brew...

At this point- I like the black epoxy putty fill idea- If can refine the profile a bit- the fill can be then sanded back and as Ellis pointed out every thing really "Pop" with the black vs Brass-The overall color combo that is in the design...

.

-Alan

Re: Messing around with a Brass piece...

#8

Stipple?

Dick Coers

Thinking about it a little more. How about adding a series of small radius "holes" to the bottom surface on the CAD file. Then with corresponding small ball mill in the CNC, you would get a stipple pattern to that bottom surface instead of mill lines. Another option would be to mill through a foam resist, then bead blast after milling.

Re: Messing around with a Brass piece...

#9

Alan Young

Re: Stipple?

Alan Young

Ok the possibilities are really expanding! The size of this particular piece may preclude this option-But I like the idea. This "stipple" concept reminds me of the time I took an aluminum meat tenderizer and whacked Mom and Dad's Mahogany Record Player...What an interesting "texture" it gave that piece!

Re: Messing around with a Brass piece...

#10

Alan Young

Ok-a bit of a learning curve.....

Alan Young

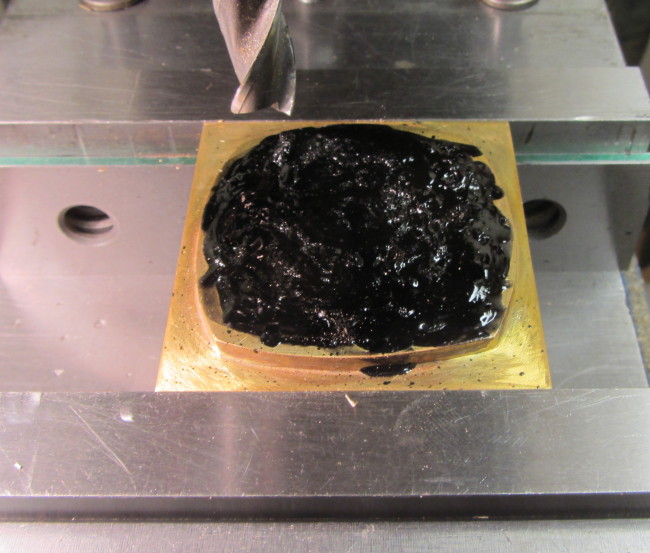
I did a black epoxy fill last night. I warmed the epoxy bottles in warm water before mixing and adding the black dye....But I also warmed the brass by placing it on the burner on my gas stove- I had the flame as low as possible- But probably heated it longer than I should have-or poured the epoxy mix before the brass cooled enough----A bit of sizzling occurred as I applied the mix-It seemed to flow very well over the warm surface-but set before it had a chance to totally fill the relief.


This morning I placed the piece in the mill and milled and filed it flat.


There are some pockets where the epoxy set before it had a chance to flow and fill-I'm sure because the work piece was too warm.

I will need a second application to fill the gaps that didn't flow.


Still- I think the concept works....

Re: Messing around with a Brass piece...

#11

Kneale Brownson

Bet there was some additional whacking later, eh?


Re: Messing around with a Brass piece...

#12

Re: Messing around with a Brass piece...

John McGaw

I take it that this was machined with CNC equipment? If so then there is no real reason for the bottom to be rough at all -- it simply takes a roughing pass and then a second pass with a finer tool and slower speed. You probably can't get to a mirror surface but it can be visually smooth if done properly. Then a bit if a commercially-available or a homebrew blackening solution and a polish would finish it a treat.

Re: Messing around with a Brass piece...

#13

Alan Young

Not CNC

Alan Young

i milled this free hand on a Bridgeport. Even though I had a depth stop there was just enough unevenness to require a "field fill"...

-Alan

Re: Messing around with a Brass piece...

#14

Re: Not CNC

TomD

If possible, I would avoid heating the epoxy. The by products you will inhale are nasty. There are seeming instances of firemen who were exposed to just one bad plastics fire, even with breathers who claim cancers rapidly resulted. Presumably fumes from a stand off area, or whatever. In a small shop leaning over a project fumes can be significant there is often not the air volume in a shop, etc...

Rod building epoxies are already very thin, and normally have some UV protection that will reduce yellowing (not a problem with Black). When they are thoroughly mixed a lot of bubbles are incorporated, which ruins the clarity. What they do is use little mixers where the medicine cup is mixed by a ball bearing that stirs because the cup is rotated, and there is an outside magnet holding the ball still. You can cheaply rig something with a drill, or buy one.

https://encrypted-tbn1.gstatic.com/images?q=tbn:ANd9GcRi5T9AHOO4Eyv5W_SZX7N5rr5FpYHSFn19necH1QCcGdOQ1zuH


Re: Messing around with a Brass piece...

#15

I wonder...

Denny

Maybe you could set the mixed epoxy under a vacuum for a few minutes to clear the bubbles. This was how we used to clear bubbles back in the lab. The liquid can rapidly expand under vacuum, you have to watch closely and break/remake the vacuum to prevent the liquid from expanding too much. I'm guessing normal shop vac levels would be sufficient, but I haven't tested.

Re: Messing around with a Brass piece...

#16

I do that...

John in NM

With urethane casting resin, pull a vacuum on it to removed any dissolved gasses in the resin and pop any bubbles from mixing it.

For the bubbles alone probably 1/2 atm is good enough, like you'd get from the input of an air compressor. For dissolved material you need more like 27" mercury or better, something like .1 atm.

Re: Messing around with a Brass piece...

#17

Hair drier maybe?

John in NM

That would warm the brass a bit more gently, gas stove seems a bit extreme.

If you were doing a bunch of these, you could try the casting resin I use, it's pre-dyed and quite fluid. Doesn't have much of a shelf life though, I usually try to use it up within a month.

Re: Messing around with a Brass piece...

#18

Wow, no CNC

Dick Coers

Ever thought about acid etch? A simple resist and ferric chloride will do the trick. But to that depth would take a fair amount of time, if even possible. Then no cleanup nor epoxy to mess with. You can achieve incredible detail with the etch.

Re: Messing around with a Brass piece...

#19

Alan Young

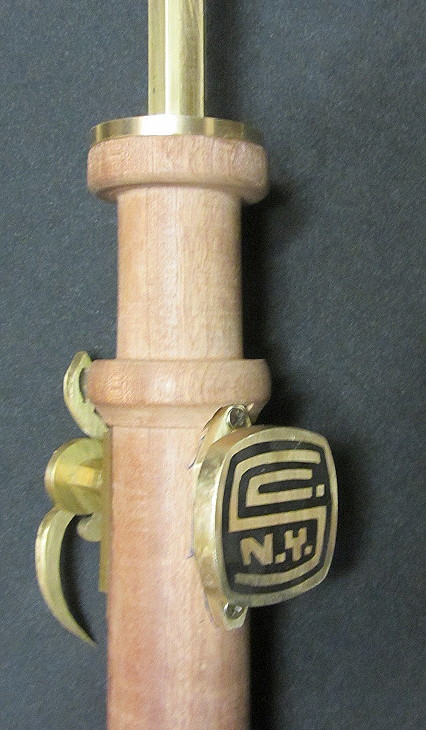
Here's Round II

Alan Young


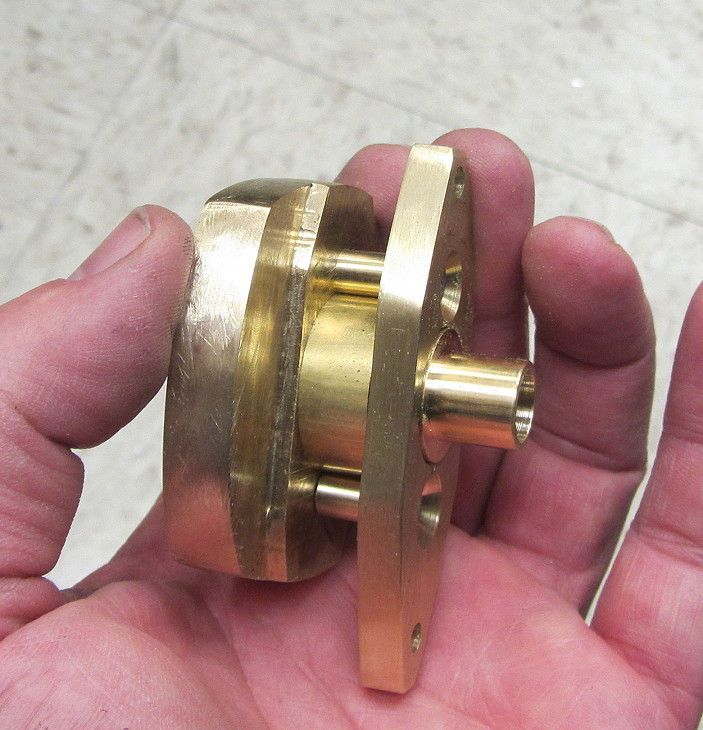
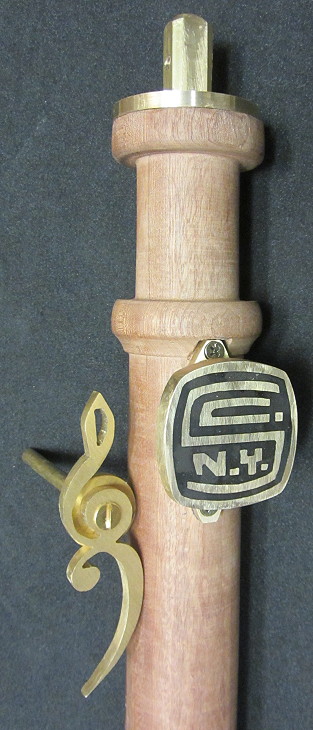
Here is the entire structure that gets mounted to the post


The medallion is mounted opposite the Height Adjustment pin.


Re: Messing around with a Brass piece...

#20

Ellis Walentine

Very nice

Ellis Walentine

I think the filled medallion looks great. Quick turnaround, too.

One change I'd make if this were my project would be to let in the brass mounting plates flush with the curvature of the surrounding wood column. I think that would really add a finishing touch.

2¢,

Ellis

Re: Messing around with a Brass piece...

#21

Re: I wonder...

TomD

Might work, the nice thing about a good mix is that it helps by itself and the open time is not used up in a secondary process. But many materials have long open time anyway.

Re: Messing around with a Brass piece...

#22

Alan Young

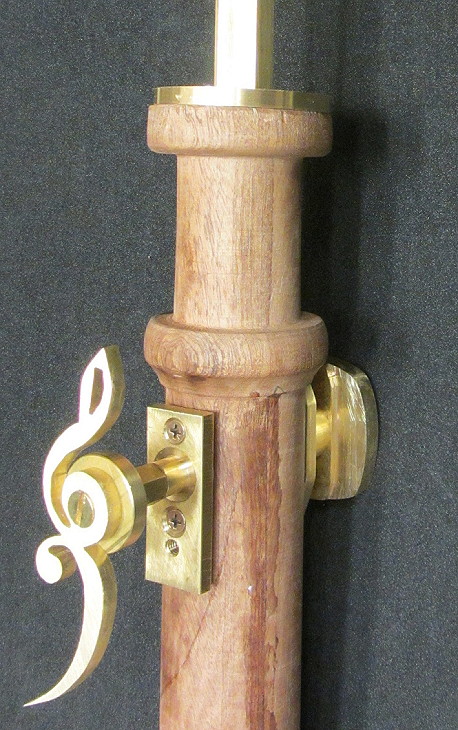
Brass refinement

Alan Young

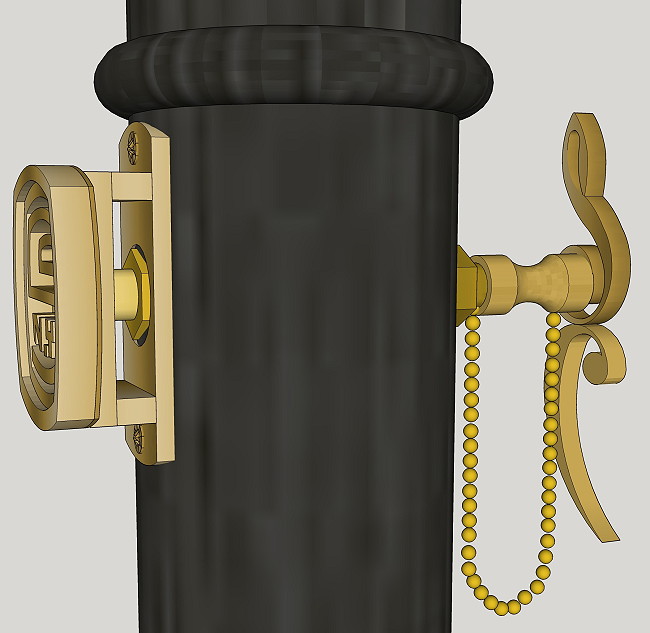
Ellis--Yes the current plates look pretty clunky and will need to be finessed. I am doing a combination of recessing the brass into the post and beveling the top surface of the brass-trying to "meld" the forms together whilst keeping the contrast of what will be a black post and the Brass...every step of refinement seems to bring me closer to the edge of an "oops gotta start over move"---so I am executing the refining moves a small bit at a time......