
Carved Coffee Table II-Part 5 FINISHED *LINK*
Alan Young
Hi Friends,
I finished the Coffee Table last week and took some pictures of it at my neighbor's house yesterday afternoon. Before posting the finished shots, I want to share one more set of pictures from the Shop. These show the finishing process- The final look and finish is no doubt not to everyone's taste. The gilding wasn't in my plan till way late in the process -even then I hemmed and hawed a lot over whether or not I should...I decided that I had the 1st coffee table with a single finish all around and that this was the one to set at full blast....:^) Here goes.........
The table is ready for the finish. I'll employ a multi-step process involving these products.
Sealcoat de-waxed shellac to seal the inlays,
Super Brass Mica Powder and Clear Shellac for gilding,
A Red Mahogany Stain for a base coat stain on the base and the top,
A mixture of Tung Oil finish and General Finishes "Nutmeg" gel stain to tone the base only.
Polurethane for the top coat of entire piece.

The top will get a coat of red mahogany stain. I don't want the light inlays to get stained so I start by sealing them with de-waxed shellac.

The next step is to gild the routed profile of the top and the carved elements of the base. The gilding solution is a mixture of Mica Powder and clear shellac. There isn't a real formula here-it's just a matter of how dense a gilded texture is desired. I want the gilding to sparkle but not totally cover the grain pattern.
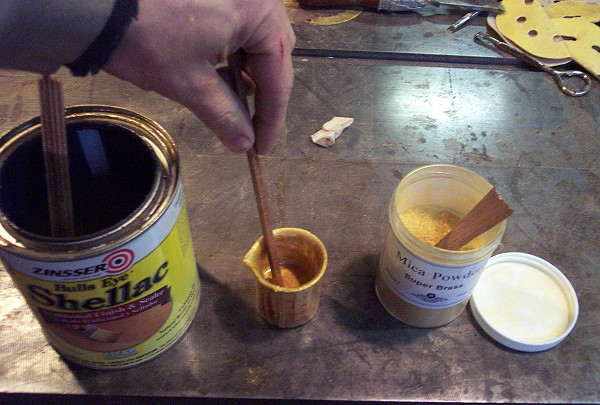
I use an artists brush to apply the gilding to the edge. I want to cover the entire edge but not the top surface. If any gets on the top I just let it dry then scrape it off with a sharp chisel.

The edge is gilded, and the inlays are sealed.

The shellac/gilding solution drys within a half hour so while the top sets I move on to the carved elements.


The gilding on the base is finished.
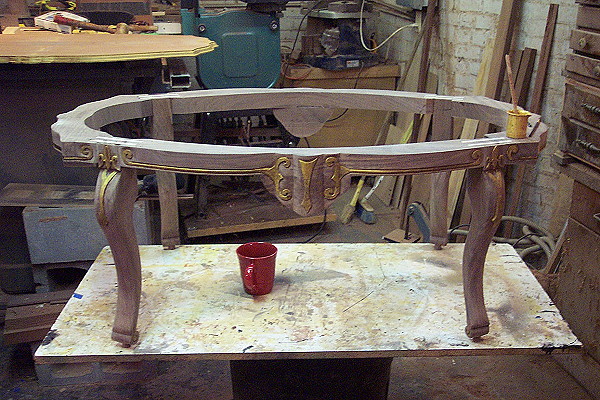
Next- I brushed on the red mahogany stain then wiped it of quickly. I couldn't take in-between-shots as I didn't want the stain to set too deeply especially in the top.
The stain went on quite dark and covered the gilding and inlays but because of the shellac base on those elements, after wiping off the stain, a nice contrast is revealed.

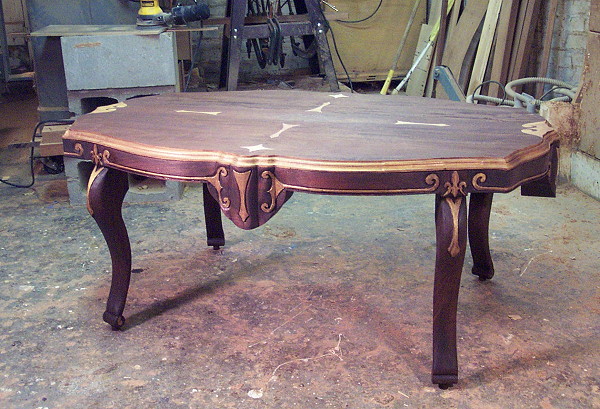
After wiping off this first stain coat I let the table set over night. The next day I made a glaze out of Tung oil varnish and the gelstain. This was applied to the base only and there just to the non-gilded sections

I let this set over night and then the next day applied 2 coats of Gloss Polyurethane.

***************** ***************


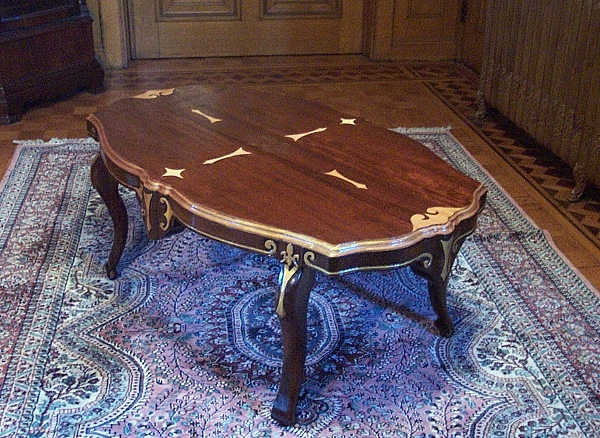

More finished shots can be seen at the link below.Thanks for looking-
Alan
MORE FINISHED PICTURES


