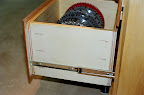
>I'll be making a lot of drawer carcasses for my shop cabinets. No, I'm not going to try to do that many hand cut dovetails - though I'd probably be very good at them when I was finished :).
So my choices are:
Butt joint- very easy to make, but weak. Not really considering it.
Rabbetted joints - easy to make, but not that stong.
Finger joints (or box joint) - a possibility, I'd have to make a jig.
Dovetail - I've got a jig, so that would be no problem.
Whatever you call the joint below - easy to make, no jig required.
I'll be storing tools in the drawers as well as various other things.
I was going to cut a 1/4" dado in the sides and front and a rabbett in the back so I can slide a piece of 1/4" plywood in the carcass.
Ease and speed of assembly are somewhat of a factor. The carcass will be made of 1/2" to 5/8" poplar (maybe even 3/4" if I get lazy :)). The carcass will be about 20-22" wide and about 22" deep. I'll be attaching a front.
>A strong joint that is often used in cabinet shops for quickly made utility drawers.
Cut it into the front from the bottom of the drawer front, and stop the cut at the appropriate height. This and the remaining tail cuts on the sides can be made at the router table. Quick, easy and fairly strong. I think almost perfect for utility drawer carcases. Also eliminates the need for a five part drawer, since you cut the sliders into the drawer front.
NOTE: This picture shows the WRONG way to do pocket screws. I did not learn that until after my project. The pocket screws should be on the front/back panels, then the false drawer front will cover them.
I use 3/4 Home Depot "Sandeply" plywood. It is very consistent and has 7 layers. GREAT for shop drawers.
Click on this picture. This is part of a web album of my table saw base.
>The joint you illustrate is a tongue and rabbet (or is it dado). Fairly easy to machine. I used that joint for a kitchen I built for a friend a few years ago, and the drawers must still be holding strong, otherwise I would have heard from him :-)
I've just done 14 hand-cut dovetailed drawers for my tool storage, with five more to go. It does take some time, but it's great for practicing DTs. I know I'm now quite a bit better at it now than before doing those drawers...
What a delicious quandry! I'd probably use all options for the hell of it. You have larger bragging rights that way. I've used them all except the locking dado. I know they too are effective, but I personally would regard my using them as a cop out. I have an omnijig and the dovetails and box joints are very good. Most of the joinery I've done for my shop involves box joints on a table saw jig. I like them because the jig can turn out "fingers" sized for the job---from 1/4 inch up to 3/4" depending on the thickness of the indexing pin. Works great in poplar, too. I buy 5/4 or 6/4 poplar, resaw and plane to 1/2". Because I can control the size of the box joints, I prefer to use that method. And, as you say, you can cut grooves for 1/4" drawer bottoms with your table saw or router table. Maybe I am over designing them, but all my drawers(except the pair I am wearing)employ a finger jointed full back with bottom slot to capture the back end of the drawer bottom. It does take a minute or two longer, but the drawers are very strongly built.
>JL, I guess I don't have bragging rights. I have made most of my shop cabinets out of Mostly "found" materials. A friend in the cabinet business gave me "sink" cutouts out of Formica countertops. They make great cabinet sides and drawer fronts. Very colorful. He also gave me "cull" drawer parts. Half inch stock, some plywood and some maple or poplar. Many have defects such as knots or stains that make them undesirable in high end cabinets. So, my drawer boxes are half inch stock with butt joints stapled together. Have at least fifteen of them and not a failure in the bunch. Some (most) are heavily loaded and they are not mounted on runners. Most are sitting on 1/4 aluminum strips rabbetted into the sides of the cabinets to form ledges for the drawers. All are over twenty seven years old, because I moved here in 1979 and I had them all then. We are talking drawers full of nails, plumbing parts, screws, tools, etc. Heavy stuff, big drawers sitting in an unheated shop on a concrete floor year in year out. Not one has even loosened and none has been repaired or needed it.
I think the thing that gave them the most strength is that I glued the plywood bottoms into the false front and probably the sides and to the bottom of the back and stapled it also. So the "force" of pulling on the front of the drawer is transmitted to the bottom and the stuff rides on that.
I also have others I made with dovetails and they have not failed either. I was practicing dovetails. Failure-wise they are just as perfect as the crappy butt joints.
Another clue, My friend has been in the high end custom cabinet business for Almost forty years. Has made thousands of drawers, almost all with butt joints and has never had a call back. We are talking regular drawers and the pull outs under the cabinets. Some on runners and some not. File cabinets drawers and bread drawers. ON and ON. No known failures.
So pick a joint you like, glue in the bottoms and move on.
>I've always thought the joint you illustrated was called a locked rabbet joint. If you find it easy to do, I know it would be plenty strong. I used them on a wooden tool box made of 1/2" maple and it's still tight today.
As far as the material for the drawer bottoms, I think you might want to consider something a little thicker, given the dimensions you mentioned. Tools can get heavy and cause 1/4" plywood to sag. For drawers that will hold those kinds of objects, I think 1/2" ply makes better sense. Also, I think I'd glue the ply in the slots, which would add more strength to the whole thing.
Are you planning on using mechanical slides? If not, the soft poplar will wear on the bottom edges of the sides over time, making a different choice of materials something to think about.
>I assume the orientation of the drawer is such that the section along the top of your illustration is the drawer front, and not a side section.
One other alternative that is very strong is a rabbit joint that is then pegged with dowels. You only need to mill the rabbits in the drawer front to the thickness of the drawer sides- I prefer miller dowels for ease of use.
>If you plan on hand cutting dovetails in some of the furniture you build, why not practice on your shop projects? You could dovetail the fronts and capture the back in a dado, this would cut the dovetailing in half. You only have 17 drawers to build; if you had good sharp tools you could make those in a week of your spare time; 5 evenings and one saturday, 2 drawers every evening and 7 on saturday.
As others have said, any of your options (or other suggested options) will work great. I would use this opportunity to build a finger joint jig for your TS and use finger joints. The finger joint jig might come in handy later on for other things as well. However, if you are interested in just getting the job done, then using your dovetail jig makes sense to me. If you want to build a real skill-set, then handcut dovetails would be the perfect way to go, but would take much longer - at least at first.
An option that wasn't mentioned (I don't think) is the router bit designed for drawer building. It is very fast and produces a joint much like the locked-rabbit you drew. I've used it, and it works well.
I agree with David on drawer bottom thickness. Your drawers are fairly big and you plan on loading them up with tools. I would consider 1/2 inch plywood glued all around. Good luck.
Lock Miter router bits have a bad name on this and other boards. They are reputed to be very difficult to set up. I have not found that to be the case, little fiddly perhaps, but not the horror that others have reported. I use lock miters for drawer construction unless I want to show off with dovetails. Lock miters are very strong joints and their geometry makes clamping a snap. Clamping is necessary in one direction only; the joint pulls tight without having to clamp in both directions. Once you're set up, cutting and assembly is fast. I usually cut the lock miters first on opposite edges of a pre-sized panel and then rip the drawer sides, fronts and backs to the correct width. My shop drawers are made of 1/2 and 3/4 BB plywood with lock miter joints and glued-in bottoms. They are very sturdy.
One caveat with lock miter bits and plywood: When cutting cross grain, score a line where the bit will exit the stock on the inside of the miter. Otherwise the bit will splinter the veneer layer of the plywood.