Home Articles Forums Gallery Marketplace Videos

WoodCentral Forums

Knowledge You Can Build On — Est. 1998

Reach the woodworkers who ACTUALLY BUY

Building a Veneer Vacuum Bag

Posts

Building a Veneer Vacuum Bag

#1

Building a Veneer Vacuum Bag

Jim Shaver - Oakville, Ontario

>Hi,

Yesterday the Halton Furniture Makers Society visited Humber College in Toronto to learn a bit about building and using veneering bags.

They have a large bench area (44 benches) with a very well equipped machine centre as well.
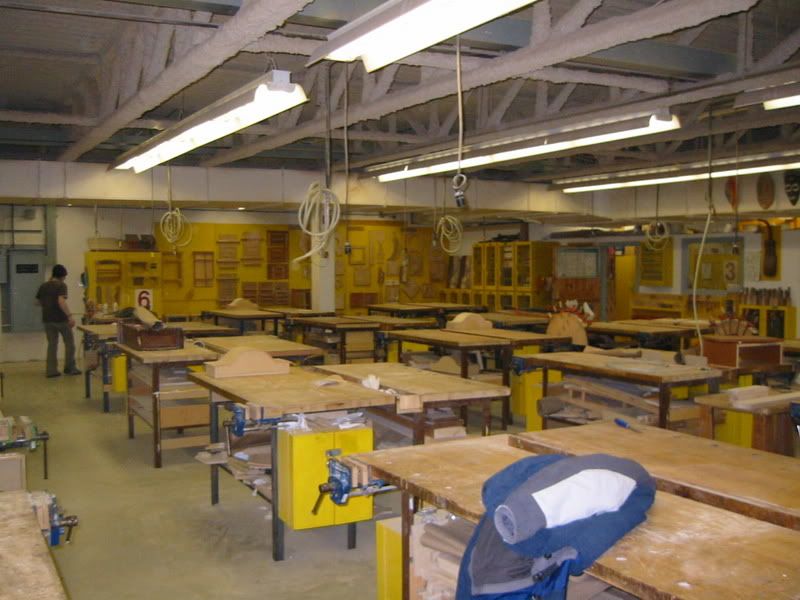
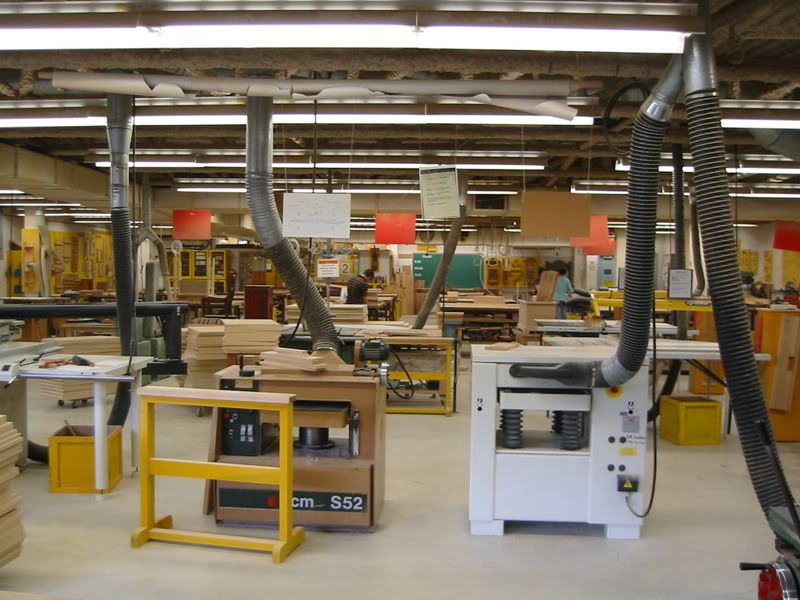
Photo Sharing and Video Hosting at Photobucket

Photo Sharing and Video Hosting at Photobucket

We met with Johan and he walked us through the process the school uses with the wood technology students (three semester, one year program). Johan showed us several veneering set ups including a home made vacuum frame as well as several dedicated bag set ups.
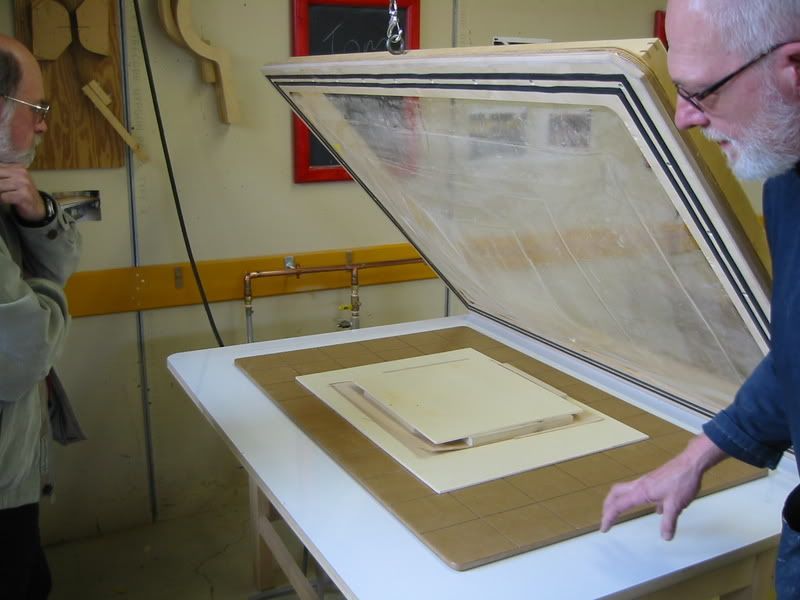
Photo Sharing and Video Hosting at Photobucket

All the applications were home made, the pumps were either bought or built for the shop over the years.
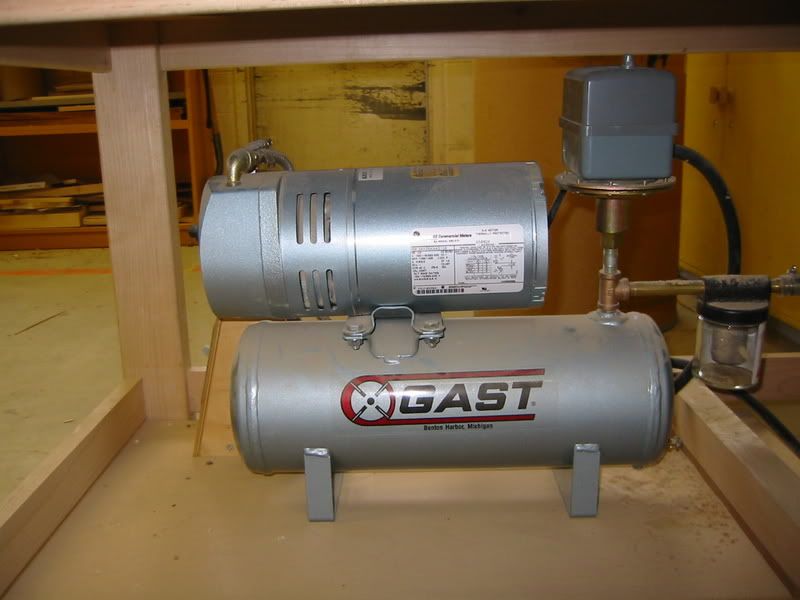
Photo Sharing and Video Hosting at Photobucket

We also had the chance to actually build a bag with Johan. This was a very good opportunity for many of us as Johan shared with us his process and showed us how simple and cost effective it really is.

We were a little surprised that he only uses 20 Mil vinyl for his bags and even with the very heavy student use he showed us how they last about 18-20 months. Remember they have students in a trimester system and they are starting a new cycle of classes and students every semester, so there is heavy use all the time form each semester class of students as they start veneering on the second project they are taught in the first semester.

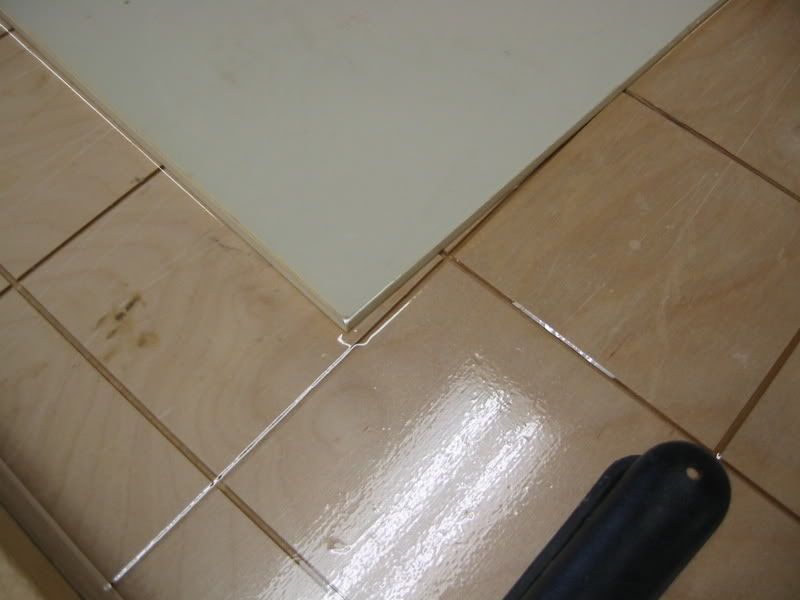
Johan showed us how over the years of experimentation he has settled on this process, using 20 mil vinyl that he buys locally from a plastic supplier, less than $8 a yard, using glue on the edges that dries once applied and is reactivated by heat and sealed with pressure, how simple.

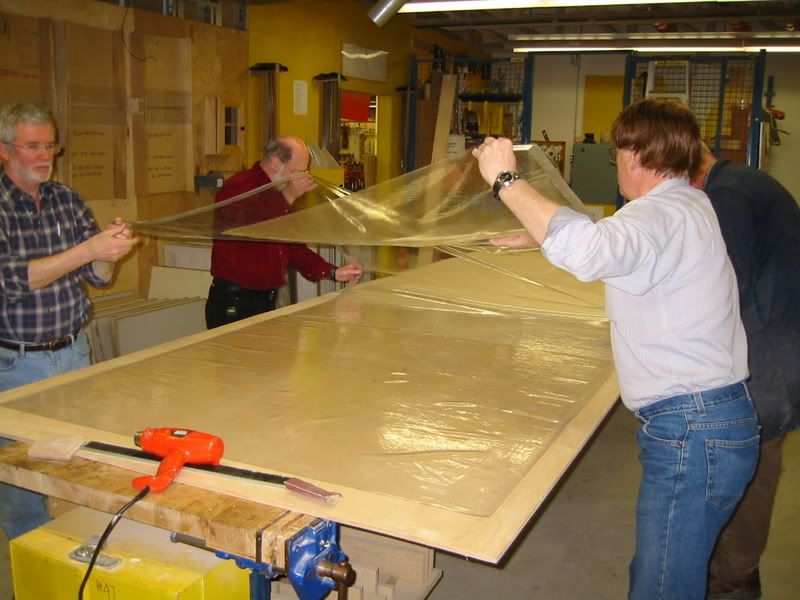
Photo Sharing and Video Hosting at Photobucket

Photo Sharing and Video Hosting at Photobucket

The edges to receive glue are roughed with 180 grit paper then the surface is cleaned up with a light acetone wipe. The bag is created by folding the vinyl on itself to length, then a heat gun and roller is used to seal the edge.

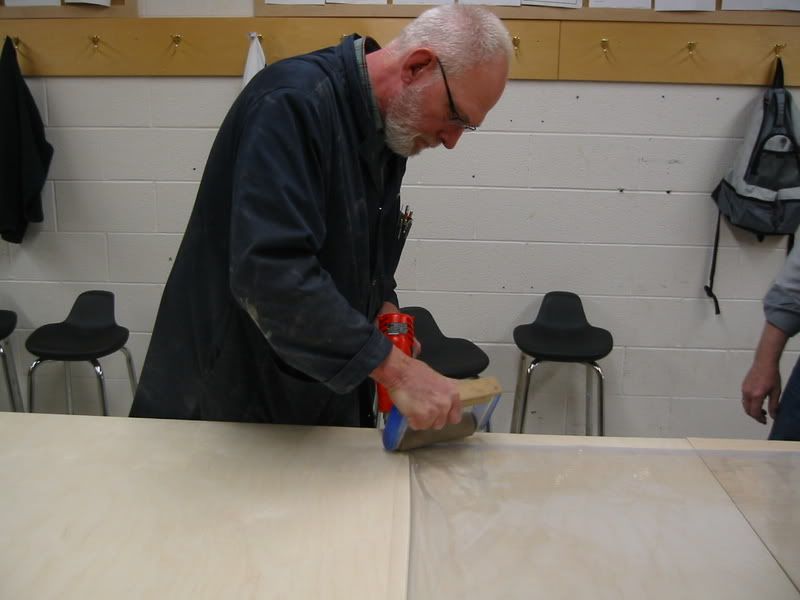
Photo Sharing and Video Hosting at Photobucket

Photo Sharing and Video Hosting at Photobucket

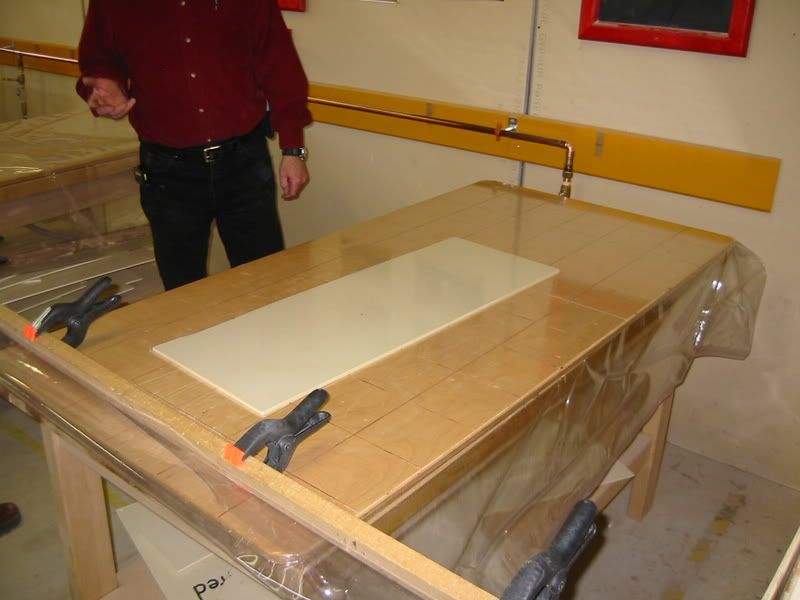
Finally after the edges are done Johan showed us how they use a dedicated plenum and connection that allows the bag to be sealed and placed on a dedicated work table with it�s own centre hole for the vacuum line to drop through to the pump.
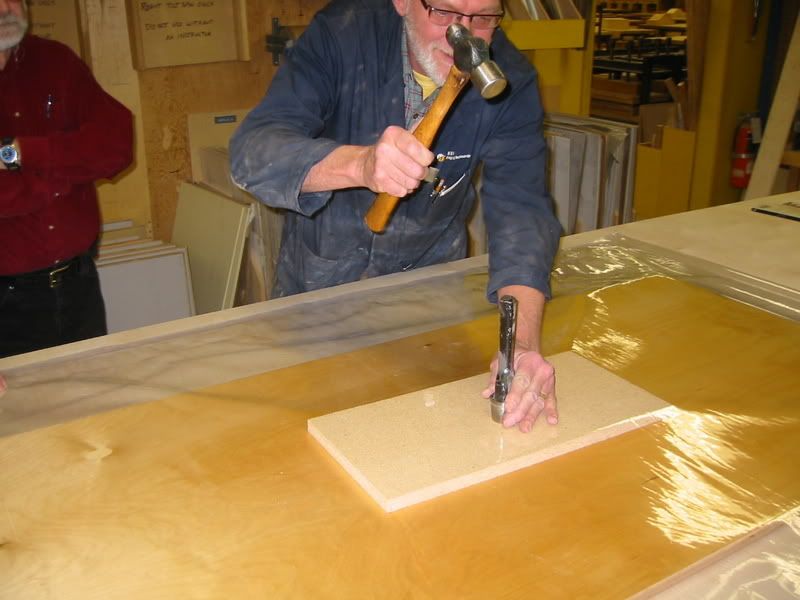
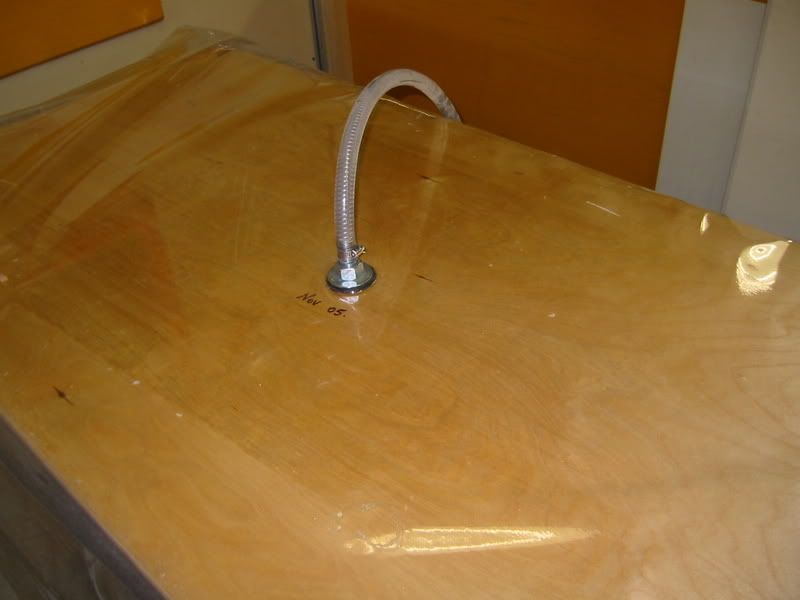
Photo Sharing and Video Hosting at Photobucket

Photo Sharing and Video Hosting at Photobucket

Photo Sharing and Video Hosting at Photobucket

Photo Sharing and Video Hosting at Photobucket

Photo Sharing and Video Hosting at Photobucket

In less than 30 minutes we made the bag and had it back on the work table for a test run, success.

This example here is a student assignment to build a display cabinet. The students were required to build the bending forms and then to use the form to make the arched component for the cabinet. The top was built using wood veneers and 8 mm �wiggle board�.
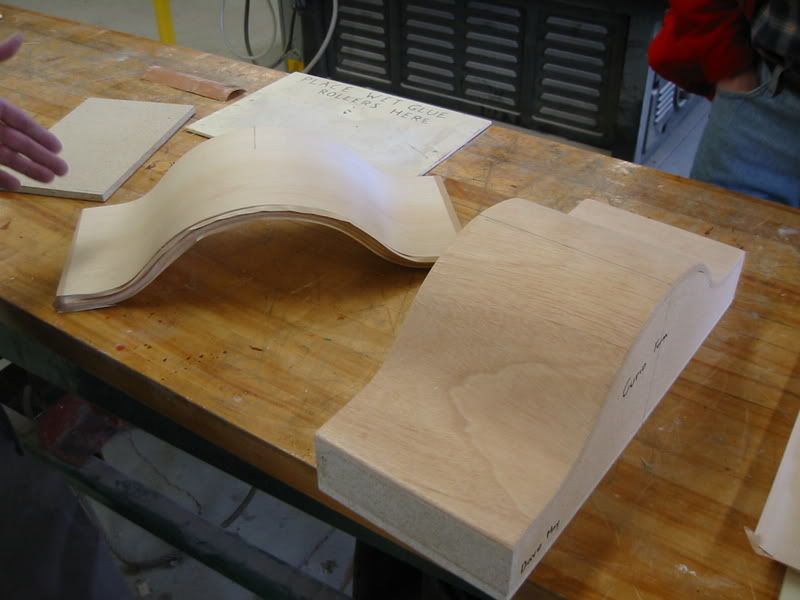
Photo Sharing and Video Hosting at Photobucket

This exercise shows the huge potential for using forms and a vacuum press system to design and build projects with curved surfaces.
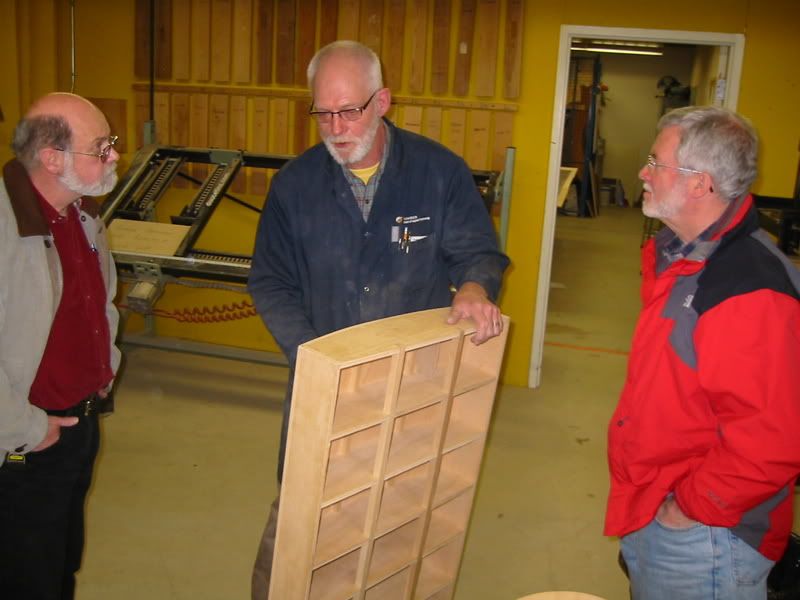
Photo Sharing and Video Hosting at Photobucket

It was a very good visit for us at Humber, I know that I will now start to look at the vacuum system I have to use it to build more interesting designs in my future work.

Again a big thanks to Johan Geurtsen, your patience and kind sharing was much appreciated.

Take care,

Jim

Re: Building a Veneer Vacuum Bag

#2

That is neat!

Dominic Greco in Richboro PA

>

Jim,

Thanks for posting this! Johan makes it look so easy to make a vacuum press bag.

See ya around,

Dominic

Re: Building a Veneer Vacuum Bag

#3

Thanks Jim....very interesting

Thomas Skaggs, Foothills of Mount Level

>You probably know that a vacuum press is only a matter of time (and money) away for me. Great job documenting their vacuum bag making. Who knows, I may try that sometime myself! Do you have access to that plastic supplier?

Tom

Re: Building a Veneer Vacuum Bag

#4

Re: Thanks Jim....very interesting

Jim Shaver - Oakville, Ontario

>Hi Tommy,

Yes the local supplier is a just a common plastic's vendour, 20 mil vinyl is very common.

Take care,

Jim

Re: Building a Veneer Vacuum Bag

#5

Re: Thanks Jim....very interesting

Thomas Skaggs, Foothills of Mount Level

>I would need you to buy it for me Jim because we don't have any "vendours" in these parts. ;-)

T.

Re: Building a Veneer Vacuum Bag

#6

Thanks, and a question....

Pat O'Connor

>Hi Jim,

Thanks for sharing this info, I am really impressed. Several years ago I tried making a bag and it was a disaster. I finally gave up and bought one. I would like to have a few different sizes so with your info I may give it another shot. Do you know the name of the glue that is used and if so, would you share? Thanks again.

Pat

Re: Building a Veneer Vacuum Bag

#7

Adhesive

Jim Shaver - Oakville, Ontario

>Hi Pat,

Yes, the glue was called HELMIBOND 808 EMULSION ADHESIVE

(www.berenson.ca). It dried in 15- 20 minutes Johan said, it does not stick to itself like contact cement, but will bond when heated.

Hope that helps.

take care,

Jim

Re: Building a Veneer Vacuum Bag

#8

Alan Young

Great tour and explanation.Thanks Jim!

Alan Young

>

Re: Building a Veneer Vacuum Bag

#9

Great post and a great service to us, Jim.

Eddie Pacheco, San Jose, Ca.

>

Re: Building a Veneer Vacuum Bag

#10

Re: Building a Veneer Vacuum Bag

Ron in Drums PA

>Thanks Jim

Can you tell us more about the fitting that he used?

A few years back I made a vacuum press from an small water bed mattress. I only used it a couple of times, but it worked well.

Re: Building a Veneer Vacuum Bag

#11

Coupling Hardware

Jim Shaver - Oakville, Ontario

>Hi Ron,

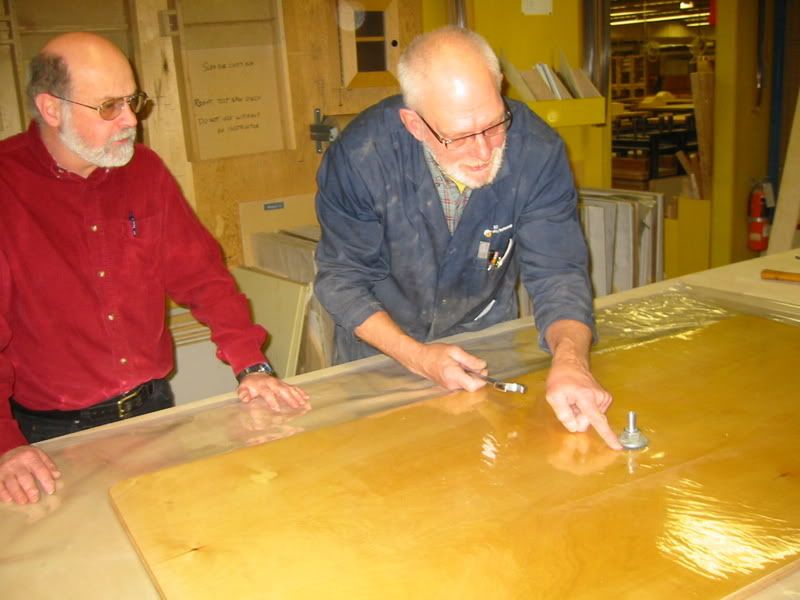
Johan used a home made fitting. He had a large hex head hollow fastener that he had milled to create a smooth end, then the complementry nut was also hollowed out, leaving about 50% of the thread, the hollow allows for the capture of the Hex head throgh the bag.

Photo Sharing and Video Hosting at Photobucket

Two rubber washers and a metal washer sandwich the coupling arrangement. One the nut was tighted it created a sealed connection.

I am sure that you can make a similar coupling with plastic components as well.

The plenam has a hollow recess in it's back to accept the Hex head, there is a small drilled hole through this recess to allow the vacumm to be drawn from the top of the plenam.

Hope that helps,

take care,

Jim

Re: Building a Veneer Vacuum Bag

#12

Re: Coupling Hardware

Ron in Drums PA

>Thanks Jim, that clears things up.

BTW, nice job on the multiple Pics

Re: Building a Veneer Vacuum Bag

#13

Wow--that's a lot of yellow!

Joanne Adler in Pt. Pleasant, PA

>Great looking shop, albeit, bright. Are those digital planers? Cool--imagine being able to go back and get another part thicknessed EXACTLY the same, probably to the thousandth.

As usual, great tour, story and pictures. Looks like a fun and really informative trip. Thanks for sharing it with us.

Re: Building a Veneer Vacuum Bag

#14

Visual Work Place Management

Jim Shaver - Oakville, Ontario

>Hi Joanne,

Funny that you should mention the Yellow. Johan made a comment that with the large number of students in the program that they needed a method to follow to identify all the required tools and keep them in place. A method was developed using colours to help with just that, in a quick glance he can walk in every morning and see where the tools should be and quickly notice if anything is missing, also if a tool is out of place they know right away�.with three classes of students in the shop all day every day it�s a very demanding work place, can you imagine looking for your tape measure or where the wrench is for the table saw?

I was really impressed with the work place visual management, it was quick, logical and easy to learn.

Now if only my own shop was so organized!

Take care,

Jim

Re: Building a Veneer Vacuum Bag

#15

Re: Thanks Jim....very interesting

Marsh Pronneke

>Jim When I built my bag a few years back I went to an upolestery shop that does Auto work. seems like mine was 40 mil thick but may be 20 to much time has passed! But it is what they use for window stock in convertable tops, and the price was pretty good also and I used a bolt on typpe of valve stem and it worked great.

marsh

Re: Building a Veneer Vacuum Bag

#16

Ellis Walentine

Wonderful post and pics, Jim

Ellis Walentine

>It comes at a good time for me, as I am planning to ramp up my veneering capabilities again soon. Did you get any specs or costs on that Gast pump? Or is it a compressor with a venturi arrangement?

What an excellent report. Thanks for putting it together for us.

Cheers,

Ellis

Re: Building a Veneer Vacuum Bag

#17

Re: Building a Veneer Vacuum Bag - Bag Fitting *LINK*

Carol - Strawberry, AZ

>Hey all,

I (and my students) used a bulkhead fitting from U.S. Plastics. We cross-drilled the inside flange so as not to get an airlock against the platen inside the bag. We got the 1/4" FNPT so we could screw in the male end of a quick disconnect fitting, then used regular airline hose with quick-disconnect fittings to attach it to the pump.

I like the yellow coil air hose to make the connection. It is lightweight. Just don't get the one with the swivel ends. They all leaked when we tried them.

16421 1/4" FNPT Polypropylene Loose Tank Fitting w/Neoprene Gasket $6.68


img

Bulkhead Fitting

Re: Building a Veneer Vacuum Bag

#18

Thanks Jim.

Pat O'Connor

>

Re: Building a Veneer Vacuum Bag

#19

Now I'm inspired ...

mike farinella

>to go build that vacuum bag set-up I've been putting off. Thanks Jim!

Re: Building a Veneer Vacuum Bag

#20

Re: Building a Veneer Vacuum Bag *LINK*

Andy Lincoln,In Dearborn MI

>Jim,

That was a great post and as others have said very informative.

I'm wondering if on small scale projects could the vacuum bags now being sold as compressible storage be used with an ordinary vacuum and obtain decent results?Kind of a crazy idea and thinking aloud wondering if it has been tried.

Andy Lincoln


Spacebag

Re: Building a Veneer Vacuum Bag

#21

It might if they worked Andy

Jay Kilpatrick in TX

>But, as I have packed a few now myself, they don't hold vacuum. I've found that, regardless of size, the space back will only hold vacuum for a couple hours before I can tell by sight it is giving up/leaking/etc. Besides, those bags are thin! I might use Jim's tour as a tutorial to make some working space bags; at least then I can justify buying a pump.

Wife: What is this box that was delivered today?

Me: Its a vacuum pump...

Wife: What in the world do you need another tool for?!?

Me: Well, you remember those space bags you had to have? and you remember how they didn't work worth a hill of beans? Well this is the first step is fixing your clothes (fetish) storage problem.

Wife: Oh, really...so where does this fit on the project list?

Me: Well, what is more important to you; a., b., c., or clothes storage?

Wife answers, and I have a new tool regardless of whether or not it will get 'immediate' use... HA!

Re: Building a Veneer Vacuum Bag

#22

Jay I like that angle!!

Andy Lincoln,In Dearborn MI

>