Making Ebony Trim Pegs
by Thomas Stockton
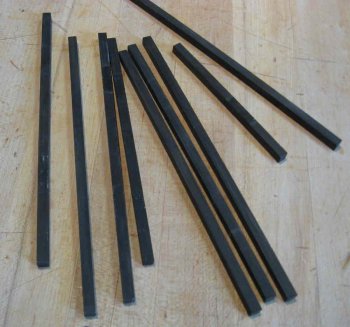
Adding ebony pegs to a piece of furniture is not that hard to do. The first step is to mill up some square stock it is easiest to make a dozen or so lengths so that you can do the steps efficiently. I make it so that it is a fairly tight friction fit into the hole.
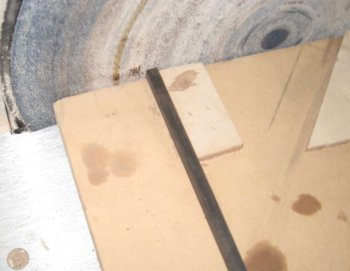
I then proceed to square up each end on a disk sander using a very simple jig that rides in the miter slot and has a 90° and 45° guide block on it.
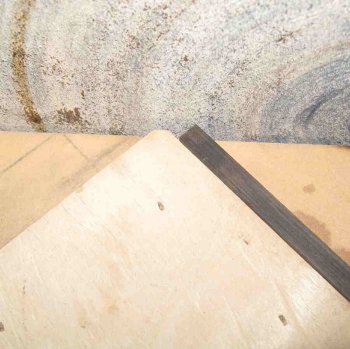
The next step is to put the 45° bevel on both ends, I just eyeball it and roll the work so that I can match the previous bevel. If you screw it up just square it up and try again.
I prefer a slight bevel as opposed to a pyramid shape, on the original Greene and Greene pieces the pegs are domed shape. Now is the time to do your shaping and sanding since it is much easier to hold onto a long stick than a little peg.
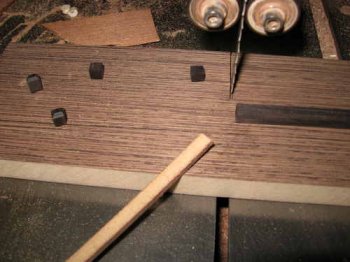
I then proceed to cut the pegs off on the bandsaw. I cut into a piece of wood to make an small auxiliary table. I then proceed to cut off the pegs lightly holding it down with a piece of wood, this keeps it from flinging across the room. I stop using a stick of ebony when it gets too short to cut safely. You could also make a simple miter box and cut them with a handsaw which is probably less intimidating.
If I’m making a bunch of these the next step is to takes the strips and go back to the sander and start over by squaring and beveling. I can easily make 100 in an hour.
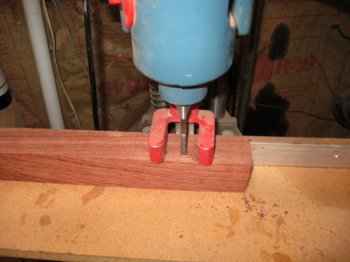
The next step is to make the hole I use a hollow chisel mortiser it is very quick and easy.
There are a couple of other ways to do this one is to use just the chisel from a mortiser. This is fairly easy just drill a hole with a brad point bit and the chop it square with the bit and a mallet. No need to buy a fancy bit the cheap ones if honed well work just fine.
The last way to do it is to drill a hole a square it up with a chisel. The drawback to this technique is that every hole is a little different and it takes forever to custom fit each peg.
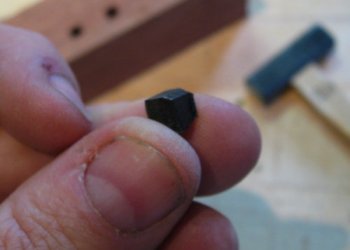
I then put a very slight bevel on the bottom of the peg to help it slide in the hole
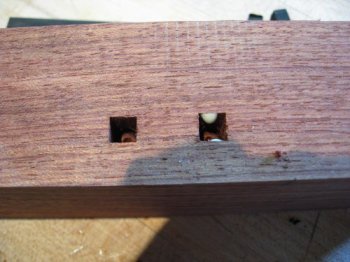
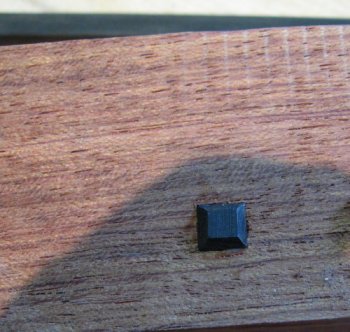
It is now time to install the pegs I put a little glue on the sides of the hole and tap the peg in until it is just at the bevel. At this point if something is wrong with a peg I just throw them out and choose another one.
The finished peg ready to lightly sand
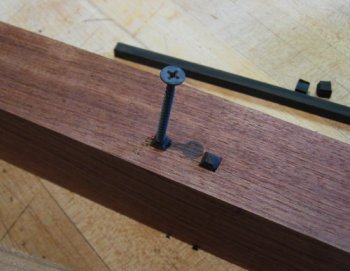
If you drive one in too far, drill a hole in the middle and drive a screw into it. Then pull it out with a pair of pliers and try again
Comments (0)
No comments yet. Be the first!
Leave a Comment